10439646 front page hits

The Cave of Dragonflies
Where the smallest bugs live alongside the strongest dragons
R/B/Y Safari Zone Mechanics
A staple of the Pokémon series since the originals is the Safari Zone: a special place with Pokémon that aren't found anywhere else (and some that are) where instead of getting to use your own Pokémon to weaken and capture them, you must employ more old-fashioned methods while the Pokémon may run at any moment. While they haven't been in every game, they shake up the usual routine of catching Pokémon and have had various interesting mechanics through the generations - however, the very most interesting has to be the original.
How It Works
In every Safari Zone, the player is unable to use their own Pokémon at all. Instead, when you encounter a Pokémon you have four options: throwing one of the limited number of Safari Balls you have; an aggressive action used to make the Pokémon easier to catch; an enticing action used to make it less likely to run away; or running away from the battle yourself.
In Red, Blue and Yellow, the aggressive action is called Rock , and the enticing action is called Bait . The basic idea is this: throwing a rock will double your chances of catching the Pokémon, but it will also make the Pokémon angry for 1-5 turns. Conversely, throwing bait will halve your chances of catching the Pokémon, but cause the Pokémon to be eating for 1-5 turns. While angry, a Pokémon is twice as likely to run on any given turn as if it were in its neutral state, while it is four times less likely to run while it is eating than in a neutral state.
However, there are several more interesting details and subtleties to how Safari Zone battles happen.
Throwing a Ball
Capturing in the Safari Zone follows the regular R/B/Y capture algorithm , though since neither the Pokémon's HP nor its status can be affected and the only balls available are Safari Balls (identical to Ultra Balls), a lot of things are abstracted out in the Safari Zone. Unfortunately, thanks to the game's flawed RNG , Safari Balls underperform against full-health Pokémon, making all capture chances in the Safari Zone lower than intended. The capture chance maxes out when the Pokémon has a catch rate of 150 or more, for which the chance will be about 27-30% depending on rounding errors; all other Pokémon are harder than that.
The catch rate C starts out being, as in regular captures, the intrinsic catch rate of the Pokémon species. However, unlike regular captures, your actions in the Safari Zone can directly modify C, as hinted above.
Throwing Rocks/Bait
Rocks and bait have two distinct effects. First, every time a rock is thrown, the catch rate C is doubled (though it is capped at 255, so if doubling would make the catch rate more than that, it is made 255 instead), and every time bait is thrown, C is halved and rounded down. This happens even if the Pokémon is already angry or eating, and it happens completely blindly - if the Pokémon has a catch rate of 235, and you throw a rock to give it a catch rate of 255, then throwing bait will take that catch rate down to 127, rather than "canceling out" to give it the same catch rate as before.
Since the capture chance maxes out when the catch rate is 150 as explained above, there is no point throwing rocks at any Pokémon with an intrinsic catch rate of 150 or more, or more than one rock at a Pokémon with a catch rate of 75 or more, or more than two rocks at one with a catch rate of 38 or more. As it happens that covers all Pokémon that can be found in the Safari Zone except for Chansey (catch rate 30) and Dragonair (catch rate 27 in Yellow), who would need three rocks to go over 150.
Secondly, while a battle in the Safari Zone is going on, the game also keeps track of two counters, the "angry counter" and the "eating counter", which stand for the number of angry or eating turns the Pokémon has left. They both start out at zero; however, when a rock or bait is thrown, a random number between 1 and 5 inclusive will be generated and added to the appropriate counter (i.e. the angry counter if it's a rock, or the eating counter if it's bait), while the other counter will be reset to zero regardless of its previous value. This means only one of the counters can be nonzero at any given time. Since the random number is added to whatever value the counter already has, throwing further rocks at a Pokémon that is already angry will prolong its angry state, and likewise with throwing bait at an eating Pokémon. The eating and angry counters are both capped at 255.
The Pokémon's Turn
You always get the first turn in the Safari Zone, but on the Pokémon's turn, two things happen.
First, the game will check if either of the angry and eating counters is nonzero. If so, then a message saying "Wild [Pokémon] is angry!" or "Wild [Pokémon] is eating!" as appropriate is shown and the counter is decreased by one. If the angry counter is decreased to zero this way, the Pokémon's catch rate will also be reset to its initial catch rate , regardless of how it has been modified in the battle before this point; note that this last bit does not happen when a Pokémon stops eating, nor when the angry counter is reset to zero because you threw a bait.
After this, the game will perform a calculation to determine whether the Pokémon will run away on this turn. The run chance depends only on which state the Pokémon is in - angry, eating or neutral - but not on how many times you've thrown rocks/bait in any way: a Pokémon that you've thrown five rocks at followed by one bait will be exactly as happy to stick around as one that you threw a bait at on the first turn. Note that the Pokémon's actual current state does not necessarily correspond to the state indicated by the message that was just shown, since the message indicates only that the counter in question was nonzero before it was subtracted from. This also means that if you throw a rock or bait and the random number generated is 1, you will see an angry/eating message, but the Pokémon will in fact be back in its neutral state before even the run check is performed.
The run calculation itself goes as follows:
- Make a variable X equal to the low byte (i.e. the remainder if you divide by 256) of the Pokémon's Speed ( not the base Speed of the species, but the individual's actual Speed).
- If the outcome is greater than 255 (i.e. if the Pokémon's Speed was 128 or more), the Pokémon automatically runs. Skip the rest of the procedure.
- If the Pokémon is angry, double X again (if it becomes greater than 255, make it 255 instead).
- If the Pokémon is eating, divide X by four.
- Generate a random number R between 0 and 255 inclusive.
- If R is less than X, the Pokémon runs away.
All in all, this means that so long as (the low byte of) the Pokémon's Speed is less than 128 (which it always will be in the actual game - the highest Speed any Pokémon actually found in the Safari Zone can have is 75), the chance that it will run is 2*Speed/256 if it's in a neutral state, min(255, 4*Speed)/256 if it's angry, or int(Speed/2)/256 if it's eating.
Crucially, since this is the actual individual Speed and not the base Speed of the species, lower-leveled individuals are less likely to run . While Scyther at level 25 or 28 have around or above a 50% chance of running every turn in a neutral state, for instance, Yellow's level 15 Scyther are considerably easier to catch, with only a 32% chance of running in a neutral state at the most. Thus, perhaps the best piece of strategic advice for the Safari Zone is to go for the lowest-leveled possible version of your desired Pokémon, given the lower-leveled version isn't unacceptably rare.
So, well, how should one go about trying to achieve success in the Safari Zone, other than trying to catch lower-leveled Pokémon? Four basic kinds of strategies come to mind:
- Balls only. This is the simplest way to go about the Safari Zone - just madly lob balls at everything you want to catch and pray that they don't run before you catch them.
- Rocks, then balls. Throw some sensible number of rocks, then lob balls and hope you catch it before it either runs or calms down and resets the catch rate. If you see it's not angry anymore, start again from scratch with the rocks.
- Bait, then balls. Throw some bait to put the Pokémon in the eating state and make it stick around, then throw balls and hope the reduced catch rate doesn't come back to bite you. Unlike with rocks, where once the Pokémon stops being angry you're back at square one, it's not quite as obvious here that you should throw more bait once the Pokémon stops eating - each bait you throw lowers the catch rate more, after all.
- Rocks to increase catch rate, then bait to get it to stay, then balls. Throw a rock or two (or three) and then immediately throw bait. Provided your first rock doesn't generate one as the number of angry turns (in which case the Pokémon will calm down immediately and reset the catch rate), you'll manage to increase the Pokémon's catch rate before the bait gets thrown, meaning you end up with a catch rate of the same, double or quadruple the original (depending on the number of rocks), but a 4x reduced chance of running and assurance that the catch rate won't reset when it returns to the neutral state.
There are other possible strategies, but they appear obviously flawed - if you were to throw bait and then a rock, for instance, you'd end up with a normal catch rate but a higher running chance after wasting two turns, which can't possibly be helpful. These are the main ones that at a glance appear to hold some kind of promise.
You may think, as I did when I was initially working this out, that the fourth strategy has the most potential. However, as it turns out, the R/B/Y Safari Zone is broken: the balls-only strategy nearly always wins by a considerable margin, at least in terms of your overall chance of catching the Pokémon per encounter. Wasting your time on bait and rocks is only worth it in a couple of very exceptional cases.
Wait, What?
Good question. If you don't care about getting an intuitive grasp on why this is true, feel free to skip to the Safari Zone calculator.
Here's the thing. The entire Safari Zone experience basically simplifies to a game where you and the Pokémon alternate turns, with each of you having a given chance of "winning" on each of your turns (you win if you catch the Pokémon, while the Pokémon wins if it runs). When you throw bait or a rock, however, you do that instead of throwing a ball on that turn, while the Pokémon will continue to have a chance of running on every single one of its turns; essentially, you are forgoing one of your turns (attempts to "win") in exchange for a later advantage.
What is that later advantage, then, and is it worth losing that turn? Well, in the case of a rock, you double your chances of winning (catching the Pokémon) for up to four subsequent turns - but you also double the Pokémon's chances of winning (running away), and because you used up your turn throwing the rock, it's the Pokémon that has the next move.
You can hopefully see how that's not really a recipe for success. However, it's not quite as bleak as it appears, thanks to the one place where the simplification breaks down: you have a limited number of Safari Balls. A rock, by doubling both yours and the Pokémon's chances of winning each turn, will shorten the average duration of the battle. Thus, if you have sufficiently few balls and the Pokémon has a sufficiently low catch rate and Speed, to the point that in an average battle against it you'd run out of balls before either catching it or it running, throwing a rock and shortening the battle so your balls will last can actually be worth it, even at the aforementioned cost. For instance, if you only have one Safari Ball left, then you can either throw that one ball with a regular catch rate or throw some rocks first, which will make your single ball much more likely to be effective once you do throw it; you'll only get one attempt to catch it either way. The risks will still outweigh the benefits if the Pokémon is pretty speedy, since then it will be likely to run before you can actually throw the ball at all, but for a sufficiently slow target (for a single Safari Ball, the highest Speed where a rock will be worth it is 25 or so), rocks can be a good idea when you don't have a lot of Safari Balls left.
Throwing multiple rocks can also help, at least in theory, since more rocks will continue to double your chances of catching the Pokémon without raising the running chance further. Primarily, in many of those situations where a lack of Safari Balls means one rock is a good idea, two (or possibly three) rocks improve your chances even further, though the range of situations where this works is even narrower than for one rock. Technically multiple rocks can also help in general for Pokémon with very low Speeds and low catch rates - however, that's low Speeds as in single digits, and no Pokémon that fit the bill are actually found in the Safari Zone, making that point kind of moot. Otherwise, if you have plenty of balls to spare, the free angry turns they usually get to run away before you even start trying to catch them just result in a disadvantage you can't make up for.
What about bait? Bait is immediately somewhat more promising than rocks, since it halves your chance of "winning" but quarters the Pokémon's. However, bait also differs from rocks in that the catch rate doesn't go back to normal after the Pokémon stops eating, and just like rocks shorten the duration of the battle, bait prolongs the battle - it makes both parties less likely to win on subsequent turns. And the longer the battle goes on, the more the up-to-four turns (remember, the counter is decreased before the run check) that the Pokémon is actually less likely to run diminish in significance compared to all the turns after the Pokémon stops eating, when it will still have a lowered catch rate but a regular chance of running. That's besides the fact that again you must forgo a turn to throw the bait in the first place. In fact, as it turns out this makes bait wholly useless: there is not even in theory a Speed/catch rate combination for which bait will do you any good.
Where does this leave that especially promising-looking "rocks, then bait" strategy? Ultimately, it's stuck in the same rut rocks are: it's normally only useful for Pokémon with such ludicrously low Speed that they don't actually exist in the Safari Zone, and unfortunately, while rocks at least have a niche when you're running low on balls, you're always going to be better off just throwing however many rocks you're going to throw and then throwing your ball than throwing the rocks and then wasting your time on bait if you only have a couple of balls left. This strategy requires wasting several turns without throwing any balls, during some of which the Pokémon will have an increased chance of running, and to make matters worse, if the number of angry turns generated is one, you're going to lose even the rock's advantage and end up with the bait's lowered catch rate after all that preparation. It just kills it.
So, again, in nearly every case the best strategy is to just throw balls and hope you get lucky. That is, however, assuming that what you want to maximize is your chance of success per encounter: since rocks shorten the battle and make for fewer Safari Balls required, rocks may actually save you time and money.
The Safari Zone calculator below includes a variety of strategies, despite their mostly limited usefulness; play around with it if you think you might go with a different one.
Safari Zone Calculator
Use this tool to calculate your chances of capturing a given Pokémon.
As it is, it only includes Pokémon that are actually found in the Safari Zone in either Red, Blue, Yellow, or the Japanese-exclusive Blue version. If there is demand for adding other Pokémon just for the hell of it, I can do that too, but in the meantime, I feel this makes more sense.
In addition to your chances of capturing the Pokémon with any or all of the provided strategies, the calculator will also provide you with the basic capture rate and run chance per turn. When you select a Pokémon and game, additionally, it will give you the locations, levels and rarities at which the Pokémon is found in the Safari Zone in that game, so that you can perhaps attempt to find your Pokémon at a lower level or in an area where it's more common.
The base percentages the calculator gives may not match exactly up with those given by my R/B/Y catch rate calculator , since this calculator makes the simplifying assumption that the Pokémon's HP and Speed are equal to the average HP/Speed a wild Pokémon of the given species/level would have, while the catch rate calculator does the entire calculation for each possible HP IV and takes the average of the actual outcomes. I chose not to do the more accurate calculation here because this calculation is both already relatively slow and involves two different stats - trying every possibility would mean doing that whole relatively slow calculation up to 256 times, which just seems like way more trouble than it's worth.
Pokémon: Chansey Cubone Doduo Dragonair Dratini Exeggcute Goldeen Kangaskhan Krabby Lickitung Magikarp Marowak Nidoran (f) Nidoran (m) Nidorina Nidorino Paras Parasect Pinsir Poliwag Psyduck Rhyhorn Scyther Slowpoke Tangela Tauros Venomoth Venonat
Game: Red Blue/JP Green JP Blue Yellow
Safari Balls remaining:
Strategy: Show all Balls only One rock Two rocks Three rocks Bait repeatedly One bait Two bait Three bait Rock, then bait Two rocks, then bait Three rocks, then bait
Page last modified August 9 2021 at 02:53 UTC

Pokemon Brilliant Diamond and Shining Pearl (BDSP) Walkthrough & Guides Wiki
- Walkthrough
- Underground
Maps & Locations
Great Marsh (Safari Zone) Daily Pokemon and Guide

☆ We Played Pokemon SV's DLC Early: Hands-On Review! ★ Game8's Pokemon Scarlet and Violet Wiki is live! ★ All Maps & Pokemon Locations ★ Best Battle Tower Team (100 Win Streak!) ★ How to Complete the National Dex ★ Tier List and Movesets for Online Battle

This is a map and walkthrough for Great Marsh, the Sinnoh region's very own safari zone in Pokemon Brilliant Diamond and Shining Pearl (BDSP). Learn about the mechanics of the Great Marsh, the Great Marsh Daily Pokemon, what Pokemon are found in each area, and what trainers, items, and events are encountered here.
List of Contents
Great Marsh Map and Items
- Great Marsh Walkthrough and Mechanics
Great Marsh Daily Pokemon
Great marsh pokemon (area 1), great marsh pokemon (area 2), great marsh pokemon (area 3), great marsh pokemon (area 4), great marsh pokemon (area 5), great marsh pokemon (area 6), great marsh tips and strategies, great marsh connected maps, pokemon bdsp related links, great marsh map, connected maps, obtainable items, get defog from ace trainer.
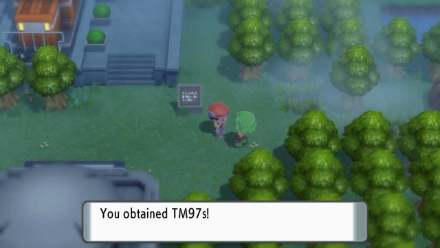
Upon entering the Great Marsh, you'll find an Ace Trainer to your right. Talk to the trainer to get the TM Defog .
This move is very important in order for you to progress through the game so don't forget to get this TM!
Great Marsh Guide and Mechanics
How to enter the great marsh.
You'll find a gate to the Great Marsh at the northern area of Pastoria City . You need to pay a ₽500 fee before you can enter the Great Marsh. Talk to the receptionist and pay the fee to receive 30 Safari Balls , which you can use to capture Pokemon inside the Great Marsh Safari Zone.
The session will end if you use up all 30 Safari Balls or take more than 500 steps.
Some Pokemon in the Great Marsh Change Daily
Six special Pokemon will appear everyday, one for each area of the Great Marsh. Take note that you may have the same special Pokemon for different areas . These six Pokemon change daily and some are exclusive to the Great Marsh.
To view the Daily Pokemon found in the Great Marsh, you can look through the binoculars on the second floor of the lobby. It will only show a random Pokemon from 5 of the areas in the Great Marsh, so you may need to look through it several times to find all six of your Daily Pokemon.
Changing the date on your Nintendo Switch will not affect the Daily Pokemon in the Great Marsh.
View Pokemon in the Great Marsh with Binoculars

You can view the Pokemon you can encounter in all the areas in the Great Marsh by going to the second floor of the lobby in the building and paying ₽100 to use the binoculars. All 3 Binoculars can scan the entire Great Marsh , so it does not matter which one you choose.
Each time you view the binoculars, you will be shown 5 Pokemon from 5 of the different areas in the Great Marsh. There is a chance that you could view one of your 6 Daily Pokemon from the binoculars. If you do not find any of your Daily Pokemon, you can pay another ₽100 to look through the binoculars again.
List of Great Marsh Binocular Backgrounds
The binoculars will show you Pokemon from 5 random areas of the Great Marsh, so it may be difficult to tell what area you are looking at through the binoculars. You can use this list of binocular backgrounds to find out what area each one corresponds to.
Throwing Ball, Bait, and Mud
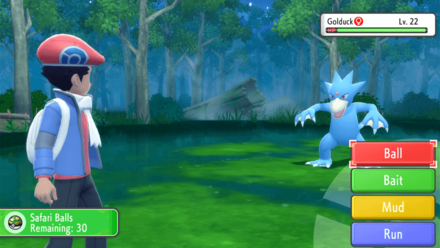
While scouring for Pokemon in the Great Marsh, encounters inside the area will be different. When engaged in a Pokemon battle, your choices will be Ball, Bait, Mud, and Run.
Throwing Bait at a Pokemon will make the Pokemon more likely to runaway from the encounter, but makes it easier to catch the Pokemon.
On the other hand, throwing Mud at a Pokemon will make it harder to catch , but also decreases the chance that it flees the battle.
Throwing Safari Ball is the safest to catch Pokemon
Simply throwing a Safari Ball is the safest way to catch Pokemon in the Great Marsh, as it does not change any catch or flee rates of the Pokemon you will encounter.
Before Unlocking the National Dex
After unlocking the national dex.
- How to Unlock the National Dex
Encountered in Tall Grass or Cave
Encountered via old rod.
How to Get the Old Rod
Encountered via Good Rod
How to Get the Good Rod
Encountered via Super Rod
How to Get the Super Rod
Encountered While Surfing
How to Get TM95 Surf
Ride the Train to Travel Between Areas
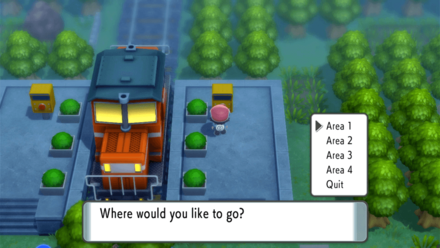
Ride the train inside the Great Marsh to travel between locations quickly instead of navigating through the bogs and swamps of the areas. The train and the stations can be found in the middle of the Great Marsh.
Avoid Stepping in Bogs
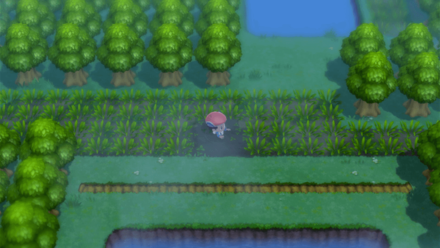
Stepping in the bogs in the swampy areas of the Great Marsh will cause you to sink. You need to move around in order to get out of it, but that movement uses up the limited steps you're allotted inside the area.
Be sure to avoid these bogs to save up on steps, as you are only allowed to take 500 inside the Great Marsh.
Use Sweet Scent to not Waste Steps

While in the Great Marsh, you are only allowed to take up to 500 steps before the Safai Game ends. Instead of using those steps to walk around grass patches, you can bring a Pokemon with the move Sweet Scent . While standing in a patch of grass, use Sweet Scent to instantly encounter a Pokemon.

All Maps and Locations

We at Game8 thank you for your support.
In order for us to make the best articles possible, share your corrections, opinions, and thoughts about 「Great Marsh (Safari Zone) Daily Pokemon and Guide | Pokemon Brilliant Diamond and Shining Pearl (BDSP)」 with us!
When reporting a problem, please be as specific as possible in providing details such as what conditions the problem occurred under and what kind of effects it had.
Do you want to send this information?
Walkthrough Menu
All pokemon wikis.
- Pokemon Scarlet and Violet
- Pokemon Legends: Arceus
- Pokemon Sword and Shield
- Pokemon UNITE
- New Pokemon Snap
- Pokemon Mystery Dungeon DX
- Message Boards
- Pokedex Completion Trading Board (8762)
- Ditto / Pokerus Trading Board (5235)
- High IV & Egg Move Pokemon Trading Board (238)
- Shiny, Legendary & Event Pokemon Trading Board (758)
- Extra Eggs and Breedjects Trading Board (95)
- Underground Message Board (22)
- Best Poffin Recipes Sharing Board (61)
- Online Battles Message Board (17)
- Discussion Board (27)
- Friend Request Board (29)
- List of All Pokemon
- Sinnoh Pokedex
- List of Legendary Pokemon
- List of All Generation 1 Pokemon
- List of All Generation 2 Pokemon
- List of All Generation 3 Pokemon
- List of All Generation 4 Pokemon
- List of All Egg Groups
- All Pokemon by Base Stats
- All Pokemon by Speed Stat
- All Pokemon by Weight
- All Pokemon by Hatch Steps
- List of Pokemon by EV Yield
- All Wild Pokemon with Held Item
- List of All Unobtainable Pokemon
Starter Pokemon
Legendary pokemon, rare pokemon, story walkthrough.
- Complete Story Walkthrough
- Getting the 1st Badge
- Getting the 2nd Badge
- Getting the 3rd Badge
- Getting the 4th Badge
- Getting the 5th Badge
- Getting the 6th Badge
- Getting the 7th Badge
- Getting the 8th Badge
- Becoming the Champion
Important Battles
- All Barry Rival Battles
- All Gym Leader Types and Pokemon
- All Elite Four Types and Pokemon
- All Team Galactic Locations and Pokemon
Post Game Rematches
- All Gym Leader Rematch Teams
- All Elite Four Rematch Teams
- All Maps and Pokemon Locations
Important Maps
- Wayward Cave
- Solaceon Ruins
- Mt. Coronet North (To Snowpoint City)
- Galactic HQ
- Mt. Coronet (To Spear Pillar)
- Victory Road
- Stark Mountain
- Snowpoint Temple
- Fuego Ironworks
Grand Underground
- Grand Underground Features
- All Underground Pokemon
- How to Make a Secret Base
- Grand Underground Map
- List of Statues and Effects
- Sphere Trader Locations
- Pokemon Hideaways
- How to Get Shiny Statues
- List of Treasures
- Digging for Treasure
- Underground Man Missions
- List of Spheres
- How to Find Diglett
- Can You Play Capture the Flag?
- Can You Place Traps?
- Can You Use Decorations in Secret Bases?
- List of Pedestals
- List of Moves
- List of Physical Moves
- List of Special Moves
- List of Status Moves
- List of Unusable Moves
All Item Types
- List of All Items and Effects
- List of All TMs and Locations
- List of Recovery Items (Medicine)
- List of All Held Items
- List of Battle Items
- List of Key Items
- List of Evolutionary Held Items
- List of Training Items
- List of All Berries
- List of All Evolutionary Stones
- List of All Poke Balls
- List of Vitamins
- List of Fossils
- List of Mints
- List of Abilities
Tips and Tricks
- Post Game Content
- How to Use the Poke Radar
- Ramanas Park
- List of Swarm Pokemon
- How to Get to the Battle Zone
- How to Get Mysterious Shards
- Ribbon Syndicate Features
- How to Get Trainer Card Stars
- When Do Legendaries Respawn?
- How to Complete the National Dex
Beginner's Guides
- Beginner's Guide
- Best Starter Pokemon
- How to Trade Locally and Online
- Pokemon by Route: Best Pokemon to Catch
- How to Have Pokemon Follow You
- How to Get Money Fast
- How to Join and Create Groups
- Character Creation and Customization
- Pokemon Allowed in Amity Square Guide and Map
- Daily and Weekly Events
- How to Battle Online
- How to Evolve Pokemon
- Language Settings
- How to Add Friends
- How to Catch Pokemon
- List of Best Settings
- What Happens When You Lose?
- Should You Use TMs?
Collectibles and Locations
- Move Reminder: How to Relearn Moves
- All Poketch App Locations
- Move Tutor Locations
- All Honey Tree Locations
- List of Clothes and Styles
- One-Time Events
- All HM Locations
- Pokemon Nursery Location
- How to Change Clothes
- List of Ribbons
- Useful Characters and Their Locations
- Poketch Clowns Locations
- Move Deleter Location
- Pokemon News Press Guide and All Poke Ball Rewards
- Poke Mart Items List and Unlock Conditions
Game Mechanics
- How to Cook the Best Poffins
- Super Contest Show Guide
- How to Use Stickers
- Fishing and How to Get Each Rod
- How to Make Traded Pokemon Obey You
- How to Grow Berries
- How to Use Ball Capsules
- How to Use Vs. Seeker
- How to Use Dowsing Machine
- How to Check Natures
- How to Change Date and Time
- How to Change Nicknames
- How to Win Jubilife TV Lottery
- Massage Girl: How to Get Massages
- How to Delete Save Data
- How to Get More PC Boxes
- How to Access Pokemon Boxes on the Road
- How to Transfer Save Data
- How to Use the PC and Boxes
- Can You Nickname Traded Pokemon?
- How to Stop Evolution
- Characteristics Guide and Meaning
- How to Save Your Game
- How to Release Pokemon
- Is the Fashion Case in the Game?
- How to Adjust Screen Size
- How to Hide the Poketch
- Are There Accessories?
- How to Farm Held Items
Advanced Tips and Tricks
- How to Tell if a Pokemon is Shiny
- How to Do a Nuzlocke
- How to Get All Starter Pokemon
Pokemon Battles
- How to Use STAB Effectively
- Double Battles Guide
- All Status Conditions
- How to Run Away From a Battle
- How to Avoid Random Battles
New Features
- Global Wonder Station
Training and Breeding
- How to Train and Breed Pokemon
- How to Breed Pokemon and Hatch Eggs
- Nature and IV Breeding Guide
- How to Level Up Fast
- How to EV Train Fast
- How to Increase IVs
- How to Reroll for Best Nature and IVs
- How to Increase Friendship
- Pokerus Effects
- Shiny Hunting Guide
- How to Learn Egg Moves
- How to Change a Pokemon's Nature
- How to Check EVs
- How to Check Pokemon IVs
- How to Hatch Eggs Faster
- How to Get Hidden Abilities
- How to Catch High IV Pokemon
Battle Tower
- Battle Tower Guide
- Best Battle Tower Team with 100-Win Streak
- Battle Tower Master Class Guide
- Best Battle Tower Doubles Team
- How to Get BP (Battle Points)
- How to Beat Tower Tycoon Palmer
Tier List and Movesets
- Best Pokemon
News & Game Features
- All News and Game Info
- Differences and Best Version to Buy
- Pokemon HOME
- How Long To Beat
- List of Glitches
- Will There Be DLC?
- Ranked Battle
- Dialga & Palkia Switch Lite
- Available Platforms
- All Gen 4 Pokemon Excluded from Sword and Shield
- Connections to Legends Arceus
- Release Date and Time
- Release Time and Countdown
- Preorder Guide and Bonuses
- Preload Guide
- All Confirmed Pokemon
- All Confirmed Moves
- Remakes' Graphics
- BDSP Review: Is It Worth It?
- Available Editions
Mystery Gifts
- How to Get Mystery Gifts
- Platinum Outfits Mystery Gift
- Manaphy Egg Mystery Gift
- Updates and Patch Notes
- Ver 1.1.0 Update (Day One Patch)
- Ver 1.1.2 Update: Patch Notes
- Ver 1.1.3 Update: Patch Notes
- Ver 1.2.0 Update: Patch Notes
- Ver 1.3.0 Update: Patch Notes
- All Trailers and Gameplay Videos
- November 10 Trailer
- November 5 Trailers
- October 26 Trailer
- September 28 Trailer
- August 18 Pokemon Presents
- Announcement Trailer
- When Will the Next Trailer Drop?
Game Features
- Everything We Know
- Version Exclusive Pokemon
- New Features and Differences
- Multiplayer and Online Features
- National Dex
- Mega Evolutions
- Platinum Content
- Removed Features
- Battle Frontier
- Dynamax and Gigantamax
- Sword and Shield Compatibility
- Sinnoh Regional Variants
- List of All Characters
Main Characters
Supporting characters.
- Johanna (Mom)
- Professor Rowan
Double Partners
Japanese pokemon bdsp walkthrough.
- ポケモンダイパリメイク攻略サイト|BDSP
Other Pokemon Wikis
- Pokemon Legends: Z-A
- Pokemon Sleep
- 1 How to Unlock the National Dex a...
- 2 How to Find Diglett in the Grand...
- 3 How to Evolve Milotic: Location ...
- 4 List of All Items and Effects
- 5 List of All Unobtainable Pokemon
- We could not find the message board you were looking for.
Gaming News

Nintendo Tells Fans to “Touch Grass”

RAID Shadow Legends Gives $100 Worth of Bonuses in Celebr...

Frieren Takes Over the Gaming World

Millennia Review
More Gaming News
Popular Games

Genshin Impact Walkthrough & Guides Wiki

Honkai: Star Rail Walkthrough & Guides Wiki

FF7 Rebirth Walkthrough & Guides Wiki

Persona 3 Reload Walkthrough & Guides Wiki

Palworld Walkthrough & Guides Wiki

Pokemon Scarlet and Violet (SV) Walkthrough & Guides Wiki

Monster Hunter Rise: Sunbreak Walkthrough & Guides Wiki

Unicorn Overlord Walkthrough & Guides Wiki

Pokemon UNITE Walkthrough & Guides Wiki

Fire Emblem Heroes (FEH) Walkthrough & Guides Wiki
Recommended Games

FF7 Remake Walkthrough & Guides Wiki

Super Smash Bros. Ultimate Walkthrough & Guides Wiki

New Pokemon Snap Walkthrough & Guides Wiki

Pokemon Legends: Arceus Walkthrough & Guides Wiki

Hyrule Warriors: Age of Calamity Walkthrough & Guides Wiki

The Legend of Zelda: Breath of the Wild Walkthrough & Guides Wiki

Elden Ring Walkthrough & Guides Wiki
All rights reserved
©2021 Pokémon. TM, ®Nintendo. The copyrights of videos of games used in our content and other intellectual property rights belong to the provider of the game. The contents we provide on this site were created personally by members of the Game8 editorial department. We refuse the right to reuse or repost content taken without our permission such as data or images to other sites.
- Popular Articles
- PlayStation 3
- PlayStation 4
- PlayStation 5
- Xbox Series
- More Systems
Pokemon SoulSilver Version – Safari Zone Guide

Safari Zone Guide (DS) by Marter
Version: 1.20 | Updated: 07/04/2010
View in: Text Mode
In Fuchsia City, you will notice a lot of Pokemon in enclosures, this is because there is a zoo right in Fuchsia City. This makes it look very big, but size wise it isn't. Gameplay wise, there is quite a bit to do. When navigating around, you can get to all areas without Cut, but it's easier to cut bushes down to work your way around Fuchsia.
Firstly head to the Pokecenter by heading to the left side of town, then head down and to the right. Heal up and head to the house on the left. The man inside will delete moves (including HM moves) off your Pokemon. For more information check out the Move Tutors Guide .
The Safari Zone is not only a great place for catching Pokemon, it is also crucial in gaining two important HMs in the game, Surf and Strength. Head as far north as you can go in Fuchsia, and enter the building at the top. This is the Safari Zone.
When you encounter a wild Pokemon you will have four options, Throw Ball means you will throw a Safari Ball and will try to catch the Pokemon. Throw Bait will keep the wild Pokemon around for longer. Throw Rock will make the Pokemon easier to catch but it will be more likely to flee. Run means you will just run from the wild Pokemon. Now here is a small tip if you get into an area a long way from the entry and have very few steps left or are running low on cash. Stay in one spot, and by lightly tapping the direction buttons, you can turn around. This will not count toward your steps but you will still encounter wild Pokemon! Also note, EVERYWHERE you go in the Safari Zone counts as steps, including the "Rest" houses. Listed below are the wild encounters and rates. Note that fishing is the same anywhere in the Safari Zone.
Now here is what you need to do to finish the Safari Zone and get all the items:
- From the Entrance head to the top right hand exit into Area 1.
- In Area 1, head right and north up the stairs. Continue north to find a Leaf Stone.
- Head back to the stairs and this time head to the left and down the next set of stairs.
- Head to the left and bit and up. To the right on the grassy peninsula near the water is TM11 - Sunny Day.
- Leave the Peninsula and head north-west to find a Max Potion.
- From the Max Potion head to the left and up the next set of stairs, to the right and down those stairs.
- To the right of here is a rest house (nothing inside really) and below it a Full Restore. Head north from the trainer house and to the left.
- When the route splits, take the bottom route still heading to the left into Area 2.
- Continue left and go north up the first set of stairs you come across.
- Follow the path and when you've gone down some stairs head to the left to collect Quick Claw.
- Head back to the start of Area 2. If you head down you will be in the top part of the Entrance Area.
- Nothing new here except if you come back with Surf. So instead, head to the northern part of the grass and head up the stairs.
- Follow the path and down the next set of stairs.
**From here you can head south into Area 3. (You will probably need to enter once more to get these, because it is unlikely you can get to the final house if you go down this south route. So instead do the bits between the double stars in your next trip.) Continue south and then head to the left and collect the Max Revive. The head up the stairs and to the left. Follow the path and at the base of the next set of stairs is a Max Potion. Return to where you were before the stars.**
- Head north, past the three pools and to the right a bit is TM47 - Steel Wing.
- Continue to the right and then head up. Collect the Protein.
- Now head west and all the way south down into Area 3.
- From the teeth head to the left. South of the hut grab TM32 - Double Team.
- Head inside the hut.
Talk to the man inside and he will give you HM03 - Surf. Now you have Surf, you can travel on water by pressing A next to a Surfable area. Now leave the Safari Zone. Now let's head to the Warden's house, the one to the right of the Pokecenter. Talk to the Warden Inside and give him his teeth. As thanks, he will give you HM04 - Strength. This can be used to move large boulders like the one in the Warden's house. Teach it to one of your Pokemon. move the boulder in his house and grab the Rare Candy.
Heal up and get ready for the next Gym Battle. When you're ready, head over to the gym. When you enter it looks relatively easy to get to the leader...however the walls are invisible. Here is a map showing the walls so you can navigate through the Gym:
The specialty in this gym is Poison, so let's try a few trainer battles first, starting with the bottom left and bottom right trainers:
Head to the right hand side of the gym and head up to fight the next two trainers:
When you get to the very top, head all the way to the left and down to fight the next two trainers:
Now onto the leader, Koga:
The biggest thing to watch out for in this battle is Toxic. This Poisons your Pokemon and the damage inflicted increases each turn. Be sure to stock up on Antidotes beforehand. If Toxic is getting the better of you, try inflicting a status effect on the opponent as soon as possible, this reduces the chance of a successful Toxic. You could also use a Poison type, which aren't affected by Toxic. I would strongly advise a Psychic type though as this is best against Poison. The two Koffing are nothing new and should be easy, however they have the Levitate ability so Ground attacks won't hit them at all. Muk has pretty good Spec. Def. and has pretty high Attack. Acid Armor boosts its Defense, but a Psychic type should mow him down pretty easy. If his Pokemon get low on health, Koga has a Full Heal and two Hyper Potions just to make things a bit harder.
Once you have the Tea, exit Celadon to the east. Now enter the house to the right with the guard, which have not allowed you to pass previously. Give him the Tea, and he will let you through. You can now enter Saffron City through any of the four guard houses. Leave the guard house to the right and enter Saffron City.
- PRO Courses Guides New Tech Help Pro Expert Videos About wikiHow Pro Upgrade Sign In
- EDIT Edit this Article
- EXPLORE Tech Help Pro About Us Random Article Quizzes Request a New Article Community Dashboard This Or That Game Popular Categories Arts and Entertainment Artwork Books Movies Computers and Electronics Computers Phone Skills Technology Hacks Health Men's Health Mental Health Women's Health Relationships Dating Love Relationship Issues Hobbies and Crafts Crafts Drawing Games Education & Communication Communication Skills Personal Development Studying Personal Care and Style Fashion Hair Care Personal Hygiene Youth Personal Care School Stuff Dating All Categories Arts and Entertainment Finance and Business Home and Garden Relationship Quizzes Cars & Other Vehicles Food and Entertaining Personal Care and Style Sports and Fitness Computers and Electronics Health Pets and Animals Travel Education & Communication Hobbies and Crafts Philosophy and Religion Work World Family Life Holidays and Traditions Relationships Youth
- RANDOM QUIZ
- Browse Articles
- Learn Something New
- Quizzes Hot
- This Or That Game New
- Train Your Brain
- Explore More
- Support wikiHow
- About wikiHow
- Log in / Sign up
- Hobbies and Crafts
- Video Games
- Multi Platform Games
- Pokemon Video Games
How to Catch Pokémon in Safari Zone
Last Updated: May 21, 2023 References
This article was reviewed by Ishrak . Ishrak is a Gaming & Video Expert specializing in sharing Pokémon and Minecraft videos. With over seven years of gaming and streaming experience, Ishrak has a follower base of over 30,000 YouTube subscribers and over 8 million views. He is also a Pokémon ROM-Hacker and some of his most popular videos highlight tips and advice for people learning how to play Pokémon games. This article has been viewed 110,568 times.
In the Pokémon series of games, Safari Zones are special unique areas in each game where rare Pokémon that don't appear anywhere else in the game can be caught. Safari Zones always operate with different rules than the rest of the game world - instead of battling Pokémon in the wild like you normally would, you'll need to carefully use baits and deterrents to get Pokémon to let down their guards so you can catch them. This can be quite challenging, so knowing the ins and outs of Safari Zone mechanics in each game is vital for success.
Navigating the Safari Zone
Fighting and capturing pokémon.

- Note that the "run away" option functions as normal, so we won't be discussing it.

- However, using bait will also make the Pokémon more difficult to catch in a safari ball. Thus, striking a balance here can be difficult — the longer you get the Pokémon to stick around for, the harder it will be to actually capture it.

- However, there's an important downside: using rocks will also make the Pokémon more likely to run away. In fact, after taking more than a few rocks, a Pokémon is virtually guaranteed to run away — some will exit the battle sooner. Thus, once again, using rocks means striking a delicate balance as you try to capture your Pokémon.

- Note that you only have a limited supply of safari balls (depending on the game, usually 30), so save them for Pokémon you want to catch. It's generally the best use of your time to use your safari balls for Pokémon that are only found in the safari zone.

- Note that safari balls are weak compared to the pokéballs you can use in the rest of the game. In addition to this, especially rare Safari Zone Pokémon are extra-difficult to catch. [2] X Research source This can lead to some very frustrating situations — for instance, it can easily take 20 or more tries to catch an exceptionally rare Pokémon like Clefairy.
General Tips

- Bulbapedia, an online user-supported Pokémon encyclopedia, has extensive information about each game's Safari Zone, including maps and guides covering where to look for the Pokémon in each zone. See the Bulbapedia Safari Zone article to get started. [3] X Research source
- Note that there is no step limit in the Safari Zone in Pokémon HeartGold and SoulSilver. [4] X Research source

- Across all of the games in the series, the entrance fee has stayed the same: 500 P . This includes the Great Marsh in Pokémon Diamond/Pearl/Platinum, which is not technically a Safari Zone but behaves very similarly.
- One smart strategy is to save your game before you enter the Safari Zone. This way, if you don't catch any Pokémon you want, you can re-load to avoid paying the entrance fee again.

- As an example of the sort of equation used in the games to determine whether certain Pokémon are captured, consider the equation from the Generation games (Gold and Silver): a = max((3 × HP max - 2 × HP current ) × rate modified / (3 × HP max ), 1) + bonus status where HP max is the Pokémon's maximum HP, HP current is the Pokémon's current HP, rate modified is the catch rate of the Pokémon modified by the ball used (every Pokémon and every ball modifies this in a certain way, and bonus status is the modifier for any status condition (sleep and freeze are 10, all others are 0). [5] X Research source When you throw a ball, a random number between 0 and 255 is generated. If this number is less than or equal to a, the Pokémon is caught.
Catching Pokémon in the Kanto Safari Zone
In the following sections, we'll highlight the rare Pokémon in each Safari zone and give specific advice where applicable. To keep these tables to a reasonable size, we've included only the rarest Pokémon in each area — for exhaustive information, consult the Safari Zone guides at Serebii.net and Bulbapedia.
Catching Pokémon in the Hoenn Safari Zone
Note that the Generation 4 Hoenn Safari Zone (Omega Ruby/Alpha Sapphire) won't be covered here as the player is allowed to engage in ordinary battles in this zone.
Catching Pokémon in the Sinnoh Great Marsh
Though Sinnoh's Pokémon preserve has a different name, it functions virtually identically to Safari Zones in other regions.
Catching Pokémon in the Johto Safari Zone
Note that the Safari Zone is not available in Generation 2 (Gold/Silver) but is available in the Generation IV games that visit Johto (HeartGold/SoulSilver). Note also that in this Safari Zone the player can arrange the six different areas in any arrangement desired. Finally, many of the areas in the Johto Safari Zones have Pokémon appearance rates that are not yet known — only data for the known areas has been included. See Bulbapedia for more information. [6] X Research source
Expert Q&A
- Once again, the data in the tables above only deals with the most noteworthy Pokémon in each area. In fact, many more Pokémon appear in each Safari Zone. Thanks Helpful 3 Not Helpful 2
- Remember — you have a limited number of steps inside the Safari Zone, not a limited amount of time. Thus, you can take as long as you like if you control your movement carefully. Thanks Helpful 1 Not Helpful 3
You Might Also Like

- ↑ http://bulbapedia.bulbagarden.net/wiki/Kanto_Safari_Zone
- ↑ https://strategywiki.org/wiki/Pok%C3%A9mon_Red_and_Blue/Safari_Zone
- ↑ https://bulbapedia.bulbagarden.net/wiki/Safari_Zone
- ↑ https://bulbapedia.bulbagarden.net/wiki/Johto_Safari_Zone#Areas
- ↑ https://bulbapedia.bulbagarden.net/wiki/Catch_rate#Capture_method_.28Generation_II.29
About This Article

- Send fan mail to authors
Reader Success Stories
Jan 16, 2017
Did this article help you?

Apr 1, 2018

Featured Articles


Trending Articles

Watch Articles

- Terms of Use
- Privacy Policy
- Do Not Sell or Share My Info
- Not Selling Info
wikiHow Tech Help Pro:
Level up your tech skills and stay ahead of the curve

- Remember me Not recommended on shared computers
Forgot your password?
- Guide Tavern
[Hunt Guide] Safari Zone Guide

By CaptainGrey February 21, 2015 in Guide Tavern
Recommended Posts
Captaingrey.
This guide is made to help you know which Pokemon are available in the Safari Zone in Kanto & Hoenn ; What their encounter rates are ( Very Common / Common / Average / Rare / Very rare ) , what items they can hold, and what items you can find inside.
- AurEzior , Bestfriendss , Bestfriends and 3 others

Link to comment
The Safari Zone in Kanto is located at Fuchsia City
Entry fees : 500 $$
Safari balls : 30
Steps : 600
>>> ENTRANCE <<<
Nidoran m -> common
Nidoran f -> common
Rhyhorn -> common
Exeggcute -> common
Venonat -> average
Nidorino -> average
Nidorina -> average
Parasect -> rare (Can hold Big & Tiny Mushroom)
Pinsir / Scyther -> rare
Chansey -> very rare (Can hold Lucky Egg)
Slowpoke/Psyduck -> very commons (day and night)
Magikarp -> 100%
Goldeen -> common
Poliwag -> average
Magikarp -> average
Seaking -> common
Dratini ->average (Can hold Dragon Fang & Dragon Scale)
Psyduck -> rare
Slowpoke -> rare
Dragonair -> very rare (Can hold Dragon Fang & Dragon Scale)
Nugget : On the island (requires Surf )
Leaf Stone : on the island (requires Surf ) (hidden)
>>> AREA 1 <<<
Nidoran m -> common
Nidoran f --> common
Doduo -> common
Paras -> average (Can hold Tiny & Big Mushroom)
Parasect -> rare (Can hold Tiny & Big Mushroom)
Kangaskhan -> rare
Scyther / Pinsir -> very rare
Psyduck / Slowpoke -> very common
Magikarp -> very commons
Poliwag -> common
Magikarp -> common
Dratini -> average (Can hold Dragon Fang & Dragon Scale)
Leaf Stone : On the upper pathway near the rest house
TM 11 (Sunny Day) : On the ledge beside the pond
Max Potion : Far west of the small mountain
Full Restore : Near the rest house
>>> AREA 2 <<<
Nidoran f -> common
Paras -> average (Can hold Tiny & Big mushroom)
Lickitung -> average
Venomoth -> rare
Nidorina -> rare
Chansey -> rare (Can Hold Lucky Egg)
Tauros -> very rare
Psyduck / Slowpoke -> very commons
Protein : On the upper pathway near the rest house
TM 47 (Steel Wing) : Beside a tree west of the rest house
Quick Claw : On a grassless patch in the middle of the area
>>> AREA 3 <<<
Exeggcute -> average
Nidorin f -> rare
Tauros -> rare
Kangaskhan -> very rare
Max revive : in a corner at the southeast base of the mountain
Max potion : in the grass at the southwest base of the mountain
Gold Teeth : south of the sign asking to find them (obligatory for obtain HM 04 Strength)
TM 32 (Double team) : southeast of the Secret House
Revive : on the southeast statue near the Secret House (hidden)
HM 03 (SURF) : from the man in the Secret House
- Bestfriends , Bestfriendss and Bilburt
The Safari Zone in Hoenn is located Route 121 before Lilycove City
>>> AREA 1 / ENTRANCE <<<
Oddish -> common
Kakuna -> common
Girafarig -> common
Wobbuffet -> average
Doduo -> average
Natu -> average
Pikachu -> rare (can hold Light Ball)
Gloom -> rare
Gloom-> rare
Psyduck -> 100%
Magikarp -> very common
Goldeen -> commmon
Goldeen -> very common
Max revive : Far southwest of the Area, beyond the pond (requires Surf )
Gloom -> average
Pinsir -> rare
Dodrio -> rare
Psyduck -> very common
Golduck -> rare
TM 22 (Solar Beam) : Far northeast of the area, beyond the pond (requires Surf and Mach Bike )
>>> AREA 4 <<<
Geodude (Rock Smash) -> 100% (can hold e verstone)
Phanpy / Donphan -> common
Heracross -> rare
Xatu -> rare
Calcium : In the far northwest part of the area (requires Acro Bike )
>>> AREA 5 <<<
Mareep -> common
Sunkern -> common
Spinarak -> average
Aipom -> average
HootHoot -> rare
Snubull -> rare
Gligar -> rare
Stantler -> rare
Chikorita -> very rare
Wooper -> common
Marill -> common
Totodile -> very rare
Quagsire -> very rare
Remoraid -> common
Octillery -> very rare
PP up : Three squares south of the southernmost Pokéblock stand (hidden)
Full Restore : In the furthest southeast patch of grass (hidden)
Big Pearl : East in a patch of grass beyond the top of the waterfall
>>> AREA 6 <<<
Shuckle (Rock Smash) -> 100% (can hold Root or Claw Fossils)
Aipom -> common
Teddiursa -> common
Sunkern -> average
Ledyba -> average
Houndour -> rare
Miltank -> rare
Pineco -> rare
Cyndaquil -> very rare
Rare Candy : In the southeast portion of the area there is a 2×3 patch of light green grass in the lower right portion of it (hidden)
Zinc : In a small nook among the wall in the rocky path to the north (hidden)
Nugget : Between two ledges at the end of the rocky path to the west
- Dibz , Bestfriendss , RayUwU and 3 others

will u include something about catchrate and best way to catch diffrents pokes?
- Angeluksdarkrose

Well done! Don't forget to include that you can find Claw & Root fossils on Shuckle in the Hoenn SZ when you add that to the guide, also a neat little trick for mass Shuckle hunting; Rock Smash all Rocks in Area -> Switch Channels & you don't have to move. :)
- CaptainGrey , kevpr and Bestfriendss

Moved to that main forum and added to the Guide Tavern Index.
Bestfriendss

I am planning on endorsing your guide when I get the chance to. Stay tuned to the RR News channel!
[spoiler]Keep up the good work! ;) [/spoiler]

less common, more %'s pls
its hard to judge percentiles, especially when the developers changed up the safari zones (lotad at night in Kanto, that is evidence of a change...).
means that they have the % as well. Besides, i'm not asking for cpt to put it in half n hour later, whenever they are accurate
I do pose this question to you Malorne, do you understand the fact that CaptainGrey is not a dev? I know that he posted where all the pokes are, but at the same time, he probably ventured out into the safari a couple of times. Captain is just giving his input from a CM's prospective. ( C M = Community Manager not Development Manager). Thus, Captain probably does not have the percentiles on top of his head. The devs have a hard job, but at the same time, they shouldn't be responsible for giving us percentiles, that is just plan silly. My conclusion to the problem, lack the percentiles (in the Emerald Guide Book, I read it and when it was showing pokemon, it didn't say "Whismer 100% " instead it stated "Whismer Very Common ." Percentiles are just plan silly and are not needed to make an effective guide. CaptainGrey made a to the point guide that I am planning to advertise on my YT channel, it is to the point, and no need for silly numbers.
I do pose this question to you Malorne, do you understand the fact that CaptainGrey is not a dev?
CaptainGrey made a to the point guide that I am planning to advertise on my YT channel, it is to the point, and no need for silly numbers.
how is this about your channel again? i prefer numbers of rarity, gives more precise rates.
1. The devs can't give numbers because then that would be like looking into a mathematics guide of PokeMMO rather than a typical guide. Thus, if they did give exact numbers, this would ruin the fun of the game, and this would single-handedly, expose the game too much.
2. Please refrain from insulting my YouTube channel, it is not polite. I am not going to insult you although I do feel like doing it sometimes. Violates Rule 1 clause a
These are two important points I would like to express to you. Please read them. Like I said, I am going to refrain from insulting you for all the distress you are causing here on a simplistic and to the point guide.
1. The devs can't give numbers because then that would be like looking into a mathematics guide of PokeMMO rather than a typical guide. Thus, if they did give exact numbers, this would ruin the fun of the game, and this would single-handedly, expose the game too much. 2. Please refrain from insulting my YouTube channel, it is not polite. I am not going to insult you although I do feel like doing it sometimes. Violates Rule 1 clause a These are two important points I would like to express to you. Please read them. Like I said, I am going to refrain from insulting you for all the distress you are causing here on a simplistic and to the point guide.
i didn't insult your channel lol, was simply asking what was the validity about it with the topic at hand (which is irrelivant btw) also, giving out exact encounter rates doesn't change that much of a thing with the fun of the game, coz it isn't... so i don't see why not actually, why am i even arguing with you lol. Cpt, give enc rates mate
You should play the game itself. You are ruining fun because you are bluntly giving way number information instead of a generic Very Common . Do you want to deface hope for those that want to catch Chansey, but come to find out that there is a 5% chance of encountering it. That would ruin hope for chansey lovers and also discorage people from venturing out into the Safari Zone for that Chansey or Kangaskan. Instead of ruining people's hopes, make a genaric Very Common or Very Rare label, saves the trouble and the more generic you can be, the happier the player base.
More numbers = More stress <---Important formula for an MMO's success
I will not give the % encounter rates, and please stop to debate about it on this topic to keep it clean. Thanks
do i need to remind you that some values are based on encounter rates?
Well done! Don't forget to include that you can find Claw & Root fossils on Shuckle in the Hoenn SZ when you add that to the guide, also a neat little trick for mass Shuckle hunting; Rock Smash all Rocks in Area -> Switch Channels & you don't have to move. :)
I am planning on endorsing your guide when I get the chance to. Stay tuned to the RR News channel! [spoiler]Keep up the good work! ;) [/spoiler]
Safari Zone tips...
I want to make an announcement, I endorsed your safari guide. I hope I helped in making your guide more known throughout the PokeMMO community.
- 2 weeks later...

- 5 months later...

hey quick think I noticed - in Area 4, i'm encountering a lot of Donphan (not phanphy, as the guide suggests). Otherwise this has been super helpful!
Ye I noticed this today too, i'll add it to the thread, thanks :)

Hey I cant seem to bunny hop or wheelie using the acro bike to access area 4 in Hoenn
- 4 weeks later...

DarkDragonborn
Yes! Been looking for this kind of guide.

O.o what tauros more rare then chanseys in area 2 weird cuz i was running into tauros left and right one after another more then other pokes and way more then chanseys!

I'm pretty sure for zone four in hoenn that xatu is a common, I have been encountering it more than donphan
Create an account or sign in to comment
You need to be a member in order to leave a comment
Create an account
Sign up for a new account in our community. It's easy!
Already have an account? Sign in here.
- Existing user? Sign In
- Online Users
- All Activity
- My Activity Streams
- Unread Content
- Content I Started
- Leaderboard
- Create New...
Important Information
By using this site, you agree to our Terms of Use and Privacy Policy .
Hoenn Safari Zone
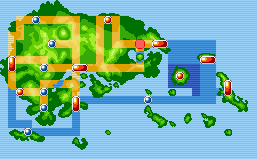
The Hoenn Safari Zone (Japanese: サファリゾーン Safari Zone ) is a special Pokémon preserve where Trainers can enter to catch wild Pokémon . The entrance is on Hoenn 's Route 121 .
In Pokémon Ruby, Sapphire , and Emerald , this Safari Zone is only accessible to Trainers participating in the Safari Game. In a Safari Game, players may only use Safari Balls , and rather than weaken wild Pokémon in battle, players must use non-conventional tactics to try and catch them. For $ 500, the player is granted entry and 30 Safari Balls. In Ruby, Sapphire, and Emerald, the player is limited to 500 steps and the player is only allowed entry if they also have a Pokéblock Case .
In Pokémon Omega Ruby and Alpha Sapphire , the Safari Game has been removed, and players can enter the Safari Zone area without paying a fee. Pokémon found here are now collected through normal battles. Each area also now has both tall and long grass , and while encounters between them are mostly the same, two rare Pokémon in each area can only be found in one type of grass specifically.
- 1.2 Pokéblock feeders
- 2.1 Pokéblock throw bug
- 3.1 Entrance
- 3.8 Vending Machine
- 4.1.1 Area 1
- 4.1.2 Area 2
- 4.1.3 Area 3
- 4.1.4 Area 4
- 4.1.5 Area 5
- 4.1.6 Area 6
- 4.2.1 Area 1
- 4.2.2 Area 2
- 4.2.3 Area 3
- 4.2.4 Area 4
- 7 In other languages
Certain areas of the Safari Zone can only be accessed with the Mach Bike or the Acro Bike . In Pokémon Omega Ruby and Alpha Sapphire, all areas are accessible with either Bike and Surf , but in some areas, only one type of grass will be accessible without using the other Bike. In Pokémon Ruby, Sapphire, and Emerald, there are also breakable rocks that can be used to encounter Pokémon. In Emerald , after the player obtains the National Pokédex , two new areas will open up to the east, featuring many Johto Pokémon not found in Pokémon Ruby and Sapphire or Pokémon FireRed and LeafGreen .
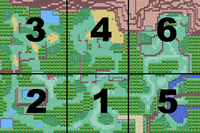
- In Omega Ruby and Alpha Sapphire, the Acro Bike and Surf are required to reach the long grass within this area.
- In Omega Ruby and Alpha Sapphire, the Mach Bike is required to reach the long grass within this area.
- In Ruby, Sapphire, and Emerald, the Mach Bike is required to access this area.
- In Omega Ruby and Alpha Sapphire, the Mach Bike is required to reach the tall grass within this area, while the Acro Bike is required to reach the long grass.
- In Ruby, Sapphire, and Emerald, the Acro Bike is required to access this area.
- In Omega Ruby and Alpha Sapphire, the Acro Bike is required to reach the tall grass within this area, while the Mach Bike and Surf are required to reach the long grass.
- Area 5 is directly east of Area 1. It is only accessible in Emerald , and only after the player has entered the Hall of Fame .
- Area 6 is directly north of Area 5. It is only accessible in Emerald, and only after the player has entered the Hall of Fame.
Pokéblock feeders
In Pokémon Ruby, Sapphire , and Emerald , there are Pokéblock feeders throughout the Safari Zone. If a Pokéblock is placed in a feeder, 80% of wild Pokémon encountered in grass patches and water tiles up to five steps away from the feeder will be forced to have a Nature such that, if an identically flavored Pokéblock were thrown at it, the Pokémon would be enthralled (i.e. its preferred flavor dominates its disliked flavor in the Pokéblock); the feeder has no effect if no such Nature exists. Only one Pokéblock may occupy a feeder, and the feeder's effect disappears after 100 steps are taken.
Due to an oddity in the programming of Pokéblock feeders, forced natures do not have a uniform distribution. This causes natures with higher ID numbers to be more common than Natures with lower ID numbers. For example, if a green (bitter) Pokéblock is in the feeder and forces an enthralling Nature: Calm has an 8.71% chance to be forced, Gentle has a 15.61% chance to be forced, Sassy has a 27.66% chance to be forced, and Careful has a 48.02% chance to be forced (approximately).
Safari Game
In Pokémon Ruby, Sapphire, and Emerald, this Safari Zone is only accessible to Trainers participating in the Safari Game. In a Safari Game, players may only use Safari Balls; rather than weaken them in battle, players must use non-conventional tactics to try and catch wild Pokémon. There are four options on the battle screen: throw a Safari Ball , throw a Pokéblock , go near, and run away. Throwing Pokéblocks makes a Pokémon less likely to run, while going near makes a Pokémon easier to catch but more likely to run.
Pokémon found in the Safari Zone carry two values with them that are used for the mechanics of the Safari Game. First is the "catch factor", which starts at 100/1275 of the Pokémon's catch rate , rounded down. Furthermore, there is an "escape factor", which represents the probability that a Pokémon will escape at the end of each turn. This "escape factor" starts with a value of 3 which results in a 15% chance to flee per turn.
Depending on the action taken, the catch and escape factors are modified as follows:
If a Pokémon's "escape factor" is reduced below 0 * , it will be adjusted to a value of 1. If a Pokémon's escape factor is currently 1: Pokéblocks are unable to affect it.
Throwing a Pokéblock that the Pokémon completely ignores does not directly affect the escape factor, but does increment the Pokéblock counter used for subsequent Pokéblock throws. A Pokémon is enthralled by a Pokéblock if its preferred flavor dominates its disliked flavor, while a Pokémon completely ignores it if its disliked flavor dominates its preferred flavor. If both preferred and disliked flavors are equal (including if neither are present), the Pokémon is curious about the Pokéblock.
If a player chooses to throw a Safari Ball, the catch factor is multiplied by 1275/100 (rounded down) to obtain the modified catch rate. At the beginning of each turn, a randomly generated value from 0 to 99 (inclusive) is obtained, and if this value is less than 5 times the escape factor, the Pokémon will escape at the end of the turn unless captured. Modifications to a Pokémon's escape rate will not take effect until the following turn.
These numbers translate to a 5% change in probability of escaping for every unit change (plus or minus 1) in the escape factor, with an initial 15% chance of escape; and approximately a 2.5% change in probability of capture for every unit change in the capture factor, with an initial capture probability of approximately catch rate/510 rounded down to the nearest multiple of 0.025 (2.5%), or 0.025 if it would be less.
Pokéblock throw bug
In Ruby, Sapphire, and Emerald, instead of the escape factor having a minimum value of 1 (5% chance to flee) like the catch factor, the game is coded to set the escape factor to 1 if it would become negative due to a thrown Pokéblock. This means it is possible for the player to throw Pokéblocks such that a Pokémon's escape factor becomes exactly 0, and the Pokémon will have a 0% chance to escape. Exploiting this can make it very easy to catch Hoenn Safari Zone Pokémon. Though, it is worth noting that if the "escape factor" is ever equal to 1, the game will not reduce it further regardless of which Pokéblocks are thrown by the player.
Due to an oddity in the programming of Pokéblock Feeders, the distribution of wild Pokémon's natures is not even across each of the possibilities. This causes Calm Pokémon to only spawn in 1/10 encounters if a bitter Pokéblock is in the feeder while Careful natured Pokémon will occur in nearly 4/10 encounters. This gives players an opportunity to greatly increase the effectiveness of their Pokéblock manipulation.
The optimal catching strategy for exploiting this is as follows:
Make these three single- flavor Pokéblocks: two green * (bitter) Pokéblocks, and one red * (spicy) Pokéblock. Put the green * Pokéblock into a feeder and start a wild encounter near that feeder.
Note: this can be done with yellow * , pink * , blue * , and green * Pokéblocks in the feeder; green * is just the most effective. With any of these colors make a red * Pokéblock as well. If you would like to use a red * Pokéblock in the feeder pair it with a yellow * (sour) Pokéblock.
When the battle starts...
- If the Pokémon's catch rate is higher than 200, throw Safari Balls .
- 1) If the Pokémon is curious (escape factor = 0), throw Safari Balls .
- 2a) If the Pokémon is enthralled (escape factor = 0), throw Safari Balls .
- 2b) If the Pokémon is curious (escape factor = 1), throw Safari Balls .
- 3) If the Pokémon is enthralled (escape factor = 1), throw Safari Balls .
This strategy results in, at minimum, a 75.88% chance to catch any Pokémon that appears.
The Safari Zone Pokémon Catch Rate goes as follows:
Vending Machine
In Pokémon Omega Ruby and Alpha Sapphire , there is a Vending Machine at the entrance to the Safari Zone.
Generation III
Generation vi.
- No Pokémon introduced in Generation III appear in this Safari Zone.
- In Pokémon Omega Ruby and Alpha Sapphire , the entrance to the Safari Zone has a book titled "The Path of the Safari Zone" written by the founder of the Safari Zone.
- In Pokémon Emerald , the Rare Candy in Area 6 cannot be picked up if the player tries to pick it up while facing it from the north or the west.
- Hoenn Safari Zone Areas 1, 2, and 4 from Pokémon Ruby and Sapphire can be found in the internal data of Pokémon FireRed and LeafGreen . However, the tileset data is missing, so the maps are glitched.
- Both Aipom and Gligar can be found in the Emerald expansion of the Safari Zone, both of which would become version exclusive Pokémon in Pokémon Scarlet and Pokémon Violets DLC: The Teal Mask.
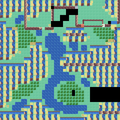
Hoenn Safari Zone Area 1 in FireRed and LeafGreen

Hoenn Safari Zone Area 2 in FireRed and LeafGreen
Hoenn Safari Zone Area 4 in FireRed and LeafGreen
In other languages
- Candidates for moving
- Articles needing better pictures
- Articles with accompanying video
- Safari Zones
- Hoenn locations
- Ruby and Sapphire locations
- Emerald locations
- Omega Ruby and Alpha Sapphire locations
Navigation menu
Page actions.
- View source
Personal tools
- Create account
- Editor's Hub
- Frequently asked questions
- Bulbawiki forum
- Recent changes
- Random page
Bulbagarden
- Bulbagarden home page
- Bulbagarden Archives
- Bulbagarden Forums
- Bulbagarden Discord server
- What links here
- Related changes
- Upload file
- Special pages
- Printable version
- Permanent link
- Page information
- Cite this page
- This page was last edited on 15 January 2024, at 01:37.
- Content is available under Attribution-NonCommercial-ShareAlike 2.5 . (see Copyrights for details)
- Privacy policy
- About Bulbapedia
- Disclaimers
- Mobile view
THE 5 BEST Moscow Safaris
Safaris in moscow.
- Adrenaline & Extreme Tours
- Gear Rentals
- Nature & Wildlife Tours
- 5.0 of 5 bubbles
- District Central (TsAO)
- 3rd Transport Ring (TTK)
- District North-Eastern (SVAO)
- District Eastern (VAO)
- District South-Western (YuZAO)
- Lomonosovskiy
- Ostankinskiy
- Meshchanskiy
- Krasnoselskiy
- Maryina Roshcha (Jewish Quarter)
- Good for Couples
- Good for Kids
- Good for Big Groups
- Adventurous
- Budget-friendly
- Good for a Rainy Day
- Hidden Gems
- Honeymoon spot
- Good for Adrenaline Seekers
- Things to do ranked using Tripadvisor data including reviews, ratings, photos, and popularity.

1. Rybokhotsoyuz

2. Easy Russia Tour Guide
3. UTS GROUP
4. 365AltaiMongolia

5. #1 Russia -Tanzania | Zanzibar, Serengeti Safari & Kilimanjaro Agency | BURIGI CHATO SAFARIS CO LTD

6. Aviashop.Ru

7. Transsib Moscow

8. BASK TOUR
- Easy Russia Tour Guide
- #1 Russia -Tanzania | Zanzibar, Serengeti Safari & Kilimanjaro Agency | BURIGI CHATO SAFARIS CO LTD
- 365AltaiMongolia
- Bahasa Indonesia
- Slovenščina
- Science & Tech
- Russian Kitchen
Your 48-hour tour guide of Moscow this winter!

9 am – Visit the Red Square

Christmas market on Red Square
The first thing that every tourist should do by default is visit the very heart of Moscow – it’s main and most beautiful (which ‘krasnaya’ actually meant in Old Russian) square!
There are several ways to explore it:
- Take a selfie with Spasskaya Tower
- Have a warm drink at the Christmas market (which lasts until mid-January)
- Visit Lenin’s Mausoleum
- Shop in the gorgeous adjacent GUM department store
- Visit St. Basil’s Cathedral (and learn that it’s actually several churches under one roof).
11 am – It’s Kremlin time!

Inside the Moscow Kremlin
Entering the Kremlin is, actually, a bit of a quest, as it’s a presidential facility with no general access. You need to buy a ticket or, better still, book a guided tour. Inside the Kremlin’s walls, you will find ancient cathedrals, in which Russian tsars used to be crowned and buried, as well as explore the magnificent architecture of the Kremlin that reflects the rich history of the country. And, finally, you could also make a quick visit to the Moscow Kremlin Museums and admire artifacts from various Russian tsarist eras: carriages, thrones, crowns and the most incredible armory and jewelry.
For more information, visit the official website of the Kremlin . It’s open from 10 am to 5 pm (and it’s closed on Thursdays) in winter.
2 pm – Watch the changing of the Guard

The honor guard at the Tomb of the Unknown Soldier
A very spectacular (and free) thing to do is watch how the honor guard does their ceremonial change at the Tomb of the Unknown Soldier and the Eternal Flame, situated in Alexander Garden, right next to the Kremlin wall. Every hour, from 8 am to 8 pm, the 1st Company of the Kremlin (Presidential) Regiment performs this rather old and beautiful tradition. But, be warned, it's often overcrowded.
3 pm – Enjoy a green oasis just in the center

Florarium in Zaryadye
Just a few steps from the Red Square, you will find the fabulous Zaryadye park. Opened in 2017, it is designed by renowned American architect bureau ‘Diller Scofidio + Renfro’. You can walk among the very cozy botanical decorations and explore Russia’s climate zones, as each of them is represented in dedicated areas, complete with flora from those zones.

The floating bridge in Zaryadye Park
The park also has an underground museum, an “ice cave” and a 3D cinema, where you can take part in a virtual adventure – a flight over Moscow! However, the piece de resistance is a floating boomerang bridge over the Moskva River, one of the best places to take a selfie.
You can also grab a quick lunch or relax with a cup of coffee or tea in the park.
7 pm – Arrange a ballet night

The Bolshoi Theater
Of course, the most fancy way to finish your day in Moscow would be to go to the ballet at the Bolshoi Theater (in a perfect world, to see ‘The Nutcracker’!). However, getting tickets to the Bolshoi is not an easy task and should be done well in advance of your visit.
But, don’t be upset if you don’t manage to get tickets to the Bolshoi. Moscow has dozens of other options to see a ballet (or opera). No less brilliant performances can be seen in the Stanislavsky and Nemirovich-Danchenko Music Theater or in The State Kremlin Palace (by the way, this is another way to get a quick glimpse inside the Kremlin!).
10:30 pm – Have a late dinner in a fancy restaurant

Dr Zhivago restaurant
There are not so many other cities with such a big choice of restaurants in a range of tastes and styles. In 2021, the authoritative Michelin guide announced their pick of the best of Moscow’s restaurants. And here’s our guide to all the places with Russian cuisine for any budget. But, if you happen to be in the area of the Bolshoi or Nemirovich-Danchenko Theater, then ‘Dr. Zhivago’ would definitely be a nice option (and it’s open around the clock).
DAY 2
9 am – grab a moscow coffee.

Winter festivities mood in Moscow
Moscow is definitely a coffee city! You can find coffee shops on every corner and they all offer a huge range of drinks. Try a ‘raf’ coffee, a sweet, creamy drink that was created in Russia, or dare to pick one of the very unusual offers, like cheese coffee or a Soviet candy style one (check out our coffee guide here ).
10 am – Take a river cruise

Winter boating along the Moskva River
Another exciting way to explore Moscow is to observe it from the water. Boats cruise along the Moskva River all year round. Most begin their route from the Hotel Ukraine, one of Stalin's ‘Seven Sister’ skyscrapers, and will bring you back to the same spot after passing the medieval Novodevichy Convent, Moscow State University and Luzhniki Stadium, the Cathedral of Christ the Saviour and giant monument to Peter the Great and many other sightseeings.
It’s always at optimum temperature inside the boat, which also has huge panoramic windows. Select boats also offer a full dining experience, so it is also a nice place to have breakfast or lunch.
If you are not a water person, then discover other, unusual sides of Moscow – pick one of the activities we’ve prepared for you here !
1 pm – Visit ‘Russia’ Expo and taste a bunch of Russian regional cuisines

Russia Expo at VDNKh
Until April 2024, the Soviet-era VDNKh exhibition park is hosting the huge ‘Russia’ expo, with tons of activities and expositions devoted to Russia, its culture, science and nature. Check out our special guide on what to do there!
An entire ‘House of Russian Cuisine’ has been opened at the expo. You will find 15 food stands with flagship dishes from Kamchatka, Siberia, Karelia and other regions of Russia. Imagine trying a range of cuisines and dishes in one place without even having to travel anywhere, be it Altai pelmeni, Tula kalach or Caucasian pies! A perfect place to grab some lunch.

House of Russian cuisines at VDNKh
The VDNKh exhibition park is a great place to visit, in general! Its pavilions are the perfect example of Stalinit Empire style architecture and you can almost feel as if you’ve traveled back in time! You will also find several interesting museums in the park – devoted to space exploration, Russian history and even a ‘Special Purpose Garage’, which showcases the various vehicles used by the country’s leaders.

'Sun of Moscow' wheel
And, finally, you can ride Europe's tallest panoramic wheel – ‘Sun of Moscow’ – that will give you panoramic views of the city – from a height of 140 meters!
5 pm – Ice skate with view & mulled wine

Ice skating rink on Red Square (GUM department store on the background)
Ice skating is one of the most popular and affordable activities in Moscow. There are several great ice skating rinks in picturesque locations that are open all winter long. One of the biggest rinks in Europe is also at the aforementioned VDNKh or you can visit the one in Gorky Park, another very popular Moscow spot, or the small, but fancy rink – right on Red Square!
All the parks offer ice skate rental, so the only things you need are warm clothes, a charged phone to record your memories and a good mood! Moscow also gets dark at 4:30 pm in winter and hundreds of lights are switched on, turning the city into a giant fairy tale!

A mulled wine with a view
And, if you are not a sports person, we’ve picked several other unusual activities that you could do in Moscow instead. For example, did you know that there is an entire district of dacha (countryside) houses, just 10 minutes from the center, surrounded by giant new highrises? How about taking a stroll there and feeling the early Soviet atmosphere?
8 pm – Warm up & laugh out loud
After all these outdoor activities, what could be better than a warm cozy bar with a hot drink and nice company? Moscow is a city full of entertainment for all tastes. So, if you know the Russian language or want to practice it, go to a theater or catch a stand-up comedy show. Moscow even has comedy shows in English, where you can hear both Russians speaking fluent English or foreigners (including Brits and Americans) who live in Russia speaking in broken or heavily-accented Russian (Check their show dates on the ‘ Moscow English Comedy ’ Telegram channel)!
11 pm – Finish by partying the night away!

Propaganda club in Moscow
Moscow never sleeps, as you might have heard. Which means there are plenty of bars and nightclubs where you can have a drink (or two or three; be sure to check out how Russians make Black Russian and White Russian cocktails) and chat with incredibly different people. Have fun and don’t miss your flight (or miss it and stay longer in the best city in the world!)!

That's it! See you soon in Moscow
Dear readers,
Our website and social media accounts are under threat of being restricted or banned, due to the current circumstances. So, to keep up with our latest content, simply do the following:
- Subscribe to our Telegram channel
- Subscribe to our weekly email newsletter
- Enable push notifications on our website
- Install a VPN service on your computer and/or phone to have access to our website, even if it is blocked in your country
If using any of Russia Beyond's content, partly or in full, always provide an active hyperlink to the original material.
to our newsletter!
Get the week's best stories straight to your inbox
- Tula: The best getaway from Moscow! (PHOTOS)
- 20 most interesting places in Moscow Region (PHOTOS)
- 10 things you should NEVER do in Moscow
This website uses cookies. Click here to find out more.

Explore the world with tourHQ
- Destinations
- I am a Guide
- I am a Traveller
- Online Experiences
- Currency (USD)
The epicenter of modern Russia, Moscow booms with shiny new skyscrapers, the bulbous onion domes of the tsars and politically-rich Red Square. Explore the metropolis with a tourHQ guide.
Search Cities in Russia
Moscow Tour Guides

Jorge De Reval
I am a happy, enthusiastic, amusing Spanish guy. Lively and hyperactive. Recently became qualified ...

Stephen Florian
Holds a Masters Degree in Theatre Arts.

Julia Koval
Hello!My name is Julia and I work as a guide last 4 years, but before together with my friends we ...

Ekaterina Smirnova
Please note: I'm away from Moscow June 11-26, 2021. I am a native Muscovite but traveled ...

Vasil Valiev
Occupation: Senior guide-translator. Guiding since 2012 in Altai mountains, North of Russia ...

Marina Spasskaya
Hi there! My name is Marina and I'm a licensed Moscow city guide.Moscow is like ...

Greetings from Saint Petersburg. This is your private tour guide Ali in Saint Petersburg. I was ...

Maria Deulina
Dear friends,My name is Maria, I am a licensed guide about Moscow. Being a native Muscovite I have ...

Ashraf Rabei
My name is Ashraf ...I'm graduated from faculty of tourism and hotel guidance department, in Egypt ...

Hengameh Ghanavati
My name is Hengameh Ghanavati. Im a licenced international tour guide since 2014 and I have ...

Todd Passey
We are a cooperative of highly experienced, certified, professional guides. Each guide takes ...

Tim Brinley
Young at heart, adventurous, organized, good people skills, a good speaker, entertaining, ...

Nikolay Borkovoy
Hace 32 años nací en la ciudad de Moscú. Tengo experiencia trabajando como guía turístico en ...

Anika Socotra-International
Our mission is to provide you with the kind of holiday you want: where you can relax in wonderful ...
The sprawling, mind-boggling metropolis of Russian Moscow has long been one of the theatrical stages on which the great dramas of Europe and Asia have been played out in grand style. Burned by Napoleon in 1812, immortalised by Tolstoy, utilised by the Bolsheviks and championed as a bastion of heroic defiance by the post-war communists, it’s almost hard to believe just how defining the historical events that found their home on Moscow’s streets have been. Moscow tour guides will easily be able to mark the major must-see landmarks on the map, from the onion-domed orthodox Saint Basil's Cathedral, to the political powerhouse of Red Square just next door, while others will be quick to recommend a ride on Moscow’s famous subterranean metro system, or a visit to the UNESCO-attested Novodevichy Convent on the city’s southern side. But Moscow is a city also in the throes of a cultural wrangling between the old and the new. Creative energies abound here: Boho bars and pumping super clubs now occupy the iconic mega structures of the old USSR; high-fashion outlets, trendy shopping malls and luxurious residential districts stand as testimony to a city that’s now the undisputed playground of the world’s super-rich, while sprawling modern art museums dominate the cultural offering of the downtown districts north of the Moskva River.
Tell us your destination, date, and group size.
Our team of travel experts and guides will design a tailored itinerary just for you., enjoy your trip with peace of mind knowing everything is taken care of..
Say Goodbye to Travel Stress

Choose Currency Close modal
- USD US, dollar
- GBP British Pounds
Cookie icon We use cookies!
We, and third parties, use cookies for technical and analytical purposes, for marketing purposes and for integration with social media. For more information, refer to our Privacy Policy and Terms of Consent.
By clicking on 'I agree', you consent to the use of these cookies.

- For tour guides
- For tourists

- All countries ―
- Russia ―

Find a local private tour guide for sightseeing in Moscow in Russia using Private Guide World by filtering your preferred language in the box at the top of this page in the center

Choose a local private tour guide in Moscow, Russia

Thanks to the Private Guide World service in a few clicks you can choose a personal tour guide to local attractions of Moscow city in Russia. Enter the destination, search parameters, and preferred language to see the results. You can use the filter ONLINE ONLY to see which local tour guide in Moscow is currently online!
Our private tour guides know Moscow and the surrounding region very well, speak the local russian language plus the other languages, too, and can help you to understand the local people, culture, traditions, and history better while you are in Moscow. During the tour in Moscow, you will not have any problems with locals if a tour guide is by your side. Your local personal tour guide in Moscow will help you learn a lot about the region and share only the most exciting knowledge and best experiences with you. Check out some of the local sights & attractions of Moscow, wildlife & nature, and ask your personal tour guide to show you the local gems hidden from a regular tourist without a professional tour guide. Before you travel to Moscow, be sure you have enough local currency Russian ruble with you in case you need to buy a souvenir or tip a tour guide!
New GENERIC REQUEST
Please add some text to the message. The tour guide will answer you in a private message
- Already have an account? Log in
- Don’t you have an account? Sign up
Pokemon Go Raid Schedule March 2024
Raids are an essential part of the gameplay experience within Pokemon GO , and are great to encounter and capture various high-level Pokemon. The available creatures regularly rotate, so you'll need to keep an eye out for the ones you want most!
This page acts as a breakdown of all the available Pokemon within Raids in Pokemon Go during March 2024 , as well as when and how you can access these Raids .
When Are Raids Available?
Raid Battles occur at Pokémon Gyms and have a chance to appear between 5:00 AM and 7:45 PM local time, with a total duration of 45 minutes once one begins. You'll know that a Gym has a Raid going on if you can see a Raid Egg above the Gym, alongside a countdown timer.
Every Wednesday, between 6PM and 7PM local time , Gyms within Pokemon GO will receive an update that triggers a Raid. All of these Raids will be 5-Star , giving you an increased chance of acquiring the assigned 5-Star Raid Pokemon at that time, which you can see in the 5-Star Raid schedule breakdown below.
How to Access Raids
To access Raids, you'll need a Raid Pass. These can be acquired one of three ways.
- A Raid Pass is available to collect each day by spinning the Photo Disc at any Gym.
- A Premium Raid Pass can also be purchased from the in-game Shop should you run out.
- A Remote Raid Pass is also available for players who can't leave the house, or who are trying to participate in a distant, region-specific event.
March 2024 Raid Schedule
This is the Raid Boss schedule for March 2024 within Pokemon Go:
1-Star Raids
3-star raids, 5-star raids, shadow raids, march 2024 raid hours, up next: pokemon go hisuian typhlosion raid day, top guide sections.
- List of Pokemon (Pokedex)
- Upcoming and Current Events in Pokemon Go
- Pokemon Go Party Play
- Pokemon GO Community Day Schedule 2024
Was this guide helpful?
In this guide.


IMAGES
VIDEO
COMMENTS
Safari Zone Area Guide The Safari Zone puzzled together as a guide Catching Safari Pokémon [] Safari Zone - Main Area. The nice thing about the Safari is that you don't have to fight with Pokémon before you can catch them, but you can only catch them with the Safari Balls provided.. There are a few original options: throwing rocks at Pokémon to make them angry and easier to catch, but also ...
Area 3. In the entrance gatehouse to the Safari Zone, pay the requisite ₽500 to enter and receive 30 Safari Balls before heading inside the Safari Zone proper. In Yellow Version, if you bother the attendant here, he will allow you to enter the Safari Zone even if you don't have ₽500. Instead, he will take all your remaining money and give ...
Throwing a Ball. Capturing in the Safari Zone follows the regular R/B/Y capture algorithm, though since neither the Pokémon's HP nor its status can be affected and the only balls available are Safari Balls (identical to Ultra Balls), a lot of things are abstracted out in the Safari Zone. Unfortunately, thanks to the game's flawed RNG, Safari ...
Find the Warden's Teeth. From the entrance, head north and east to find the exit to Area 1. Head east until you come to a grassy area, then go up the steps to the north. Go west, then down the ...
This is a map and walkthrough for Great Marsh, the Sinnoh region's very own safari zone in Pokemon Brilliant Diamond and Shining Pearl (BDSP). Learn about the mechanics of the Great Marsh, the Great Marsh Daily Pokemon, what Pokemon are found in each area, and what trainers, items, and events are encountered here.
Pokemon Go 2022 Safari Zones. There have been 2 Safari Zones so far in 2022, with another 2 scheduled for later in the year: Safari Zone Seville - May 13th to May 15th, 2022. Safari Zone Goyang ...
Version History [Vsion1] ----- Version 1.00 - March 16, 2010 - Started Safari Zone Guide Version 1.00 - March 17, 2010 - Finished Safari Zone Guide Version 1.01 - March 18, 2010 - Added in the location Pokemon are found Version 1.02 - March 20, 2010 - Added Sandslash to Desert area Version 1.10 - March 23, 2010 - Area Names Now Match Game's ...
The Safari Zone is not only a great place for catching Pokemon, it is also crucial in gaining two important HMs in the game, Surf and Strength. Head as far north as you can go in Fuchsia, and enter the building at the top. This is the Safari Zone. Inside, walk past the guy on the right and he will ask if you want to enter the Safari Zone. For ...
Walkthrough. The Safari Zone is a large conservation area where players can attempt to capture various rare species of Wild Pokemon. Certain Pokemon found within the Pokedex can only be found in the Safari Zone, making it a vital area should you look to complete the Pokedex. In addition to having the opportunity to find loads of new Wild Pokemon, the Safari Zone has a few additional goals ...
The Johto Safari Zone is the most unique Safari Zone ever existing in the games. This Safari Zone has 12 areas, which you can customise at will. Only six areas are accessible at any one time, with you able to switch them around. As you progress through the Safari Zone, you can place blocks in the various areas which attract even more Pokémon ...
This new Safari Zone allows you to customise the areas. The customisation allows you to move where all six of the areas of the Safari Zone are. This is useful so you don't have to walk and waste a load of steps should you wish to find a Pokémon that is only in the Desert area. All you do is slide the areas around using the touch screen.
The idea behind the Safari Zone is to catch rare kinds of Pokémon found nowhere else in Hoenn. You'll get 30 Safari Balls to play, and get teleported back to the Safari Zone entrance once all 30 are used or once you walk 500 steps (whichever comes first). The Safari Zone is unlike other Pokémon-catching situations: you don't actually battle ...
Located to the northeast of Area 1. Kangaskhan 4%, Scyther (Red only) 1%, Pinsir (Blue only) 1%, Parasect 5%. Area 3. Located to the northwest of the rest house in Area 2. Tauros 1%, Chansey 4%, Rhyhorn 15%, Dratini 25%. To catch Dratini and the other high-value aquatic Pokémon in this area, use a Super Rod. Area 4.
4th Area. The Safari Zone should be your next stop and you'll find yourself coming back quite a few times in order to catch all of the Pokémon inside. You'll find tons of items including the HM03 Surf and the Gold Teeth which need to be returned to the Warden. The Warden lives beside the fishing guru and will reward you with the HM04 Strength.
Posted February 22, 2015. 1. The devs can't give numbers because then that would be like looking into a mathematics guide of PokeMMO rather than a typical guide. Thus, if they did give exact numbers, this would ruin the fun of the game, and this would single-handedly, expose the game too much. 2.
The Hoenn Safari Zone (Japanese: サファリゾーン Safari Zone) is a special Pokémon preserve where Trainers can enter to catch wild Pokémon.The entrance is on Hoenn's Route 121.. In Pokémon Ruby, Sapphire, and Emerald, this Safari Zone is only accessible to Trainers participating in the Safari Game.In a Safari Game, players may only use Safari Balls, and rather than weaken wild ...
The Safari Zone is a gated off area in eastern-central Hoenn where you can catch a large number of different and rare Pokemon. This area can only be reached from Route 121 . Head inside the ...
Easy Russia Tour Guide. 29. City Tours • Safaris. Lomonosovskiy. By ... Tverskoy. 5. #1 Russia -Tanzania | Zanzibar, Serengeti Safari & Kilimanjaro Agency | BURIGI CHATO SAFARIS CO LTD. Multi-day Tours • 4WD, ATV & Off-Road Tours. Open now. 6. Aviashop.Ru. Hop-On Hop-Off Tours • Private Tours. District Central (TsAO) 7. Transsib Moscow.
Pokémon tells the story of how a kid (you can choose to be a boy or a girl) from Pallet Town goes on an adventure to become the best Pokémon trainer in the Kanto region. Throughout your journey you will collect many Pokémon which you will use to defeat all 8 Gym Leaders. Each time you defeat a Gym Leader, you will be rewarded with a Badge ...
And, finally, you could also make a quick visit to the Moscow Kremlin Museums and admire artifacts from various Russian tsarist eras: carriages, thrones, crowns and the most incredible armory and ...
Tell us your destination, date, and group size. Our team of travel experts and guides will design a tailored itinerary just for you. Enjoy your trip with peace of mind knowing everything is taken care of. The epicenter of modern Russia, Moscow booms with shiny new skyscrapers, the bulbous onion domes of the tsars and politically-rich Red Square.
Check out some of the local sights & attractions of Moscow, wildlife & nature, and ask your personal tour guide to show you the local gems hidden from a regular tourist without a professional tour guide. Before you travel to Moscow, be sure you have enough local currency Russian ruble with you in case you need to buy a souvenir or tip a tour guide!
March 2024 Raid Schedule. This is the Raid Boss schedule for March 2024 within Pokemon Go: 1-Star Raids. 3-Star Raids. 5-Star Raids. Mega Raids. Shadow Raids. NOTE: Both 5-Star and Mega Raids ...