
- Succès/Trophées
- Guides/Tutos
- Centre d'aide
- Wiki Soluces
- Succes/Trophees
- Wiki soluces

Soluce The Legend of Zelda : Tears of the Kingdom
- Tour des hauteurs Gerudos
- Ajouter une precision
Sommaire de la soluce
- A la recherche de Zelda - Partie 1
- La porte close
- A la recherche de Zelda - Partie 2
- Retour en Hyrule
- Etrange phénomène au château - Partie 1
- Enquêtes régionales
- Des gens dans les profondeurs
- Le Temple des Profondeurs
- Impa et les Géoglyphes
- Les Larmes du Dragon
- L'arc de Babil
- La Voie des Cieux
- Le Temple du Vent
- La statue couverte de vase
- Pour restaurer l'armure Zora
- La gravure cassée
- La piste vers le ciel
- Le Temple Zora Antique
- L'île des Eaux Jaillissantes
- Le Temple de l'Eau
- Défense de la Cité Gerudo
- Les trois piliers du désert
- Le Temple de la Foudre
- Vers le Mont de la Mort
- L'Abîme de la Mort
- Le Temple du Feu
- Etrange phénomène au château - Partie 2
- Le secret des vestiges circulaires
- La voix venue du passé
- Sur les traces de l'Epée de Légende
- La lame perdue du Héros
- Abattre Ganondorf
- En quête de vérité !
- La princesse chevauchant une bête
- Le cheval doré de Zelda
- Le puits hors service
- L'enlèvement de Zelda ?!
- Les chèvres en fuite
- Les gourmets n'arrivent pas
- Les outils disparus
- L'oracle Cocotte
- Personne en détresse
- Pour l'amour de la princesse
- Un sinistre chant
- Le laboratoire Pru'ha d'Elimith
- Activer l'amulette de téléportation
- Activer le mode empreintes
- Le détecteur encyclopédique
- Votre encyclopédie personnelle
- Sérénade pour une grande fée
- Sérénade pour Mijah
- Le sauvetage du joueur de cor
- Sérénade pour Cotura
- La danse des abeilles
- Sérénade pour Caesa
- Le joueur de flûte des alpages
- Goutiée ou Baldinn ?
- Le grand débat
- Les malheurs de Naye
- Le secret de Baldinn
- Le secret de Goutiée
- Tout un fromage !
- Invasion de pirates
- Reconstruction d'Ecaraille
- Le départ de Tinieh
- En quête d'un cristal d'Elusis
- Les pérégrinations de Koltin
- Le collectionneur de monstres 1 à 5
- Les plans du Grand Kohga
- Infiltration chez les Yigas
- L'examen d'officier Yiga
- La technique secrète du Clan Yiga
- Pacification d'Hyrule
- L'appel des Profondeurs
Les ennuis de Noïa
- La voix du Démon
- Fouilles des Ruines des Obscurcies
- Un message des temps anciens
- L'Ile Céleste du Prélude
- À la chasse à l'Hinox
- À la chasse au Lithorok
- À la chasse au Moldarquor
- La jument perdue
- L'écurie inachevée
- L'énorme silhouette mystérieuse
- Le menu du jour
- Le mystérieux géant du ciel
- Le mystérieux monstre à trois têtes
- Un village en détresse
- Barricadés dans la cabane
- Décorer le relais du pont de Taranta
- Décorer le nouveau relais de Delass
- Des champignons brillants
- Le trésor de rêve de Lambda 2
- Si j'avais un chariot
- Un pont à réparer
- L'arc de l'aigle des Piafs
- La grotte bloquée
- La requête de Mohino
- Le grand fossile d'Hébra
- Le plat maison de Ghenkott
- Le trésor dormant des sources
- L'impératrice disparue
- Nouvel entraînement Piaf
Traversée en eaux froides
- Troc chez les Piafs
- À la recherche du paradis
- Décorer le relais des prairies gelées
- La prophétie d'Edal - Nord
- La statue matriarche
- La tente accaparée
- Des provisions convoitées
- La cachette dans l'Arbre Mojo
- La chasse aux trésors de Cernus
- Les cercles qui tournent
- Notre trésor
- Bienvenue à Wagoland !
- Brise-montagne, l'âme des Gorons
- Décorer le relais de la forêt
- Décorer le relais du pied de la montagne
- L'acheteuse d'ambre
- La cité antique de Gorondia !
- La cité antique de Gorondia ?
- La tenue du Dieu démon
- Le trésor de rêve de Lambda 1
- Le mineur abandonné
- Le trésor des étangs lézards
- Les bains secrets
- Les Gorons et la lune
- On ne gâche pas la viande !
- Sus au trésor de Lambda
- Parcours expert
- Parcours intermédiaire
- Un gigot de caillasse ou rien !
- Un silex au goût riche
- Décorer le relais de l'orée de la plaine
- Décorer le relais de la rivière
- En plein dans le puits
- Le trésor de rêve de Lambda 3
- Les animaux de Tabos
- Objectif : cocottes !
- À l'épreuve de la chaleur
- À l'épreuve du froid
- Adieu les virevoltants
- Au secours de Peiffa
- Conduis-moi jusqu'aux ruines
- Décorer le relais du canyon Gerudo 1
- Décorer le relais du canyon Gerudo 2
- Des glaçons pour la glacière
- Des viscères de Griock
- L'âme à l'héroïsme véritable
- La fierté des Gerudos
- La prophétie d'Edal - Sud
- La propriétaire disparue
- Le caravanier disparu
- Le défi de Tiklama
- Le secret des héroïnes
- Le trésor caché du désert Gerudo
- Les égarés du canyon Gerudo
- Le grand fossile du désert
- Passion déco
- Angoisses nocturnes
- Décorer le relais des marécages
- L'aubergiste disparu
- La meilleure stratégie
- Le plat ultime... ?
- Le mal des miasmes
- Les dalles ancestrales
- Les œufs des cocottes
- Pour l'amour des puits
- La fierté d'Elimith
- La statue de la source de la Sagesse
- Le désir secret d'Hamel
- Le potager de Florène
- Les joies de l'enseignement
- Les joies de l'enseignement 2
- Une bouteille à la mer
- Une nouvelle tunique de Prodige
- Rhodo, maître crémier
- Un modèle de Chuchu
- Couvert de vase
- L'épouse montée au ciel
- La lance d'écailles radieuse
- La pierre bleue
- La princesse zora au clair de lune
- Le fort du plateau de Jarbu
- Le trésor du poisson géant
- Un généreux trésor
- Un symbole d'amitié
- Une crabuleuse affaire
- Remontrances sans fin
- Décorer le relais des Géminés
- Le repaire des pirates
- Décorer le relais de l'est d'Akkala
- Décorer le relais du sud d'Akkala
- L'arme ultime
- D'un coup d'un seul
- La horde de pirates
- L'artéfact soneau maîtrisé
- La statue de la source de la Force
- La prophétie de l'île d'Edal
- Le grand fossile d'Ordinn
- Le rallye d'Euzero
- Qu'est-ce qu'il y a dedans ?
- Une maison de rêve
- Décorer le relais des alpages
- La nouvelle attraction d'Écaraille
- Décorer le relais du lac
- La chemise bleue de Papa
- La statue de la source du Courage
- Le bateau à la dérive
- Le projet de Lorelo
- Les trois frères des grottes
- Le Sanctuaire du Cratère d'Oriolo
- L'oiseau blanc et la grotte
- Le Sanctuaire d'Hébra Ouest
- Le Sanctuaire d'Hébra Nord
- La jolie pierre et les pommes
- Le refuge de Markus
- On ne passe pas !
- Le Sanctuaire de la Caldeira de la Mort
- Le Sanctuaire du Lac de Torgol
- Le Sanctuaire du Mont Satori
- Le Sanctuaire du canyon Gerudo
- En noir et blanc
- Le Sanctuaire de Lanelle
- La légende de la source et des anneaux
- Le Sanctuaire du Lac Nêche
- Le Sanctuaire de la veine de Lars
- Un rocher à vendre
- La légende du javelot
- À dos de géant
- Le Sanctuaire du Lac Hylia
- Les clés nées de l'eau
- Le sanctuaire céleste d'Hébra est
- Le sanctuaire céleste d'Hyrule sud
- Le sanctuaire céleste d'Hyrule nord
- Le sanctuaire de l'île de la Carrière
- Le sanctuaire céleste de Necluda
- Le sanctuaire céleste de Necluda nord
- Le sanctuaire céleste de Necluda ouest
- Le sanctuaire céleste de Tabanta
- Le sanctuaire céleste de Lanelle sud
- Le sanctuaire céleste d'Akkala sud
- Sanctuaire de Ixoda Qun
- Sanctuaire de Seltabo Mati
- Sanctuaire de Susu Yaï
- Sanctuaire de Oya Miö
- Sanctuaire de Zio Siniö
- Sanctuaire de Qyono Nisiü
- Sanctuaire de Se Papa
- Sanctuaire de Iqa Taq
- Sanctuaire de Iün Oloq
- Sanctuaire de Maqlu Qisa
- Sanctuaire de Olom Uaqa
- Sanctuaire de Qiü Yoyoü
- Sanctuaire de Runa Qita
- Sanctuaire de Sinaqa Uaqa
- Sanctuaire de Taqi Ihabano
- Sanctuaire de Eüto Ume
- Sanctuaire de Gata Qisa
- Sanctuaire de Ota Qalqa
- Sanctuaire de Ruta Fuüme
- Sanctuaire de Sahilo Ua
- Sanctuaire de Sisu Rana
- Sanctuaire de Taü Yosipuni
- Sanctuaire de Uaö Osa
- Sanctuaire de Maya Otaqi
- Sanctuaire de Maya Usiyu
- Sanctuaire de Noü Da
- Sanctuaire de Olo Tiüm
Sanctuaire de Oxo Sagnu
- Sanctuaire de Maya Qoqo
- Sanctuaire de Mineta Qalqa
- Sanctuaire de Musano Qila
- Sanctuaire de Nin Zixi
- Sanctuaire de Pupun Qe
- Sanctuaire de Qiqa Qun
- Sanctuaire de Sequn Bomala
- Sanctuaire de Siq Quti
- Sanctuaire de Ten Maten
- Sanctuaire de Eqo Tiü
- Sanctuaire de Isi Sime
- Sanctuaire de Malaq Guti
- Sanctuaire de Momo Siqa
- Sanctuaire de Moxa Pin
- Sanctuaire de Qima Yata
- Sanctuaire de Qisi Nona
- Sanctuaire de Si Tumoï
- Sanctuaire de Sivaji Taqiö
- Sanctuaire de Tima Uaqa
- Sanctuaire de Zio Taqiö
- Sanctuaire de Maya Tinoü
- Sanctuaire de Qami Zuna
- Sanctuaire de Qyoq Goni
- Sanctuaire de Riö Goqo
- Sanctuaire de Sona Pano
- Sanctuaire de Tadalo Qun
- Sanctuaire de Taji Qatu
- Sanctuaire de Ten Ziten
- Sanctuaire de Tut Ume
- Sanctuaire de Usa Zuma
- Sanctuaire de Ila Saqu
- Sanctuaire de Milio Tanigo
- Sanctuaire de Qalaha Tagi
- Sanctuaire de Laqa Quda Zito
- Sanctuaire de Maya Tata
- Sanctuaire de Siua Qama
- Sanctuaire de Motu Sisi
- Sanctuaire de Qita Uaqa
- Sanctuaire de Solyota Nigo
- Sanctuaire de Suäli Uaqa
- Sanctuaire de Titi Maü
- Sanctuaire de Tula Qamiqa
- Sanctuaire de Exo Se
- Sanctuaire de Jojo Niü
- Sanctuaire de Jon Saü
- Sanctuaire de Len Ize
- Sanctuaire de Maqa Sula
- Sanctuaire de Mo Lonqu
- Sanctuaire de O Ogin
- Sanctuaire de Qula Qata
- Sanctuaire de Tuqa Loqu
- Sanctuaire de Aneda Mimiqa
- Sanctuaire de Jo Goü
- Sanctuaire de Maya Hisiqa
- Sanctuaire de Zanmi Qalqa
- Sanctuaire de Zaq Suqa
- Sanctuaire de Ziqa Isen
- Sanctuaire de Ga Sasa
- Sanctuaire de Maya Matuno
- Sanctuaire de Otu Tuma
- Sanctuaire de Qudani Sala
- Sanctuaire de Rotu Mam
- Sanctuaire de Tulaqa Uaqa
- Sanctuaire de Maya Liïna
- Sanctuaire de Sifu Mimi
- Sanctuaire de Toqi Yoü
- Sanctuaire de Vami Toqa
- Sanctuaire de Apo Geqe
- Sanctuaire de Gata Nisisi
- Sanctuaire de Moga Uaqa
- Sanctuaire de Ihe Na
- Sanctuaire de Jo Niü
- Sanctuaire de Joti Ihiga
- Sanctuaire de Maoï Qesqa
- Sanctuaire de Yomi Zuqi
- Sanctuaire de Domi Zuïno
- Sanctuaire de Gemi Miqa
- Sanctuaire de Iga Xuq
- Sanctuaire de Maya Tidegina
- Sanctuaire de Joti Iyu
- Sanctuaire de Lasi Uaqa
- Sanctuaire de Lasitaqi Uaqa
- Sanctuaire de Qamatu Qisa
- Sanctuaire de Sinata Niqalqa
- Sanctuaire de En Oma
- Sanctuaire de Ixo Qin
- Sanctuaire de Joju Uü
- Sanctuaire de Joti Xiü
- Sanctuaire de Susu Bië
- Sanctuaire de Uto Zixi
- Sanctuaire de Utu Xoqi
- Sanctuaire de Ziu Qoüme
- Sanctuaire de Gutan Bati
- Sanctuaire de In Isa
- Sanctuaire de Nacho Yaha
- Sanctuaire de Uqo Uho
- Sanctuaire de Ijo O
- Sanctuaire de Mayaü Meqisa
- Sanctuaire de Qahata Naüme
- Sanctuaire de Tanino Uda
- Sanctuaire de Ten Vezaï
- Sanctuaire de Gata Unali
- Sanctuaire de Maya Miï
- Sanctuaire de Ximoxi Uaqa
- Sanctuaire de Mogi Sali
- Sanctuaire de Nata Qalqa
- Sanctuaire de Gaahi Sasa
- Sanctuaire de Gano Sa
- Sanctuaire de Maya Siäla
- Sanctuaire de Taün Hiyo
- Sanctuaire de Zino Qaö
- Sanctuaire de Giqa Qun
- Sanctuaire de Igo Xon
- Sanctuaire de Maya Nasi
- Sanctuaire de Siha Jogoü
- Sanctuaire de Ziruta Gumati
- Sanctuaire Jo Siü
- Sanctuaire de Qumama Ino
- Sanctuaire de Yansa Mino
- Sanctuaire de Uqo Ozixi
- Sanctuaire de Laqa Xogo
- Sanctuaire de Siya Motusi
- Sanctuaire de Joq U
- Sanctuaire de Joq Usini
- Tour du Fort de Guet
- Tour du Mont Labulat
- Tour du col de Térel
- Tour de la prairie d'Urban
- Tour des ruines des Obscurcies
- Tour du ravin d'Ordinn
- Tour de la plaine d'Hyrule
- Tour du canyon Gerudo
- Tour de la plaine de Sahasla
- Tour de la montagne de Lanelle
- Tour de Rabelle
- Tour du plateau Zoran
- Tour du mont Ramol
- Tour des Peupliers
- Les statues de Génie
- Gravures et plans d'assemblage
- Les Voeux des Sages
- Les panneaux de Boulieh
- Tissus de Paravoile
- Selles et filets pour cheval
- Tenue hylienne
- Tenue duveteuse
- Tenue de pierre
- Tenue furtive
- Tenue des sablons
- Bottes de neige
- Bottes des sables
- Tenue d'escalade
- Tenue de barbare
- Tenue isolante
- Tenue du blizzard
- Tenue du brasier
- Tenue du Dieu démon
- Tenue spectrale
- Tenue de batracien
- Tenue de la foudre
- Tenue des esprits
- Tenue du rêve
- Esprit du Héros Ancestral
- Nouvelle tunique de prodige
- Tenue bleue de homard
- Chapeau de Goutiée
- Masque anti-tonnerre
- Vieille tenue
- Tenue de soldat
- Tenue de garde royal
- Tenue de chute libre
- Tenue de sonium
- Tenue de Tingle
- Tenue de spectre
- Vieil anneau capillaire
- Tenue des Ténèbres
- Tenue Noire
- Tunique Nostalgique
- Tenue de Mineur
- Tenue du Temps
- Tenue du Vent
- Tenue du Crépuscule
- Tenue des Landes
- Tenue du Ciel
- Tenue du Prélude
- Masque de Sheik
- Casque de Xanto
- Masque de Majora
- Masque de Korogu
- Couronne de Midona
- Capuche de Lavio
- Heaume Divins
- Masques de monstres
- Diadèmes et boucles d'oreilles
- Noix Korogus de l'Île céleste du Prélude
- Noix des Iles Célestes : Partie nord
- Noix des Iles Célestes : Partie sud
- Noix de la Tour du Fort de Guet : Château d'Hyrule
- Noix de la Tour du Fort de Guet : Partie nord
- Noix de la Tour du Fort de Guet : Partie sud
- Noix de la Tour du Mont Labulat : Confins de Tabanta
- Noix de la Tour du Mont Labulat : Collines d'Hyrule (Partie 1)
- Noix de la Tour du Mont Labulat : Collines d'Hyrule (Partie 2)
- Noix Korogus de la Tour du col de Térel
- Noix de la Prairie d'Urban : Partie nord
- Noix de la Prairie d'Urban : Partie sud
- Noix Korogu de la Tour des ruines des Obscurcies
- Noix Korogus de la Tour du ravin d'Ordinn
- Noix Korogus de la Tour de la plaine d'Hyrule
- Noix Korogus de la Tour du canyon Gerudo
- Noix Korogus de la Tour de la plaine de Sahasla
- Noix de la Montagne de Lanelle : Partie nord
- Noix de la Montagne de Lanelle : Partie sud
- Noix Korogus de la Tour des hauteurs Gerudos
- Noix de la Tour de Rabelle : Partie nord
- Noix de la Tour de Rabelle : Partie sud
- Noix Korogus de la Tour du plateau Zoran
- Noix du Mont Ramol : Partie nord
- Noix du Mont Ramol : Partie sud
- Noix Korogus de la Tour des Peupliers
- Les boutiques de vêtements
- Fontaines des Grandes Fées
- Emplacement des relais
- Recettes 1 à 60
- Recettes 61 à 120
- Recettes 121 à 180
- Recettes 181 à 228
Avant de débloquer la Tour des hauteurs Gerudos, nous vous conseillons grandement d'activer la Tour du canyon Gerudo ( image1 ). Utilisez-la pour être projeté puis planer dans les airs vers le nord-ouest ( image2 ). Équipé d'une armure duveteuse, achetée dans le Village Piaf et vous permettant de résister aux températures les plus basses du jeu, allez au pied de la tour ( image3 ).

Malheureusement pour vous, la tour est ensevelie dans la neige. En lisant le livre situé dans la tente, vous apprendrez qu'une grotte se trouve non loin et peut vous donner accès au bas de la tour. Chassez le Rumy dans cette zone pour obtenir quelque rubis et trouver l'entrée de la Grotte du plateau d'Esmara ( image4et5 ). À l'intérieur, confectionnez un radeau avec deux planches de bois ( image6 ).

Placez le radeau sur l'eau puis laissez-vous guider par le courant. Durant votre parcours, vous pourrez récupérer un coffre sur votre gauche ( image7 ). En l'ouvrant, vous obtiendrez un Arc gerudo ( image8 ). Après la chute d'eau, le radeau va se bloquer contre plusieurs piliers en bois ( image9 ). Utilisez la compétence "Infiltration" pour accéder à la Tour des hauteurs Gerudos.

Avant cela, vous avez la possibilité de rejoindre le rivage et marcher dans le petit tunnel ( image10 ). Au bout de celui-ci, vous tomberez sur un coffre contenant une Topaze brute ( image11 ). Après avoir atteint le terminal de la tour, éjectez-vous dans les airs afin de mettre à jour la Carte de la surface et la Carte du ciel de la Tour des hauteurs Gerudos ( image12 ).

Sur le même sujet

Il parait que ça cartonne ...
- sur la semaine
- l'année
- depuis toujours

Soluce Witcher 3 : Wild Hunt

Soluce Metal Gear Solid V : The Phantom Pain

Soluce Assassin's Creed Unity

Soluce Batman Arkham Knight

Soluce Skyrim
The Legend Of Zelda: Tears Of The Kingdom - How To Complete Disaster In Gerudo Canyon

Your changes have been saved
Email is sent
Email has already been sent
Please verify your email address.
You’ve reached your account maximum for followed topics.
Tears Of The Kingdom's Nine-Disc Soundtrack Is On Sale For Less Than $140 At Amazon
Days gone director says deacon's cameo in astro bot is "sad", astro bot isn't a celebration, it's a graveyard, quick links, talking to quince and nenea, first traveler - stalry plateau cave, second traveler - lonely camp, third traveler - koukot plateau.
The winding trek through The Legend of Zelda: Tears of the Kingdom 's Gerudo Canyon comes with no shortage of mysterious locales and fun quests to engage with along your way. From the Highlands to the river at its heart, Gerudo Canyon is a highlight and a must-see for any traveler worth their rock salt. However, not everyone is cut out for the journey.
RELATED: The Legend Of Zelda: Tears Of The Kingdom - How To Complete Messages From An Ancient Era
Within the walls of the canyon are three adventurers like yourself that didn't come as prepared as they should have. In the unforgiving Gerudo Desert, it is the unprepared that suffer the most. Those stranded in the canyon's bowels will rely on you to find them and aid them in their journey back to camp, where their other friends await.
To begin this quest, venture to the camp at the entrance of Gerudo Canyon. It's just south of the Mini Stable and Diggdog Suspension Bridge . You'll notice two individuals speaking about their missing friends under a tent closest to the bridge.
Speak with Quince and Nenea to learn that three of their friends are trapped within the canyon. You'll need to find them all.
Before leaving, you'll need to ensure you have the following supplies:
- Heat-resistant gear.
- Cold-resistant gear.
- One Spicy Pepper (can be found within the canyon near caves).
- One Splash Fruit (can be found within the canyon near the river).
Your first straggler is hiding out in Stalry Plateau Cave. If you follow the path from the Gerudo Canyon camp , you'll notice the cave on your left where the road begins to bend.
There is one Fiery Lizalfos standing guard near a bush of Spicy Peppers . Defeat it and enter the cave.
There is a Bubbulfrog on the ceiling of this cave.
Botrick, the traveler, is hiding in the corner of the cave on the left side behind a rock. When you speak with him, two Fiery Lizalfos will raid the cave.
Defeat both Fiery Lizalfos , and your traveler will return to camp after speaking with him a second time.
Continuing along the path, keep an eye out for a plume of smoke. Your second traveler will be beside it, sitting at a campside fire to stay warm.
On your left side and as you go up a small incline on the path , you'll spy this campfire and Giro among some tall rocks and near some construction supplies.
There is also the crystal for the Rakakudaj Shrine beside him. Taking it does not require you to finish this quest, and will start a second one called The Gerudo Canyon Crystal .
Speak with Giro , and he'll tell you he's in need of one Splash Fruit . Give him one, and he'll return to camp.
If you don't have a Splash Fruit, there are several of them at the riverfront further north.
Although the other two have been on the trail, this traveler has managed to go quite a ways off the beaten path. From the second traveler, Giro, there are three main ways to reach him on the Koukot Plateau:
- Fast Travel to the Gerudo Canyon Skyview Tower and paraglide north to the smoke his campfire is making.
- Climb the cliff l eading to the a rch above the top of the hill (just before the river). Then climb to the plateau and run to the smoke.
- Run (or drive a vehicle) up the waterfalls of the river near Rakakudaj Shrine. On the second bend, enter the Koukot Plateau Cave. Use Ascend and climb to reach the top of the cave where the traveler rests.
The first option is by far the easiest.
Once you reach Garill, the third traveler, your work isn't done yet. He'll ask for a Spicy Pepper .
Giving Garill his Spicy Pepper will return him to the camp, and you'll have all three travelers now. Return with him to speak with the group.
Quince and Nenea will thank you for your hard work, and your reward will be ten Bomb Flowers . With this now in hand, the quest will end, and you can continue your exploration of Gerudo Canyon as it pleases you.
NEXT: The Legend Of Zelda: Tears Of The Kingdom - How To Complete Lost In The Dunes
- Triple-A Games
- The Legend of Zelda: Tears of the Kingdom
Tour des Hauteurs Gerudo Zelda Tears of the Kingdom : Comment débloquer la tour dans la neige ?
Complétement submergée par la neige, la Tour des Hauteurs Gerudo de Zelda TotK peut être très compliquée à réparer si vous ne savez pas quoi faire ni comment passer par la grotte à côté d'elle. Voici comment l'activer en vidéo et en images !
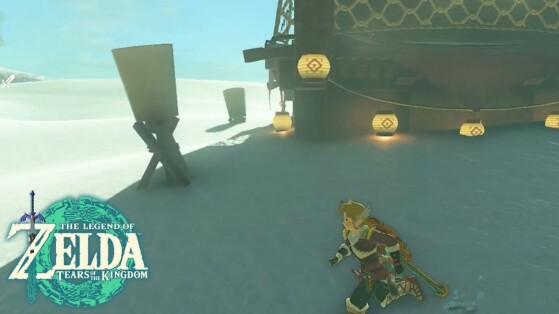
Voilà une nouvelle tour d'observation de Zelda Tears of the Kingdom qui va vous poser problème. Pas de monstre à tuer cette fois-ci ou de ronces à brûler mais des escaliers complètement ensevelis sous la neige ! Vous allez devoir passer par dessous si vous espérez ouvrir cette tour.
Comment activer la tour des Hauteurs Gerudo ?
- Région : Contrées Gerudo
- Problème : la porte est sous la neige, inaccessible.
- Solution : passer par une grotte pour arriver par dessous grâce à Infiltration
Même si la Tour du Canyon Gerudo est plus pratique pour accéder à la Cité et donc à la quête principale de Riju , celle des Hauteurs est également essentielle pour vous déplacer et explorer aisément Hyrule.
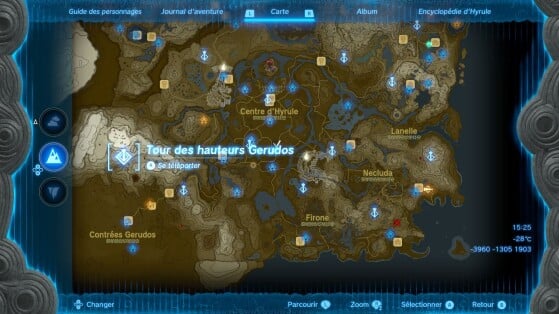
Auprès de la tour, vous pourrez voir une tente avec un livre vous parlant d'une grotte. C'est évidemment votre objectif : en face de la tour se trouve l'entrée de la grotte du plateau d'Esmera . Dedans, vous pourrez trouver du matériel de construction de Grosaillieh . Il vous suffit de saisir une planche en bois, assez large, avec Emprise, et de la laisser flotter sur l'eau, tout à droite contre la falaise.
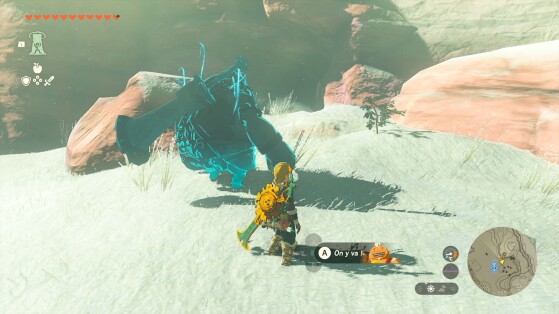
Montez sur la planche et laissez le courant vous emmener jusqu'à la chute d'eau (pas d'inquiétude la planche va amortir). Votre objectif final est d'arrivé pile entre les piliers, au milieu de l'eau. N'hésitez pas à tirer une flèche de glace (gelée chuchu blanche ou fruit glagla) pour créer une plateforme sur l'eau.
Montez dessus et utilisez Infiltration pour arriver à l'intérieur de la Tour et activer le mécanisme. Regardez la vidéo soluce tout en haut de l'article pour plus d'aide.
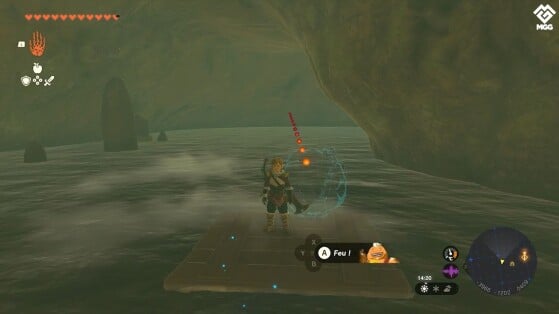
Débloquer toutes les tours d'observation de TotK
Si vous voulez cartographier la totalité de votre map d'Hyrule avant de vous lancer dans une exploration approfondie ou la complétion des quêtes principales, alors il vous faudra passer par les 15 tours disponibles à la Surface . Cela vous débloquera aussi la carte des cieux par la même occasion. En ce qui concerne les Profondeurs, il faut les éclairer grâce aux racines.
Et si certaines sont très simples à activer (il suffit d'ouvrir les portes), d'autres comme celle de la Plaine sont un peu plus complexes. Celles qu'il faut escalader entièrement par exemple pour pouvoir sauter à l'intérieur ou encore celles bloquées par des ronces et autre vase. Quoi qu'il en soit, vous trouverez ci-dessous un guide complet vous aidant à débloquer toutes les tours du jeu :
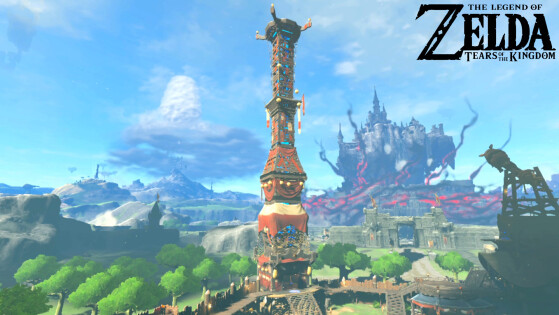
Comme dans Breath of the Wild, vous allez devoir trouver et escalader les tours d'observation afin de découvrir la carte, et repérer les points d'intérêt de Zelda TotK, comme les Sanctuaires. Retrouvez-en la liste dans ce guide, avec des explications afin de grimper au sommet.

Pokémon || Animal Crossing || Harry Potter || Top Jeux || Hytale || Star Wars
L'actu
02:07 Ce jeu culte de la licence Zelda cachait un secret horrible pour les joueurs qui affectait considérablement le confort de jeu
18:23 Zelda Tears of the Kingdom ne profite pas d'une des meilleures idées de Breath of the Wild à cause de son manque de DLC...
16:27 Nintendo officialise la place des jeux Zelda Breath of the Wild et Tears of the Kingdom dans la chronologie de la saga, et c'est surprenant !
17:54 Le héros de l'un des jeux Zelda de votre enfance a connu une fin tragique et vous ne le saviez sûrement pas !
15:59 Un tout petit détail dans Zelda Tears of the Kingdom montre à quel point l'histoire du jeu était géniale !
15:52 Après 1 100 heures de jeu sur Zelda Tears of the Kingdom, ce joueur découvre une nouvelle astuce de fusion très utile !
15:03 Cette création astucieuse dans Zelda Tears of the Kingdom règle un des plus gros problèmes d'exploration du jeu
21:09 Zelda Tears of the Kingdom a forcé Nintendo à prendre une décision totalement inédite lors du développement du jeu
20:41 Une star de cinéma se cache dans Zelda Tears of the Kingdom et Breath of the Wild, et voici où la trouver
17:45 Les mystères de Zelda Tears of the Kingdom enfin résolus après plus d'un an de sortie du jeu ?
recommandés
à découvrir
Hang out and play games

Tears of the Kingdom Gerudo Town Guide
Master the Gerudo Desert
Written by Alex Legard for Guides on September 10, 2023 🏜️
The Gerudo are being troubled by monster attacks and a freak sandstorm so let's trek to Gerudo Town and see how we can help.
│ We here at Video Chums strive to offer the best experience and content so contact us if there is any way that we can improve. 🏆

How to reach Gerudo Town
Go to Outskirt Stable and travel south past Digdogg Suspension Bridge . You'll reach Nabooru Canyon Pass where you'll have to get off your horse. Naia , a Gerudo guard, will quiz you on your survival skills: v1d30chumz 185-80-150-64
Prepare some Chillshroom recipes for later. For the cold, use your Snowquill Armor that you used for Saving the Rito or prepare Sunshroom recipes.
There are several ways past the canyon pass. First off, there is a river that you can row up just north and if you keep a keen eye south of the river, there's the Gerudo Canyon Crystal which you have to take up the river to a shrine. Second, there are many rickety bridges above and if you could get up there, you could climb the ladders and scale the canyon easily. Lastly, there is a ground route going south which leads to the top of the canyon but it is the longest route and there isn't anything special down there. It's also worth mentioning that the Skyview Tower is on top of the canyon.
Once you get up the Skyview Tower , Sawson is waiting there at the bottom of the lift. Climb up to the Skyview Tower and add a counterweight to the lift but you'll need to add 3 weights before it has enough weight to lift up Sawson . Then, talk to him and he'll repair the tower pronto. Launch yourself up from the Skyview Tower , map the Gerudo region, start traveling west, and look for Turakamik Shrine which should be in the canyon but it can be hard to see. Next, simply take the road west until you reach Kara Kara Bazaar .

Kara Kara Bazaar
Complete Mayatat Shrine then start talking to people around Kara Kara Bazaar . Buy the Desert Voe Headband from Saula but we'll find out where to collect the other Desert Voe pieces later. Go into the inn and buy some White Chuchu Jelly to upgrade the Desert Voe Headband .
There's a desert-wide storm that folks call the sand shroud. You need to pass through it to get to Gerudo Town but when you're inside, your map is disabled. You'll be passing through it quite a bit so you should get comfortable with walking through it using the sun for direction. Since your goal is initially to get to Gerudo Town , climb on top of the inn and glide toward the stone pillar to the west then place a Zonai spring to hop high into the sky and glide as far west as you can but you'll have to walk the rest of the way through the intense storm.

Gerudo Town
Go into the front entrance of town, head into the tunnel ahead, and there'll be a guard for the Gerudo Underground Shelter but she won't let you in. Ascend up to Soryotanog Shrine on the rock towering over Gerudo Town and complete it. Go into the throne room and behind the throne, there's a secret entrance to the Underground Shelter so you should help yourself in. The guards will threaten you but Buliara will intervene and inform you that Riju is out training in the ruins to the north so make your way there.

North Ruins
Go to the ruins north of Gerudo Town and simply walk toward the lightning strikes. Talk to Riju who's practicing calling down lightning. You need to help Riju with her training. When she creates a yellow aura, fire an arrow at the dummy, and Riju will strike it with lightning. This is Riju's Power of Lightning . Next, there will be 3 more dummies and you need to strike all of them at once by firing an arrow at the rock in the middle.
A Gerudo will arrive to inform Riju that Gibdos are attacking Kara Kara Bazaar so head there at once.

Defend Kara Kara Bazaar
The Gibdos are mummy-like monsters that showed up in the desert at the same time as the Sand Shroud . They come from mushroom-shaped hives that can only be destroyed by Riju's Power of Lightning . When you start the encounter, simply interact with Riju to create her lightning aura, and then shoot the attacking Gibdos to strike them with lightning. The Gibdos keep appearing from the hive so destroy the hive the same way as the Gibdos by striking the pink weak spot. Once the hive is down, clean-up the rest of the Gibdos , and continue with the story.

Defend Gerudo Town
Preparation.
Fast-travel back to Gerudo Town and Riju and Buliara are waiting in front of the throne room. You need to prepare for a massive Gibdo attack and this time, there are 3 hives. West of the throne room, talk to Captain Teake to decide where to deploy the troops. Put the soldiers at the north and west gates and the cannon at the west gate.
Talk to Padda in the courtyard east of the throne room, barricade the west gate, and take all the free stuff that Padda left out for you. Prepare weapons tipped with electric Keese wings, electric Lizalfos horns, and Topaz . Keep in mind that Gibdos can only be damaged with elemental attacks. When you're ready, talk to Riju to start the encounter
Our goal is to take out all 3 Gibdo hives and wipe out the Gibdos but we also have to protect Riju . Since we so heavily defended the west gate and left nothing at the east gate, start by attacking the hive at the east gate. Riju stays at the center of town but her aura extends all the way outside town so you can still use her Power of Lightning .
Once the east hive is down, return to the center of town, make sure the area is clear, and move to the south. Take out the south hive then with 2 hives down, return to the center of town. Flying Gibdos will start to appear around now so check the skies then move on to the west gate, take out the hive, and then defeat the rest of the Gibdos .

Pillars of Light
Riju will ask you to take a look at the ancient mural in the Underground Shelter which says:
Standing back-to-back with the throne, witness red pillars across a vast sea. Unite the pillars in light to reveal the lightning stone and open the way. You who can hear my voice, come to me. I await you.
There are 3 pillars in the deep desert. You'll want to visit blue, then red, and then green.

Start with the blue one which you can easily see from the back of the throne room. This pillar has some cracked ground which you can easily destroy by slamming it with a rock-crushing weapon. Next, follow the beam of light to the red tower.
You need to raise the red tower into the air. It's quite hard to see thanks to the sand shroud but there's a stone pillar and a lever on top of it so spin it to raise the tower. The beam should reflect to the blue tower and from there, reflect back to Gerudo Town . It looks like a complete triangle but actually, the alignment on the third beam is off so head to the third tower now.
On the green pillar, smash the ground with a rock-smashing weapon and there is a Zonai hover stone and 4 sticks. Use the hover stone to smuggle the sticks to the very top of the structure, use the sticks to repair the broken lever, and then spin it to complete the triangle of light. Go to the pinned location in the center of the triangle where the lightning stone has appeared. Zelda is there... for some reason? Riju will arrive but then Zelda will disappear. That was weird! Use Riju's Power of Lightning on the lightning stone then suddenly, the Lightning Temple will rise up from the sands!

Lightning Temple The Mural's Myth, Risen from the Sands
Approach the Lightning Temple and use Riju's Power of Lightning to strike the pink blob at its entrance. The temple boss, Queen Gibdo , will attack immediately. You might want to dismiss your other party members so they don't get in your way and you can more easily use Riju's Power of Lightning . Hit her majesty with a couple of lightning strikes and Queen Gibdo will quickly flee into the temple. Destroy the Gibdo hives and the pink blob to clear the way into the temple then grab a Korok frond to blow away the sand piles and reveal a button; press it to open the way into the basement.
The basement is a linear area of puzzles. Once you get to the big room (the Room of Ascension ), the temple really opens up and this is also where you unlock the Lightning Temple 's waypoint. You need to go around the temple and charge all 4 batteries using Riju's Power of Lightning then return to the bottom of the Room of Ascension and power-up the elevator.
There will be a very challenging second fight against Queen Gibdo but once she's down, the sand shroud will dissipate and everything will go back to normal in the desert. Huzzah! 🥳

Secret Clothes Store
Return to the Underground Shelter and fall down in-between the rocks next to the fire. There will be an underground river so follow it and when the river forks, take a right. Smash through a few rocks and Ascend at the location in the screenshot below. From this store, you can buy the Desert Voe Spaulder and Desert Voe Trousers for a total of 1,950 rupees.

Lost in the Dunes
💡 This sidequest and Dalia's Game are required to complete The Heroines' Secret .
There are 2 Hylian merchants in Kara Kara Bazaar but their friend is missing and Ponthos ' fire is still burning west of Kara Kara Bazaar . Run to the fire and jump into the sinkhole. You'll land in a cave where Ponthos is also trapped. Keep smashing rocks until you get out of the cave and make sure you find and defeat the Bubbulfrog as well. When you reach the ladder, Ponthos will catch-up. After talking to the merchants on the surface, they will give you their Stelae Orb as a reward.

Dalia's Game
During the day, walk into Gerudo Town from the front entrance, turn right, and talk to Dalia . Follow her to the Underground Shelter and talk to her again. She'll hide a stuffed sand seal doll somewhere in the shelter and you have 1 minute to find it so pay attention to her dialogue if you want a clue. Pick up the doll to win the game and she'll let you have her Stelae Orb as a reward.
The Heroines' Secret Stone Tablets
Talk to Rotana in the Underground Shelter to start a very long sidequest. She'll ask you to photograph 4 stone tablets around the shelter:
Rotana will award you with 100 rupees for completing this part of the quest. Bring Rotana's Stelae to the chamber of 7 statues behind the " Voe and You " class to begin the next part of the quest.

7 Stone Stelae
Place Rotana's Stelae into the statue's hand with the flame symbol. You now have to track down the remaining 6 Stelae that are scattered around the desert and bring them all back to Rotana .
💡 Patricia , the old sand seal in the courtyard east of the throne room will give you a hint for the location of the missing Stelae if you give it enough snacks.
Once you bring all 7 Stelae to Rotana , place them into the statues' hands, make sure the symbols match, and the way will open into a secret chamber.
The Mysterious Eighth
Go into the secret chamber, talk to Rotana , and read the inscription. You now have to take the giant orb to the Gerudo North Ruins north entrance. Gerudo Sanctuary is a linear dungeon but there's nothing particularly challenging in it so simply make your way to the end and witness the statue of the eighth heroine. There are 300 rupees and some free gems that you can take and don't forget to read the stone tablet to learn that the eighth was actually a Voe?! Finally, return to Rotana and reveal the eighth heroine's (or should I say hero's?) secret then she will reward you with a diamond. 💎

Vah Naboris Divine Helm
This is a cool helmet based off Divine Beast Vah Naboris from Breath of the Wild . Find the West Gerudo Underground Ruins in the far northwest of the desert. There's a tiny little entrance blocked by a rock and a nearby Shock Like . Destroy the rock with a bomb arrow then below, there's a cavern full of rocks to smash. The swordswoman statues are pointing in the direction of the treasure so keep smashing and be sure to use Yunobo's Power of Fire to speed-up the process.

Armor Upgrades
Desert voe armor.


Comments for The Legend of Zelda: Tears of the Kingdom Gerudo Town Guide
A.J. Maciejewski (crazyaejay): Thanks for this guide, Alex! That Queen Gibdo is really something else.
3-Day Tour in St Petersburg
- Page active

Description
Ultimate 3-day private tour around Saint Petersburg with all the best the Northern Capital of Russia can offer.
Combine must-see and off the beaten path: river cruise, world-known cathedrals, royal palaces, the fortress, picturesque bridges and sculptures, historical downtown, finest landscapes, cozy nooks, local cafes and much-much more!
Highlights of Saint Petersburg:
- See all the main sights of Saint Petersburg in one day, such as St Isaac’s Cathedral, Kazan Cathedral, Winter Palace, Faberge Museum and more!
- Enjoy a flexible itinerary and customize your own authentic experience;
- Learn all the secrets of St Petersburg;
- Climb down the 2 nd deepest station in the world;
- Hear intriguing life stories about Russian Tsars and Emperors (and Empresses): Peter I, Catherine the Great and Alexander II;
- Take pictures of plenty of bridges, like legendary Trinity and Palace bridges, Kazan and Italian bridges, and – just for fun – Red, Blue and Green bridges;
- Combine must-see and off the beaten path of St Petersburg;
- Go to best parks and cafes to meet locals and get a local insight;
- Try Russian authentic cuisine;
- Have Peter I’s favorite drink – coffee – in the best coffee bar of St Petersburg;
- Make friends with your local guide on this exciting 3-day tour of St Petersburg.
Tour Itinerary:
Hotel pickup (any time you wish)
Nevsky Prospect
Eliseev Emporium
Kazan Cathedral
Church of Our Savior on Spilled Blood
Beloselsky Beloozersky Palace and Anichkov Palace
Russian National Library
Monument to Catherine the Great
Coffee experience (optional)
Michael Garden & Michael Palace
Summer Garden
Field of Mars
Palace Embankment, Admiralty Embankment, Griboedova Channel, Moika Embankment and Lebyazhya Kanavka Embankment , Fontanka Embankment
Trinity and Palace bridges;
Bronze Horseman
Palace Square
The Hermitage
Marble Palace
Winter Palace
The buildings of Imperial Army General Staff and Royal Guards’ General Staff
Alexander column
The Narva Triumphal Arch
The Admiralty Garden
St Isaac’s cathedral
Red, Green, Blue bridges
Drop off at your hotel or any place you wish.
Highlights of Peterhof:
- Feel the breeze and on a round Neva cruise on a high-speed hydrofoil;
- Have a chance to take memorable stunning shots of Saint Petersburg from a hydrofoil boat;
- Explore the former residence of the Russian Emperors;
- Experience the beauty of Russian Versaille: artistic architectural styles, sparkling fountains, finest landscape and more!
- Learn about the life of Russian royalty back in the 19th century;
- Admire the fantastic Ensemble Of Grand Cascade;
- Have some fun in Joke fountains where you can get totally soaked (only in summer);
- Enjoy a peaceful scenic walk around gold sculptures, serene ponds, fascinating monuments and original palaces;
- Have Russian traditional pancakes on the shore of the Gulf of Finland.
Cruise along the Nera river
Peterhof Park and Gardens
Peterhof Fountains
The Grand Palace
The Grottoes of the Grand Cascade
Tsaritsyn Pavilion
The Special Treasury
Monplaisir Palace
Marly Palace
The Aviaries
The Catherine Block
The Bath Block
Cottage Palace and Alexandria Park
The Imperial Yachts Museum
Peterhof Hermitage
Ride back to Saint Petersburg
Highlights of Peter and Paul Cathedral + Strelka island:
- Discover the gems of Peter and Paul Fortress, the birthplace of the city;
- Explore the oldest and the most striking building of St Petersburg;
- Take a sneak peek into a prison museum and torture chamber – Trubetskoy Bastion;
- Learn about outstanding Russian rulers;
- Visit the tombs of Russian Emperors;
- Get an insight into daily life of St. Petersburg in the 19th – early 20th centuries;
- Catch the legendary gun shot when a cannon fires a blank shot from the Naryshkin Bastion;
- Get impressed with the ceremony of the guard mounting (every Saturday during the summer season);
- See a unique complex of the bells of Peter and Paul Cathedral;
- See 500 items, including archeological finds, telling the story of Peter and Paul fortress;
- See 600 items from the collection of furniture of the XVIII – early XX century;
- See 5000 objects of porcelain and glassware of Russian and West European production;
- Stunning views of Winter Palace, Vasilievsky Island and Neva river on our Trinity bridge walk;
- Enjoy spectacular views over the St Petersburg skyline on the 138 feet high belfry;
- Visit Vasilievsky Island which is the largest in St. Petersburg and one of the oldest parts of the city;
- Reward yourself with refreshing drinks in a local cozy cafe or bar.
Peter and Paul Fortress:
Scenic Trinity bridge walk
Ioannovskiy Ravelin
Petrovskiy Curtain Wall and Gate
Kronverkskaya Curtain Wall and Gate
Nikolskiy Curtain Wall and Gate
Vasilievskaya Curtain Wall and Gate
Neva Curtain Wall
Peter and Paul Cathedral
Bell Tower and Belfry
Exhibitions of the State Museum of History of St Petersburg
Commandant’s House of Peter and Paul Fortress
Trubetskoy Bastion, Naryshkin Bastion, Gosudarev Bastion and Menshikov Bastion, Golovkin Bastion, Zotov Bastion
Main Treasury
Artillery Stores
Grand-Ducal Burial Vault
Monument to Peter the Great
The Guardhouse
The Boathouse
Museum of Cosmonautics and Rocket Technology
Alexeevskiy Ravelin
Vasilievsky Island
The Spit of Vasilievsky Island
What you get:
- + Meet a local and make a new friend in Saint Petersburg.
- + Exciting fun communication with a local, not just boring history lessons.
- + Ask your guide questions about any subject, get genuinely connected with your guide.
- + Private Saint Petersburg three day tour, customized itinerary, personalized experience.
- + Flexibility during the tour: changes can be made at any time to suit your individual preferences.
- + Your personal tour guide focuses solely on you and makes sure you get the most out of your experience.
- + Your personal travel consultant is at your service any time via email, facebook, skype or whatsapp. You will not feel alone with Friendly Local Guides.
- + Must do + off the beaten path of the city.
- + An authentic experience of local life.
- + Local cosy cafes and restaurants with traditional cuisine and interior.
- + Lunch specials on weekdays (Mon-Fri).
- + Best coffee shops in the city.
- + A photo session amongst spectacular Saint Petersburg scenery that can be treasured for a lifetime.
- + Special offers for taxi and hotels with good location and price.
- + Expert local advice on what to do, where to go, and how to make the most of your time in St Petersburg.
*This tour can be modified to meet your preferences
Write your review
- Login / Sign Up
- Zelda: Tears of the Kingdom guide
‘Riju of Gerudo Town’ quest walkthrough in Zelda: Tears of the Kingdom
Help Riju protect Gerudo Town from the Gibdo
by Julia Lee

Completing “Riju of Gerudo Town” in The Legend of Zelda: Tears of the Kingdom helps you find Riju, one of the four companions you’ll need to seek out.
You can start this once you have become acquainted with Purah , who sends you off in four directions as part of the Regional Phenomena main quest — with this being in the south-west of Hyrule’s map.
Riju is in the Gerudo Town desert and before she helps you, you’ll need to assist her in freeing Gerudo Desert from a terrible sandstorm.
What you need to know before starting Riju of Gerudo Town
Getting to Gerudo Town can be hectic, but if you start from the Kara-Kara Bazaar and just keep heading in one direction without turning or getting distracted, you should be able to get there with no problems.
Once you actually arrive in Gerudo Town, Buliara will prevent you for getting tossed out. You’ll be free to explore the now-underground town, buy stuff from the vendors, and most importantly, find Riju.
Before you head off on this long journey, consider farming up some hydromelons and cooking them to give you heat resistance . You will frequently need to cool down if you’re caught out during the daytime and it’s better to have the cooling food on-hand before, so you don’t have to run back and forth between the town and wherever you’re supposed to be.
You can find hydromelons around Gerudo Desert, so feel free to lose yourself in the sandstorm to find them, as long as you have the nearby shrines unlocked to teleport back to.
How to find Riju through the Valley of Silent Statues
To find Riju, you’ll need to head deep into these caverns, heading this way:

Keep following the path and you’ll eventually hit the Valley of Silent Statues, which drops you into a pit with moving quicksand. Luckily, there’s tons of Ultrahand-able planks to help you cross.
You’ll need to set up the planks to drop from one rock to the next, but be quick — the planks move with the quicksand. That being said, you’ll want to set the planks a bit further out, so they drift past you, allowing you to quickly jump from one platform to the next.
Once you get to the other side (with vases and some ore), you can climb up both manually and/or using Ascend.
Optional: Solve the mirror light puzzle
At the top of the quicksand, there’s some suspicious statues holding up orange plates that you may have seen in the Soryotanog Shrine . On the other side of the platform, you can see some rocks blocking a light source. Do not break the wooden box that is in front of the lightsource .
Attach a bomb flower to an arrow and fire it off at the rocks to free the light. There are bomb flower on the walls of this area.
Once you break the rocks, pick up this mirror:

Carry the mirror into the light beam and aim it diagonally at the two orange plates on each side of the area, like this:

This will move the statues, allowing you to step on a switch and open up new rooms. The left room has a Bubbulfrog inside and the right room has a fan and a sand pile inside.
After taking out the Bubbulfrog, head to the newly-opened right room and pluck the fan out of the sand with Ultrahand. Use the sand to blow away the dirt pile to reveal second mirror.
Head back to the first mirror in front of the light, and set it up on top of the nearby wooden box like so, using Ultrahand. (This is why we said not to break the box.)

Grab the second mirror, stand in the reflected light beam, and aim it at the orange plate behind the wall like so:

The last room will open up, similarly to the other two rooms. Inside, there’s a shock like enemy, some arrows, and a bow. Defeating the shock like rewards you with a Gerudo shield and the chest behind it has a topaz inside.
Head through the following door and keep following the path forward, defeating the baddies, until you find Riju:

She’ll teach you how to use her ability: you fire an arrow, and her lightning will strike where it lands. After this tutorial, it’ll be time to put your skills to the test in Kara-Kara Bazaar.
Teleport to Mayatat Shrine and jump straight into the action. You’ll just need to use arrows with Riju’s lightning to take out the Gibdo, and then hit the center of the hive with a final blow when prompted.
If you run out of arrows, one of the nearby Gerudo warriors will provide you with some more.
Now that you know how the game’s psuedo-horde mode works, it’s time to really put all that practice to the test ...
Defending Gerudo Town
Once you head back to Gerudo Town, Riju will talk about preparing for battle. One Gerudo woman has tons of loot that you can freely take, including rupees, weapons , and other valuable materials. She’ll also place one barricade at one of the Gerudo Town entrances.
The other woman will direct soldiers where to go, and you can place them at various entrances.
To beat out the baddies, we placed the barricade in the east, and just set one group of Gerudo warriors per entrance. It doesn’t seem to matter too much where you place the barriers.
Once you’re done looting and setting up, you can talk to Riju in the throne room to start the fight.
You will largely be using arrows for this fight, directing Riju’s lightning around, while defending Riju in the center. Keep your eyes on Riju’s health, because if she dies, it’s game over (literally).
The best way to navigate the town is to climb up and run along the roofs, since you’ll be mostly using arrows anyway. Try to focus on one hive at a time, leaving whichever one you barricaded for last.
Each hive will be immune to damage until it glows like so:

When it glows like this, hit it with an arrow to direct Riju’s lightning and take it out. Just like in the tutorial, Riju’s lightning can only reach far when it’s charged up, so make sure that the points you’re firing at are within the range of her lightning, as indicated by the yellow glow.
Between taking out hives, make sure to clear out the Gibdos around Riju and monitor her health. The Gerudo warriors can hold up pretty well, but you still need to make sure that Riju isn’t being attacked, so make sure to pay attention to her health. (We keep repeating it because she’s pretty squishy and can’t survive long if you leave Gibdos attacking her.)
Once you take out all three hives, you’ll just need to clean up any straggling Gibdos. The gang will celebrate and Riju will tell you to meet her back in the bunker downstairs.
Before you head down, we recommend picking up any of the drops that killed Gibdo left behind during the fight, as they all add a ton of attack power to your weapons.
Solving the red pillar puzzle
After you meet up with Riju, she’ll read the mural in the bunker, talking about being back to back from the throne, red pillars, and light.
Starting from the beginning, head to the throne room upstairs and look out into the distance. You’ll see — gasp — three red pillars straight ahead. Run straight there and try not to take any unnecessary turns, as your map will still be obscured by the sandstorm.
There will be Gibdo along the way, so use elemental arrows and weapons to take them down.
Climb up the tower and break the cracked rocks in the center using bomb flower arrows or a hammer-type weapon:

This will free the light, now firing off a beam of light in a new direction. Follow the light to find the next tower. There are still Gibdo along the way, but there are also updrafts you can take to ease the trip.
At the second tower, use Ascend to climb up this nearby rock and use Ultrahand to spin the crank at the top:

The rock can be hard to see in the sandstorm, but it is faintly visible from the pillars.
Just keep spinning it and eventually the mirror in the tower will flip, shooting a beam of light to a new direction. Again, follow the light.
At the third tower, break the rocks at the bottom of the tower to see some platforms and tiny pillars. Using Ultrahand, attach at least one of the tiny pillars to a platform, and float the platform as high as you can, like this:

Ascend up the tower and jump down to the grated floor. Use Ultrahand to pick up the platform and float it as high as you can again, like so:

Jump down, re-Ascend up the tower, and use Ultrahand to grab the platform and the small pillar(s). Attach a small pillar to the broken crank at the top of the tower and spin it, aiming the mirror’s light towards the first tower. When the light lines up, it’ll automatically play a cutscene, showing a suspiciously lightning-rod-shaped statue appear from the ground.
Head there and help Riju strike the rod with lightning to reveal the next and final part of “Riju of Gerudo Town:” the Lightning Temple .
Patch Notes
The best of Polygon in your inbox, every Friday.
More in Zelda: Tears of the Kingdom walkthrough and guides


Most Popular
- Anker's two-headed USB-C cable is a $22 blessing
- Grid's tastefully destroyed Game Boys make for great art, and they're 40% off now
- The Baldur's Gate 3 team isn't finished with the game yet
- The Boy and the Heron, Twilight of the Warriors, Netflix’s Rebel Ridge, and every movie new to streaming this week
- Monster Hunter Wilds made me a believer in its ecosystem
This is the title for the native ad
More in Zelda: Tears of the Kingdom guide

The Latest ⚡️

The Legend of Zelda: Tears of the Kingdom Walkthrough & Guides Wiki
- Main Quests
- Side Quests
- Side Adventures
- Tips & Tricks
- Interactive Map
Treasure of the Gerudo Desert Walkthrough and How to Unlock

▲ Get Pristine Weapons from the depths or an amiibo ! △ All 1000 Koroks | All 4 Great Fairies ▲ All 81 Addison Signs | All 147 Caves | All 58 Wells △ Starter Tips: Farm Rupees | Starting Armor ▲ Advanced Tips: Best Weapons | Best Armor | Best Food
Treasure of the Gerudo Desert is a Side Quest in The Legend of Zelda: Tears of the Kingdom (TotK) that can be found in Gerudo Town. Read on to learn how to unlock Treasure of the Gerudo Desert, its location and rewards, walkthrough, as well as how to complete it.
List of Contents
- How to Unlock
- Location and Rewards
- Walkthrough Guide
- Related Guides
How to Unlock Treasure of the Gerudo Desert
Finish riju of gerudo town and talk to riju.
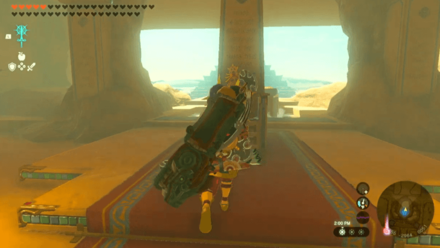
To start the Treasure of the Gerudo Desert side quest, you'll need to finish Riju of Gerudo Town first which is part of the main questline. This is required since Riju won't appear in the throne room until you've completed this Regional Phenomena subquest.
Riju of Gerudo Town Walkthrough
Treasure of the Gerudo Desert Location and Rewards
Gerudo desert - gerudo town.

Gerudo Town is situated in the middle of the Gerudo Desert. Follow the main path to the west from Kara Kara Bazaar and you'll end up in the town.
The exact coordinates for this quest on the map are -3885, -2964, 0051 .
Gerudo Desert Region Map
Treasure of the Gerudo Desert Walkthrough Guide
Speak to riju in the throne room.
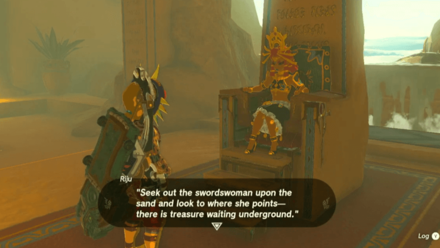
Travel to Gerudo Town and talk to Riju ; she will mention a riddle by Mineru, a Sage of Spirit. The riddle hints a treasure hidden underground.
Head Northwest of Gerudo Town
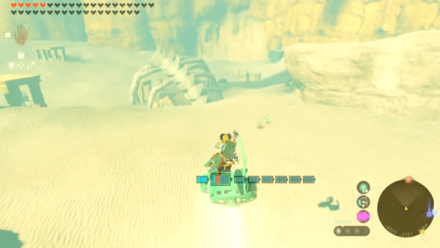
Travel northwest of Gerudo Town until you reach the West Barrens . You will eventually stumble upon a huge animal-like bone ruins.
Throw Bombs at the Crack on the Ground
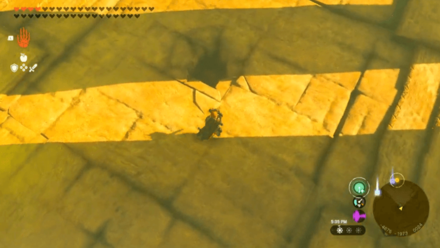
Look for a crack on the ground and use Bomb Flowers to create an opening, then jump down the hole afterwards.
Destroy the Boulders Inside
You'll find yourself in the West Gerudo Underground Ruins filled with multiple boulders inside. Keep destroying the rocks using bombs until you reach a room with a lone chest inside.
Open the Treasure Chest
Open the treasure chest and you'll receive the Vah Naboris Divine Helm . This will automatically complete the side quest.
The Legend of Zelda: Tears of the Kingdom Related Guides

List of All Walkthroughs
List of all side quests.

We at Game8 thank you for your support.
In order for us to make the best articles possible, share your corrections, opinions, and thoughts about 「Treasure of the Gerudo Desert Walkthrough and How to Unlock | Zelda: Tears of the Kingdom (TotK)」 with us!
When reporting a problem, please be as specific as possible in providing details such as what conditions the problem occurred under and what kind of effects it had.
This site is protected by reCAPTCHA and the Google
Do you want to send this information?
Walkthrough Menu
- TotK Wiki Top
Walkthroughs
Tips and tricks.
- Beginner's Guide
New Features
- How to Confuse Enemies
- How to Cure Gloom
- How to Blind Enemies
Combat Guides
- Flurry Rush, Sneakstrike, and Deal Critical Damage
- Weapon Modifiers Explained
- How to Raise Defense
- Passive Abilities for Weapons Explained
- How to Upgrade Armor
- How to Defeat Shielded Enemies
- How to Throw Items and Materials
- How to Repair Weapons
- How to Get Earthwake Technique
- How to Increase Weapon Durability
- How to Parry
- How to Sneakstrike
- How to Perfect Dodge and Flurry Rush
- Stealth Mechanics Explained
Exploration Guides
- How to Get Cold Resistance
- How to Dive
- How to Shield Surf
- How to Break Cracked Rocks
- How to Use Minecarts
- How to Chop Down and Use Fallen Trees
- How to Cross the Freezing Water
- Fast Travel Guide: How to Warp
- Weather Effects and How to Change the Weather
- How to Get Heat Resistance
- How to Make an Axe
- How to Tame Wild Horses
- What to Do During a Thunderstorm
- How to Pass Time
- How to Light Up Dark Areas
- How to Get Epona
- How to Check Coordinates
- How to Climb Efficiently
- How to Break Wooden Boxes
- How to Make a Fire
- How to Make a Raft
- How to Make a Hover Bike
- How to Use Rocket Shields
General Tips and Tricks
- Zonai Dispenser Guide
- How to Get the Paraglider and All Paraglider Designs
- How to Expand Inventory
- Pony Points Guide
- How to Increase Health and Stamina
- Best Settings to Use
- How to Swap Hearts for Stamina
- amiibo Unlocks and List of Compatible amiibo
- Blood Moon Explained
- Missables and One-Time Events Guide
- Where to Find Wild Greens
- Whistle Effects and How to Use
- How to Farm Crops
- How to Heal
- Post Game Content Guide
- Kochi Dye Shop Guide: How to Recolor Armor
- Ending Explained: How to Watch the True Ending
- List of Unlockables
- How to Get Ganon's Horse
Farming Guides
- How to Farm Arrows
- Bubbul Gem Guide
- How to Get More Energy Cells
- Early Game Rupee Farming
- How to Farm Weapons
- Dragon Part Farming Guide
- How to Get Pristine Weapons
Notable Item Location Guides
- How to Get the Travel Medallion
- How to Get the Champion's Leathers Early
- How to Get the Hylian Shield Early
- How to Restore the Master Sword
- How to Get the Classic Green Tunic
- How to Get Ring Garland
- Misko's Treasure Locations
- How to Get Monster Medals
Puzzle Solution Guides
- How to Solve the Water Temple Spinning Tower
- Where to Find King Dorephan
- How to Solve the Gerudo Light Puzzle
- Voe and You Class Solutions
Map Location Guides
- All Stable Locations
- All Sage's Will Locations
- How to Get to Hyrule Castle
- How to Get to Lost Woods and Enter Korok Forest
- Great Fairy Locations and How to Unlock
- How to Find the Light Dragon: Location and Drops
- How to Find Farosh: Location and Drops
- How to Find Naydra: Location and Drops
- How to Find Dinraal: Location and Drops
- Satori Cherry Blossom Tree Locations and Guide
- How to Reach Abandoned Hebra Mine
- How to Unlock Royal Hidden Passage
- All Addison Sign Locations
- How to Get into Gerudo Secret Club
- All Coliseum Locations and Rewards
- Koltin Locations and List of Rewards
- Satori (King of the Mountain) Locations
- Where to Find Dondons
- All Forge Construct Locations
- How to Get to Toto Lake
- All Goddess Statue Locations
Tier List Guides
- Best Early Game Armor
- Best Armor Sets (Equipment)
- Best Weapons and Shields
- Best Horses
- Best Equipment for Exploration
- Best Fuse Materials and Weapon Combinations
- Best Modes of Travel
Glitches and Exploits
- List of Glitches and Exploits
- How to Duplicate Weapons, Bows, and Shields
- How to Duplicate Materials
- Can You Pet the Dogs?
- What Transfers Over From Breath of the Wild?
- Should You Play BotW First?
- What Happens When You Die?
- How Does Autosave Work?
- What Happened to Link's House?
- Do Materials Respawn?
- How to Change the Difficulty
- How to Lower and Raise Hylian Hood
- When Do Shops Restock?
- Is There a Master Mode?
- All Abilities and How to Unlock
Zonai Arm Abilities
Purah pad abilities.
- Travel Medallion
- Shrine Sensor
- Hero's Path Mode
Sage's Abilities
- Vow of Tulin
- Vow of Riju
- Vow of Sidon
- Vow of Yunobo
- Interactive Map of Hyrule and All Locations
- Hyrule Surface Map and Regions
- Hyrule Sky Map and Regions
- Hyrule Depths Map and Regions
- Korok Seed Map and How to Use
- All 147 Caves
- All 58 Wells
- All Lightroot Locations and Maps
- All Chasm Locations and Maps
- List of Towns and Settlements
- All Tower Locations
- Lookout Landing Tower
- Hyrule Field Tower
- Gerudo Highlands Tower
- Lindor's Brow Tower
- Rospro Pass Tower
- Pikida Stonegrove Tower
- Thyphlo Ruins Tower
- Eldin Canyon Tower
- Ulri Mountain Tower
- Rabella Wetlands Tower
- Sahasra Slope Tower
- Popla Foothills Tower
- Gerudo Canyon Tower
- Upland Zorana Tower
- Mount Lanayru Tower
- List of All Shrines
- All 31 Shrine Quests
Great Sky Island Shrines
- Ukouh Shrine
- In-isa Shrine
- Gutanbac Shrine
- Nachoyah Shrine
Hyrule Field Shrines
- Ren-Iz Shrine
- Tsutsu-um Shrine
- Riogok Shrine
- Kamizun Shrine
- Sepapa Shrine
- Taki-Ihaban Shrine
- Ishodag Shrine
- Teniten Shrine
- Tajikats Shrine
- Yamiyo Shrine
- Kyononis Shrine
- Jiosin Shrine
- Jojon Shrine
- Serutabomac Shrine
- Tenmaten Shrine
- Sonapan Shrine
- Usazum Shrine
- Kyokugon Shrine
- Tadarok Shrine
- En-oma Shrine
- Susuyai Shrine
- Mayachin Shrine
- Makurukis Shrine
- Runakit Shrine
- Sinakawak Shrine
- Jinodok Shrine
Tabantha Shrines
- Oromuwak Shrine
- Gatakis Shrine
- Nouda Shrine
- Wao-os Shrine
- Iun-orok Shrine
- Turakawak Shrine
- Gasas Shrine
- Mayausiy Shrine
- Ikatak Shrine
- Ga-ahisas Shrine
- Ganos Shrine
- Taunhiy Shrine
Hebra Shrines
- Sahirow Shrine
- Rutafu-um Shrine
- Otak Shrine
- Eutoum Shrine
- Sisuran Shrine
- Oshozan-u Shrine
- Mayaotaki Shrine
- Tauyosipun Shrine
- Orochium Shrine
- Ijo-o Shrine
- Tenbez Shrine
- Taninoud Shrine
- Mayaumekis Shrine
- Kahatanaum Shrine
Great Hyrule Forest Shrines
- Sakunbomar Shrine
- Pupunke Shrine
- Ninjis Shrine
- Musanokir Shrine
- Kikakin Shrine
- Kiuyoyou Shrine
- Ekochiu Shrine
- Mayam Shrine
- Simosiwak Shrine
Akkala Shrines
- Rasiwak Shrine
- Jochi-iu Shrine
- Igashuk Shrine
- Sinatanika Shrine
- Rasitakiwak Shrine
- Jochi-ihiga Shrine
- Gatanisis Shrine
- Domizuin Shrine
- Kamatukis Shrine
- Gemimik Shrine
- Gikaku Shrine
- Mogisari Shrine
- Natak Shrine
Eldin Shrines
- Kisinona Shrine
- Minetak Shrine
- Mayak Shrine
- Sibajitak Shrine
- Sikukuu Shrine
- Timawak Shrine
- Mayachideg Shrine
- Sitsum Shrine
- Marakuguc Shrine
- Kadaunar Shrine
- Moshapin Shrine
- Jiotak Shrine
- Kimayat Shrine
- Isisim Shrine
- Momosik Shrine
Lanayru Shrines
- Ihen-a Shrine
- Mogawak Shrine
- Jonsau Shrine
- Maoikes Shrine
- Joniu Shrine
- Apogek Shrine
- Yomizuk Shrine
- Kurakat Shrine
- Morok Shrine
- O-ogim Shrine
- Jikais Shrine
- Tukarok Shrine
- Zakusu Shrine
- Igoshon Shrine
- Mayanas Shrine
- Jirutagumac Shrine
- Sihajog Shrine
Necluda Shrines
- Susub Shrine
- Zanmik Shrine
- Jochisiu Shrine
- Jogou Shrine
- Anedamimik Shrine
- Tokiy Shrine
- Utojis Shrine
- Sifumim Shrine
- Bamitok Shrine
- Marari-in Shrine
- Eshos Shrine
- Makasura Shrine
- Mayahisik Shrine
- Joju-u-u Shrine
- Josiu Shrine
- Ukoojisi Shrine
- Kumamayn Shrine
- Yansamin Shrine
Faron Shrines
- Jiukoum Shrine
- Ishokin Shrine
- Utsushok Shrine
- Joku-u Shrine
- Joku-usin Shrine
Gerudo Shrines
- Soryotanog Shrine
- Mayatat Shrine
- Miryotanog Shrine
- Suariwak Shrine
- Otutsum Shrine
- Mayamats Shrine
- Rakakudaj Shrine
- Irasak Shrine
- Karahatag Shrine
- Chichim Shrine
- Siwakama Shrine
- Motsusis Shrine
- Kitawak Shrine
- Turakamik Shrine
- Rotsumamu Shrine
- Siyamotsus Shrine
- Mayasiar Shrine
- Rakashog Shrine
- Kudanisar Shrine
- List of All Bosses and Minibosses
- Master Kohga
- Marbled Gohma
- Sludge Like
- Queen Gibdo
- Seized Construct
- Phantom Ganon
- Demon King Ganondorf and Demon Dragon
- Obsidian Frox
- Flame Gleeok
- Thunder Gleeok
- Frost Gleeok
- King Gleeok
- Flux Construct
- Flux Construct II
- Flux Construct III
- Stone Talus
- Stone Talus (Luminous)
- Battle Talus
- All Weapons and Equipment
- List of All One-Handed Weapons
- List of All Two-Handed Weapons
- List of All Spears
- List of All Bows
- List of All Shields
- All Champion Weapons
- List of amiibo Weapons
- List of All Armor
- List of All Headgear
- List of All Body Armor
- List of All Legwear
Temples and Dungeons
- All Temple Locations and Dungeon Guides
- Wind Temple
- Lightning Temple
- Fire Temple
- Water Temple
- Fifth Temple
- List of All Items
- List of All Materials
- List of All Zonai Devices
- List of All Key Items
- Basic Cooking Guide
- Advanced Cooking: Adding Buffs
- List of Cooked Dishes and Recipes
- List of Roasted Dishes and Recipes
- List of Frozen Dishes and Recipes
- List of Elixirs and Recipes
- All Monsters and Enemies
- Gloom Hands
- All Yiga Schematics and Schema Stones
- New and Returning Characters
- Latest News and Updates
- Ver. 1.2.0 Update Patch Notes
- New Zelda and Ganondorf amiibo
- Ver. 1.1.2 Update Patch Notes
- Release Date Guide
- Pre-Order Bonuses
- Will There Be DLC?
- Story Summary and Timeline
- Easter Eggs and Secrets
- New Features & Gameplay
- Will the Champions Appear?
- Is the Hookshot a Useable Item?
- Will There Be a Demo?
- Multiplayer Features
- List of Official Trailers
- Why Is the Master Sword Broken?
- How Long to Beat
- 3/28 Gameplay Trailer Analysis
- TOTK Edition Switch OLED
- Four New Abilities Introduced
- Sky Islands Explored
- Who are the Zonai?
- 4/13 Final Trailer Analysis
- Where is Daruk's Successor?
- Is Demise Returning?
- All Voice Actors Cast
- Is TOTK the Last Zelda Game?
- Preload Date and Guide
- Collector's Edition Differences
- How to Get TOTK Cheaper
- Hands-On Previews: Everything We Learned
- Where to Pre-Order Guidebook
- Tears of the Kingdom 1.1 Patch Notes
- Are Hearty Durians Still in the Game?
- What Happened to the Divine Beasts?
- Where is Kass?
- Message Boards
- Game Help & Questions (10)
- Discussion & Review Board (6)
- Fan Theory Sharing Board (7)
Other Zelda Wikis
- Breath of the Wild
- Link's Awakening
- Hyrule Warriors: Age of Calamity
- Skyward Sword HD
Japanese Wiki (日本語版)
- ティアーズオブザキングダム攻略
- 1 List of All 147 Caves Locations ...
- 2 Satori (King of the Mountain) Ef...
- 3 Hyrule Field Region Map: Korok S...
- 4 How to Get the Hero of Time Set,...
- 5 How to Get Royal Guard's Claymor...
- We could not find the message board you were looking for.
Gaming News
Project KV, a Game From Ex-Blue Archive Devs, Draws Polar...

Date A Live: Ren Dystopia Review (Steam)
![3 tours gerudo Ace Attorney Investigations Collection Review [Switch] | OBJECTION! This Game's Guilty of Greatness!](https://img.game8.co/3981424/2b9f85c1068d6c293b599bb184a6cea6.png/thumb)
Ace Attorney Investigations Collection Review [Switch]
![3 tours gerudo NBA 2K25 Review [PS5] | The Best It's Been In Years](https://img.game8.co/3981487/84ebdc491bc13e7be1f519dd138f8962.png/thumb)
NBA 2K25 Review [PS5]
More Gaming News
Popular Games

Genshin Impact Walkthrough & Guides Wiki

Zenless Zone Zero Walkthrough & Guides Wiki

Honkai: Star Rail Walkthrough & Guides Wiki

Black Myth: Wukong Walkthrough & Guides Wiki

Pokemon Scarlet and Violet (SV) Walkthrough & Guides Wiki

Monster Hunter Rise: Sunbreak Walkthrough & Guides Wiki

Star Wars Outlaws Walkthrough & Guides Wiki

Wuthering Waves Walkthrough & Guides Wiki

Once Human Walkthrough & Guides Wiki

Palworld Walkthrough & Guides Wiki
Recommended Games

Elden Ring Shadow of the Erdtree Walkthrough & Guides Wiki

Super Smash Bros. Ultimate Walkthrough & Guides Wiki

FF7 Remake Walkthrough & Guides Wiki

The Legend of Zelda: Breath of the Wild Walkthrough & Guides Wiki

Pokemon Legends: Arceus Walkthrough & Guides Wiki

New Pokemon Snap Walkthrough & Guides Wiki

Hyrule Warriors: Age of Calamity Walkthrough & Guides Wiki
All rights reserved
© Nintendo. The Legend of Zelda and Nintendo Switch are trademarks of Nintendo. The copyrights of videos of games used in our content and other intellectual property rights belong to the provider of the game. The contents we provide on this site were created personally by members of the Game8 editorial department. We refuse the right to reuse or repost content taken without our permission such as data or images to other sites.
- Popular Articles
2123 42nd Street S, Saint Petersburg, FL 33711
Single Family
Joaquin Jaramillo
360 Realty Of Tampa LLC.
Last updated:
September 7, 2024, 02:31 AM
About This Home
Discover this stunning bungalow, walkable to Gulfport! Step into an open-concept living space bathed in warm natural light, highlighting the newly remodeled kitchen. Featuring custom quartz countertops, all-wood cabinetry with soft-close doors and drawers, and upgraded stainless steel appliances, every detail has been meticulously crafted. The home showcases new wood plank vinyl floors, fresh interior and exterior paint, and a NEW Roof (2022). Located just one block from golf courses, close to the beaches, and minutes from downtown St. Pete, this home also boasts a large backyard, perfect for outdoor living. Truly a gem!
Built in 1955
Price Summary
$450 per Sq. Ft.
Last Updated:
3 day(s) ago
Rooms & Interior
Total Bedrooms:
Total Bathrooms:
Full Bathrooms:
Living Area:
864 Sq. Ft.
Building Area:
976 Sq. Ft.
Year Built:
Lot Size (Sq. Ft):
Finances & Disclosures
Price per Sq. Ft:
Contact an Agent
Yes, I would like more information from Coldwell Banker. Please use and/or share my information with a Coldwell Banker agent to contact me about my real estate needs.
By clicking Contact I agree a Coldwell Banker Agent may contact me by phone or text message including by automated means and prerecorded messages about real estate services, and that I can access real estate services without providing my phone number. I acknowledge that I have read and agree to the Terms of Use and Privacy Policy.

IMAGES
VIDEO
COMMENTS
How to activate the Gerudo Canyon tower in Zelda
Hello ! On se retrouve sur Zelda : Tears Of The Kingdom pour vous montrer comment activer la Tour des hauteurs Gerudos.Elle se trouve au sud-ouest du Centre...
Nos autres réseaux : Discord : https://discord.gg/VSy6EpeZz7Twitch : https://www.twitch.tv/laclemstimTiktok : https://www.tiktok.com/@la_clemstimTwitter: htt...
Comment accéder à la Tour des hauteurs Gerudos, une tour de la Carte de la surface, en utilisant un radeau et la compétence "Infiltration". Suivez les étapes de la soluce avec des images et des conseils.
Retrouvez la soluce, pour la TOUR DES HAUTEURS GERUDO dans The Legend Of Zelda Tears Of The Kingdom !Retrouvez les meilleurs prix pour le jeu ici https://n...
Learn how to reach and activate the Gerudo Canyon Skyview Tower, one of 15 towers in the game. Find out how to use the Ultrahand to lift a crate and open the tower, and get a map of the Gerudo Desert.
Learn how to access the tower trapped under ice in Zelda: Tears of the Kingdom using an unorthodox method. You'll need cold resistance, a board, and Ultrahand to solve this puzzle.
Disaster In Gerudo Canyon is a quest in The Legend of Zelda: Tears of the Kingdom where you help three lost travelers in the desert. Learn where to find them, what they need, and how to get your reward in this guide.
Learn how to navigate the sandstorm and enter the Gerudo Shelter, a war bunker in Gerudo Town. Find out how to use elemental attacks, glide, and Ascend to access the town and its shrine.
Pour cette tour des contrées Gerudo dans Zelda TotK, vous allez devoir faire venir le réparateur Chênieh pour activer le mécanisme. Problème ? Il est coincé tout en bas d'un ascenseur.
Complétement submergée par la neige, la Tour des Hauteurs Gerudo de Zelda TotK peut être très compliquée à réparer si vous ne savez pas quoi faire ni comment passer par la grotte à côté ...
The Gerudo Highlands Skyview Tower is hard to reach due to it being completely hidden from view from all of Hyrule aside from the Gerudo Desert. For this reason, it's smart to activate the ...
Learn how to clear the dust in tears of the kingdom by solving the riddle of the red pillars in the Gerudo desert. Follow the steps to find the pillars, destroy the rocks, and unite the light to reveal the lightning stone.
This is a cool helmet based off Divine Beast Vah Naboris from Breath of the Wild. Find the West Gerudo Underground Ruins in the far northwest of the desert. There's a tiny little entrance blocked by a rock and a nearby Shock Like. Destroy the rock with a bomb arrow then below, there's a cavern full of rocks to smash.
1. Head to the first pillar at the following coordinates: -4060, -3149, 0062. Use Ascend on the ceiling of the pillar to find a breakable cover at the center. 2. Equip a hammer-type weapon and destroy the rocks with a jump attack (X > Y). This will reveal a pillar of light that is redirected by an object above it. 3.
A full walkthrough for the entire Gerudo questline up until the Lightning Temple in The Legend of Zelda: Tears of the Kingdom showing all puzzle solutions, h...
Description. Ultimate 3-day private tour around Saint Petersburg with all the best the Northern Capital of Russia can offer. Combine must-see and off the beaten path: river cruise, world-known cathedrals, royal palaces, the fortress, picturesque bridges and sculptures, historical downtown, finest landscapes, cozy nooks, local cafes and much ...
The Top 20 Global Concert Tours ranks artists by average box office gross per city and includes the average ticket price for shows Worldwide. The list is based on data provided to the trade publication Pollstar by concert promoters and venue managers. TOP 20 GLOBAL CONCERT TOURS. 1: Luke Combs: $6,962,629: 51,686: $134.71: 2: Coldplay:
Learn how to find and help Riju, one of the four companions, in the Gerudo Town desert. Follow the steps to solve puzzles, fight Gibdo, and use Riju's lightning ability.
Activity level: Moderate. Day 1. 9:30. Meeting at the hotel. City tour - drive by the main sights, stops for pictures. 10:30—12:00. The Peter and Paul Fortress visit, incl. Cathedral, Prison and Panorama walk. Midday shot. 12:30—13:30.
3. The Winter Palace and the Palace Square. The Winter Palace is another beautiful landmark you have to see in Saint Petersburg. Its unique green/white color combination and perfect symmetry make the exterior quite a sight to behold. To make this place even better, the inside of the palace is home to the Hermitage Museum.
Take a virtual tour and see price history for 5213 Dover Street NE, Saint Petersburg, FL, 33703, Rental, Single Family Residence, 4 bed, 3 bath, $5,900/month, MLS U8250627.
Plan your trip to the most beautiful city in Russia with this guide that covers the best season, places to stay, transport, activities and tips. Learn about the history, culture and architecture of St.Petersburg and its attractions.
To start the Treasure of the Gerudo Desert side quest, you'll need to finish Riju of Gerudo Town first which is part of the main questline. This is required since Riju won't appear in the throne room until you've completed this Regional Phenomena subquest. Riju of Gerudo Town Walkthrough. Treasure of the Gerudo Desert Location and Rewards
The U.S. government is spending billions of dollars to build a new lock in Sault Ste. Marie, Michigan. The Army Corps of Engineers let me past the fence, and...
Take a virtual tour and see price history for 4681 1st Street NE #211, Saint Petersburg, FL, 33703, Residential, Condominium, 3 bed, 2 bath, $399,000, MLS U8255875.
2023年11月4日、5日に西日本総合展示場 新館にて開催された、the idolm@ster million live! 10thlive tour act-3 r@ise the dream!!!のlive blu-rayが"2024年11月27日"に ...
Find Property Information for 2123 42nd Street S, Saint Petersburg, FL 33711. MLS# T3551085. View Photos, Pricing, Listing Status & More.