
- AIR DEFLECTORS
- LIGHTHOUSE PROTECTIONS
- SUPPLEMENTARY LIGHTS
- WINDSCREENS
- ACCESSORIES
- COLLECTORS AND DECATS
- COMPLETE EXHAUST SYSTEM
- HEATSHIELDS
- STICKERS AND PLATES
- SUPPORT BRACKETS
- FORK PISTON KIT
- FORK SPRINGS KIT
- SHOCK ABSORBER OIL
- SHOCK ABSORBERS
- SHOCK SPRINGS
- STEERING DAMPERS
- UPGRADE KIT
- ADJUSTMENTS & ADAPTERS
- BRAKE DISCS
- BRAKE LINES
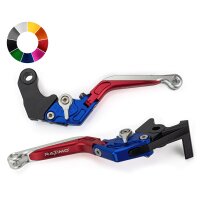
- BRAKE/CLUTCH LEVERS
- MASTER CYLINDERS
- BATTERIES STANDARD
- BATTERY CHARGERS
- GEAR INDICATOR
- HANDLEBAR SWITCHES
- HOUR METERS
- INSTRUMENTS
- LAPTIMER / DASHBOARDS
- LIGHTS & INDICATORS
- LITHIUM BATTERIES
- QUICK SHIFTER
- TRACTION CONTROL
- CARBON WHEELS
- FORGED ALUMINIUM
- FORGED MAGNESIUM
- RIMS VALVES
- FRAME SLIDERS
- HALF-HANDLEBARS
- SPARE PARTS PLATFORMS
- THROTTLE CONTROLS
- TRIPLE CLAMPS
- AIR FILTERS
- ENGINE GUARDS
- INTAKE PARTS / SUCTION
- REED VALVES
- THROTTLE BODIES
- WATER PUMP KIT
- ENLARGED RADIATORS
- RADIATOR COVERS
- SILICONE HOSES
- AUTOMATIC CLUTCHES
- CLUTCH DISCS
- CLUTCH LINES
- CLUTCH MASTER CYLINDERS
- CLUTCH SLAVE CYLINDERS
- PRESSURE PLATE
- SLIPPER CLUTCHES
- SPARE PARTS
- STANDARD CLUTCHES
- CHAIN ADJUSTER
- REAR SPROCKET AND PINION
- SCOOTER TRANSMISSION
- LICENSE PLATE SUPPORT
- MOTORBIKE COVERS
- NAVIGATOR SUPPORTS
- SEAT COVERS
- TOP CASE/PANNIERS
- FRAME PROTECTIONS
- TYREWARMERS
- BRAKE/CLUTCH FLUID TANKS
- CLUTCH COVERS
- ENGINE OIL FILLER CAPS
- ENGINE SCREWS KIT
- FAIRING SCREWS KIT
- FLUID TANK CAPS
- FRAME PLUGS
- FRAME SCREWS KIT
- REAR SPROCKET FLANGE
- SPROCKET COVERS
- TAPPI RUOTA
- WHEEL BOLTS
- WINDSCREEN SCREWS KIT
- CARBON PARTS
- MTORBIKE CARES
- WORKSHOP EQUIPMENT
- USED SHOWCASE
- SWEATSHIRTS
- PROTECTIONS
- VISORS AND ACCESSORIES
- BRAKE HOSES
- BRAKE LEVERS
- DISCS AND PADS
- IGNITION AND CONTROL UNITS
- INSTRUMENTATION
- COMPLETE ENGINE KITS
- CRANKSHAFTS
- CYLINDER HEADS
- ENGINE CRANCKASE
- ENGINE VALVES
- EXHAUST SYSTEM
- GAS VALVE SPRINGS
- OIL LEVEL DIPS
- ROLLER CAGES
- ROLLER SHELLS
- THERMAL GROUPS
- CARBURETOR KITS
- CARBURETORS
- INTAKE MANIFOLDS
- OIL AND FUEL FILTERS
- OIL FOR AIR FILTERS
- POWER SUPPLY KIT
- FORK CLAMPS
- OIL SEALS AND DUST SEALS
- SHOCK ABSORBER SPRINGS
- SHOCK ABSORBERS AND FORKS
- CRANKCASE COVERS
- DRIVE ROLLERS
- PINS AND HUBS
- TORQUE CONTROLLERS AND PULLEYS
- TORSION CONTROLLER
- GAS CABLES AND FUEL HOSES
- LEVER CONTROLS
- SILENT BLOCK
- WHEEL SPACER
- All manufacturers
- Tre 1130 K Amazonas

BONAMICI RACING ADAPTOR FOR STANDARD LEVER PROTECTION 15-16 MM
Remote adjuster racing for bonamici racing lever 77,5mm, remote adjuster racing for bonamici racing lever 52,5mm, remote adjuster standard bonamici racing for bonamici racing lever 77,5mm, remote adjuster standard bonamici racing for bonamici racing lever 52,5mm, bonamici racing pair of half handlebars 50mm universal, bonamici racing universal pair of racing evo stand support, bonamici racing universal pair of standard evo stand support, bonamici racing universal evo clutch lever protection, bonamici racing universal evo brake lever protection, excel spoked rear wheel benelli tre-k amazonas with disc and tire, pair of excel spoked rims benelli tre-k amazonas with discs and tires, dna cotton air filter benelli tre-k 1130 2007-2010, bonamici racing carbon lever protection adapter for 20-21mm handlebars, bonamici racing carbon lever protection adapter for 19-20mm handlebars, bonamici racing carbon lever protection adapter for 18-19mm handlebars, bonamici racing carbon lever protection adapter for 17-18mm handlebars, bonamici racing carbon lever protection adapter for 16-17mm handlebars, bonamici racing carbon / evo lever protection adapter for 15-16mm handlebars, bonamici racing carbon / evo lever protection adapter for 14-15mm handlebars, bonamici racing carbon / evo lever protection adapter for 13-14mm handlebars, bonamici racing universal carbon brake lever protection without adaptor, bonamici racing brake adjuster connection for brembo 19x20, replacement footpeg racing 82mm not threaded for bonamici racing rearboards.
- Tornado 900
- TNT Titanium
- Pepe 100 Lx
- Leoncino 250
- Tornado Tre 1130
- Tornado Naked Tre Sport Evo
- TNT Cafè Racer
- Velvet 250 Eco
- Velvet 150 Eco
- Velvet 125 Eco
- Tornado 900 Tre
- Leoncino 500
- TRK 502 / X 2017-2024
- BN 251 2016-2020
- 502 C 2019-2024
- 752 C / S 2019-2024
- Leoncino 800
- LEONCINO 125
- IMPERIALE 400
- Tornado Naked Twin 500 2023-2024
- TRK 702 / X 2023-2024
Save products on your wishlist to buy them later or share with your friends.
- Advice & Inspiration
- Track an Order
- Return an item
- Create an account
- Accessories
- Klarna Klarna available at the checkout
- Over 250,000 Products £14m+ stock holding
- Next-day Delivery Available 7 Days a Week
- Click & Collect From a shop near you
- Pay later with Paypal Pay within 4 or pay in 3 available
- 15+ Years Online Tried, tested, trusted
- Benelli Tre-K 1130
- Price Range £7 - £187 Price Range Simply drag the slider bar to set your price range.
- Dynavolt (1)
- Hiflo filtro (1)
- R&G Racing (3)
- Renthal (1)
- View More (3)
- Product Type
- Batteries (1)
- Bodywork (2)
- Brake Discs (4)
- Brake Pads (12)
- Crash Protectors (1)
- Luggage Accessories (1)
- Luggage Fitting Kits (3)
- Oil Filters (1)
- Spark Plugs (2)
- View More (1)
Benelli Tre-K 1130 Parts & Accessories
model fitment

MOTORCYCLE ACCESSORIES AND SPARE PARTS
- Brake discs 1
- Brake pads 3
- License plate 1
- Motorcycle batteries 2
- Quickshifters 1
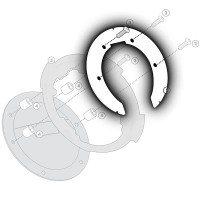
- Flanges and accessories for tank bags 1
MOTORCYCLE BRAND AND MODEL
- Cafe Racer 1130 - 2007/2008 1
- TNT 1130 - 2005/2008 1
- TNT 899 S/T - 2008 1
- TNT Sport 1130 - 2007/2008 1
- TNT Titanium - 2007/2008 1
- Tornado Tre 1130 - 2007/2008 1
- Tornado Tre 900 - 2007/2008 1
- Tornado Tre 900 RS - 2007/2008 1
- Trek 1130 - 2006/2009 10
Manufacturers
- Accossato 0
- All-Balls 0
- Barracuda 0
- Bike-Lift 0
- Blackbird Racing 0
- Braking (E23) 0
- Braking (E28) 0
- Braking (Epta Racing) 0
- Brembo Racing 0
- CNC Racing 0
- DT1 Air Filters 0
- Dynojet - Power Commander 0
- Fren Tubo 0
- GB Racing 0
- LabelBike 0
- Lea Components 0
- Lightech Carbon 0
- Motomaniashop 0
- Powerbronze 0
- Quattroerre 0
- Racing Bike 0
- Rapid Bike 0
- Rizoma Stealth 0
- SP Connect 0
- Sprintfilter 0
- Steelbike 1
- Tommaselli 0
BREMBO GENUINE BRAKE REAR PADS SET 07BB2065 BENELLI TREK 1130 2006-2009
Brembo serie oro rear brake disc benelli trek 1130 2006-2009, brembo sintered brake rear pads set 07bb20sp benelli trek 1130 2006-2009, givi flange for attaching bags tanklock tank benelli, healtech electronic quickshifter kit for benelli trek 1130 2006-2009, high power battery furukawa ftz14-bs benelli trek 1130 2006-2009, license plate holder for benelli trek 1130 2006-2009, adjustable in aluminum, pair of brembo serie oro floating front brake discs benelli trek 1130 2006-2009, sintered rear brake pads set sbs 730 ls benelli trek 1130 2006-2009, skyrich hjtz14s lithium battery benelli trek 1130 2006-2009 (for europe only).
- EUR EUR USD GBP AUD CAD NZD
parts and accessories for Benelli Trek 1130 TK 2007-2017
More universal products that fit your model Benelli Trek 1130 TK 2007-2017

Declaration of production articles and exclusion from revocation
Steel braided hoses are not stock items, but production items. They are only produced and pressed firmly at your request with your selected colours and fittings. We exclude these articles from revocation in accordance with the applicable law ( take a look Cancellation-Instructions ) and refer to § 312g Para. 2 BGB (German Civil Code).
On working days the production takes place on the same day and we are anxious to dispatch it also on the same day. As a rule, orders received before 14:00 are picked, pressed, packed and dispatched on the same working day.
No liability is accepted for damage caused by improper installation. Modifications to the lines are not permitted and therefore lose your operating licence.
Your team from MTP-Racing
Aftermarket BENELLI / TRE-K 1130
Do you want to search on OEM parts Click here
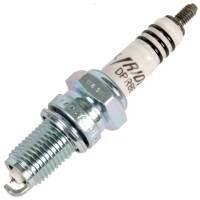
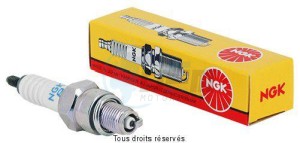
Spark plug CR9EB
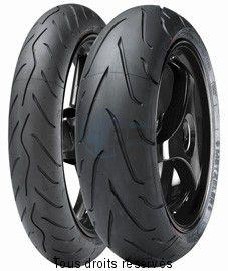
Tyre 120/70-17 58W TL SPORTEC M3 FRONT Avant
Battery Ytz14s-bs - Ss Entr. AGM L 150mm W 87mm H 110mm 12v 11.2ah Acid 0.54l

Ball bearing 30x55x13 - 2RS/C3
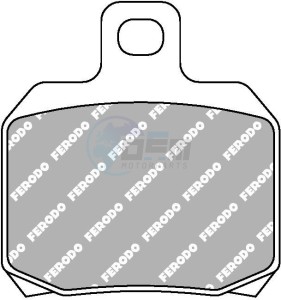
Brakepad Sinter metal Sinter Grip Road
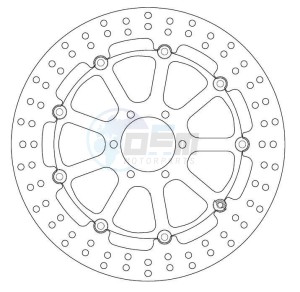
Brake Disc Floating YAMAHA - Approval TÜV Ø External: 320mm, ØInternal: 64mm, Thickness: 5mm, No mounting holes: 6, Ø diam: 8.5mm, Ø Diam int: 80mm, Offset: .0mm
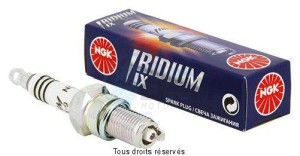
Spark plug CR9EIX
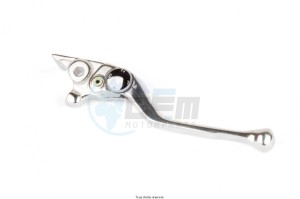
Lever Brake Benelli - Yamaha OEM: 5ch-83922-00
Tyre 180/55 ZR 17 SPORTMAX QUALIFIER 2 73W TL Rear
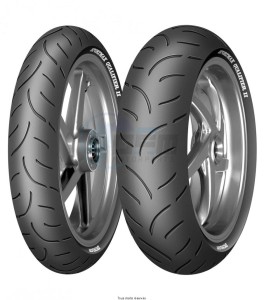
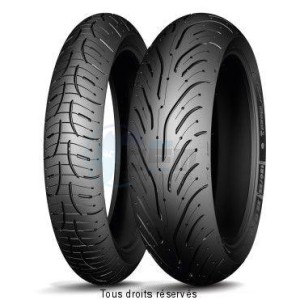
Tyre Michelin Pilot Pilot Road 4 MIC103565 + MIC694117
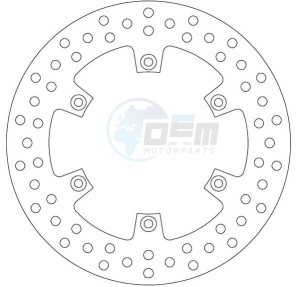
Brake disc fixed BMW - with homologation TUV
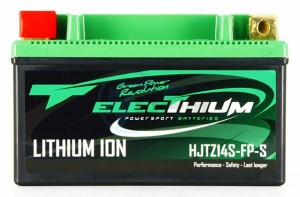
Battery Lithium HJTZ14S-FP-S - (YTZ14S-BS)
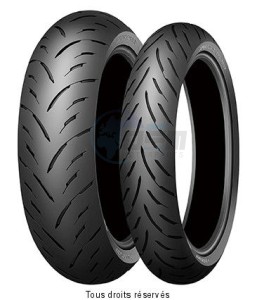
Tyre 180/55-17 73W TL GPR300
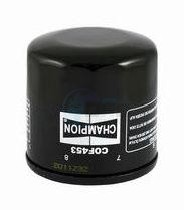
Oil Fiter Adaptable BENELLI - Equal to HF553 Ø External: 65mm, Length: 65mm, Color: Black, Qty:
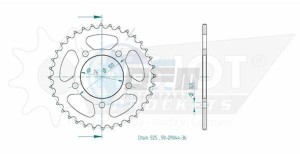
Chainwheel Steel Benelli - 525 - 36 Teeth- Made in Germany
Battery Ytz14s-bs SLA-AGM - Without Acid. Ready to Use

Brake Pad Sifam Sinter Metal S1110N

Brakepad Organic Eco-Friction suitable for road use
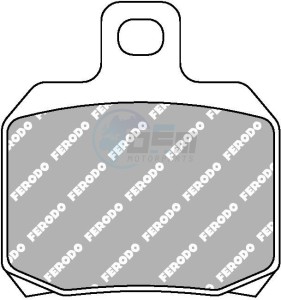
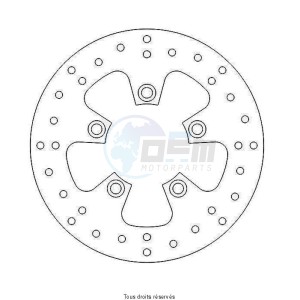
Brake Disc Bmw Ø240x124X110 Mounting holes 6xØ6,5 Disk Thickness 5
Battery TTZ14-S - AGM L 150mm W 87mm H 110mm 12v 11.2ah Delivery with Acid
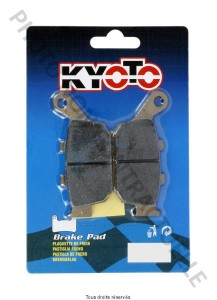
Brake Pad Kyoto Semi-Metal YAMAHA X-MAX 125 2006-2015
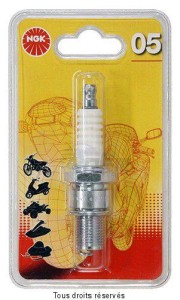
Spark plug CR9E-B1 BLISTER
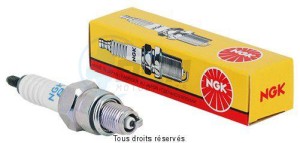
Spark plug CR9E
Train Tyres Dunlop Roadsmart SPORTMAX ROADSMART DUN621254 + DUN621259
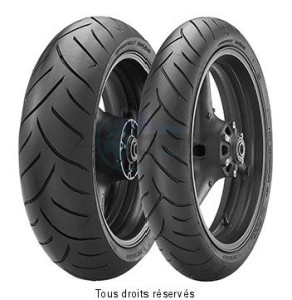

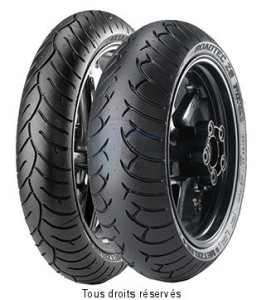
Train Tyres Metzeler RoadtecZ6 RoadtecZ6 MET1448100 and MET1448600
Lever Clutch Aprilia - Benelli - BMW - Derbi - Rieju - Yamaha

Ball bearing 6005-2RSH/C3 - SKF 25 x 47 x 12
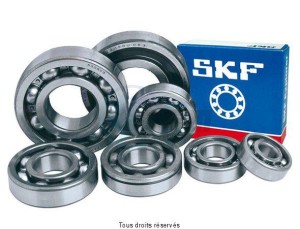
Ball bearing 25x47x12 - 2RS/C3
Train Tyres Pirelli Diablo Diablo PIR1430700 and PIR1430000
Brake Pad Vesrah Sinter Metal VD262JL Length: 74.6 Width: 55.5 Thickness: 8.6 Length2: 0 Width2: 0 Thickness2: 0
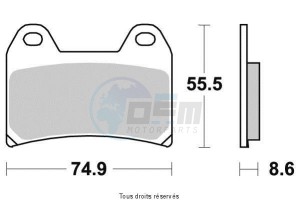
Ball bearing 6006-2RS1/C3 - SKF 30 x 55 x 13
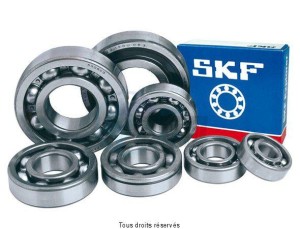
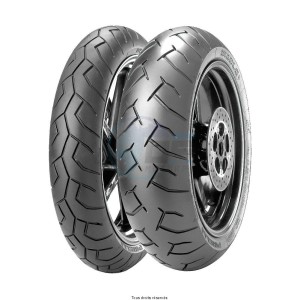
Tyre 120/70-17 58W TL GPR300F
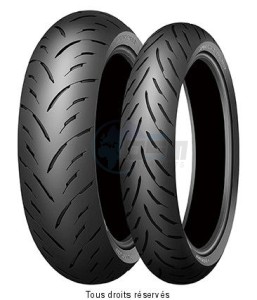
Brake Pad Sifam Sinter Metal S1262N
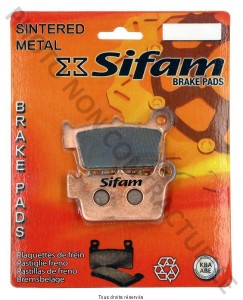
Battery YTZ14-S - AGM L 150mm W 87mm H 110mm 12v 11.2ah
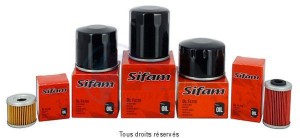
Oil filter BENELLI - Equal to HF553
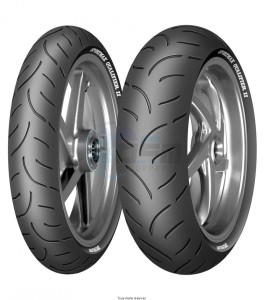
Tyre 120/70 ZR 17 58W TL Front SPORTMAX QUALIFIER 2
Why choose OEM Motorparts?
- Easy online ordering
- All your spare parts from one supplier
- Shipped and Packed Professionally
Multiple payment options
We offer several payment options. Pay safely and securely with the payment method you are used to.

It's great that you are here!

Call or WhatsApp 786-242-5400 | Mon-Fri 9-5 EST

Benelli Tre 1130 K Parts

Do you need assistance with your order?

- FASHION ACCESSORIES

- MODEL SCALE
- New Discover!
Filter by price
- More than (20)
Showing 1-20 of 20 item(s)
- Not available
Filter Your Selection
Benelli shop, search for products.
Start typing to see products you are looking for.

- Benelli Manuals
- Workshop manual
Benelli TnT 1130 Workshop Manual
- Use and maintenance (47 pages)
- page of 392 Go / 392
Advertisement
Quick Links
Related manuals for benelli tnt 1130.

Summary of Contents for Benelli TnT 1130
- Page 2 P P P P P remise This manual contains an introductory description of the Benelli TnT together with the procedures for control/intervention and revision of the main components. Information considered generally noted is not included. This manual will help you to understand the motorcycle better in order to provide the client with a rapid and trustworthy service.
- Page 3 I I I I I ntroduction SYMBOLS The symbols listed below are all present inside the manual and serve to show those parts which need to be given special attention. ATTENTION - Be aware that you will find death or serious injury, in case the instructions are not observed.
- Page 4 1 1 1 1 1 GENERAL INFORMATION GENERAL INFORMATION GENERAL INFORMATION GENERAL INFORMATION GENERAL INFORMATION C C C C C ONTENTS VEHICLE IDENTIFICATION IMPORTANT INFORMATION SPECIAL INSTRUMENTS 1.3.1 SPECIAL ENGINE INSTRUMENTS 1.3.2 SPECIAL FRAME INSTRUMENTS 2 2 2 2 2 SPECIFICATIONS SPECIFICATIONS SPECIFICATIONS...
- Page 5 3.28 CONTROL AND REPLACEMENT TRANSMISSION COG-WHEELS 3.29 CHECKING AND ADJUSTING STEERING BALL-BEARINGS 3.30 CHECKING FORK 3.31 CHECKING DAMPER 3.32 ADJUSTING DAMPER 3.33 CHECKING TIRE PRESSURE 3.34 CHECKING WHEELS 3.35 CHECKING AND OILING CLUTCH CABLE 3.36 ELECTRICAL PLANT 3.36.1 CHECKING BATTERY 3.36.2 BATTERY RECHARGING SYSTEM 3.37...
- Page 6 5.3.2 CHECKING VALVES AND VALVE GUIDES 5.3.3 CHECKING VALVE HOUSINGS 5.3.4 CHECKING VALVE SPRINGS 5.3.5 CHECKING BUCKET-TYPE TAPPETS 5.3.6 MOUNTING VALVES CYLINDER 5.4.1 DISMANTLING CYLINDER CASING 5.4.2 CHECKING CYLINDER 5.4.3 DISMANTLING WATER COLLECTOR 5.4.4 CHECKING WATER COLLECTOR 5.4.5 MOUNTING WATER COLLECTOR 5.4.6 MOUNTING CYLINDERS PISTONS...
- Page 7 5.10.4 DISMANTLING OIL PUMP 5.10.5 CHECKING OIL SUMP 5.10.6 CHECKING OIL PUMP 5.10.7 ASSEMBLING OIL PUMP 5.10.8 MOUNTING OIL PUMP 5.10.9 MOUNTING OVERPRESSURE OIL VALVE 5.10.10 MOUNTING OIL SUMP 5.11 CASING 5.11.1 DISMANTLING CASING 5.11.2 DISMANTLING FREE WHEEL 5.11.3 DISMANTLING BALANCING COUNTER SHAFT 5.11.4 DISMANTLING ENGINE SHAFT 5.11.5...
- Page 8 REAR WHEEL, BRAKE DISK AND CROWN 7.2.1 REMOVING REAR WHEEL 7.2.2 CHECKING REAR BRAKE DISK 7.2.3 DISMANTLING REAR WHEEL 7.2.4 CHECKING REAR WHEEL 7.2.5 CHECKING HUB 7.2.6 CHECKING CROWN 7.2.7 MOUNTING REAR WHEEL 7.2.8 INSTALLING REAR WHEEL FRONT AND REAR BRAKES 7.3.1 REMOVING FRONT BRAKE PUMP 7.3.2...
- Page 9 BACK ARROW LAMP REPLACEMENT DIAGNOSTICS DIAGNOSTICS DIAGNOSTICS DIAGNOSTICS DIAGNOSTICS 10.1 ELECTRICAL PART 10.2 FRAME 10.3 AXONE2000 BENELLI INSTRUCTION MANUAL 10.3.1 GENERAL SAFETY PRECAUTIONS FOR OPERATORS 10.3.2 HOW TO USE AXONE2000 BENELLI CORECTLY 10.3.3 DESCRIPTION OF AXONE2000 BENELLI 10.3.3.1 KEYPAD MF13...
- Page 10 10.3.3.2 INTERFACE MODULE 10.3.3.3 READ/WRITE UNIT 10.3.3.4 INPUT/OUTPUT CONNECTORS 10.3.3.5 HOW TO POWER THE AXONE2000 BENELLI 10.3.3.6 RECHARGING THE BATTERY 10.3.3.7 REPLACING THE BATTERY 10.3.3.8 NOTES FOR CORRECT USE 10.3.3.9 TECHNICAL SPECIFICATIONS 10.3.3.10 SPARE PARTS 10.3.3.11 GLOSSARY 10.3.3.12 GETTING STARTED 10.3.3.13 STARTING PROGRAMS...
- Page 11 GENERAL INFORMATION G G G G G eneral I I I I I nformation ATTENTION/WARNING/NOTE Read carefully the manual and follow the instructions. To underline special information, the symbols and the words ATTENTION, WARNING and NOTE have specific meanings. Pay particular attention to the messages underlined with the following words and the corresponding signal.
- Page 12 WARNING WARNING AVVERTENZA * In case it will be necessary to replace parts, only use Benelli original spare parts or their equivalents * In case of disassembly of parts to be used again, dispose them in a tidy way in order to reassemble them in the right way and in the correct position.
- Page 13 5. Keep all the components away from any source of heat. • SPARE PARTS Use original Benelli spare parts exclusively. Use oils and greases recommended by Benelli to oil the components. Other products might appear similar in look and function but are inferior in quality. MF13...
- Page 14 1.3 SPECIAL INSTRUMENTS WARNING: To avoid errors in ordering the special instruments, refer exclusively to the inherent code. For correct maintenance and a perfect set-up use the BENELLI special instruments, avoiding damage as a result of inadequate or technically improvised instruments. MF13...
- Page 15 1.3.1 SPECIAL ENGINE INSTRUMENTS 1. R180197015000 GONIOMETER PLUG FOR DISTRIBUTION[*] 2. R180197017000 INSTRUMENT FOR MOUNTING CLUTCH OIL SEAL CASING [*] 3. R180197018000 CYLINDER MOUNTING SPACERS 4. R180197019000 SMALL CYLINDER COLUMN FIXING SPAN 5. R180197020000 FALSE SPARKING-PLUG 6. R180197021000 PISTON THREAD MEASURER MF13...
- Page 16 7. R180197022000 P.M.S. MEASURER 8. R180197023000 CLUTCH COVER OIL SEAL PAD [*] 9. R180197024000 OIL SEAL PINION PAD [*] 10. R180197025000 OIL SEAL VALVE PAD [*] 11. R180197026000 INSTRUMENT FOR CHECKING VALVE LIFT 12. R180197027000 GONIOMETER INDICATOR 13. R180197028000 CLUTCH OIL SEAL PAD ON FLANGE [*] MF13...
- Page 17 14. R180197029000 ENGINE SUPPORT 15. R180197030000 INSTRUUMENT FOR CHECKING ENGINE SHAFT AXIAL PLAY 16. R180197036000 ENGINE MANAGEMENT DIAGNOSTIC INSTRUMENT [*] 17. R180100143000 RAPID RELEASE PETROL TUBE KIT [*] 18. R180297130000 CLUTCH REGULATION KEY 19. R180297048000 DISMANTLING PINION INSTRUMENT MF13...
- Page 18 20. R180297047000 DISMANTLING CLUTCH INSTRUMENT 1.3.2 SPECIAL FRAME INSTRUMENTS 1. R180197033000 20 ALLEN WRENCH [*] 2. R180197031000 STEERING RING-NUT CLAMPS [*] 3. R180197034000 EMGINE DISMANTLING INSTRU- MENT[*] 4. R180197032000 ENGINE SHOULDER ADJUST- MENT CLAMPS [*] 5. R180297049000 COWLING SUPPORT TROLLEY MF13 (*) Compulsory instruments...
- Page 19 6. R180297129000 RING NUT REGULATION KEY AND STEERING LOCK NUT 7. R300097147000 CHAIN REGULATION TOOL 8. R300097146000 DISASSEMBLY TOOL STEERING PLATE MF13...
- Page 20 S S S S S pecifications SPECIFICATIONS 2.1 GENERAL SPECIFICATIONS 2100 1050 1443 Dimensions in mm Dimensioni in mm DIMENSIONS STANDARD LIMITS Engine length 2100 mm — Engine width 900 mm — Maximum height 1050 mm — Wheelbase 1443 mm —...
- Page 21 2.2 TECHNICAL CHARACTERISTICS: ENGINE ENGINE Type Three four-stroke cylinders in line Bore 88 mm Stroke 62 mm Total displacement 1130 cm Compression ratio 11,2:1 ± 0,5;1 Max. power at shaft [95/1/EC] 101 kw / 135 cv at 10500 rpm reduced for foreign countries 72 kw / 98 cv Minimum rotation at full speed 1350 rpm Maximum at full speed...
- Page 22 OILING/COOLING Oiling Humid housing with trochoidal circulation pump, opening pressure of the oil circuit valve, 6.5 bar. Engine oil quantity With filter: 4.0 l about Without filter: 3.8 l about Cooling Liquid, closed pressured circuit with radiator, thermostat and radiator oil air cooling. A centrifugal pump commanded by gears on the primary gearbox shaft circulates the liquid and an expansion tank recovers the thermal expansion of the cooling liquid.
- Page 23 2.3 FRAME CHARACTERISTICS FRAME STANDARD LIMITS Type Mixed steel-aluminium frame and structurre Angle of incidence 24,50° — Forward stroke 103,7 mm — FRONT WHEEL STANDARD LIMITS Type Cast — Dimensions: 17 x MT3.50 Material: aluminium Wheel span 120 mm — REAR WHEEL STANDARD LIMITS...
- Page 24 REAR TIRE STANDARD LIMITS Type Tubeless — Dimensions 190/55 ZR17 (73W) — Model D207 RR — Tire pressure cold 250 kPa (2,5 kg/cm, 2,5 bar) — Maximum tire pressure 250 kPa (2,5 kg/cm, 2,5 bar) — Min. depth tread — 2,0 mm FRONT BRAKES STANDARD...
- Page 25 FRONT SUSPENSION STANDARD LIMITS Type Telescopic fork with — upturned stems Type of front fork Helical spring/damper — Front fork stroke 120 mm — Spring Spring rate (K1): 9.5 N/mm — Spring stroke (K1): 0 ~ 120 mm — Oil advised SAE 7,5 Marzocchi 19 —...
- Page 26 OSCILLATING ARM STANDARD LIMITS Free play (at the end of the arm) Radial — 1 mm Axial — 1 mm TRANSMISSION CHAIN STANDARD LIMITS Model: REGINA 137-ORPB — Connection quantities — Play of the chain 30 ~ 40 mm — 2.4 ELECTRICAL CONNECTIONS COMPONENTS STANDARD...
- Page 27 COMPONENTS STANDARD Loading system Type: AC magnet Model: 5-101211-502-1 (DENSO) Nominal exit: 13.5V / 48A at 5000 rpm Tension adjustment (in the alternator) Type: Semiconductor, FIELD CONTROL Voltage adjustment: 14.5 ± 0.3V (at 5000 rpm, 10A and 25°C) Battery YUASA YTZ 14 S Electrical start system Model: 5-128-330 (DENSO)
- Page 28 BOLT TORQUE 2.5.1 GENERAL BOLT TORQUE The bolt torques are inserted in the chapters of the manual together with the relative special instructions, if necessary. If not otherwise specified, the bolts are considered with greased thread, created at environmental temperature. BOLT TORQUES kgf·m 4 mm...
- Page 29 2.5.2 BOLT TORQUE FRAME DESCRIPTION THREAD TORQUE (Nm) ENGINE GROUP: ENGINE ON BACK FUSION PLATE RIGHTHAND FRAME WITH LEFTHAND NUT ENGINE SUPPORT ROD ON ENGINE HEAD RIGHTHAND ENGINE ON LOWER CROSSBAR LOWER ENGINE CRANKPIN THROUGH FRAME WITH NUT LOWER CRANKPIN HEAD TORQUE ENGINE ON LOWER FRAME CROSSBAR (CLAMP) ENGINE HEAD ON RIGHTHAND FRAMEWORK WITH NUT RIGHTHAND ENGINE FIXING SCREW HEAD TORQUE ON...
- Page 30 SADDLE PILLAR GROUP: BACK FRAME HANDLEBAR GROUP COMMANDS: FRONT BRAKE PUMP HANDLEBAR CLUTCH LEVER HANDLEBAR PLATE FIXING PEDAL GROUP COMMANDS: PILOT FOOTBOARD ON FRAME SUPPORTS GEAR TORQUE COMMAND ON SHAFT DRIVING GEAR ROD ON GEAR COMMAND WITH NUT DRIVING GEAR ROD ON GEAR PEDAL WITH NUT PEDAL BEAT SPRING PIVOT UPPER BRAKE PEDAL SUPPORT LOWER BRAKE PEDAL SUPPORT...
- Page 31 REAR FORK GROUP: REAR FORK CRANKPIN SCREW ON REAR FORK CRANKPIN LOWER CHAIN GLIDING SHOE FORK UPPER CHAIN GLIDING SHOE FORK CENTRAL CHAIN GLIDING SHOE FORK FERRULES FOR ASSEMBLY STAND ON REAR FORK FRONT SUSPENSION GROUP: FERRULE STEMS ON STEERING BASE FERRULE STEMS ON STEERING HEAD FERRULE HUBS ON FRONT WHEEL CRANKPIN FRONT MUDGUARD SUPPORTS ON FORKS...
- Page 32 REAR WHEELGROUP: REAR WHEEL CRANKPIN NUT CROWN ON FLEXIBLE COUPLING FLANGE REAR BRAKE DISK ON WHEEL SPEED SENSOR ON CLIP SUPPORT LATERAL ASSEMBLY STAND GROUP: HANGER SUPPORT PLATE ON FRAME HANGER CRANKPIN ON FRAME SPRING HOOK ON HANGER ELECTRIC PLANT GROUP: IINERTIAL SWITCH ON FILTER BOX AIR SENSOR ON FILTER BOX COOLING PLANT GROUP:...
- Page 33 FRONT BRAKING PLANT GROUP: PUMP FRONT BRAKE ON HANDLEBAR FRONT BRAKE CLIPS ON RELATIVE SUPPORTS HYDRAULIC CONNECTIONS ON FRONT BRAKE PUMP AND CLIPS REAR BRAKING PLANT GROUP: REAR BRAKE PUMP ON RIGHT FOOTBOARD SUPPORT WITH NUT REAR BRAKE CLIP ON SUPPORT HYDRAULIC CONNECTION ON REAR BRAKE CLIP HYDROSTOP ON REAR BRAKE PUMP REAR BRAKE OILTANK ON EXPANSION VASE...
- Page 34 PETROL PUMP ON TANK PETROL TUBE ON THROTTLE BODY DISTRIBUTOR ON PLATE GAS CABLES FIXING PLATE ON THROTTLE BODY FRONT AND BACK BODYWORK GROUP: USE STANDARD TIGHTENING TORQUE WITH M6 THREAD FOR BODYWORK: 8Nm±20% MF13...
- Page 35 2.5.3 BOLT TORQUE ENGINE DESCRIPTION THREAD BOLT TORQUE (Nm) ENGINE CRANKCASE GROUP: CRANKCASE TEF FIXING SCREW CRANKCASE FIXING SCREW CRANKCASE BANKS TCEI FIXING SCREW OIL CONDUIT CLOSURE CONICAL DOWEL BALL-BEARING AND CRANKPIN FIXING SCREW SMALL PLATES AND TUBE FIXING SCREW CYLINDRICAL CAP CYLINDRICAL CAP OIL DIAPHRAGM...
- Page 36 PRISONNER SCREW HEAD BY STRIKING VENT HEAD CONNECTION DOWEL ENGINE GROUP/OILING: OIL PUMP FIXING SCREW OVERPRESSURE VALVE LARGE EXCHANGER FIXING SCREW OIL TUBE HEAD BORED SCREW OIL HEAD NIPPLE TUBE FILTER ENGINE GROUP/CRANK MECHANISM: PHONIC WHEEL FIXING NUT ROD SCREW 25+50°...
- Page 37 LOW CLUTCH ROD HEXAGONAL FIXING NUT CLUTCH SPRING FIXING SCREW CLUTCH HEXAGONAL FIXING NUT CLUTCH CONTROL FIXING SCREW ENGINE GROUP/GEARS: ENGINE PINION FIXING NUT ENGINE GROUP/ GEAR COMMAND: PLATE FIXING SCREW FORK PINS FIXING SCREW FORK PINS FIXING SCREW SELLET DRUM FIXING SCREW GEAR COMMAND SUMP FIXING SCREW GEAR COMMAND SUMP FIXING SCREW CHAIN COVER SUMP FIXING SCREW...
- Page 38 PHONIC WHEEL SENSOR SCREW ENGINE GROUP/ SUPPLY: THROTTLE BODY FIXING SCREW ENGINE GROUP: SUPPLY: FREE WHEEL RING FIXING SCREW ENGINE HEXAG. FLEXIBLE COUPLING SCREW ESAGONAL NUT ENGINE BUMPER TEF INGR. SATELLITE SCREW 2.6 POINTS TO OIL ENGINE OIL - Ball-bearings - Piston surface - Piston segments - Piston pin...
- Page 39 MF13...
- Page 40 MF13...
- Page 41 MF13...
- Page 42 MF13...
- Page 43 MF13...
- Page 44 MF13...
- Page 45 MF13...
- Page 46 MF13...
- Page 47 MF13...
- Page 48 MF13...
- Page 49 MF13...
- Page 50 MF13...
- Page 51 MF13...
- Page 52 P P P P P eriodical PERIODICAL CHECKS AND C C C C C ADJUSTMENTS hecks 3.1 INTRODUCTION This chapter includes information about checks and adjustments for better maintanence of the bike's performance. MAINTENANCE FREQUENCY 0 km 1000 km 6000 km 11000 km (0 mi) (625 mi)
- Page 53 MAINTENANCE FREQUENCY 0 km 1000 km 6000 km 11000 km (0 mi) (625 mi) (3750 mi) (6875 mi) COMPONENT OPERATION before delivery running-in Service Service Service Petrol filter Check/Change Throttle body Check/Change Air filter Check/Change Check/Change Pinion/Stop washer At every change of the transmission chain in any case Change Check/Adjust Transmission chain...
- Page 54 MAINTENANCE FREQUENCY 0 km 1000 km 6000 km 11000 km (0 mi) (625 mi) (3750 mi) (6875 mi) COMPONENT OPERATION before delivery running-in Service Service Service Transmissions and flexible Check/Adjust commands Steering crown saddle post Check/Adjust Steering saddlle post ball- Check/Adjust bearings Every 20000 km (12000 mi)
- Page 55 MAINTENANCE FREQUENCY 0 km 1000 km 6000 km 11000 km (0 mi) (625 mi) (3750 mi) (6875 mi) COMPONENT OPERATION before delivery running-in Service Service Service Locks Check/ Functioning Screws and nuts Check/Tighten Tube clamp straps Check/Tighten General oiling General test CODE: i = inspection and adjustment , cleaning, oiling or change according to need.
- Page 56 3.2 CHECK SPARKING-PLUGS WARNING: Changing and checking the sparking-plugs must be carried out with the engine cold. Remove the petrol tank (see “DISMANTLE TANK“). Remove the air box (see“DISMANTLE AIR BOX“). Remove the resonator. WARNING: Clean the dirt around the sparking-plugs before removing them.
- Page 57 3.2.1 INSTALLING SPARK-PLUGS Oil the sparking-plug threading, position it in its proper seat and tighten it. Install the candles on the cylinder head manually screwing them on until you reach the basis, then tighten to the indicated torque. 12 N·m 1,2 Kg-m NOTE: spark-plugs advised: CHAMPION RG4HC or NGK CR 9E 3.3 CLEAN AIR BOX...
- Page 58 NOTE: Check that the filtering element is always positioned with its side of major density turned upwards. ATTENTION: Before re-inserting the filtering element into the air box, eliminate excess oil by squeezing the element and checking that it is not dripping. Reposition the filtering element inside the air box Position the air box cover (2) and fix it with the nine screws.
- Page 59 Take off the Air Box base disconnect the air sensor connector below it. Remove the Air Box air duct (3). Check the state of the components visually, if necessary replace them. 3.3.2 SOLENOID MOTOR REMOVAL Remove the petrol tank. Loosen and remove the fixing screws (1). Loosen the nut (1) and the lock nut (2).
- Page 60 3.4 GAS COMMAND PLAY Check first at 1000 Km and then at every 5000 Km. The first adjustment is made during the installation of the gas command cables. Verify that the gas command handle works in a regular way and that reaching the position of maximum opening and that of automatic closing is possible in all the positions of the steering.
- Page 61 3.4.1 CLUTCH NOTE: Take the clutch cable off from the lower clutch command before setting the regulation of the clutch pack. Check every 5000 km. Position the bike onto the lateral stand to avoid oil spilling out when removing the clutch cover. Remove the clutch cover.
- Page 62 3.5 ADJUSTMENT CLUTCH LEVER PLAY Move the adjustment cover cap. Unscrew the crown (1) and restore the clutch lever play by turning the adjuster (2) clockwise or anti-clockwise. Clockwise the play diminishes. Anti-clockwise the play increases. The value of the clutch lever (A) must enter within the specific value.
- Page 63 Select on the display of the Axone the engineering parameters icon, then select fuel adjustment minimum, press enter. Connect a CO instrument tester to the exhaust plant. Take the engine temperature to 85°/90°C. The operation of adjusting the CO at minimum is recursive and must take into consideration contemporaneously variations in the Stepper position and the strength of the mixture.
- Page 64 3.7 ADJUSTMENT THROTTLE HOUSING Verify that the cables are assembled correctly and have the right clearance. Connect the minimum air ducts (1) of the throttle body to a vacuum gauge. Start the engine and warm it up to 85-90 degrees. Verify that the mercury columns (2) with the engine running at minimum are aligned, otherwise balance them.
- Page 65 Turn the engine off. Now connect the vacuum meter including also the stepper (2), leaving connected the bodies n° 2 and n° 3 to the vacuum gauge. Connect the connector (3) of the body n° 1 to the stepper. Proceed to reset the throttle by aid of the diagnostics tool. Start the engine and warm it up to 85-90 degrees.
- Page 66 Take off the clamps (2) disconnect the connection (3) pipes between stepper and throttle body. Take off the electric connector, remove the component. Check visually that the Stepper (4) does not present failures or deformation, otherwise replace it. Check visually that there are no obstructions inside the valve body (5) otherwise replace it.
- Page 67 3.9 ADJUSTMENT VALVE PLAY Remove the petrol tank (see "DISMANTLE TANK“). Rimuovere l’air box (vedi “SMONTAGGIO AIR BOX“). Remove the air box duct (see “AIR BOX DUCT DISASSEMBLY”). Remove the coils. (see “COIL DISASSEMBLY”). Remove the sparking-plugs. (see “SPARKING-PLUGS DISASSEMBLY”). Remove the head cover (see "DISMANTLE HEAD COVER").
- Page 68 3.9.1 VALVE TABLET REPLACEMENT Remove the chain stretcher. Remove the camshaft fixing bridges. Raise the cam shaft paying attention to keep all teeth of the distribution chain in place, allowing so the removal of the valve chap.s (1). Raise the valve chap.s (2) one at a time by aid of a magnet. Remove the valve tablet (3) replace it with a new one.
- Page 69 3.10 ENGINE DISTRIBUTION ATTENTION: Specific instruments are needed to set up the distribution: Indicator for goniomete • : R1801977027000 grip • Goniometer : R180197015000: DP-meter • : R180197020000 Valve lift verification equipment • : R180197026000 Remove the tank (see “tank disassembly”). Remove the air box (see “AIR box disassembly”).
- Page 70 At UDP set the comparators to (A) (B) (C) and the goniometer to zero. Rotate the goniometer hold clockwise the comparator (A) (aspiration) to 1 mm and check the goniometer value. SPECIFIC VALUE: Aspiration 21° opening ± 2° before the UDP 21°...
- Page 71 3.11 CHECK ENGINE OIL LEVEL WARNING: Do not mix chemical additives in the oil nor use types of oil different to that in the oils and liquids table. Make sure that foreign bodies do not penetrate into the casing during filling. ATTENTION: New or used engine oil can be dangerous.
- Page 72 WARNING: Danger: Do not start the engine if the oil is below the MIN. reference. Carry out the check cold with the engine off. If carried out while warm, the engine must be off for at least ten minutes. This check is carried out placing the mortorbike on a horizontal surface and in an upright position (vertical position).
- Page 73 ATTENTION: Used oils are harmful to the environment. Dispose of the used oils according to the regulations in vigour. Remove the oil loading cap (1). Remove the magnetic oil discharge chap. (2). Let all the used oil empty away. Loosen the screw (1) and remove the security clamp (2). Unscrew and remove the oilfilter (3).
- Page 74 To re-mount the oil filters (3), oil the surfaces of their contacts. NOTE: It is essential to use original Benelli filter oil Code: R180107101000. Oil filters of other brands can differ as far as the threading (diameter and step) is concerned.
- Page 75 3.13 CHECK COOLING LIQUID LEVEL WARNING: Filling the cooling liquid must always be carried out with the engine cold. Never try to remove the radia- tor cap when the engine is hot to avoid the risk of burns. ATTENTION: In determined conditions the ethylene glycol con- tained in the cooling liquid is inflammable and its flame is invisible.
- Page 76 To access the radiator CHAP., loosen and remove the screw (1) the upper closing lid (2) of the cooler right side. Remove the CHAP. and fill up to the upper limit of the radiators neck using recommended cooling liquid. Verify the reference MIN and MAX on the recovery tank. 3.14 CHANGE REFRIGERANT LIQUID NOTA:...
- Page 77 Remove the liquid discharge screw (2) on the pump (3) and recover the washer. NOTE: Let the cooling liquid empty away completely. NOTE: To facilitate the complete emptying of the cooling liquid contained in the cylinder blocks, lean the bike on both sides and press contemporaneously on the entry and exit rubber tubes of the radiator.
- Page 78 3.15 FILL COOLING PLANT NOTE: Carry out the following operations with the engine cold and the bike on the lateral assembly stand. Remove the radiator chap. lid (1). Remove the radiator chap. right side. Fill the circuit with about 3 litres of cooling liquid, through the supply pipe (2) up to the brim.
- Page 79 COOLING SYSTEM SCHEME HEAD FEEDING DUCT MF13...
- Page 80 3.16 CHECK FUEL TUBES Remove the tank (see "DISMANTLE TANK"). Take off the petrol pipe with the specific tool. SPECIFIC EQUIPMENT Petrol tube rapid release kit: R180100143000 Sight check the state of the fuel tube (1). If the tube is damaged or excessively worn, change it. Unscrew and remove the petrol pipe fixing screw from the injectors flute.
- Page 81 Loosen and remove the screw (3). Take off the holding spring (4), slip off the pipe union (B). Loosen the nut and the lock nut (5). Take off the valve recall cable (6). Slip off the three in one pipe union (c). MF13...
- Page 82 Unscrew and remove the screw’s nuts (7). Remove the manifolds (d). Check parts visually if particularly damaged or obstructed replace them removing the three in one pipe union (c). Verify if the choke valve is not obstructed, if required clean with solvent to remove the carbon deposits.
- Page 83 3.20 CHECK BRAKE LIQUID WARNING: An insufficient quantity of brake liquid may allow the penetration of air into the brake plant, reducing the efficiency of braking with a consequent increase in the risk of accidents. The presence of air in the hydraulic plant can be felt in the case in which, pressing the brake pedal, there is a sensation of excessive pliability.
- Page 84 3.21 CHECK FRONT AND REAR BRAKE PADS Unscrew and remove the fixing screws (1) of pliers. Take off and remove the elastic bulkhead (1). Extract the two elastic pivots (2), slip off the two fixing plugs (3) of brake blocks. Remove the brake blocks verifying that the thickness (A) is not under 3,5 mm.
- Page 85 Clean the inside of the pliers especially around the pistons. Push the pistons of the pliers simultaneously inside to allow the installation of the new brake blocks. Install the elastic bulkhead (1) with the arrow up (in march sense). Position the two blocks, insert the two plugs (2), insert the two elastic stoppers (3).
- Page 86 3.21.1 CHANGE REAR BRAKE PADS Remove the safety ring (4), undo the pin (5) on the opposite side and remove the spring (6). Replace the couple of blocks (7). Re-position spring (6), pin (5) and secure with ring (4). WARNING: After changing the brake pads, work on the brake command with long but not intense braking for about a hundred Km.
- Page 87 3.22 CHECK BRAKING PLANT TUBES Pull the break lever or the break pedal fully and check that no air did come into the system. If the lever or the pedal seem soft or elastic during use, discharge the air from the plant. Inspect the flexible pipes and the connectors of the brake to identify wear signs, cuts or losses.
- Page 88 In the case of the front brake before taking away the lid of the tank turn the handlebar until the tank is parallel to the ground. Unscrew and remove the screws (1), remove the lid. Remove the lid (2) membrane plate (3), the membrane and the float.
- Page 89 3.23.1 AIR DISCHARGE BACK BRAKE SYSTEM WARNING: To carry out the purge of the rear plant, the brake clamps of the relative support have to be dismantled and the plant tubing kept as vertical as possible. To discharge the back brake system proceed in the same way as at the front removing also the pliers from the support.
- Page 90 3.24 ADJUSTMENT GEAR COMMAND PEDAL Remove the fixing screws (3) of the gear pedal rod. Loosen the two nuts (1). Adjust the angle of the gear command pedal by working on the rod (2). Rotating it clockwise, the pedal will bend lower and vice versa if rotated anti-clockwise.
- Page 91 3.25 LUBRICATION AND CHAIN CLEANING LUBRICATE LUBRIFICARE WARNING: The chain is of the type with seal rings (O-Ring); to prevent any damages, do not clean the chain by jet of high-pressure steam or water, neither using petrol or commercial cleaning solvents. The chain cleaning must be done exclusively using kerosene.
- Page 92 Identify the knurled terminals (2) of the pivots of the main link from the outside of the chain, remove the main link, the plate and the O-ring. O-RING GOMMINI O-RING PIASTRA PLATE NOTE: When the links of the transmission chain are counted it is necessary to include the main link.
- Page 93 3.27 CHAIN REGULATION To make the following regulations position the motorcycle on a back trestle, on a horizontal plane with the gear in neutral. Loosen the eccentric blocking screws (1) on both sides of the fork. Insert the specific tool in the eccentric rotate clockwise to pull the chain and counter clockwise to loosen the chain.
- Page 94 WARNING: Use of the motorcycle with the chain in bad condition or never regulated can cause accidents. WARNING: If you note damages or excessive wear of the chain and the relative cog-wheels, replace them. Every time the chain is replaced also the relative cog- wheels must be replaced.
- Page 95 3.29 CHECK AND ADJUSTMENT STEER- ING BALL-BEARINGS Keeping the front brake drawn verify the clearance on the steering bearings. Check that the steering ball-bearings have no play. If necessary procede as follows. Unscrew and remove the handlebar plate fixing screws (1). Lower the handlebar on the tank.
- Page 96 Check the absence of play. If necesary, repeat the previous operations. Mount the handlebar. Mount the upper steering plate (1) (see "MOUNT FRONT FORK") Check the free rotation of the steering. 3.30 CHECK FORK Keeping the front brake drawn verify the state of the fork moving Sight check the state of the splashguards.
- Page 97 3.31 CHECK DAMPER Check the state of the rear damper as shown in the figure. If the rear damper needs maintenance, refer directly to the supplier listed in the "SPECIFICATIONS" chapter. 3.32 ADJUSTMENT DAMPER Two adjustments are possible on the rear damper: : - Preload spring adjustment (1) - Braking in extension adjustment (2) REAR SUSPENSION...
- Page 98 Adjustment of the preload spring is carried out using the two ring-nuts (1) and (2) in the figure. Loosen ring-nut (1) and adjust the preload with ring-nut (2). Clockwise, the preload will be more rigid. Anti-clockwise, the preload will be slacker. Once the preload is adjusted, tighten the ring-nut (1).
- Page 99 3.33 CHECK TIRE PRESSURE WARNING: Incorrect inflation of the tires causes serious danger in using the bike. Insufficient pressure can cause the the tire to slip on the rim or its detachment, with consequent deflation of the tire and loss of control of the vehicle.
- Page 100 3.34 CHECK WHEELS Check the radial and axial on the rear rim as in the figure. The value must enter within the specific value. SPECIFIC VALUE Axial veer = 0.3 mm Work on the front wheel as on the back wheel. SPECIFIC VALUE Axial veer = 0.05 mm Excessive veering and eccentricity are generally caused by wear...
- Page 101 3.35 CHECK AND OIL CLUTCH CABLE Check the free run of the cable in its sheath. If necessary, oil it with the advised oil. If the cable sheath is damaged, change both the cable and sheath together. WARNING: If the external body of the battery is damaged, sulphuric acid, a poisonous and extremely corrosive substance, may leak out.
- Page 102 Check the state of charge of the battery (1) with a tester (2) functioning as a voltmeter. If necessary recharge the battery. SPECIFIC VALUE Battery charge = 12.5V ATTENTION: These values vary according to the temperature, the condition of the battery plates and the level of the electrolyte.
- Page 103 ATTENTION: Pay attention never to remove the sealing fastenings of the MF battery. Recharge Environmental temperature Avoid the use of a nominal high potential battery charge because this forces the high amperage ten- sion too quickly inside the battery, causing the bat- tery to overheat with consequent damage to the plates.
- Page 104 RECHARGING WITH A VARIABLE TENSION BATTERY CHARGER Measuring the NOTE: Recharge wait over 30 minutes tension at empty Ampere meter before measuring the tension at before recharging. empty of the battery Connect the battery NOTE: Set the recharge tension to 16 ~ charger and an ampere 17V.
- Page 105 RECHARGING WITH A CONTINUOUS TENSION BATTERY CHARGER Measure the tension at NOTE: wait over 30 minutes empty before before measuring the tension at recharging. empty of the battery Connect the battery NOTE: Set the recharge tension to 16 ~ charger and an ampere 17V.
- Page 106 3.37 CHANGING FUSES The reload fuse (1) is on the left side of the engine in the posi- tion indicated. The spare fuse (2) is beside it. WARNING: Never use a fuse with a setting different to that speci- fied to avoid damaging the electrical plant of the motorcycle with a consequent danger of fire.
- Page 107 3.38 CHANGING FRONT LIGHTS To replace the front lights remove the right and left inspection chap.s of the parabolas unscrewing and removing the fixing screws (1). 3.38.1 FRONT LIGHT DISASSEMBLY Remove the front shield carrier (see “Front shield disassembly”). Unscrew and remove the screws (2) from the framelet. Take off the wiring connector front light (3).
- Page 108 Remove the lamp inspection lids. Unscrew the light fixing pivots (1). Unscrew and remove the central closing screw (2) from the framelet right and left. Loosen and remove the screws (2) remove the speed indicator, take off the connector (3) remove the light wiring. MF13...
- Page 109 3.39 ADUSTMENT FRONT HEADLIGHT To carry out the correct adjustment of the luminous beam pro- jected by the front headlight, position the vehicle at about 10 metres from a vertical wall on a perfectly flat terrain. Switch the front headlight on, sit on the vehicle in the driving position and check that the upper limit of the beam projected onto the vertical wall in less than about 1/10 with respect to the the horizontal axis of the lights.
- Page 110 3.40 BACK LIGHT DISASSEMBLY 3.40.1 CHANGING REAR HEADLIGHT This motorcycle is equipped with led lights. Loosen the screws (2) of the muffler and lower it to allow to remove the lamp. Cut the wiring blocking clamp (3), take off the connector (4). Loosen and remove the nuts (5), remove the light (6).
- Page 111 3.40.2 CHANGING LICENCE-PLATE LIGHT Loosen and remove the screw (1). Remove the rubber lamp-holder. Change the position lamp. Position the rubber lamp-holder and tighten the screw (1). 3.40.3 CHANGE FRONT AND REAR ARROWS 3.40.3.1 CHANGE FRONT ARROWS Cut the wiring fixing clamps. Loosen and remove screw (1).
- Page 112 3.40.3. BACK ARROW LAMP REPLACEMENT Loosen and remove the screw (1). Remove the arrow glass (2). Remove and replace the lamp (3). Reposition the glass (2) tighten the screw (1). MF13...
- Page 113 MF13...
- Page 114 C C C C C owling COWLING 4.1 TANK COVER DISASSEMBLY WARNING: Do not damage the cowling while removing. NOTE: Take note of the position of the screws for correct remounting. Unscrew and remove the screws (1) on the left cover, take off the cover pulling it towards away from the motorcycle.
- Page 115 4.2.1 COVER PLATE DISASSEMBLY Raise the adhesive. Unscrew and remove the screws (1). Extract the cover fixing plate (2). 4.2.2 PETROL PUMP REMOVAL Remove the petrol pipe (see “petrol pipe disassembly”). Disconnect the rapid unhooking petrol tube (8) from the pump using the specific equipment.
- Page 116 DISMANTLE TANK FUEL PUMP Remove the tank from the vehicle (see "DISMANTLE TANK"). Empty the tank, conserving the fuel in a dry place and far from the rays of the sun and open flames. Loosen and remove the six screws (1) and remove the pump (2).
- Page 117 4.4.1 FRONT SHIELD AND FRONT SHIELD SUPPORT DISASSEMBLY Unscrew and remove the screw (1). Take off the front shield support pulling it away from the motorcycle. Loosen and remove the screws (2) remove the front shield from the front shield support. COOLERS CONVEYORS DISASSEMBLY Position the motorcycle on the side stand.
- Page 118 Unscrew and remove the lower fixing screws (2) of the cooler. Take off the clamp (3) on the right cooler support from the inlet fixing. NOTE: Replace the clamp when reassembling. Take off the right cooler towards the outside from the supports allowing to slip from the ducts.
- Page 119 4.6 MUDGUARDS DISASSEMBLY 4.6.1 FRONT MUDGUARD DISASSEMBLY Take off the oil brake pipe blocking support from the mudguard (2). Unscrew and remove the screws (1). Slip off the mudguard. 4.6.2 BACK MUDGUARD DISASSEMBLY Unscrew and remove the screws (1). Slip off the mudguard (3). 4.7 CHAIN CARTER DISASSEMBLY Unscrew and remove the screws (4).
- Page 120 4.8 NUMBER PLATE HOLDER DISASSEMBLY Cut the wiring blocking clips (1). Take off the connectors of the back lights. Unscrew and remove the screws (2) on both sides of the exhaust. Remove the number plate holder MF13...
- Page 121 MF13...
- Page 122 ENGINE E E E E E engine MOTOR REMOVAL 5.0.1 MOTOR DISASSEMBLY FROM THE FRAME Take off the cooler covers. Remove the coolers. Dismantle Air box. Dismantle the fuel tank. Remove Air box duct. Remove cooler ducts. Disconnect the battery. Disconnect the remote control switch.
- Page 123 Loosen the screw (2) of the security arm band on the frame right side. Loosen the two screw s (3) and (4) fixing the motor upper right and left without removing them. Loosen the two security arm band screw s (5) of the lower motor fixing on the right side.
- Page 124 Loosen and remove the spindle (8) upper motor fixing. Place the motor ahead, and put a suitable support to the motor, remove definitively the two upper motor fixing screws, lower the motor and pull it out of the frame. 5.0.2 MOTOR ASSEMBLY ON THE FRAME Place the motor, lift and fix it with the two upper fixing screws.
- Page 125 Move the motor toward the frame back wall , connect the lower and upper motor fixing spindles without closing. Close the upper spindle (1) to the ledge, loosen again the ¼ revolution spindle, ritighten it to ledge. Close the ledge inside metal ring (2). MF13...
- Page 126 Close the ledge lower spindle (3). Close the two arm band security screws (4). Close the two upper fixing motor screws (5) and (6), close the arm band security screw (7). Install the small frame, close the couple of the upper fixing screws.
- Page 127 CAMSHAFT 5.1.1 REMOVE CAMSHAFT To remove the engine from the frame use the specific equipment. SPECIFIC EQUIPMENT Engine dismantling instrument: R180197034000 To support the engine use the specific equipment. SPECIFIC EQUIPMENT Engine support: R180197029000 Remove the access cover (1) to the phonic wheel. Position the phonic wheel as shown in the figure.
- Page 128 Remove the coils (4) and the sparking-plugs beneath. ATTENTION: Take note of the position of the screws for correct remounting. Unscrew the eight head cover fixing screws (5). NOTE: Replace the screws rubber tops (5) during reassembly. Remove the head cover. Remove the chain pad (6), unscrewing the two fixing screws (7).
- Page 129 5.1.2 CHECK CAMSHAFT Check the olives of the camshaft with a micrometer, as indicated in the figure. If the value does not enter within the specific measure, change the element. SUCTION SHAFT VALUE LIMIT: A= 36.6 mm B= 27.85 mm EXHAUST SHAFT: A= 36.6 mm B= 27.85 mm Check the deformation of the camshaft with a comparator, as...
- Page 130 5.1.3 CHECK CHAIN, SPROCKET WHEELS AND CAMSHAFT CHAIN GUIDE Check the state of wear of the camshaft distribution chain (1). If the element has blocked links, is excessively worn or has exceeded 40000 Km, change it. Sight check the distribution chain guides: 1 Fixed guide (FRONT PART) 2 Mobile guide (REAR PART) 3 Upper guide (FIXED ON HEAD)
- Page 131 5.1.4 CHECK CHAIN STRETCHER Check the free sliding of the chain stretcher rod. Check the state of the chain stretcher spring. Check the integrity of the chain stretcher. If an element or its components are damaged or ruined, change it/them. 5.1.5 MOUNT CAMSHAFT WARNING: To mount the camshafts correctly position the olives...
- Page 132 Position the transmission chain on the toothed wheels of the distribution shafts. Position the bridge and the upper chain pad and tighten the fixing screws in two phases as in the diagram in the figure. 1st phase: 6 N·m; 2nd phase: 13 N·m NOTE: Always oil the sliding parts with Teflon SINTOFLON paste.
- Page 133 Check that the posiiton of the cylinder 1 olives are turned to- wards each other as in the figure. Check that the position of the phonic wheel is as indicated in the figure (“A” and “B” aligned). Check the valve play with a feeler. If the valve play is not within the specific value, adjust the valve play (see "ADJUST VALVE PLAY").
- Page 134 ATTENTION: Always use new gaskets. Position the gaskets of the head cover (1 and 2 ). ATTENTION: Make sure during mounting that the gaskets (2) do not fall into the head. *Apply THREEBOND® paste as in the drawing. Position the cover of the head and insert the screws (3) and (4) where indicated in the figure.
- Page 135 Remove the two fixing joining elements (A) and (B) of the head and the lower crankcase and disconnect the oil tube (20). NOTE: Tighten the head cover fixing screws to the specific worm drive according to the order indjcated in the figure, paying attention not to cut or damage the gaskets.
- Page 136 5.2.2 CHECK CYLINDER HEAD WARNING: Do not use a pointed instrument to avoid damaging or scatching: Sparking-plug hole threading Valve seat Check and eventually eliminate carbon deposits in the combus- tion chamber with a rounded-off scraper. If the surface is damaged or scratched, change the element. Check the distortion of the cylinder head as indicated in the figure.
- Page 137 5.2.3 MOUNT CYLINDER HEAD NOTE: Always use new gaskets. Clean and degrease the head surface and the cylinders. Position the head/cylinder gasket. Position the cylinder head. Position the fixing washers and nuts. Tighten to the specified worm drive following the order in the figure in the following phases: 1st phase: 2.5 Kg-m;...
- Page 138 To remove the valves use a valve dismantling instrument (2) with the correct attachment (3), press the valve down and take off the two semi-cones. Loosen the clamp and remove the valve and its components as in the photo. The following procedure is applied to the valves (4), the springs (5 and 6) and relative components (7, 8 and 9).
- Page 139 5.3.2 CHECK VALVES AND VALVE GUIDES The following procedure must be carried out on all valves and relative valve guides. Check that values (A) and (B) are within the tollerance of the specific values. If values (A) and (B) are not within the value limits, change the elements.
- Page 140 Check the deformation of the legs of the valve. If the concentricity value does not enter within the margin, change the element. VALVE REFORMATION VALUE LIMIT 0.01 mm MF13...
- Page 141 5.3.3 CHECK VALVE SEATS The following procedure must be applied to all the valve seats. Eliminate eventual carbon deposits. Apply the tincture of bluing (b) on the face of the valve. Install the valve into the appropriate seat. Press it using the guide on the seat to leave an evident impression.
- Page 142 Apply disulfide of molybdenum to the stem of the valve. Insert the valve into the cylinder head. Rotate the valve until its face and seat shine uniformly, then remove the smoothing paste. NOTE: To obtain optimum smoothing results, strike the seat of the valve lightly while turning it forwards and backwards in your hands.
- Page 143 Bring the spring to a value length (c) and check the value of the load: VALUE LIMIT External spring length: 23.2 mm Load value limit: 565 N Internal spring length: 21.2 mm Load value limit: 314 N Check the inclination (a) of the valve spring as illustrated in the figure.
- Page 144 5.3.6 MOUNT VALVES The follwing procedure must be applied to all the valves and relative components. Oil the valve stem with the recommended oil. RECOMMENED OIL Disulfide of molybdenum oil Mount the lower small cup (1). Check that the thickness of the small cap is 1.5 mm. WARNING: Always use new gaskets and oil seals.
- Page 145 ATTENTION: The suction valves are larger than the exhaust valves. Insert the valves (4). Position the internal (5) and external (6) springs as shown in the figure. Insert the two lock cones (7) into the upper small cup (8). MF13...
- Page 146 Position the small cap as shown in the figure. Use the dismantling valve instrument making sure that the valve is correct. Position the calibrated pads (9) and the bucket-type tappets (10). ATTENTION Make sure that the individual valve lifters and the valve guide are re-mounted in the original position.
- Page 147 5.4.2 CHECK CYLINDER Check that the walls do not present signs of seizure with the pistons. Check the ovalisation of the cylinders as indicated in the figure. ATTENTION: In the case of changing the cylinder block also change the pistons and the elastic straps, if necessary. The cylinder is distinguished by a letter that indicates CLASS D1/D2...
- Page 148 5.4.4 CHECK WATER COLLECTOR Check eventual breaks on the collector and if necessary change the piece. 5.4.5 MOUNT WATER COLLECTOR ATTENTION: Always use new gaskets. Position the gasket (1)and the collector (2) and tighten the screws (3). 10 N·m 1 Kg-m 5.4.6 MOUNT CYLINDERS WARNING:...
- Page 149 PISTON 5.5.1 DISMANTLE PISTON Remove the cylinder (see "DISMANTLE CYLINDER BODY"). The following procedure must be applied to all 3 pistons. Remove the elastic ring (1). ATTENTION: Do not use hammers for the spindle removal (2). Remove pin (2) and remove piston (3). MF13...
- Page 150 5.5.2 CHECK PISTON The following procedure must also be applied to all the other pistons. 10,5 Check eventual breaks on the piston. Use a micrometer, as shown in the figure, to check that the value (P) enters within the specific value. CLASS ø...
- Page 151 5.5.4 SEGMENT-CABLE PLAY Measure the lateral play of the 1 and 2 segment using a feeler. If one of the two plays exceeds the limit specified, change both the piston and the segments. SEGMENT-CABLE PLAY SERVICE LIMIT:(1 ): 0.20 mm ): 0.18 mm SEGMENT CABLE WIDTH STANDARD: (1...
- Page 152 Check the value of (b). NOMINAL VALUE b = 19,002 ÷ 19,008 mm NOTE: If the play between the piston pin and the pin is more than 0.03 mm, change the piston. 5.5.6 MOUNTING SEGMENTS Install the segments in the order: scraper ring segment, 2nd segment, 1st segment.
- Page 153 Install the 2 segment (3) and the 1 segment (4). NOTE: The form and width of the 1st and 2nd segment are different. W4 = 3.1 ± 0.1 mm W3 = 3.7 ± 0.1 mm The 1 and 2 segment have the letter “N” on the upper side. Make sure that the marked side is turned upwards when being installed on the piston.
- Page 154 Position the piston (3), as shown in the figure, with the arrow on the piston pointing towards the exhaust. Insert the pin (4). ATTENTION: Always use new elastic rings for mounting the pistons. To avoid breaks that can take place with the rings bent. Position the two elastic rings (5), one for each side pay atten- tion not to deform them.
- Page 155 Remove the generator (2). Check the state of the flexible couplings of the tires. If they are worn or damaged, change them. 5.6.2 MOUNT GENERATOR To mount the generator, grease the O-ring and work in the re- verse way to dismantling, tightening screws (1) to the specific worm drive after having applied LOCTITE ®...
- Page 156 5.7.2 MOUNT PHASE SENSOR Position the sensor in its housing and fix with screw (2), and tighten. 10 N·m 1 Kg-m + LOCTITE 243 ® 5.7.3 REMOVE PHONIC WHEEL Remove the clutch cover (see "REMOVE CLUTCH COVER"). Unscrew and remove the screw and the washer (3) and remove the phonic wheel (4).
- Page 157 CLUTCH 5.8.1 DISMANTLE CLUTCH COMMAND Remove the clutch command cable and unscrew the three screws (1). Remove the clutch body command (2) and the cable support plate (3). Remove the ferrule (4) and the clutch command rod (5). 5.8.2 REMOVE CLUTCH COVER Place a container under the oil sump to allow the oil to empty.
- Page 158 5.8.3 REMOVE THE CLUTCH Remove the clutch cover, loosening the two centring screws (1) first, then the rest of the screws (2). Remove the six clutch disk pushing plate fixing screws (1). Extract the clutch plate (2). Extract the external teeth and internal teeth disk unit conductor MF13...
- Page 159 Remove the Belleville spring (4). Unscrew and remove the clutch fixing nut (5). Extract the sphere from inside the gear shaft with a magnetic tool (6). Remove the clearance adjustor (7) with the 4 mm thick projecting stop. Undo the drum (8). Undo the bell (9).
- Page 160 5.8.4 CHECKING THE EXTERNAL TEETH DISK CONDUCTOR The following operations must be carried out on all the external equipped disks. Check the external equipped disk liner. If it does not enter within the specific value, change the entire set of disks. VALUE LIMIT DISK LINER = 2.8 mm 5.8.5...
- Page 161 Bring the spring to a value length (c) and check the value of the load. The value C is the same for all springs. CLUTCH SPRING LENGTH c = 22 mm YELLOW SPRING LOAD VALUE LIMIT =170 N Check the incline (d) of the clutch spring as illustrated in the figure.
- Page 162 5.8.8 CHECKING PRIMARY CLUTCH BELL UNIT Verify that the primary assembly gear does not present an excessive wear, roughness or breaking. If necessary change the clutch bell unit and primary. 5.8.9 MOUNTING CLUTCH UNIT NOTE: There are two clearance elements for assembling the clutch unit.
- Page 163 Oil the ball-bearing slide area well. Insert the clutch bell unit (2) complete with roller bearings. Engage in sequence: Primary gear (4) Gear control alternator (5). MF13...
- Page 164 Oil pump gear (1) Insert the second (2) clearance element with the projection thickness (4.0 mm) towards the outside of the engine. Insert the clutch drum (3). Insert the slide plate (4) and relative 6 return springs (5) into the appropriate columns.
- Page 165 Insert the convex washer towards the outside of the engine. VERSO SIDE INSERIMENTO TO INSERT Insert the clutch bell unit fixing nut (1). Block the clutch bell unit with the specific instrument. Screw and tighten the nut with loctite. Worm drive: 80 N.M 8 Kgm Loctite: 648 ®...
- Page 166 Insert the Belleville spring with the convex side towards the inside of the engine (1). NOTE: The first steel internal teeth conduit disk is to be inserted with the friction band turned towards the inside of the engine. Insert in sequence alternating the conductor disks with external teeth (A) and conducted disks with internal teeth (B).
- Page 167 Reinsert the sphere (1). Insert the disk pushing plate (2), insert the springs and the screws alternated between them tighten to indicated torque. Worm drive 10N.M 1 Kg-m NOTE: Oil the screw threads. MF13...
- Page 168 5.8.10 ADJUSTING CLUTCH DISKS Block the flange (1), loosen the locknut (2) and screw up the adjuster (3) until it makes contact with the internal reaction rod, unscrew a ¼ turn. Check the play on the clutch control positioned on the opposite side of the engine.
- Page 169 5.8.11 MOUNT CLUTCH COVER NOTE: Before mounting the clutch cover, clean the contact surface with the engine (1) accurately without damaging it, change the clutch casing cover gasket. ATTENTION: Aways use new gaskets. Position the gasket and the clutch cover (1) and tighten with the centering screws (2) and then with screws (2).
- Page 170 5.8.12 MOUNT CLUTCH COMMAND Insert the clutch command rod (1). Insert the ferrule (2). Position the cable support rod (3) and the clutch command body (4). Fix the clutch command with the three screws (5) and tighten. Insert the clutch command cable. 10 N·m 1 Kg-m + LOCTITE 243 ®...
- Page 171 GEARS 5.9.1 REMOVE GEARS Remove the clutch unit. (see “REMOVING CLUTCH UNIT”). ATTENTION: Before removing the gears, remove the neutral sen- sor at the back of the engine. Loosen and remove the nine fixing screws (1) and remove the gears (2). 5.9.2 DISMANTLE GEARS Position the gears on a support.
- Page 172 WARNING: While removing pin (6), resist the reaction of the spring placed under the pawls (7). WARNING: Take note of the position of the forks before remov- ing them for correct re-mounting. Remove the sprocket wheel (6). Loosen and remove the two screws (8). Remove the stop plate (9).
- Page 173 ATTENTION: During the dismantling of the drum fixing pin, sup- port the positive valve gear (17) (see previous figure) to avoid it falling. Rotate the gear flange (external side above). Unscrew and remove the drum fixing pin (18), Remove the posiive valve gear (17) (see previous figure) and the gear selector drum (19).
- Page 174 5.9.3 CHECK GEAR FLANGE BALL-BEARINGS Check the free rotation of the ball-bearings (1) and (2). If necessary, change them. NOTE: It is necessary to remove plate (3), working on screws (4), to change the ball-bearings (1) and (2). 5.9.4 CHECK FORK GEAR AND SLIDE RODS The following procedure must be carried out on all the fork gears.
- Page 175 FORK GEAR SLOT WIDTH Measure the width of the fork gear slot using a cursor gauge. Fork slot length: Standard value: 5.0 – 5.1 mm FORK GEAR THICKNESS Measure the THICKNESS of the fork gear slot using a cursor gauge. Fork gear thickness: Standard: 4.8 –...
- Page 176 ATTENTION: Do not attempt to straighten the rod. Check the presence of curvature on a surface plate on the sliding rod. If necessary, change the element. 5.9.5 CHECK POSITIVE GEAR SHAFT VALVE Sight check the state of the guide on the positive shaft. If necessary, change it.
- Page 177 5.9.7 ASSEMBLE GEAR ATTENTION: Always use new gaskets and oil seals. Position the gear flange on a support (external side uppermost). Position the gear fixing spring (i) in the appropriate hole. Position the washer (2) and the gear fixing spring (3) and fix with the threaded pin (4).
- Page 178 Position the positive valve gear shaft as in the figure, supporting it with a suitable support. NOTE: Check, while mounting the gear selector drum, that the two elements shown coincide. Fix the drum (7) with the threaded pin (8) and tighten. NOTE: Once pin (8) is tightened it is possible to remove the support previously positioned under the positive val-...
- Page 179 Mount springs (10) and push rods (11) onto the flange (9). Position the pawls (12). Position the stop plate (13). Position the pre-mounted pin complete with sprocket wheel and pawl (15). MF13...
- Page 180 Fix the plate with the two screws (14) and tighten. Position the pre-mounted pin (15). 10 N·m 1 Kg-m + LOCTITE 243 ® Rotate the flange on the support (internal side above). Couple the primary and secondary shafts Position them as shown in the figure. Rotate the flange (external side above).
- Page 181 Position the O-Ring (16) on the secondary shaft. Position the spacer (17) with its minor dimension outwards. Position the pinion (18), the safety washer (19) and the nut (20). Tighten the nut. Bend the washer tongue. 140 N·m 14 Kg-m + LOCTITE 648 ®...
- Page 182 ATTENTION: Do not force the spring (21) too much while mount- ing the command shaft (22). Mount the spring (21) on the command shaft selector (22), as indicated in the figure. Insert the 3 mm thick spacer (22A) next to the spring. Insert the 1 mm thick clearance element (22B) on the selector shaft.
- Page 183 Position the command shaft selector (29), already pre-mounted, as shown in the figure. Insert on the shaft the smoother ( 29A ) of 0,8 mm thickness. Insert the oil seal (31) onto the gear command cover (30) with the appropriate instrument. Grease the internal lip, see chapter 2: specifications.
- Page 184 Insert the fixing screws (34) and tighten. 10 N·m 1 Kg-m 5.9.8 MOUNT GEARS ATTENTION: While mounting the gears make sure that they are in fourth gear to avoid breaking the neutral sensor. Otherwise, remove the neutral sensor before re- mounting the gears.
- Page 185 5.10 OIL SUMP AND OIL PUMP 5.10.1 DISMANTLE OIL SUMP Unscrew and remove the oil discharge cap (1) and the gasket beneath. Unscrew and remove the twelve screws (2) and remove the oil sump (3). 5.10.2 DISMANTLE OVERPRESSURE OIL VALVE Remove the oil sump (see "DISMANTLE OIL SUMP").
- Page 186 5.10.3 REMOVE OIL PUMP Remove the clutch unit. Remove the safety ring (1) and the toothed wheel (2) Unscrew and remove the three screws (3) and extract the oil pump (4). 5.10.4 DISMANTLE OIL PUMP Remove the oil pump shaft (1) complete with internal rotor (2). Remove the external rotor.
- Page 187 If necessary, remove the safety ring (4) and the internal rotor (5). Take off the pin (6). 5.10.5 CHECK OIL SUMP Check for breaks on the oil sump (1), eventually changing it. Check the presence of foreign bodies, eventually cleaning the drip filter.
- Page 188 The internal and external rotors should not be serrated. Check that the measurements (a) and (b) enter within the specific value, otherwise change the oil pump. 1: Internal rotor 2: External rotor 3: Pump body VALUE LIMIT a = 0.25 mm max. b = 0.2 mm max.
- Page 189 Insert the external rotor (6) as in the figure. Oil the two rotors abundantly. 5.10.8 MOUNT OIL PUMP Insert the oil pump from the right with the specific instrument until it touches, as in the figure. Insert the centering dowel. Fix with the three screws (7) and tighten.
- Page 190 5.10.9 MOUNT OVERPRESSURE VALVE Position the overpressure valve (1) and valve (2). Tighten. 25 N·m 2.5 Kg-m + LOCTITE 243 ® 5.10.10 MOUNT OIL SUMP ATTENTION: Always use new gaskets or O-rings. Position the two centering dowels on the base. Position the O-Ring (1) on the casing.
- Page 191 5.11 CASING 5.11.1 DISMANTLE CASING Remove the head. Remove the pistons (see “DISMANTLE PISTONS"). Remove the oil sump (see "DISMANTLE OIL SUMP"). Remove the oil pump (see "DISMANTLE OIL PUMP"). Remove the water pump (see "DISMANTLE WATER PUMP"). Remove the gears (see "ADJUSTMENT PHASE"). Remove the oil distributor ( see “OIL DISTRIBUTOR”...
- Page 192 Remove the five screws (6). Remove screw (7). Remove the two screws (8). MF13...
- Page 193 Remove screw (9). Remove the two screws (10). Loosen and remove screw (11). MF13...
- Page 194 ATTENTION: Take note of the position of the screws for correct re- mounting. Remove the nine screws (12) indicated in the figure (lower part of the engine). Remove the lower base (13). Remove the large plastic lock nut (14). MF13...
- Page 195 Remove the ring (15). Remove the balancing counter-shaft (16). Remove the engine shaft (17). ATTENTION: Take note of the position of the bronze bearings for correct re-mounting. Remove the four semi-bronze bearings (18). MF13...
- Page 196 Remove the drainage tube stop plate (19.) Remove the drainage tube (20). Remove the ball-bearings (21) and (22). Remove screw (23) and plate (24), freeing the pin (25). MF13...
- Page 197 Support the satellite gear (27) and take off the pin (26) as shown in the figure. Unscrew and remove the screw (28), the washer (29), the retaining plate and the female flexible coupling (30). Support the toothed wheel (31) and remove pin (32). Remove the toothed wheel (31).
- Page 198 Remove the spacer (33). Remove the free wheel (34). 5.11.2 DISMANTLE FREE WHEEL Remove the elastic safety ring. Remove the washer (1). MF13...
- Page 199 Remove the toothed wheel (2). Remove the roller cage (3). Remove the screws (4). MF13...
- Page 200 Dismantle the free wheel. 5.11.3 DISMANTLE BALANCING COUNTER SHAFT Remove the circlip (1). Remove the ball-bearing (2) and the toothed wheel (3). Remove the ball-bearing (4). MF13...
- Page 201 5.11.4 DISMANTLE ENGINE SHAFT ATTENTION: Take note of the position of the elements for correct re-mounting. The following procedure must be applied to all the connecting rods mounted on the engine shaft. Unscrew and remove screws (1). Remove the connecting rod (2) from the engine shaft (3). 5.11.5 CHECK CASING Check the presence of any breaks on the upper and lower cas- ing, eventually changing the casings, always coupled.
- Page 202 Check that the toothed wheels are not broken or excessively worn. Change them if necessary. 5.11.6 CHECK ENGINE SHAFT AND CONNECTING ROD Check eventual breaks or excessive wear on the whole engine shaft (1). Change the piece if necessary. Support the engine shaft with two “V” blocks and with the two ends resting upon the blocks, install a comparator and turn the engine shaft slowly.
- Page 203 Check eventual breaks or excessive play on the connecting rod (2) and on the two semi-bronze bearings. In case of replacement of the connecting rod, verify the belonging class marked on the shank (1). SELECTION SHEET TYPE COLOUR Ø CONNECTING ROD HEAD 40.395/40.401 Blue 40.401/40.407...
- Page 204 CONNECTING ROD HEAD WIDTH STANDARD: 2,18 - 2,19 mm CONNECTING ROD PIN WIDTH STANDARD: 22,0 - 22,05 mm 5.11.9 CHECK BALANCING COUNTER SHAFT Check the eventual presence of breaks on the balancing coun- ter shaft. Check the free rotation of the ball-bearings. Check eventual breaks or excessive wear on the toothed wheel.
- Page 205 5.11.10 CHECK FREE WHEEL Check eventual breaks, wear and slippage on the free wheel. Change the element if necessary. 5.11.11 ASSEMBLE FREE WHEEL Assemble the two elements as shown in the figure. Tighten screws (1). 17 N·m 1.7 Kg-m + LOCTITE 270 ®...
- Page 206 Position the roller-cage (2), oiling it. (See Chapter. 2: SPECIFI- CATIONS) Positon the toothed wheel (3). Position the washer (4) and fix with the circlip. MF13...
- Page 207 5.11.12 MOUNT ENGINE SHAFT CONNECTING ROD SEMI-BALL-BEARING WARNING: COLOUR SELECTION Various semi-bronze bearings liners exist distin- 1.680 - 1.684 guished by different colours (see table). Blue 1.684 - 1.688 Yellow 1.688 - 1.692 NOTE: Ø seat std A red 40.395 - 40.401 Position every bronze bearing of the right colour connected to its letter indicated on the connecting Ø...
- Page 208 Position the engine shaft on the upper semi-casing. Tighten the connecting rod screws in three phases. = 15 N·m 1,5 Kg-m = 25 N·m 2,5 Kg-m = + 50° NOTE: An angle torque control wrench is needed to carry out the third tightening phase. 5.11.13 MOUNTAGGIO BALANCING COUNTER SHAFT Position the ball-bearing (1) and fix with the circlip (2).
- Page 209 5.11.14 MOUNT CASING Position the roller cage (1), block it with washer (2) and fix with screw (3) tightly. 10 N·m 1 Kg-m + LOCTITE 243 ® Position the ball-bearing (4) with the apposite pad and fix with the circlip (5). Position the spacer (6) as indicated in the figure.
- Page 210 Position the free wheel (7) as shown in the figure. Position the toothed wheel (8) and insert pin (9) until touching, in the direction in the figure.. Position the flexible coupling, the washer retaining plate and tightened screw in the housing. Bend the retaining plate to avoid it protruding from the head of the screw.
- Page 211 Position the toothed wheel (13) as shown in the figure. Position pin (14) until touching, as indicated in the figure. Position plate (15) and fix with screw (16) tightly. 10 N·m 1 Kg-m + LOCTITE 243 ® MF13...
- Page 212 ATTENTION: Position the element highlighted in the figure. Position ball-bearings (17) and (18). ATTENTION: Position element (19) as shown in the figure. Insert the shower pipe (19) completely verifying the phase on the bearing sealing plate (A). Position the tube retaining plate and ball-bearing (20) and fix with screws (21) tightly.
- Page 213 Position and tighten the copper washer and the cap (22). 25 N·m 2,5 Kg-m ATTENTION: A type of semi-bronze bearing exists: Various liners of this semi-bronze bearing exist distinguished by different colours (see table). BENCH SEMI-BALL-BEARING COLOUR SELECTION 1.918 - 1.922 Blue 1.922 - 1.926 Yellow...
- Page 214 WARNING: Reading the letters must always be carried out starting from the side of the distribution chain. Position the four semi-bronze bearings (25) each slotted with the correct colour associated with its letter stamped on the outside of the casing (24), centering them with the tooth in the cable.
- Page 215 Make sure that the toothed wheels of the balancing counter shaft and the engine shaft are as shown in the figure. Position ring (28). Position the large cap (29), one per side, in the apposite seats. Put THREEBOND 1215 on the contact surfaces of the two casings.
- Page 216 Position the lower casing (30) on the upper. ATTENTION: Follow the mounting phases correctly. Position the eight screws (31) with washers and copper fat and tighten to torque in three phases according to the order printed on the carter. 13 N·m 1.3 Kg-m 25 N·m 2.5 Kg-m 45 N·m 4.5 Kg-m Tighten screws (32) in two phases.
- Page 217 Tighten screws (33) according to the order in the figure. 10 N·m 1 Kg-m Tighten screw (34). 10 N·m 1 Kg-m Tighten the two screws (35). With M8 screws, the worm drive is: 1° 13 N·m 1.3 Kg-m 2° 30 N·m 3 Kg-m MF13...
- Page 218 Tighten screw (36). With M8 screws, the worm drive is: 1° 13 N·m 1.3 Kg-m 2° 30 N·m 3 Kg-m Tighten the two screws (37) in two phases. With M8 screws, the worm drive is: 1° 10 N·m 1 Kg-m 2°...
- Page 219 Tighten the four screws (39). 1° 10 N·m 1 Kg-m Position balancing counter shaft ball-bearing stop plate (40) and fix with the two screws (41) tightly. 10 N·m 1 Kg-m ATTENTION: Always use new gaskets. Position the gasket and the counter shaft cover (42). Tighten the screws (43).
- Page 220 COOLING PLANT C C C C C P P P P P ooling lant REFRIGERANT LIQUID ENGINE Antifreeze density Freezing point The cooling circuit is filled in the factory with a 50:50 mixture of -30°C distilled water and ethylene glycol antifreeze. This 50:50 mixture provides optimum protection against both -40°C corrosion and temperature and shelters the cooling system...
- Page 221 RADIATOR 6.1.1 DISMANTLE RADIATOR Remove cooler fairings (see “COOLER FAIRING DISASSEMBLY”) Take off the elastic clamp (1) on the right side cooler pipe union. Take off the lower elastic clamp (2) on the cooler. MF13...
- Page 222 Remove the upper and lower fixing screws (1). Take off the cooler, disconnect the fan connector. Unscrew the screws (2). Remove the fan from the cooler (3). 6.1.1.1 LEFT COOLER DISASSEMBLY Remove the cooler fairings (see “fairing disassembly”). Take off the upper elastic clamp (1). MF13...
- Page 223 Take off the lower elastic clamp (2)on the cooler. Remove the upper and lower fixing screws (3). Take off the cooler. Disconnect the fan connector. MF13...
- Page 224 6.1.2 COOLER CHECK AND CLEANING Bent or indented tabs can be straightened with a small screwdriver. Dirt and foreign bodies must be removed. We recommend using compressed air for cleaning. Repair or change the radiator if necessary. If any water-carrying tube is cracked or flattened, it must be removed.
- Page 225 6.1.4 OIL RADIATOR DISASSEMBLY Put the container under the oil filter to impound the oil to blow off. Remove the two pipes fittings (A) and (B) on the oil distributor. Blow off the oil in the container. Loosen and remove the two pipe unions (A) and (B) on the oil cooler.
- Page 226 Loosen and remove the cooler fixing screws (1). Take off the cooler from the support removing it. 6.1.5 OIL COOLER CHECK AND CLEANING Verify the radiator wings conditions. Bent or nicked wings can be rectified with a small screwdriver. For the cleaning the foreign materials must be removed. For the cleaning we suggest you to use compressed air.
- Page 227 Close in couple the two connectors (5/6) on the radiator. 30 Nm 3 Kg-m Put the two oil delivery and recovery tubes (A) and (B) on the distributor. Close in couple the two connectors (5/6) on the distributor. 30 Nm 3 Kg-m WARNING: Fit the oil with about 400cc, make the starting motor rotate without switching on the motor, favouring in...
- Page 228 6.2 OIL DISTRIBUTOR Remove the exhaust system. Remove the engine oil filter (1) ( see “ OIL FILTER REMOVAL“). Disconnect the inlet and outlet pipes of the oil distributor. NOTE: Take care not to lose the clearance. Loosen and remove the screw (2) and remove the distributor. Loosen and remove the two underlying screws.
- Page 229 6.2.1 OIL DISTRIBUTOR ASSEMBLY Oil the O-Ring (1) on the distributor. Place the oil distributor with the phase plaque without closing the two screws (A). Close in couple, in two phases the connector screw (2). 1° phase: 30 N·m 3 Kg-m 2°...
- Page 230 THERMOSTAT 6.3.1 DISMANTLE THERMOSTAT WARNING: Always use new gaskets and oil seals. Remove the refrigerant liquid from the cooling circuit (see "CHANGE REFRIGENRANT LIQUID"). Remove the tube (1) loosening the clamp (2). Loosen and remove the two screws (3) and remove the thermo- stat cover (4).
- Page 231 6.3.2 CHECK THERMOSTAT The thermostat begins and opens at around 75°C and reaches 7 mm minimum opening at 90°C, as shown in the diagram in the figure. TEMPERATURE Check whether the thermostat pad is cracked. SPAGO CORD Pass a cord through the flange as indicated in the figure. Check the above-mentioned conditions by immerging the thermostat (1) in a container with water, maintaining it in suspension.
- Page 232 6.3.3 MOUNT THERMOSTAT WARNING: The thermostat must be mounted with the by-pass hole (2) turned upwards, as in the figure. Position ithe thermostat (1) as indicated in the figure. Position the thermostat cover (3) and tighten with the two screws (4) il coperchio termostato (3) e fissare con le due viti (4).
- Page 233 WATER PUMP 6.4.1 REMOVE WATER PUMP Remove the refrigerant liquid from the cooling circuIt ("CHANGE RERIGERANT LIQUID"). Remove the inlet and outlet pipes(1) from the pump (2) . 6.4.2 DISMANTLE WATER PUMP Loosen and remove the two screws (4) and the small plates (5). Remove the entry elbow (6).
- Page 234 Loosen and remove the two screws (8). Remove the cover (9). Loosen and remove the nut (10) and remove the rotor (11). MF13...
- Page 235 Remove the external circlip (12), the internal circlip (13) and the ball-bearing beneath. Remove the liner (14), the shaft (15), the ball-bearing (16) and the oil seal beneath. Remove the mechanical seal (17). MF13...
- Page 236 6.4.3 CHECK WATER PUMP Check the state of wear of the various components of the pump. Check that the various elements are not broken. Change worn or damaged elements if necessary. 6.4.4 WATER PUMP ASSEMBLY Position the pump body (1) on a support. ATTENTION: The oil seal must be inserted downwards with the lip closed.
- Page 237 Grease the shaft (4) at the points indicated in the figure. Position the shaft (4) inside the pump body (1). Position the first ball-bearing (5), using a press to make it touch. MF13...
- Page 238 Position the liner (6). Position the second ball-bearing (7), using a press to make it touch. Fix the ball-bearings with the external (8) and internal (9)circlips. MF13...
- Page 239 ATTENTION: While mounting the counterface and the mechanical seal make sure that they are clean and bear no traces of grease. Position the counterface as in the figure (10). Position the mechanical seal (11) until it touches as shown in the figure.
- Page 240 Position the sealing washer (13) and fix it tight with the nut (14). 8 N·m 0.8 Kg-m Always use LOCTITE 243 ® Position the cover and lock it tight with the two screws (15). 10 N·m 1 Kg-m Position the sealing washer (16) and tightly screw the purge screw (17) up.
- Page 241 Position the O-Ring (18) on the pump body. Position the entry elbow (19) and fix with the two small plates (20) and the two screws (21) tightly. 10 N·m 1 Kg-m 6.4.5 MOUNT WATER PUMP Position the pump (1) as in the figure and screw the two screws (2) up tightly.
- Page 242 Reposition the entry and exit tubes (3) of the pump, tightening the two bands (4). Restore the level of the liquid in the circuit (see "CHANGE COOLING LIQUID"). MF13...
- Page 243 MF13...
- Page 244 7 7 7 7 7 FRAME FRAME FRAME FRAME FRAME F F F F F rame FRONT WHEEL AND BRAKE DISKS 7.1.1 REMOVE FRONT WHEEL Prepare a support suitable to sustain the bike without the front wheel. Loosen the two fork clamp locking screws (1) on the right stem. Loosen and remove the two brake clamp fixing screws (2) on both sides.
- Page 245 7.1.2 CHECK FRONT BRAKE DISKS WARNING: The following procedures must also be applied to the opposite disk. WARNING: The following procedures must be applied with the disk mounted on the wheel. Check the lateral displacement of the brake disk with a comparator. The lateral displacement must enter within the specific value.
- Page 246 7.1.4 CHECK FRONT WHEEL ATTENTION: Change the brake disk fixing screws. The ball-bear- ings must be changed if removed. Carry out the radial and axial check on the front rim (see "CHECK WHEEL"), using a comparator. If the value of displacement does not enter within the specific value, change the piece.
- Page 247 Tighten the disk fixing screws in the order indicated in the fig- ure. Do the same for the opposite disk. 22 N·m 2.2 Kg-m Grease thread 7.1.6 INSTALL FRONT WHEEL WARNING: After each operation on the bike it is advisable to balance it.
- Page 248 Tighten the two fork clamp locking screws (3) on the right stem. Mount the brake clamp. Tighten. 30 N·m 3 Kg-m Grease the thread Clamp screws 50 N·m 5 Kg-m Grease the thread Brake clamp screws. REAR WHEEL, BRAKE DISK AND CROWN 7.2.1 REMOVE REAR WHEEL Loosen the fork screws (4).
- Page 249 Slip off the pivot (7). Remove the wheel. 7.2.2 CHECK REAR BRAKE DISK ATTENTION: The following procedure must be carried out with the disk mounted on the wheel. Check the lateral displacement of the brake disk with a compa- rator. The lateral displacement must enter within the specific value.
- Page 250 7.2.3 DISMANTLE REAR WHEEL Loosen and remove the six disk fixing screws (1). Remove the brake disk (2). Change the brake disk fixing screws. Remove the right spacer (3), extracting it from the wheel. Remove the flange (4) complete with crown (5), extracting it from the wheel.
- Page 251 ATTENTION: During the following operation prevent the internal spacer falling if dismantling the ball-bearings is en- 7 7 7 7 7 visaged. 7 7 7 7 7 Remove the five flexible couplings (7). Remove the circlip (9). 7 7 7 7 7 Extract the ball-bearings (8) on both sides.
- Page 252 7.2.4 CHECK REAR WHEEL ATTENTION: Change the fixing screws on the brake disk. If the ball-bearings are dismantled, they must be changed. Carry out the radial and axial check on the rear rim (see CHECK WHEEL"), using a comparator. If the value of displacement does not enter within the specific value, change the piece.
- Page 253 Check that the flexible couplings (2) are not broken. If necessary, change them. 7.2.6 CHECK CROWN Sight check that the crown (1) is not broken and that the teeth are not excessively worn. Change the crown, the pinion and the chain if necessary. 7.2.7 MOUNT REAR WHEEL ATTENTION: Before mounting the ball-bearings, identify the right...
- Page 254 Push the left side ball-bearing in first until it touches and fix it with the circlip (2). Insert the internal spacer from the right side and push the right 3 3 3 3 3 side ball-bearing in until it touches. 3 3 3 3 3 Position the five flexible couplings in the correct seats (3).
- Page 255 Position the disk (11) and tighten the six screws (10) according to the order in the figure. 22 N·m 2.2 Kg-m Grease thread 7.2.8 INSTALL REAR WHEEL ATTENTION: It is advisable to balance the wheel after every opera- tion on the wheel. Position the wheel (1).
- Page 256 FRONT AND REAR BRAKES 7.3.1 REMOVE FRONT BRAKE PUMP The oil in the braking plant needs to be emptied before proceed- ing to remove the pump. Position the end of a tube of suitable diameter at the purge screw (1) of a front brake clamp and the other end in a suitable recipient.
- Page 257 7.3.2 REMOVE REAR BRAKE PUMP Remove the rear brake pump from the clamp support and posi- tion it under the brake pump. Position the end of a tube of suitable diameter at the purge screw (1) and the other end in a suitable recipient. Open the purge screw (1) and empty the braking liquid.
- Page 258 7.3.3 CHECK FRONT AND REAR BRAKE PUMP Check that the front and rear brake pumps are not damaged. If necessary, change the damaged pump. Check that the front and rear brake pumps are not obstructed. If necessary, eliminate the obstruction with a jet of compressed air.
- Page 259 7.3.4 INSTALL FRONT BRAKE PUMP WARNING: First tighten the arrow side screw. ATTENTION: Always change the braking plant sealing gaskets. Position the front brake pump (1), and the assembly stand (2) and fix tightly with the two screws (3). 10 N·m 1 Kg-m Position the brake (4) and fix it tightly with screw (5) on the connector.
- Page 260 Position the rear brake pump (2) and fix with the two screws (5) and the relative nuts tightly. 10 N·m 1 Kg-m Fixing the pump tank (8) with the screw (10). Mount the footrest (see "MOUNT FOOTREST"). 4 N·m 0.4 Kg-m 7.3.6 DISMANTLE FRONT BRAKE PLANT TUBES Position the end of a tube of suitable diameter at the purge...
- Page 261 WARNING: Always change the sealing gaskets at every disman- tling. Loosen and remove the pump connector screw (2). Loosen and remove the pliers connector screws (3). Unhook the brake tube from the eye positioned on the front mudguard. Remove the front brake plant tubing. Be careful with the sealing gasket.
- Page 262 7.3.8 CHECK FRONT AND REAR BRAKE TUBING Check that the front (1) and rear (2) tubing is not broken. Change the damaged element if necessary. 7.3.9 MOUNT FRONT BRAKE TUBES PLANT ATTENTION: Always change the sealing gaskets at every disman- tling.
- Page 263 7.3.10 MOUNT REAR BRAKE TUBES PLANT ATTENTION: Always change the sealing gaskets at every disman- tling. Position tube (1) on the clamp (2) and on the pump. Position the connector screw (3) and tighten it with the associ- ated sealing gasket. 15 N·m 1.5 Kg-m Restore the level of the braking liquid and purge the plant (see "PURGE BRAKING PLANT").
- Page 264 Remove the connector screws (2). Loosen and remove the two brake clamp fixing screws (3). Remove the brake clamps (4). 7.3.12 DISMANTLE REAR BRAKE CLAMP WARNING: Always change the sealing gaskets at every disman- tling. Remove the rear brake clamp from the clamp support unscrew- ing the two screws and position it under the brake pump.
- Page 265 7.3.13 CHECK BRAKE CLAMP Check that the front and rear brake clamps are not broken or show losses. If necessary, change the damaged element. 7.3.14 MOUNT FRONT BRAKE CLAMP Position the right and left (2) brake clamps. Tighten screws (3). Position the brake tubing on the two clamps and on the pump.
- Page 266 7.3.15 MOUNT REAR BRAKE CLAMP Tighten the connector screw (1) on the clamp (2). 15 N·m 1.5 Kg-m Restore the level of the braking liquid and purge the rear plant (see "PURGE BRAKING PLANT"). Position the clamp (2) on the clamp support (3). Tighten the two screws (4).
- Page 267 FORK 7.4.1 REMOVE RIGHT AND LEFT STEM ATTENTION: After removing the stem clamps do not leave them hanging up but provide an adequate support. Remove the front mudguard (see "DISMANTLE FRONT MUD- GUARD"). Remove the front wheel (see "REMOVE FRONT WHEEL"). Remove the handlebar.
- Page 268 7.4.2 CHECK FORK LEGS Turn directly to the supplier listed in the "SPECIFICATIONS" chapter with regard to checking the stems and linings. 7.4.3 INSTALL FORK LININGS WARNING: Do not damage the surfaces of the linings. WARNING: The stem must be mounted with the brake clamp holder support towards the inside of the vehicle.
- Page 269 Position the upper steering plate (4) and adjust the stems ac- cording to specific value A. SPECIFIC VALUE A = 10 mm Tighten the screws (5), one for each stem. 25 N·m 2.5 Kg-m Tighten the steering plate central screw (6). 60 N·m 6 Kg-m Tighten the six screws (3), three for each stem.
- Page 270 HANDLEBAR Loosen and remove the two screws (1) and free the front brake pump (2). Remove the gas command, using the two screws beneath. Loosen and remove the two screws (4). Disconnect the connector. Remove right light command (5). Disconnect the micro switch connector (1) brake lights. MF13...
- Page 271 Disconnect the micro clutch connector (1), taking the rubber cap off first. Loosen and remove the two screws (2) and free the clutch command (3). Disconnect the left light command connector. Loosen and remove the screws (4). Remove the left light command (5). Slip off the handlebar grip.
- Page 272 7.5.1 HANDLEBAR CONTROL ATTENTION: Do not try to straighten the semi-handlebar rod. Verify that the handlebar does not present any damages or bending. If necessary replace it. 7.5.2 HANDLEBAR INSTALLATION Position the handlebar on the steering plate seat. Verify the correct inclination with the reference notches, tighten the two screws (1) of the U-bolt to the indicated torque.
- Page 273 Position the front brake pump (4) and fix it with the two screws (5) to the indicated torque. 22 N·m 2,2 Kg-m Position right light command block and fix it with the two screws (6). Connect the brake light micro switch connector (7). MF13...
- Page 274 Position the left light command block (1). Connect the connector. 6 N·m 0.6 Kg-m Position the clutch command and tighten the two fixing screws (3). 10 N·m 1 Kg-m Connect the micro clutch connector (4) on the lever. Insert the handle (5). MF13...
- Page 275 STEERING HEAD 7.6.1 DISMANTLE LOWER STEERING PLATE Loosen the two lateral steering plate screws (1). Remove the two bridge fixing screws (2). Remove the fixing screw, steering plate (3). Remove the upper plate. ATTENTION: Support the lower steering plate during the folllowing operation.
- Page 276 Remove the upper cowling pin (9) and the lower steering plate complete with pin (10). Remove the ball cage (11) and the upper and lower coupling pins inside the chassis. Remove the ball cage (12). Remove the upper coupling pin (13) and the dust cover (14) from the steering plate.
- Page 277 7.6.2 CHECK LOWER STEERING PLATE Check that none of the components of the steering plate are broken. Check that the steering roller cages are not excessively worn or broken. Change the elements damaged or worn if necessary. 7.6.3 MOUNT LOWER STEERING PLATE Carry out in reverse order to dismantling.
- Page 278 REAR DAMPER 7.7.1 CHECK REAR DAMPER Apply to the direct supplier listed in the "SPECIFICATIONS" chapter with regard to checking the rear damper. 140 mm 7.7.2 REMOVE REAR DAMPER Lift the vehicle adequately with some supports under the driver’s footboards keeping the back wheel raised from earth. Loosen and remove the upper fixing screw (3) from the engine setting the shock-absorber free, laying the wheel to ground.
- Page 279 Loosen and remove the lower shock-absorber fixing screw (5). Setting the shock-absorber totally free slip the shock-absorber off from the left side. 7.3.3 MOUNT REAR DAMPER Operate in the reverse sense to dismantling. Tighten the upper shock-absorber fixing nut (1) to the indicated torque.
- Page 280 Tighten the connecting rod fixing nuts (1) to the indicated torque. 50 N·m 5 Kg-m 65 N·m 6,5 Kg-m MF13...
- Page 281 REAR FORK 7.8.1 REMOVE REAR FORK Support the vehicle adequately. Remove the rear wheel(see "REMOVE REAR WHEEL"). l Remove the chain (see "DISMANTLE CHAIN"). Remove the mudguard. Remove the chain carter. Remove the brake pliers. Disconnect the connector of the speed sensor wiring (4). Disconnect the cable (5) on the exhaust valve.
- Page 282 Loosen the reaction ring nut (7) inside the frame, loosen the register (8). Loosen the nut (9) and the relative upper fixing screw of the shock-absorber. Loosen and remove the lower fixing screw shock-absorber. Set the back brake pump body free (11). MF13...
- Page 283 Loosen and remove the upper fixing screw (2) of the right footboard setting the brake oil tank free. Slip off the fork from the frame. Slip off the pivot (11). Extract the fork. MF13...
- Page 284 Loosen and remove the two screws (3) and remove the chain pad (4). Remove the ferrule (5) and the oil seal (6). Repeat the operation on the opposite part of the rear fork as well. Remove the oil seal (7). Repeat the operation on the opposite part of the rear fork as well.
- Page 285 7.8.2 CHECK REAR FORK Sight check the state of the rear fork, change it if there are breaks. Check the free rotation of the ball-bearings (1). If necessary, change them. Check the state of wear of the chain pad. If necessary change it. Verify the eccentrics state if necessary replace them.
- Page 286 7.8.3 MOUNT REAR FORK ATTENTION: Always use new oil seals. Proceed in the reverse manner to dismantling. Tighten the screws (1) of the lower chain shoe Tighten the screws (2) of the upper chain shoe to the indicated torque. 10 N·m 1 Kg-m Tighten the screws (3) of the internal chain shoes.
- Page 287 7.8.4 BACK FORK INSTALLATION ON FRAME Operate in the reverse manner to removal. Bring the adjustor (1) to touch and tighten. + 90° 40 N·m 4 Kg-m Tighten the ring nut (2) placed inside the frame. Insert the pin from the left side. Tighten the rear fork pin fixing screw (3).
- Page 288 SUPPORT FRAME 7.9.1 LIGHT SUPPORT FRAME REMOVAL Loosen and remove the two screws (1). Disconnect the front light wiring connector (2). Remove the light support frame. Remove the front shield (see “front shield disassembly”). Remove the light from the light support frame (see “LIGHT DISASSEMBLY”).
- Page 289 Loosen and remove the lateral fixing screws (1) of the speed meter dashboard. Take off the dashboard, separate the light support frame. 7 . 9 . 2 7 . 9 . 2 7 . 9 . 2 TEST FRONT LIGHT SUPPORT 7 .
- Page 290 7.9.3 FRONT LIGHT SUPPORT FRAME INSTALLATION Operate in the reverse manner to removal. Tighten the two fixing nuts (1) on the frame to the indicated torque. Connect the front wiring connector. 12 N·m 1,2 Kg-m 7.10 REAR FRAME 7.10.1 BACK RIGHT FRAME DISASSEMBLY Loosen and remove the heat shield screws (2) under the saddle.
- Page 291 Loosen and remove the lateral fixing screws (1). Loosen and remove the screw (2). Remove the internal wiring fixing clip. NOTE: Verify always before dismantling the passage of the wiring. Loosen the lock nut (3) of the joint pivot. Loosen the pivot (4) making the side of the frame come out from its seat.
- Page 292 7.10.2 BACK RIGHT FRAME ASSEMBLY Position the right side of the rear frame on motion. Screw the joint pivot up to reach the contact of the two parts. Block the pivot with the lock nut (1). Position and tighten the frame right side fixing screws (2) to the frame with the indicated torque.
- Page 293 Position the cross bar. Tighten the screws (1) to the indicated torque. Position the heat shield under the saddle and tighten the screws (2). Assemble the number plate holder (see “NUMBER PLATE HOLDER assembly”). Assemble the muffler. 7.10.3 LEFT BACK FRAME DISASSEMBLY Remove the saddles.
- Page 294 Loosen and remove the screws (1). Remove the back frame cross bar. Loosen and remove the lateral fixing screws (2). Loosen and remove the screw (3). Remove the internal wiring fixing tie-wrap. NOTE: Verify always before dismantling the passage of the wiring.
- Page 295 Loosen and remove the screws (1) and take off the cable (2). Remove the lock (3) Loosen the lock nut (1) of the joint pivot. Loosen the pivot (1) making the side of the frame coming out of its seat. Remove the left side from the frame.
- Page 296 Insert and screw the joint pivot of the two sides of the frame up to reach the contact of the two parts. Block with the lock nut (2). Position and tighten the left frame side fixing screws (3) to the indicated torque.
- Page 297 Position the central cross bar and tighten the screws (5) to the indicated torque. Position the heat shield under the saddle and tighten the screws (6). Assemble the exhaust muffler ( see “muffler assembly ). Assemble the saddles. 7.10.5 STIRRUP REMOVAL PASSENGER FOOTBOARDS Loosen and remove the screws (1) right footboard stirrup (2).
- Page 298 7.11 TRANSMISSION CHAIN 7.11.1 REMOVE TRANSMISSION CHAIN Remove the transmission chain (1) with a link cutter. 7.11.2 CHECK TRANSMISSION CHAIN Check that the chain is not excessively worn or excessively loose. Change the chain if necesary. Check that the chain does not have crushed or seized up links. ATTENTION: This is a chain with an O-ring.
- Page 299 7.11.3 INSTALL TRANSMISSION CHAIN Position the chain on the crown and on the pinion. Unite the two ends of the chain (1) and (2) with the specific equipment. Adjust the chain (see "ADJUST CHAIN"). MF13...
- Page 300 These functions ensure that, in the case of faults in the system, the type of fault and the engine data at the moment of fault are stored in the ECM memory. The stored data can be retrieved by a Benelli dealer using the apposite service equipment supplied to all Benelli dealers (see Axone imstruction manual).
- Page 301 Throttle body group position sensor - placed at the right end of the small throttle body group shaft. The throttle body group position sensor gives a completely closed position reading and all the other opening angles are calculated taking the completely closed position as basis.
- Page 302 The system controls the following parameters: • Minimum functioning. • Supply of air in the case of the engine missing. • Correction of the air/fuel relation operating at minimum speeds at heights above sea-level. • Correction of the air/fuel relation in cold and hot starts. When the stepper is activated it opens the valve more or less to allow a determined flow of air to flow along a series of tubes in the throttle body group.
- Page 303 8.2.1 ENGINE SUPPLY PLANT Location of actuators 1 Oil pump (on the base of the oil tank) 2 Ignition coils (upper part of the cover of the cams) 3 Canister breather valve (only USA version) 4 Minimum air control system (on the lower part of the air box filter) 5 Injectors (behind the throttle bodies) 6 Cooling fan (behind the radiator).
- Page 304 NOTE: Note that the first column is not marke A because of the restricted space on the face of the connector. The diagram to the side shows the numbering of the pins as they appear on the connector. The position of the ECM connectors is described in this manual GREY BLACK through the identification of the connector, 1 (black) or 2 (grey),...
- Page 305 8.4 SUPPLEMENTARY DIAGNOSIS The following tables, if used correctly, help to identify a fault in the system once the diagnostic code of the problem has been stored. NOTE: 1 BLACK CONNECTOR ECU 2 GREY CONNETOR ECU INJECTORS – WALBRO ECUA - 1 Fault code Possible cause Instruction...
- Page 306 Change the relative injector, proceed to test 7 - Reconnect the cabling, cancel the Activity carried out - terminate test fault code and activate the engine to check the elimination of the fault The fault persists Contact the Benelli assistance MF13...
- Page 307 Locate and repair the cable fault, proceed to test 5 5 - Reconnect the cabling, cancel the Activity carried out – terminate the test fault code and activate the engine to check the elimination of the fault. The fault persists Contact the Benelli assistance MF13...
- Page 308 IGNITION COIL – WALBRO ECUA -1 Fault Code Possible cause Instruction P1351/52/53 Open or short circuit – ignition Make sure that the connector of the relative coil 2/1/3 ignition coil is inserted correctly. Disconnect the ECM and proceed to location test 1.
- Page 309 7 - Reconnect the cabling, cancel the Activity carried out - terminate test fault code and activate the engine to check the elimination of the fault The fault persists Contact the Benelli assistance COOLING LIQUID TEMPERATURE SENSOR – WALBRO ECUA-1 Fault Code Possible cause Instruction P0118 C.C engine temperature...
- Page 310 6 - Reconnect the cabling, cancel the Activity carried out - terminate test fault code and activate the engine to check the elimination of the fault Fault Contact the Benelli assistance Resistance data in typical conditions: Engine warm: Environmental temperature Resistance value 20°C...
- Page 311 AIR ENTRANCE TEMPERATURE SENSOR – WALBRO ECUA-1 Fault code Possible cause Instruction P1502 Open or short circuit at posi- Check and note the data on the display of tive battery pole (+) the diagnostic instrument (see Axone instruction manual) if available. Check and note the data on the diagnostic instrument sensor (see Axone instruction manual).
- Page 312 Activity carried out - temoinate test fault code and activate the engine to check the elimination of the fault Fault Contact Benelli assitance If the engine is hot, remove the sensor and let it cool down beofre carrying out the test Resistance data:...
- Page 313 - ECM pin 2/A2 to ECM pin 2/E1 Activity carried out – terminate the test 5 - Reconnect the cabling, cancel the Fault Contact the Benelli assistance fault code and activate the engine to check the elimination of the fault MF13...
- Page 314 NOTE: Another possible cause for non correct working of the sensors TPS /TEMP. Air/TEMP. H O could be due to the missing of the 5 Vdc supply. Check as follows: Disconnect TEMP. Air/TEMP. H2O/TPS according to the discovered anomaly and verify turning on the switchboard and using a voltmeter that: On Pin 2 of the connector TEMP.
- Page 315 BAD FUNCTIONING OF THE ENGINE DIAGNOSIS WARNING LAMP (MIL) – WALBRO ECUA-1 Fault code Possible cause Instruction P1601 Open or short circuit to the Check and make sure that the connector of chassis the warning lamp is inserted well and that the bulb works.
- Page 316 5 relays injection of the ECM 5 - Reconnect the cabling, cancel the Activity carried out – terminate ithe test fault code and activate the engine to Fault check the elimination of the fault. Contact the Benelli l’assistance MF13...
- Page 317 MF13...
- Page 318 E E E E E ELECTRICAL PLANT lectrical P P P P P lant MF13...
- Page 319 KEY: Orange Azure White Black BLU Blue Yellow Pink Grey Brown Violet Green Sky blue MF13...
- Page 320 Consult the table below to identify the contacts of the various components: COLOURS COLOURS 1) Oil pressure Violet 11) Set / Reset Switch Yellow / Grey 2) H O Temperature Brown / Violet 12) Gears Grey / Red 3) Injection alarm Red / Black 13) Speed sensor exit Blue...
- Page 321 9.1 CONNEC TORS When connecting a connector make sure to press until hearing a click. Check whether the connector is corroded or dirty and whether its cover is broken. CLICK With a block type connector make sure to release the block CLICK before disconnecting it and to press down completely when connecting.
- Page 322 9.3 SEMI-CONDUCTOR PARTS INCORRECT ATTENTION: Be careful not the let the parts fall with an incorporated semi-conductor like the ECU. When controlling such parts follow the checking instructions to the letter. Failure to respect the correct procedure can cause grave damage.
- Page 323 Loading method It is preferable to use the constant tension method of loading so as not to overload the batteries. Follow this rule: NORMAL: 1.0A x 5 ~ 10h SLOW: 0.5A x 8 ~ 16h Check the voltage after ~ 30 minutes from loading the voltage at the battery heads.
- Page 324 Battery current losses ATTENTION: Since current losses in the case of malfunctioning can be high, use a high range of the multitester first when using the ammeter. Do not put the ignition switch on "ON" when measuring the current. With the switchboard off, the losses of current should be >/- Ã...
- Page 325 9.5 FUSES General fuse: The general fuse (1) is on the left side of the engine. To remove it undo the plastic protective cover. Fuse (2) is the spare. GENERAL FUSE 40 Ah Service fuses: The service fuses box is under the saddle. Open the fusebox cover to identify the position of the burned- out fuse, read the key placed under the cover and consult the electricity diagram.
- Page 326 9.6.2 RELAY SERVICES GROUP Positioned under the passenger saddle there are: 1) Electro-fan relay (NE+AR/NE+MA+BI/NE). 2) Safery (MA/BI+MA+BI/RO+RO/GI) 3) Dazzle relay (GI/VE+AR/BI+GI/BI). 4) Injection (VI/MA+AR+RO/GI) 5) Oil pump relay (BI/RO+NE+AZ/VE). 6) Anti-dazzle relay (GI/VE+AR/BI+RO/GI). LEGENDA COLORI: MA = BROWN AZ/VE = BLUE/GREEN MA/BI = BROWN/WHITE AR/BI = ORANGE/WHITE NE = BLACK...
- Page 327 9.8 ALTERNATOR Unscrew the three clutch command fixing screws (1), unhook the clutch cable and remove the clutch command to allow the removal of the alternator. Disconnect the battery supply cables. Disconnect the connector (2), lift the protective cap and unscrew the starter supply fixing nut(3).
- Page 328 9.9 STARTER DIAGNOSTIC SYSTEM The starter does not rotate Put the ignition switch on "ON" with the engine shut-off switch on "RUN". Put the gears into neutral (the Check whether the starter engine relative warning lamp on the The click rotates by connecting the starter instrument board lights up).
- Page 329 The starting motor turns but the motor does not ignite Incorrect Neutral sensor defective Check the neutral sensor Open circuit on the cabling. Correct Contact connector defective. Incorrect Check the lateral assembly stand Lateral assembly stand switch defective. switch Open circuit on the cabling. Correct Contact connector defective.
- Page 330 9.10 CHECK SAFETY SYSTEM PARTS If the safety system does not function properly, check each component. If anomalies are found, substitute the component (1) with a new one. 9.11 GEAR POSITION SWITCH The connector of the neutral switch wire is in the rear zone of the engine.
- Page 331 9.12 LATERAL STAND SWITCH The connector of the lateral stand switch is under the petrol tank. Remove the petrol tank. Disconnect the lateral stand switch and measure the continuity as described below. Check the continuity with a multitester as indicated in the table. Stand PIN 1 PIN 2...
- Page 332 9.14 SPEED SENSOR When the speed is not indicated on the instrument board, proceed as follows: Check the integrity of the fuse. If the fuse in question is intact, check the speed sensor (1): NOTE: Verify that the distance between sensor and disc fixing screws is 1 mm.
- Page 333 9.16 SOLENOID Remove the solenoid (see solenoid disassembly). Remove the Seeger ring (1) remove the cable fixing plate, set the piston free. Loosen and remove the screws (2) remove the solenoid (3). Verify the free movement of the piston (4), if it moves hard remove it and lubricate the sliding zone.
- Page 334 9.17 CHANGING FRONT LIGHTS For front lamps replacement remove the parabolas right and left inspection lids unscrewing and removing the fixing screws (1). 9.17.1 FRONT LIGHT DISASSEMBLY Remove the wind shield (see “wind shield disassembly”). Unscrew and remove the frame screws (2) . Take off the front LIGHT wiring connector (3).
- Page 335 Remove the lamp inspection lids. Unscrew the LIGHT fixing pivots (1). Unscrew and remove the central closing screw (2)of the right and left frame. Loosen and remove the screws (2) remove the speed indicator remove the connector (3) remove the LIGHT wiring. MF13...
- Page 336 9.17.2 ADUSTMENT FRONT HEADLIGHT To carry out the correct adjustment of the luminous beam pro- jected by the front headlight, position the vehicle at about 10 metres from a vertical wall on a perfectly flat terrain. Switch the front headlight on, sit on the vehicle in the driving position and check that the upper limit of the beam projected onto the vertical wall in less than about 1/10 with respect to the the horizontal axis of the lights.
- Page 337 Loosen and remove the nuts (5), remove the light (6). 9.18.2 CHANGING LICENCE-PLATE LIGHT Loosen and remove the screw (1). Remove the rubber lamp-holder. Change the position lamp. Position the rubber lamp-holder and tighten the screw (1). 9.18.3 CHANGE FRONT AND REAR ARROWS 9.18.3.1 CHANGE FRONT ARROWS Cut the wiring fixing tie-wraps...
- Page 338 Replace the damaged lamp (4) rotating it counter clockwise. Position the arrow body, the glass, and fix with the dedicated screw. Work the same way with the opposite arrow. 9.18.3.2 BACK ARROW LAMP REPLACEMENT Loosen and remove the screw (1). Remove the glass arrow (2).
- Page 339 MF13...
- Page 340 D D D D D iagnostic DIAGNOSTICS DIAGNOSTICS 1 0 DIAGNOSTICS DIAGNOSTICS DIAGNOSTICS 10.1 ELECTRICAL PART LOADING SYSTEM Battery warning light lit Alternator damaged Change Alternator connection defective Check Battery damaged Change GENERAL No function 30A Fuse Change Relay switch burnt Change Battery connections oxidised Deoxidise/Restore...
- Page 341 Dazzle/dimmer lights not functioning Light fuses burnt Change Light fuses connection defective Deoxidise/Restore Lamps burnt Change Lamp connections defective Deoxidise/Restore Lights switch damaged Change Lights switch connection defective Deoxidise/Restore Dazzle + dimmer lights relay damaged Change Dazzle light and dimmers relay connection defective Deoxidise/Restore Rear light stop not functioning...
- Page 342 Tachymeter not functioning Speed sensor damaged Change Speed sensor connection defective Deoxidise/Restore 10A fuse burnt Change 10A fuse connection defective Deoxidise/Restore Instrument board damaged Change Instrument board connection defective Deoxidise/Restore Oil warning light does not light up Oil pressure sensor damaged Change Oil pressure sensor connection defective Deoxidise/Restore...
- Page 343 INJECTION Air temperature sensor indicates a fault Sensor damaged Change Sensor connection defective Deoxidise/Restore Potentiometer floating body Potentiometer damaged Change Potentiometer connection defective Deoxidise/Restore O temperature indicator not functioning Bulb H Change 10A fuse burnt Change 10A fuse connection defective Deoxidise/Restore Instrument board damaged Change...
- Page 344 10.2 FRAME STEERING Steering hard Steering ball-bearings damaged Change Steerring ball-bearings tightened excessively Adjust Steering pin bent Change Sterring damper braked excessively Adjust Steering damper joints damaged Change Low tire pressure Adjust The engine tends to swerve or not proceed in a direct line Fork bent Change Frame bent...
- Page 345 REAR WHEEL Rear wheel oscilates/vibrates Wheel rim bent Change Wheel not balanced Balance Tire defective Change Tire unsuitable Change Wheel ball-bearings damaged Tighten Fixing nut not tight Tighten Suspension screws not tight Tighten Suspension ball-bearings damaged Change Rear wheel rotates with difficulty Ball-bearings damaged Change Wheel hub sealing ring out of place...
- Page 346 Braking power insufficient Disks dirty Clean Air bubble in hydraulic circuit Purge Losses in the hydraulic circuit Repair Clamp seals damaged Change Pump seals damaged Change Clamp pistons do not run freely Check Hydraulic liquid low Refill Brake disks distorted Change Pads dragging on brake disks Pad springs damaged...
- Page 347 10.3 AXONE2000 BENELLI INSTRUCTION MANUAL 10.3.1 GENERAL SAFETY PRECAUTIONS FOR OPERATORS Carefully read the instructions on set up, use and maintenance in this operatine manual. Do not allow unskilled personnel to use this machine as this could cause injury to personnel and damage to the equipment.
- Page 348 - Do not touch with wet hands. How to use AXONE2000 BENELLI correctly Observe the following safety rules in order to use your AXONE2000 BENELLI correctly: - The equipment must be used in a dry area. Do not expose it or use it near to heat couces.
- Page 349 10.3.3 DESCRIPTION OF AXONE2000 BENELLI Top connection Input/Output Back-lit display (320x200) with protective layer Card drive Plastic foil keyboard Interface module housing Battery housing External power supply Battery recharge Botton connection Serial/Parallel 10.3.3.1 KEYPAD 1 - Contrast key: to adjust and the screen contrast, push whilst adjusting with the vertical scroll keys (2).
- Page 350 10.3.3.2 INTERFACE MODULE This module is used to physically interface the AXONE2000 BENELLI with the cables, the sensor and the probes of the various avilable kits. Three different types of interface modules are avaible. -Self-test OBD-II (OBD module) -Measurements (ACQ module)
- Page 351 AXONE2000 BENELLI. 3 - Upper connector: Depending on the interface module inserted in the AXONE2000 BENELLI, the connector is used to carry out special tests or characteristics for perform AXONE2000 BENELLI diagnostic functions, using the standard cables provided in each kit.
- Page 352 10.3.3.5 HOW TO POWER THE AXONE2000 BENELLI The AXONE2000 BENELLI can be powered automaticaly by means of an internal battery (self-powered) or externally using the cable provided. Connect as follows: Connect the cable of the kit in use (1) to the upper connector (2) and connect the battery clamp cable (4) to the connector.
- Page 353 10.3.3.7 REPLACING THE BATTERY The battery is contained a compartment in the base of the AXONE2000 BENELLI. Delicately open the retainer by inserting by the arrow to open the flap and access the battery compartment. The flap will open. Access the battery compartment to replace the battery.
- Page 354 10.3.3.9 TECHNICAL SPECIFICATIONS The following technical characteristics refer to the use of the AXONE2000 BENELLI CPU, those relating to the various programs and the associated interface modules are available in the specific section of each kit.
- Page 355 - MEMORY CARD: data card which can be inserted into AXONE2000 BENELLI drive; data can be read and written on the card. - PARALLEL: execution of several tasks at the same time (e.g.
- Page 356 Each kit includes the instrument control program, an interface module (to be arranged in the base AXONE2000 BENELLI), the sensors, the cables for the connection to the engine, the adapters, the manual and all what is required by the UPGRADES tools and the specific tests.
- Page 357 10.3.4 HOW TO USE AXONE2000 BENELLI The instructions refer to the AXONE2000 BENELLI CPU; those relating to the various programs are available in the section specific for each kit. 10.3.4.1SERVICE MENU From the introductory page, you can access the diagnosis and service programs using the scroll arrows as described in the previous paragraph.
- Page 358 FIRMWARE UPGRADE: This function is used to upgrade the firmware contained in the various interface modules. Update firmware (Service) PARALLEL: This function is used to test transmission/reception and check correct operation of the parallel port. Parallel (Service) SERIAL: This function is used to test transmission/reception and check correct operation of the serial ports.
- Page 359 WORKSHOP: This function is used to enter the name of the workshop which will appear in the main menu when the AXONE2000 BENELLI is switched on. Workshop data (Service) BATTERY: The function is used to discharge the battery. The discharge curve is stored on the memory card to be displayed at a later time.
- Page 360 Update PC CONNECTION: Use a serial connection cable to connect AXONE2000 BENELLI to a PC where the upgrade program is installed. The memory card will be upgraded based on the upgrade file installed in the...
- Page 361 CONFIGURATION OF THE INTERNET CONNECTION Accede to the menu Service Service Accede to the program internet Configuration Internet-Configuration (Service) CALLING COUNTRY CONFIGURATION CONFIGURATION Modem ISP access Upgrading Mail Modem Test Select page MODEM MF13...
- Page 362 Make sure that in the Calling Country row appears: “Your Country” otherwise set your Country. MODEM Calling from To move the various session use the + and - keys and make the Italy necessary changes up to get the request of “save the performed Type of call changes”.
- Page 363 Insert: - Provider POP (Point Of Presence) phone number (obligatory). ISP ACCESS - External line code if necesary otherwise leave it free. Telephone number - Username (obligatory). 123456 - Password (obligatory). External line access number - DNS Adress (Domain Name Server) used by the provider (if avaible).
- Page 364 NEXT / CANCEL INTERNET ON-LINE UPGRADE Insert the MDM56 communications module and connect the AXONE2000 BENELLI to a telephone socket using the cable provided for this upgrade procedure. Select “Upgrade” in the main menu to proceed. NB:If the battery is down, the programme indicates the potential criticality of the connection.
- Page 365 (which depends on the OPTIONS communication line). The first steps ends once the available programs on the BENELLI server have been detected and after comparing the versions on the BENELLI server with those installed on the AXONE2000.
- Page 366 Connected at 49333 b/s. Connected at 49333 b/s. start downloading the new self-diagnostics program version to Upgrading Upgrading the AXONE2000 BENELLI memory card. Tje lower bars indicate Self-diagnosis Self-diagnosis current, partial and total file upgrade advancement. in progress ... in progress …...
- Page 367 The program will shut down and AXONE2000 BENELLI will be restarted after upgrading. OPTIONS Memory version: 8.0.0 The tool will now be restarted Press a key to continue The AXONE2000 BENELLI has now been upgraded. 10.3.6 MEASURES Measurs 10.3.6.1 MULTIMETER...
- Page 368 The message CAL will blink and temporarily +000.0 replace the clock icon). The calibration procedure is used to specifically optimise the AXONE2000 BENELLI. The calibration +000.0 will be stored only after closing the selected function. The instrument can be used at this point.
- Page 369 The main characteristics of the ammeter clamp are: - Stored values: minimum, medium, maximum. OPTIONS - Graphic view of voltage flow in time. - Concurrent analogue and digital display. +000.0 +000.0 NOTE: Measurements are possible only with DC (direct +000.0 current).
- Page 370 CH.1 OPTIONS or 4) and the red, yellow, green and blue wires, all referred to the AXONE2000 BENELLI black power clamp (i.e. the common earth terminal). 8 - Flag icon: to start and end measurements. The flag icon will blink when the manual function page is accessed. Press ENTER to start measuring.
- Page 371 10.3.6.6 OPTIONS Use the scroll arrows to access the Options window and press ENTER. OPTIONS Va:-10.0mV The options menu containing several functions will be opened: Vb:-10.0mV TIPO Dv:0.0 INPUT SINC. Dt:5mS CURSORS ZOOM GRID SCREEN RESET ON-LINE HELP (0) INPUT: Press ENTER in the Options menu to access the input function.
- Page 372 CURSOR: To select the Cursors function, go to the required option by means of the scroll buttons and press ENTER. Select Input The Cursors function window (1) shows the readings on the Channel 1 curve. Letter A will blink. In this condition, move cursor A to the Channel required point on the displayed curve by means of the left/right Channel...
- Page 373 A dotted-border square will appear on the display when the Zoom function is on. OPTIONS Use the scroll buttons to position the square where you want to Va:-10.0mV zoom in (magnify). The zoom magnifies all the area within the Vb:-10.0mV TIPO Dv:0.0 SINC.
- Page 374 HELP LINE (0) To select the Help line (0) function, go to the corresponding option and press ENTER. A page describing the operations rewuired to change the zero OPTIONS potential line will appear. This function can be used to wiew Input parts of the signal which would otherwise be left out.
- Page 375 SCALE SELECTION (V): To select V/div scale, select the window with the letter V (bold and blinking) and press ENTER. A drop-down menu will appear containing the values which can OPTIONS be set on the volt scale. Use the scroll arrows to select the Va:-10.0mV V/div.
- Page 376 Specially, accurate measurements will not be possible if you want to measure the injection time (Fig. 1). Simply change the time division value, lowering to 1 ms for each division (Fig.2). In ths case the signal will now show the entire form and appear clearly and easily quantifiable.
- Page 377 AC READING SELECTION: To select alternate current measurement, select the window with the letters AC (bold and blinking) and press ENTER. This function is useful for identifying interference signals. OPTIONS Va:-10.0mV Vb:-10.0mV SYNC. Dv:0.0 TYPE Dt:5mS DC READING SELECTION: To select direct current measurement, select the window with the letters DC (bold and blinking) and press ENTER.
- Page 378 INTERNAL SYNCHRONISM: The waveform on the display is stabilised with a signal generated by the yxz microprocessor. OPTIONS The synchronism may be adjustment in size and position Va:-10.0mV Vb:-10.0mV SYNC. Dv:0.0 (TRIGGER). To start such adjustment, move to the window with TYPE Dt:5mS the letters INT and press ENTER.
- Page 379 TYPE Dt:5mS 10.3.7 AUTO-DIAGNOSTICS The AUTO-DIAGNOSTICS program is used to connect the AXONE2000 BENELLI to various injection ECUs with different characteristics according to the make and the specific injection system. The auto-diagnostics with the motorcycle ECU. Possible procedures: - Read functional parameters of all systems connected to the Auto-diagnostics ECU.
- Page 380 HOW TO CONNECT AXONE2000 BENELLI TO THE ECU: Insert the interface cable connector (1) in the upper connector (2) on the yxz respecting the indications shown on the labels attached to the cable. HOW TO POWER THE AUTO-DIAGNOSTICS INTERFACE CABLE: The auto-diagnostics interface cable cannot be powered by the yxz internal battery.
- Page 381 HOW TO SELECT MAKE AND MODEL: Use the scroll arrows to select the available manufacturers and DATABASE press ENTER to confirm. SELECT BRAND BENELLI DATABASE Select the motorcycle model and press ENTER to confirm. BENELLI SELECT MODEL Tornado Tre...
- Page 382 Select the engine type and press ENTER to confirm.. DATABASE BENELLI Tornado Tre POWERPLANT Select the system to be tested from the list of available systems. DATABASE Select chassis code and system type. BENELLI Tornado Tre The following can be selected:...
- Page 383 Confirm selections. A picture of the adapter cable to be used and the interface between auto-diagnostics cable interface and DATABASE 3151/AP01 main cable with respective code will appear after BENELLI confirming all selections. Tornado Tre INJECTION The battery icon will appear to indicate thet the power cable Sagem must be connected.
- Page 384 The auto-diagnostics program will start if the cable is correctly connected and powered. DATABASE A message such as the one shown in the figure will appear. On BENELLI the other hand, if the connections has not been set up correctly, Tornado Tre the message “Communication interrupted, reactivate?” will INJECTION appear.
- Page 385 Example of stored error: The message MEM will appear next to the error message if the DATABASE ECU detected a fault in the past which may no longer be present. BENELLI Tornado Tre NOTE: INJECTION Sagem In some ECUs, the communication protocol may not be capable of discriminating between a current error and a stored error.
- Page 386 INPUT STATUS: Status parameters indicate theconditions of some ECU inputs, DATABASE specifically ON/OFF (engine running/not running, lambda sensor BENELLI STATUS on/off, etc.). Status view is constantly enabled in some systems. Tornado Tre FUNCTION -Repeatedly press keys (+ or -) to view the STATUS function to...
- Page 387 DELETE CODE PAGE ACTUATOR ERROR/ACTIVE DIAGNOSTICS DATABASE Press “ENTER” to confirm deletion of all failures stored in the BENELLI memory. Tornado Tre INJECTION AVAILABLE press ENTER to activate the selected actuator. Sagem Error clearing HOW TO QUIT THE PROGRAM: DATABASE - Press ESC until the message CONFIRM EXIT appears.
- Page 388 1. Carry out the procedure described in "Preliminary operations", selecting "self- diagnosis" and pressing "ENTER". 2. Select "DATABASE" with the horizontal arrows 3. Press “ENTER” 4. From the "SELECT TRADEMARK" menu select “Benelli” 5. Press “ENTER” 6. From the "SELECT MODEL" menu select “TnT” 7. Press “ENTER”...
- Page 389 10.7 ADJUST STEPPER / CO This operation must be carried out also using an exhaust gases analyser. The process is repetitive, arriving at the CO wanted by repeating the procedure described below. 1. Carry out the procedure described for self-diagnosis. 2.
- Page 390 SOFTWARE WITH THE AXONE NOTE: During update of the control unit software connect also the second diagnosics connector (to two poles). SCREENS SYMBOL Self-diagnosis screen Press Enter Benelli screen Press Enter TnT screen Press Enter Displacement 1130 Press Enter Injection screen Select...
- Page 391 MF13...
Rename the bookmark
Delete bookmark, delete from my manuals, upload manual.
- Shopping Cart 0
Benelli Tornado Tre 1130 Parts & Accessories

Benelli Tornado Tre 1130 Helmets
Benelli Tornado Tre 1130 Riding Gear
Benelli Tornado Tre 1130 Body Armor & Protection
Universal Accessories
Benelli Tornado Tre 1130 Parts
Benelli Tornado Tre 1130 Wheels & Tires
Benelli Tornado Tre 1130 Lighting
Universal Electronics
Benelli Tornado Tre 1130 Maintenance
Benelli Tornado Tre 1130 Women's
They say you'll never see a motorbike parked outside a therapist's office. Any kind of motorcycle is an anti-depressant and a sure way to clear your mind. We know how edgy and frustrated you can feel when your Benelli Tornado Tre 1130 breaks down and you cannot ride for some time. We know you put much love and pride into your bike. We've all been there. That's why we go the extra mile to make sure that when you need any motorcycle parts and accessories, you get exactly what you are looking for, delivered to you promptly. When you buy from us, you get products that feature the quality and look you expect.
Browse by Year

IMAGES
VIDEO
COMMENTS
Spare parts and accessories for BENELLI TREK 1130 / AMAZONAS - TREK1130. My Bike 2006 - 2016. Find another bike. Specifications * Engine size: 1131 Cylinders: 3 hp/kW: 125/92, 112/72, 137/87 Vehicle weight (kg): 240 Seat height (mm): 807 Engine idle speed: 1250 U/MIN ...
REPLACEMENT FOOTPEG RACING 82MM NOT THREADED FOR BONAMICI RACING REARBOARDS. €54.90 €61.00. Showing 1-24 of 99 item (s) 1. 2. 3. …. 5. Benelli Tre 1130 K Amazonas Spare parts and accessories online shop.
EBC Semi-Sintered Touring V Brake Pads - FA266V. model fitment. £22. 06. 1. 2. We're hiring. Find out more…. Benelli Tre-K 1130 (06-11) Parts & Accessories from the UK's leading online bike store. Free UK delivery over £25 and easy returns on our range of over 80,000 products.
When you buy from us, you get products that feature the quality and look you expect. 2009 2008 2007 2006. We carry all Benelli Tre 1130 K parts and accessories you need to make your motorcycle look and perform perfectly. Shop for wheels, lights, and more at MOTORCYCLEiD.com.
Moto Vision, your specialist to equip your bike BENELLI TRE-K 899 1130 ! Parts and accessories for motorcycles BENELLI TRE-K 899 1130. On Moto Vision, you will find everything you need to equip your BENELLI TRE-K 899 1130 at the best price ! ... Ring gear steel for BENELLI 899 TNT 2005/2009 41 525 1130 TREK 2007/2013. 39,40€ incl. VAT. 33,49 ...
MOTORCYCLE ACCESSORIES AND SPARE PARTS. Brake discs 1; Brake pads 3; License plate 1; Motorcycle batteries 2; Quickshifters 1; Tank bags 1. Flanges and accessories for tank bags 1; MOTORCYCLE BRAND AND MODEL. BENELLI 10. ... LICENSE PLATE HOLDER FOR BENELLI TREK 1130 2006-2009, ADJUSTABLE IN ALUMINUM.
TreK 1130 Amazonas - Looking for Parts. Tags automatic choke fuel sensor parts needed trek 1130. Jump to Latest Follow ... Benelli Forum. 201.7K posts 9.9K members Since 2003 A forum community dedicated to Benelli Motorcycle owners and enthusiasts. Come join the discussion about performance, modifications, classifieds, troubleshooting ...
All motorcycle parts at great prices for BENELLI TRE-K 1130 AMAZONAS 1130 2014. motorcycle parts for benelli tre-k 1130 amazonas 1130 2014 . Home; Contact; Cart ; BENELLI; 1130; TRE-K 1130 Amazonas; ... BENELLI 1130 cc TREK-K 1130 2014 . Available products . Quicksearch. Make
parts and accessories for Benelli Trek 1130 TK 2007-2017 Motorcycle Accessories Brake Lever Clutch Lever Motorcycle Handlebar Riser TÜV approved
Welcome to the greatest source for Benelli parts, accessories and information! Product added to basket Your Benelli Superstore! Catalog; TRE K Family TRE 1130 Family TRE 1130 K MY11 Register here! Log in to your account. 0. 0.00. Log in to your account. 0. 0.00 - SPECIAL TOOLS TIMING HEAD ASSEMBLY CYLINDER-PISTONS CRANK GEARASSEMBLY HALF ...
Benelli Tre 1130 K Parts. Parts Helmets Riding Gear Body Armor Accessories Wheels & Tires Lighting Electronics Maintenance Women'S Benelli Tre 1130 K Parts ...
Your Supplier for BENELLI, TRE-K 1130 parts, all parts delivered worldwide, order easy with a great customer service.
Benelli Tre 1130 K Parts. View (reloads the page) Sort (reloads the page) Cruztools Speedkit Compact European Tool Kit $34.00. Givi E360N 40 Liter Monokey Top or Side Case Matte Black $217.80. Givi E470NTA 47 Liter Monolock Tech Top Case $214.20. Givi V46NFA 46 Liter Monokey Top Case Matte Black with pre-install LED light $352.80.
I have bought a new Trek 1130 with 0 kms and I have changed the springs of the fork (Andreani), injectors, Z25, rear shock absorber and starter. The fork I sell is in good condition and the springs are new. All carbon parts purchased from Laurence are also on sale. The carbon rear fender is original Benelli.
ENGINE/THROTTLED BODY THROTTLED BODY ADJUSTMENT N OTE: Before synchronising the throttle bodies, suitably regulate the valves clearance and the engine minimum power. Engine Minimum Power 1250 ~ 1350 r/min. N OTE: Check and execute the alignment of the throttled body with engine temperature at approx. 90/95°C.
New. Fits your 2008 Benelli Tornado Tre 1130. SBS Standard Rear Brake Rotor 5089. $13899. Sale. Universal Fit. Trackside Rear Paddock Stand. $9999. $119.99.
Bracket Kit For Side Bags Trek (Givi 41L) TRE 1130 K, TRE 899 K e Amazonas (0) €214.90. Buy. ... Stay up to date on the latest news and special offers from Benelli Moto. ... SPECIAL PARTS. ENGINE PERFORMANCE. MOTORCYCLE PROTECTIVE CLOTH. CARBON. TANK PROTECTOR. NUMBER PLATE HOLDER.
Related Manuals for Benelli TnT 1130. Motorcycle Benelli TnT1130 Use And Maintenance (47 pages) Motorcycle Benelli TNT 15 Owner's Manual ... • SPARE PARTS Use original Benelli spare parts exclusively. Use oils and greases recommended by Benelli to oil the components. Other products might appear similar in look and function but are inferior in ...
Find company research, competitor information, contact details & financial data for STELS, OOO of Elektrostal, Moscow region. Get the latest business insights from Dun & Bradstreet.
We carry all Benelli Tornado Tre 1130 parts and accessories you need to make your motorcycle look and perform perfectly. Shop for wheels, lights, and more at MOTORCYCLEiD.com. ... We know how edgy and frustrated you can feel when your Benelli Tornado Tre 1130 breaks down and you cannot ride for some time. We know you put much love and pride ...
See other industries within the Manufacturing sector: Aerospace Product and Parts Manufacturing , Agriculture, Construction, and Mining Machinery Manufacturing , Alumina and Aluminum Production and Processing , Animal Food Manufacturing , Animal Slaughtering and Processing , Apparel Accessories and Other Apparel Manufacturing , Apparel Knitting Mills , Architectural and Structural Metals ...
The 9th radio centre of Moscow was a high power shortwave and medium wave broadcasting facility at Elektrostal near Moscow.Its broadcasting frequency was 873 kHz with a transmission power of up to 1200 kilowatts. It was also used as radio jammer of "unwanted" stations.
See other industries within the Retail Trade sector: Automobile Dealers , Automotive Parts, Accessories, and Tire Retailers , Beer, Wine, and Liquor Retailers , Book Retailers and News Dealers , Building Material and Supplies Dealers , Clothing and Clothing Accessories Retailers , Department Stores , Electronics and Appliance Retailers View ...