- PlayStation 3
- PlayStation 4
- PlayStation 5
- Xbox Series
- More Systems

Safari Zone
Pokemon red version — guide and walkthrough (gb).

Guide and Walkthrough (GB) by zerokid
Version: 2.8 | Updated: 03/21/2023
- Previous: Fuchsia Gym
Table of Contents
- Next: Power Plant
- Introduction
- Gameplay hints and tips
Walkthrough
- Pallet Town
- Viridian City
- Viridian Forest
- Pewter City
- Cerulean City
- Sea Cottage
- Cerulean Gym
- Underground Path (Routes 5–6)
Vermilion City
- Diglett's Cave
- Vermilion Gym
- Rock Tunnel
- Lavender Town
- Underground Path (Routes 7–8)
Celadon City
- Saffron City
- Celadon Game Corner
- Rocket Hideout
- Celadon Gym
- Pokémon Tower
Fuchsia City
- Fuchsia Gym
- Power Plant
- Fighting Dojo
- Saffron Gym
- Sea Route 19
- Sea Route 20
- Seafoam Islands
- Sea Route 21
- Cinnabar Island
- Pokémon Mansion
- Cinnabar Gym
- Viridian Gym
- Victory Road
- Indigo Plateau
- Cerulean Cave
- About the games
- Version differences
- Title screen
- Overworld menu
- Stat modifiers
- Status conditions
- Catching Pokémon
- Pikachu's Beach
- In-game trades
- Connectivity
- Pokémon evaluations
- General items
- TMs and HMs
- Battle items
- Pokémon list
- Pokémon #001–#010
- Pokémon #011–#020
- Pokémon #021–#030
- Pokémon #031–#040
- Pokémon #041–#050
- Pokémon #051–#060
- Pokémon #061–#070
- Pokémon #071–#080
- Pokémon #081–#090
- Pokémon #091–#100
- Pokémon #101–#110
- Pokémon #111–#120
- Pokémon #121–#130
- Pokémon #131–#140
- Pokémon #141–#151
- Stat determination
- Evade and accuracy
- Critical hits
- Damage calculation
- Encounter tables
- Catching mechanics
- Safari Zone mechanics
- Pikachu's friendship
- HP bar colour
- Dual-type effectiveness message
- Obedience mechanics
- Hidden items
- Bugs and glitches
- Cinnabar Island wild Pokémon glitch
- Old Man glitch
- Trainer-Fly glitch
- Experience underflow glitch
- Stat modification glitch
- Stoneless Evolution
- Revisit the S.S. Anne
- Battle Professor Oak
- Version history
Center Area

Center Area (east)

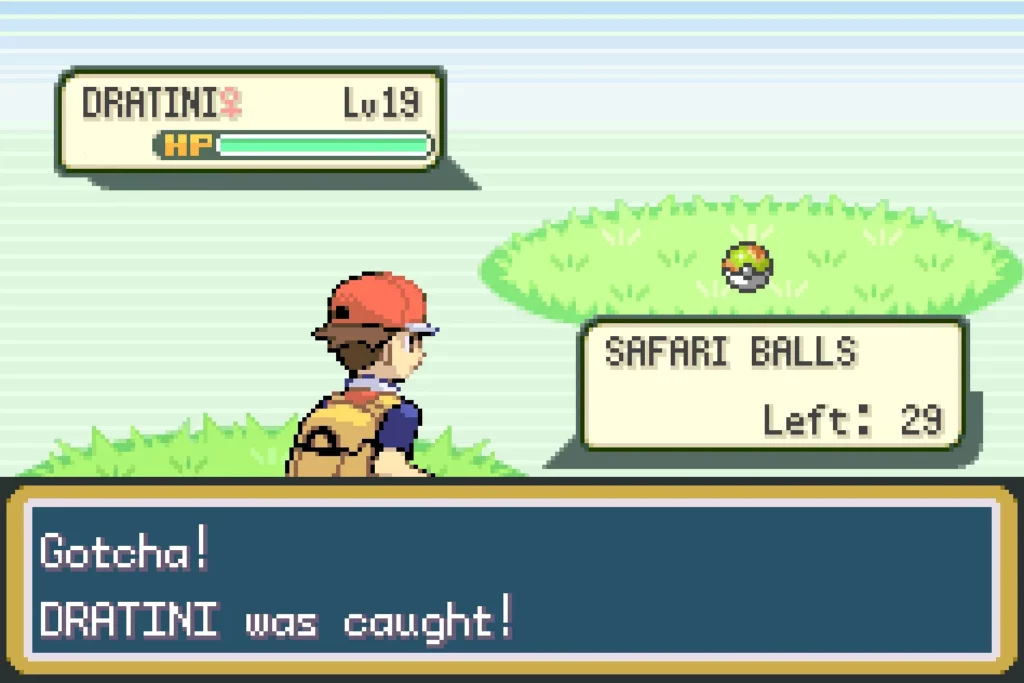
In the entrance gatehouse to the Safari Zone, pay the requisite ₽500 to enter and receive 30 Safari Balls before heading inside the Safari Zone proper.
In Yellow Version, if you bother the attendant here, he will allow you to enter the Safari Zone even if you don't have ₽500. Instead, he will take all your remaining money and give you a number of Safari Balls proportionate to the amount you paid, leaving you with a single Safari Ball if you have no money at all. It seems the developers did this to avoid an uncommon scenario that could prevent you from making any further progress in the game: if you have no money and no method of earning any more, you cannot enter the Safari Zone to obtain HM03 and the Gold Teeth, both necessary items to complete the game. No such check exists in Red and Blue, so it is quite possible, though extremely unlikely, to get yourself into this situation in those games.
Interestingly, there is an out-of-bounds hidden item inside the entry gatehouse. The Itemfinder will ping if you use it, but, unfortunately, there is no way to unearth the hidden Nugget in here.
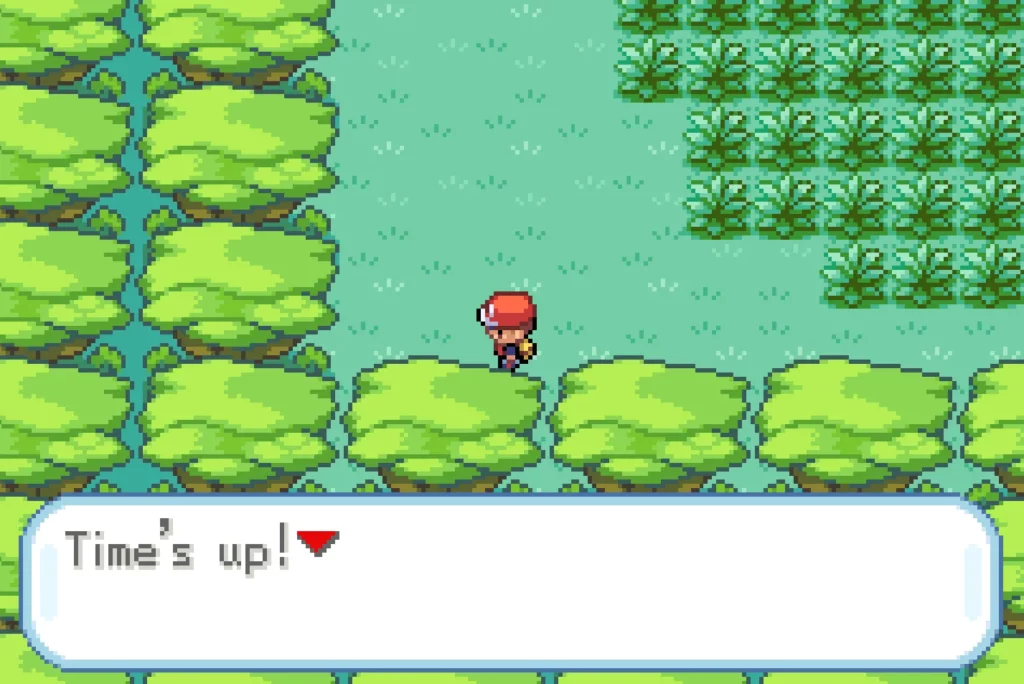
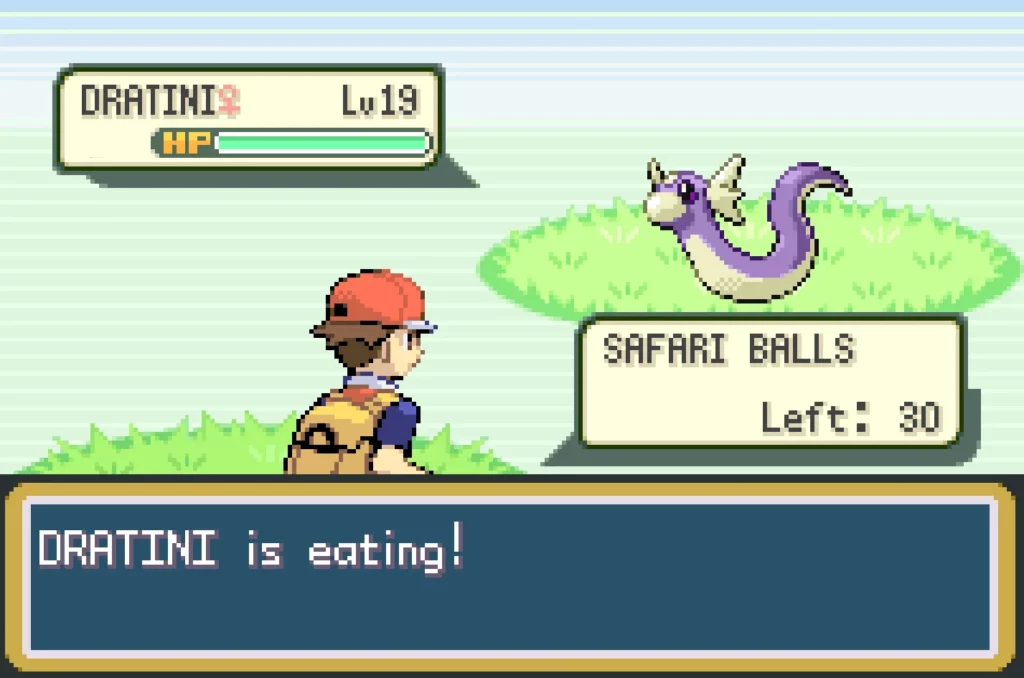
Safari Zone mechanics You have a 500-step counter while inside the Safari Zone. Running out the counter will automatically return you to the entrance, as will running out of Safari Balls. Turning on the spot does not count as a step, but can still be used to trigger wild Pokémon battles. You are restricted to the 30 Safari Balls you bought when entering, and any unused Safari Balls are lost once the game is over. The Safari Zone also has different battling mechanics to the rest of the game. The Pokémon here do not attack you but have a nasty habit of running away from battle, and those with higher Speed stats are more likely to flee. Instead of sending out a Pokémon to fight, you're restricted to throwing rocks and bait, which affect the capture chance and fleeing chance of the target Pokémon. Each rock you throw at the wild Pokémon doubles the chance of catching it but also makes it angry for 1–5 turns, and an angry Pokémon is twice as likely to flee. Conversely, each thrown bait halves the chance of catching the Pokémon but also lulls it into an eating state for 1–5 turns, during which time it is four times less likely to flee. For all these unexplained mechanics, the strategy that gives you the best chance to capture a Pokémon on any given encounter is simply to throw Balls at it and ignore rocks and bait entirely. The only time you might ever want to consider rocks and bait is if you are running low on Balls, but you will be significantly reducing your capture chances if you do this. A little later on, Red and Blue players can take advantage of a glitch to bypass all these odd mechanics and catch Safari Zone Pokémon using standard battle mechanics. For a full breakdown of these mechanics, take a look at the Safari Zone mechanics section.
Center Area : Besides the tall grass, there isn't much of interest in the Center Area at the moment.
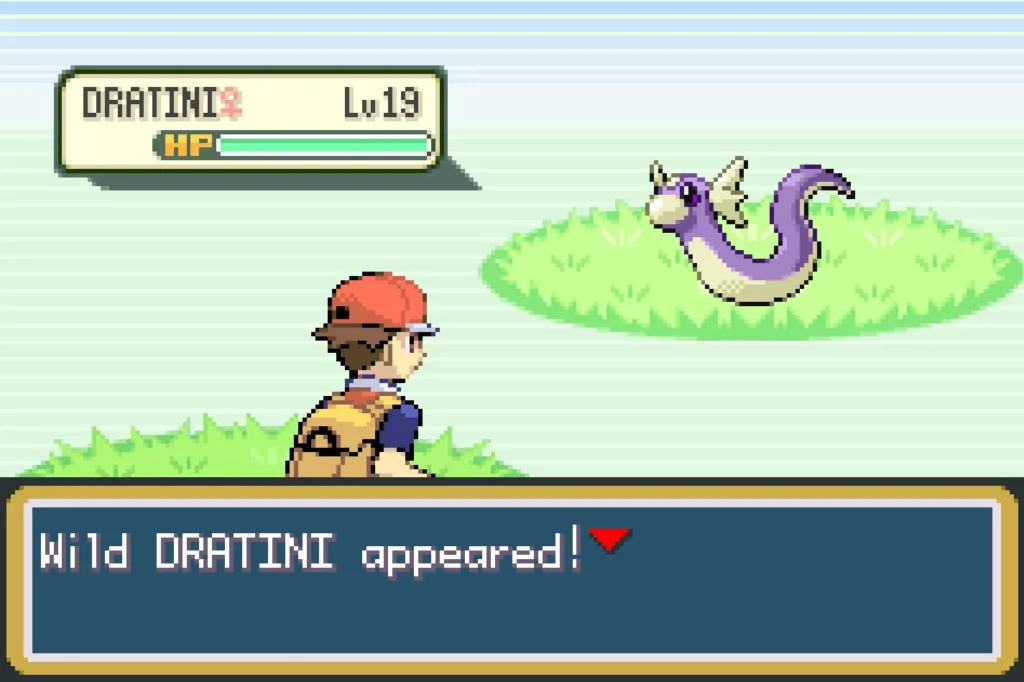
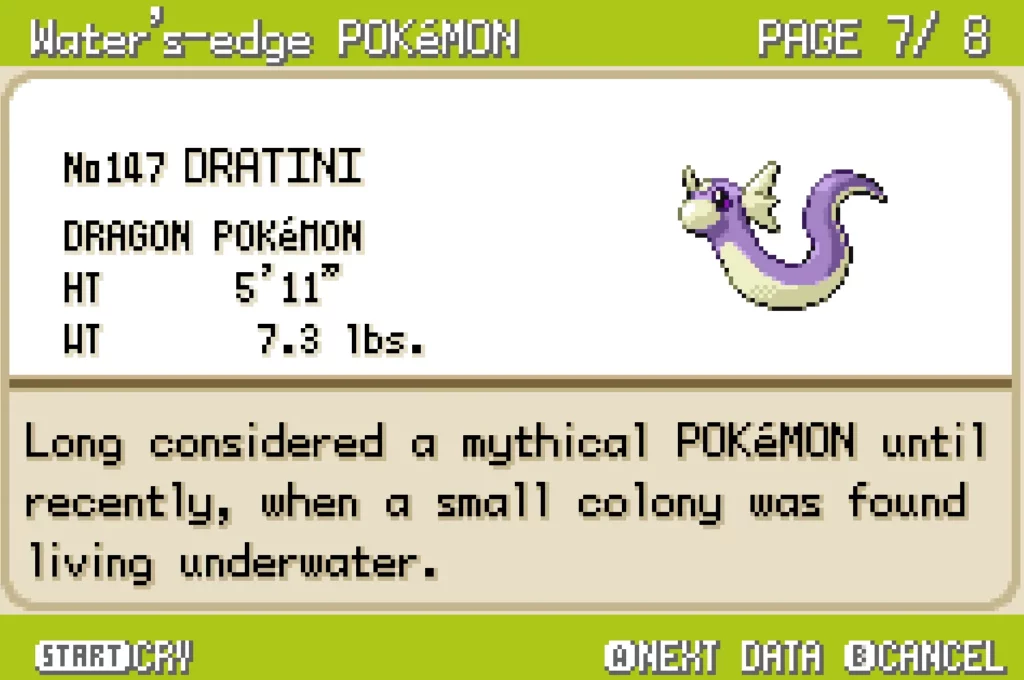
Pokémon evaluations Exeggcute ( evaluation ) — Rating: C . Though it will be underlevelled and belongs to the Slow experience group, Exeggcute has a nice Grass/Psychic typing and can evolve immediately into the powerful Exeggutor. It wants the Psychic TM to be truly effective, however. Rhyhorn ( evaluation ) — Rating: D . Another underlevelled Pokémon in the Slow experience group, Rhyhorn won't evolve until level 42. While its physical stats are incredible and its movepool is great, it requires a long grind to become powerful, and still has low Speed and Special. Chansey ( evaluation ) — Rating: D . Chansey isn't a bad Pokémon, but it is extremely difficult to catch. Its abysmally low Attack means it can't effectively use any STAB moves, but it does at least have a strong Special and a wide special movepool. Tangela ( evaluation ) — Rating: D . A rare Safari Zone encounter, Tangela has a terrible movepool consisting entirely of Grass- and Normal-type attacks. It lacks SolarBeam or even Petal Dance , and its Attack stat is too low to use Normal-type moves effectively. Dratini ( evaluation ) — Rating: D . Available for the first time in Yellow Version, though at the low level of 15, Dratini only evolves into its powerful final form at level 55. This is a long grind due to Dratini's low stats and Slow experience group.
In-game trade preparation To complete all in-game trades, Red and Blue players should catch a Nidorino to trade for a Nidorina on Route 11, while Yellow players should catch an extra Tangela to trade for a Parasect on Route 18. You'll be reminded shortly when to trade these in, although none of these trades is worth it for anything except completion purposes.
Head north-east and take the narrow eastern path into Center Area (east).
Center Area (east) : In this area, a few new Pokémon are available, though Kangaskhan is found in Area 2 in Yellow, while Tauros is found in Areas 2 and 3 in Red and Blue, being most common (though still very rare) in Area 3.
Pokémon evaluations Kangaskhan ( evaluation ) — Rating: D . Kangaskhan is a tough Normal-type Pokémon with good stats and an excellent movepool. However, it is also a rare Safari Zone-exclusive encounter that is likely to run away, making it extremely difficult to catch. Tauros ( evaluation ) — Rating: D . Tauros doesn't fair too well in-game largely because it's so rare and hard to catch, and then will be a little underlevelled. If you do get one, it's a strong Normal-type Pokémon with great Attack and Speed and a fantastic movepool.
Head east and climb the rocky plateau to the north. At the northern edge is a Carbos . Take the westernmost stairs down off this plateau and head north. A patch of land jutting into the central body of water has TM37 ( Egg Bomb ) on it.
TM37 can be bought infinitely at the Celadon Department Store and contains Egg Bomb, a mediocre Normal-type move with 100 power and 75% accuracy. It can only be learned by Exeggcute, Exeggutor, Chansey and Mew, which all have much better options.
To the north-west, you can pick up a Max Potion . Proceed east from there, using the small rocky plateau here to bypass the tree, and pick up the Full Restore on the other side. Finally, go up around the plateau to the west and take the western exit to Area 2.
Area 2 : Check if you have any new Pokémon available to you in Area 2 before continuing.
In-game trade preparation (Yellow) This is the only area in the game where Kangaskhan can be caught in Yellow Version, and you can catch a spare one to trade away for a Muk much later on. This isn't worth it for anything other than completion purposes.
Head west, ignoring the first staircase to the north and the path exiting south, and instead pass through the patch of tall grass to the north and take the set of stairs here. Come down off this rocky plateau using the stairs to the south-west, and then go as far north as you can. To the east from here is TM40 ( Skull Bash ).
TM40 is a one-time TM which teaches Skull Bash, a 130-power Normal-type move with the massive drawback of requiring a charge turn to execute. Pass.
Loop around the bushes to the north to find a Protein and continue west. Head all the way south and exit south into Area 3.
Area 3 : Pick up the Gold Teeth to the south, then head west and pick up TM32 ( Double Team ) in plain sight.
Using Double Team to ramp up your evade stat can be very useful if luck is on your side. After enough uses, it can feel almost impossible for your opponent to hit you, and with enough luck, it can be so good that it earned itself a ban from competitive matches. Still, it takes time to use it repeatedly over a few turns, and in-game you can often one-hit KO an opponent with supereffective hits. If you want game-breaking strategies, X Accuracy and one-hit KO moves are quicker and far superior. TM32 is also infinitely available to buy from the Celadon Department Store, so you can at least try it out without having to worry too much.
There is also a hidden Revive which is inside the nearby statue. Enter the Secret House by this statue and speak to the man inside to receive HM03 ( Surf ).
As well as being an HM move which allows you to travel over bodies of water on the overworld, Surf is an excellent Water-type move in its own right, being a little less powerful than its closest competition, Hydro Pump, in exchange for near-perfect accuracy and higher PP. It should be a staple move on any Water-type Pokémon for a strong and reliable STAB attack, though a handful of other Pokémon can learn it too. Its only downside is that once it is learned, it can't be forgotten short of trading the Pokémon to Gold, Silver or Crystal, so think carefully before teaching it.
If you have defeated the Fuchsia Gym Leader, you can now use Surf outside of battle after teaching it to a compatible Pokémon. Exit the Secret House and surf south over the small body of water here. Head south into the patch of tall grass and pick up the Max Potion a little to the east before climbing on to the rocky plateau. Head east and descend the other set of stairs here to pick up a Max Revive before exiting to the east.
Center Area : You'll emerge back into the west side of the Center Area. Head east and surf across the water to pick up the final item, a Nugget . That's all for the Safari Zone unless you want to catch any more Pokémon, so either exit to the south or, more likely, have the step counter run out to return to the entrance.
Link to area overview
Back in Fuchsia City, head for the Warden's house, which is the building directly east of the Pokémon Center. Now that you have the Gold Teeth, you can return them to the Warden to receive HM04 ( Strength ).
Strength is used on the field to push large boulders around, which will be needed to solve a few puzzles later on. In battle, it's an unremarkable 80-power Normal-type move that's outclassed by moves such as Body Slam. However, because it is an HM move, it can be taught infinitely, so if the TM for Body Slam has already been used up on a Pokémon, Strength is a reasonable alternative.
You can put Strength to work immediately and push the nearby boulder to one side so you can claim the Rare Candy .
Surf round-up With Surf now available to use outside of battle, a large portion of the game opens up to you. There are also some areas you have previously visited where you can now pick up new items and Pokémon. This guide will first take care of some in-game trades before continuing to the surf round-up.
Red/Blue in-game trade 6/9 : Nidorino ↔ Nidorina Red and Blue players should withdraw their Nidorino for this in-game trade before flying to Vermilion City and heading east on to Route 11. Proceed all the way east into the gatehouse, then head upstairs and talk to the young man by the window to trade your Nidorino away for a Nidorina.
Yellow in-game trade 3/7 : Tangela ↔ Parasect Yellow players can instead withdraw their Tangela for another rather pointless in-game trade. From Fuchsia City, take the western exit into the Route 18 gatehouse, then head upstairs and talk to the man here to trade Tangela away for a Parasect.
Surf on to the water directly south of the Pokémon Center. You'll spot two houses to the south. Surf in between them and examine the west side of the eastern house, on the tile closest to land, to find a hidden Max Ether .
Yellow players should now head to Route 6, just north of Vermilion City.
Pokémon evaluations Psyduck ( evaluation ) — Rating: D . This is the only place that Yellow players can catch a Psyduck or, rarely, its evolved form, Golduck. It'll be very underlevelled compared to the rest of your team but is otherwise a decent, if somewhat bland, Water-type Pokémon.
In-game trade preparation (Yellow) Catch a spare Golduck here if you can, even if it is rather rare, to trade away for a Rhydon later on. If you don't want to hunt for the rare Golduck, then alternatively you can get one by evolving a Psyduck, though you will have to train it from level 15 to level 33 to get it to evolve.
Make your way west from the Pokémon Center to the small pond in the centre of the city. Surf across and talk to the elderly lady on the other side to receive TM41 ( Softboiled ).
Softboiled can only be taught to Chansey and Mew. If you're using one of these two Pokémon, Softboiled has some utility for its out-of-battle effect, which transfers 20% of the user's HP to a chosen party Pokémon. Given Chansey's gargantuan HP, this can save you a few trips to the Pokémon Center. In battle, it's also useful for simply healing the user for 50% of its maximum HP, though using items is still superior without taking up a moveslot. TM41 is unique, but this isn't much of an issue as there is hardly any demand for it.
Fly to Lavender Town so you can head south into Route 12. Continue south, passing through the gatehouse, until you come to the first Fisherman. Just south from him on a small isolated section of land sits TM16 ( Pay Day ), which you can reach with Surf.
Pay Day is a weak 40-power Normal-type move without much battling use and generates money equal to twice the user's level whenever it hits the opponent. This isn't much, so it is not worth using up a moveslot for this. TM16 is unique, so use it carefully.
Pokémon evaluations Slowpoke ( evaluation ) — Rating: C . This marks the first opportunity for Yellow players to catch a Slowpoke, though higher-level ones are available later on at the Seafoam Islands. Water/Psychic typing is fantastic, but Slowpoke takes a lot of hits due to its abysmal Speed.
Now that you have Surf and have tidied up any previous areas, you can take a detour to pick up Zapdos, a level 50 dual-type Electric/Flying Legendary Pokémon. It's an excellent Pokémon, particularly if you don't have an Electric-type Pokémon on your team and have saved the Thunderbolt TM for it.
Purchase a handful of Ultra Balls and bring along a Pokémon that can put opponents to sleep, because Zapdos has a very low catch chance if it isn't inflicted with any status conditions. Freeze is equally good but far harder to inflict, while poison, burn and paralysis aren't quite as good but are still better than using no status condition at all. Also, make sure you have enough room in your PC Box for Zapdos and a handful of other wild Pokémon that you might be interested in.
Fly to Cerulean City and withdraw Pokémon that can use Surf and Cut. Head toward the eastern exit of the city by passing through the burgled house and using Cut on the bush before Route 9. Head all the way east through Route 9 on to Route 10, recognisable by a large patch of tall grass bordered by water on the north and east sides.
It might be worth healing up at the Pokémon Center just to the south here, which is the nearest one to the Power Plant but also cannot be accessed via Fly. This means that using Dig or an Escape Rope to leave the Power Plant will return you to this Pokémon Center, saving you the trek through Route 9 from Cerulean City.
Surf on to the water to the north and follow it around to the east and south. As it banks around to the west, you'll spot a PokéManiac (F) above you.
PokéManiac (F) Pokémon Type Lv. Exp. Moves Rhyhorn Ground/Rock 30 867 Horn Attack , Stomp HP: 92 , Attack: 61 , Defense: 66 , Speed: 24 , Special: 27 Lickitung Normal 30 816 Supersonic , Stomp , Disable , Defense Curl HP: 98 , Attack: 43 , Defense: 54 , Speed: 27 , Special: 45 Reward ₽1500
Just to the north-west of him is the entrance to the Power Plant, so head inside.
Pokémon Details
Dratini is a bit on the slow side, so it's important that trainers let it learn Thunder Wave at level 10. It's always a great idea to start out a battle with a quick Thunder Wave paralysis attack. Not only does it frequently prevent your opponent from attacking, it also turns the tables and lets your Dratini attack first. Here are a couple of other moves that help make Dratini be a powerful fighting Pokemon: Hyper Beam (two-part attack, but great as a finisher), Blizzard, Thunder, Fire Blast, Surf, Strength or Rest.
As stated above, Dratini defends well against Fire, Water, Electric and Grass types. If your Dratini knows a wide variety of attacks, you can use it as a wild card against any of the four. Dragon Pokemon only fear two things: Dragon and Ice attacks. Since Dragon Rage is the only Dragon type attack in Blue/Red and Yellow, it's the Ice types you really need to worry about. When fighting against Dratini, use status-changing techniques to paralyze it or put it to sleep, then follow up with Blizzard hits.
Up Next: Drowzee
Top guide sections.
- Walkthrough
- Pokemon Listings
Was this guide helpful?
In this guide.

10453572 front page hits
The Cave of Dragonflies
Where the smallest bugs live alongside the strongest dragons
R/B/Y Safari Zone Mechanics
A staple of the Pokémon series since the originals is the Safari Zone: a special place with Pokémon that aren't found anywhere else (and some that are) where instead of getting to use your own Pokémon to weaken and capture them, you must employ more old-fashioned methods while the Pokémon may run at any moment. While they haven't been in every game, they shake up the usual routine of catching Pokémon and have had various interesting mechanics through the generations - however, the very most interesting has to be the original.
How It Works
In every Safari Zone, the player is unable to use their own Pokémon at all. Instead, when you encounter a Pokémon you have four options: throwing one of the limited number of Safari Balls you have; an aggressive action used to make the Pokémon easier to catch; an enticing action used to make it less likely to run away; or running away from the battle yourself.
In Red, Blue and Yellow, the aggressive action is called Rock , and the enticing action is called Bait . The basic idea is this: throwing a rock will double your chances of catching the Pokémon, but it will also make the Pokémon angry for 1-5 turns. Conversely, throwing bait will halve your chances of catching the Pokémon, but cause the Pokémon to be eating for 1-5 turns. While angry, a Pokémon is twice as likely to run on any given turn as if it were in its neutral state, while it is four times less likely to run while it is eating than in a neutral state.
However, there are several more interesting details and subtleties to how Safari Zone battles happen.
Throwing a Ball
Capturing in the Safari Zone follows the regular R/B/Y capture algorithm , though since neither the Pokémon's HP nor its status can be affected and the only balls available are Safari Balls (identical to Ultra Balls), a lot of things are abstracted out in the Safari Zone. Unfortunately, thanks to the game's flawed RNG , Safari Balls underperform against full-health Pokémon, making all capture chances in the Safari Zone lower than intended. The capture chance maxes out when the Pokémon has a catch rate of 150 or more, for which the chance will be about 27-30% depending on rounding errors; all other Pokémon are harder than that.
The catch rate C starts out being, as in regular captures, the intrinsic catch rate of the Pokémon species. However, unlike regular captures, your actions in the Safari Zone can directly modify C, as hinted above.
Throwing Rocks/Bait
Rocks and bait have two distinct effects. First, every time a rock is thrown, the catch rate C is doubled (though it is capped at 255, so if doubling would make the catch rate more than that, it is made 255 instead), and every time bait is thrown, C is halved and rounded down. This happens even if the Pokémon is already angry or eating, and it happens completely blindly - if the Pokémon has a catch rate of 235, and you throw a rock to give it a catch rate of 255, then throwing bait will take that catch rate down to 127, rather than "canceling out" to give it the same catch rate as before.
Since the capture chance maxes out when the catch rate is 150 as explained above, there is no point throwing rocks at any Pokémon with an intrinsic catch rate of 150 or more, or more than one rock at a Pokémon with a catch rate of 75 or more, or more than two rocks at one with a catch rate of 38 or more. As it happens that covers all Pokémon that can be found in the Safari Zone except for Chansey (catch rate 30) and Dragonair (catch rate 27 in Yellow), who would need three rocks to go over 150.
Secondly, while a battle in the Safari Zone is going on, the game also keeps track of two counters, the "angry counter" and the "eating counter", which stand for the number of angry or eating turns the Pokémon has left. They both start out at zero; however, when a rock or bait is thrown, a random number between 1 and 5 inclusive will be generated and added to the appropriate counter (i.e. the angry counter if it's a rock, or the eating counter if it's bait), while the other counter will be reset to zero regardless of its previous value. This means only one of the counters can be nonzero at any given time. Since the random number is added to whatever value the counter already has, throwing further rocks at a Pokémon that is already angry will prolong its angry state, and likewise with throwing bait at an eating Pokémon. The eating and angry counters are both capped at 255.
The Pokémon's Turn
You always get the first turn in the Safari Zone, but on the Pokémon's turn, two things happen.
First, the game will check if either of the angry and eating counters is nonzero. If so, then a message saying "Wild [Pokémon] is angry!" or "Wild [Pokémon] is eating!" as appropriate is shown and the counter is decreased by one. If the angry counter is decreased to zero this way, the Pokémon's catch rate will also be reset to its initial catch rate , regardless of how it has been modified in the battle before this point; note that this last bit does not happen when a Pokémon stops eating, nor when the angry counter is reset to zero because you threw a bait.
After this, the game will perform a calculation to determine whether the Pokémon will run away on this turn. The run chance depends only on which state the Pokémon is in - angry, eating or neutral - but not on how many times you've thrown rocks/bait in any way: a Pokémon that you've thrown five rocks at followed by one bait will be exactly as happy to stick around as one that you threw a bait at on the first turn. Note that the Pokémon's actual current state does not necessarily correspond to the state indicated by the message that was just shown, since the message indicates only that the counter in question was nonzero before it was subtracted from. This also means that if you throw a rock or bait and the random number generated is 1, you will see an angry/eating message, but the Pokémon will in fact be back in its neutral state before even the run check is performed.
The run calculation itself goes as follows:
- Make a variable X equal to the low byte (i.e. the remainder if you divide by 256) of the Pokémon's Speed ( not the base Speed of the species, but the individual's actual Speed).
- If the outcome is greater than 255 (i.e. if the Pokémon's Speed was 128 or more), the Pokémon automatically runs. Skip the rest of the procedure.
- If the Pokémon is angry, double X again (if it becomes greater than 255, make it 255 instead).
- If the Pokémon is eating, divide X by four.
- Generate a random number R between 0 and 255 inclusive.
- If R is less than X, the Pokémon runs away.
All in all, this means that so long as (the low byte of) the Pokémon's Speed is less than 128 (which it always will be in the actual game - the highest Speed any Pokémon actually found in the Safari Zone can have is 75), the chance that it will run is 2*Speed/256 if it's in a neutral state, min(255, 4*Speed)/256 if it's angry, or int(Speed/2)/256 if it's eating.
Crucially, since this is the actual individual Speed and not the base Speed of the species, lower-leveled individuals are less likely to run . While Scyther at level 25 or 28 have around or above a 50% chance of running every turn in a neutral state, for instance, Yellow's level 15 Scyther are considerably easier to catch, with only a 32% chance of running in a neutral state at the most. Thus, perhaps the best piece of strategic advice for the Safari Zone is to go for the lowest-leveled possible version of your desired Pokémon, given the lower-leveled version isn't unacceptably rare.
So, well, how should one go about trying to achieve success in the Safari Zone, other than trying to catch lower-leveled Pokémon? Four basic kinds of strategies come to mind:
- Balls only. This is the simplest way to go about the Safari Zone - just madly lob balls at everything you want to catch and pray that they don't run before you catch them.
- Rocks, then balls. Throw some sensible number of rocks, then lob balls and hope you catch it before it either runs or calms down and resets the catch rate. If you see it's not angry anymore, start again from scratch with the rocks.
- Bait, then balls. Throw some bait to put the Pokémon in the eating state and make it stick around, then throw balls and hope the reduced catch rate doesn't come back to bite you. Unlike with rocks, where once the Pokémon stops being angry you're back at square one, it's not quite as obvious here that you should throw more bait once the Pokémon stops eating - each bait you throw lowers the catch rate more, after all.
- Rocks to increase catch rate, then bait to get it to stay, then balls. Throw a rock or two (or three) and then immediately throw bait. Provided your first rock doesn't generate one as the number of angry turns (in which case the Pokémon will calm down immediately and reset the catch rate), you'll manage to increase the Pokémon's catch rate before the bait gets thrown, meaning you end up with a catch rate of the same, double or quadruple the original (depending on the number of rocks), but a 4x reduced chance of running and assurance that the catch rate won't reset when it returns to the neutral state.
There are other possible strategies, but they appear obviously flawed - if you were to throw bait and then a rock, for instance, you'd end up with a normal catch rate but a higher running chance after wasting two turns, which can't possibly be helpful. These are the main ones that at a glance appear to hold some kind of promise.
You may think, as I did when I was initially working this out, that the fourth strategy has the most potential. However, as it turns out, the R/B/Y Safari Zone is broken: the balls-only strategy nearly always wins by a considerable margin, at least in terms of your overall chance of catching the Pokémon per encounter. Wasting your time on bait and rocks is only worth it in a couple of very exceptional cases.
Wait, What?
Good question. If you don't care about getting an intuitive grasp on why this is true, feel free to skip to the Safari Zone calculator.
Here's the thing. The entire Safari Zone experience basically simplifies to a game where you and the Pokémon alternate turns, with each of you having a given chance of "winning" on each of your turns (you win if you catch the Pokémon, while the Pokémon wins if it runs). When you throw bait or a rock, however, you do that instead of throwing a ball on that turn, while the Pokémon will continue to have a chance of running on every single one of its turns; essentially, you are forgoing one of your turns (attempts to "win") in exchange for a later advantage.
What is that later advantage, then, and is it worth losing that turn? Well, in the case of a rock, you double your chances of winning (catching the Pokémon) for up to four subsequent turns - but you also double the Pokémon's chances of winning (running away), and because you used up your turn throwing the rock, it's the Pokémon that has the next move.
You can hopefully see how that's not really a recipe for success. However, it's not quite as bleak as it appears, thanks to the one place where the simplification breaks down: you have a limited number of Safari Balls. A rock, by doubling both yours and the Pokémon's chances of winning each turn, will shorten the average duration of the battle. Thus, if you have sufficiently few balls and the Pokémon has a sufficiently low catch rate and Speed, to the point that in an average battle against it you'd run out of balls before either catching it or it running, throwing a rock and shortening the battle so your balls will last can actually be worth it, even at the aforementioned cost. For instance, if you only have one Safari Ball left, then you can either throw that one ball with a regular catch rate or throw some rocks first, which will make your single ball much more likely to be effective once you do throw it; you'll only get one attempt to catch it either way. The risks will still outweigh the benefits if the Pokémon is pretty speedy, since then it will be likely to run before you can actually throw the ball at all, but for a sufficiently slow target (for a single Safari Ball, the highest Speed where a rock will be worth it is 25 or so), rocks can be a good idea when you don't have a lot of Safari Balls left.
Throwing multiple rocks can also help, at least in theory, since more rocks will continue to double your chances of catching the Pokémon without raising the running chance further. Primarily, in many of those situations where a lack of Safari Balls means one rock is a good idea, two (or possibly three) rocks improve your chances even further, though the range of situations where this works is even narrower than for one rock. Technically multiple rocks can also help in general for Pokémon with very low Speeds and low catch rates - however, that's low Speeds as in single digits, and no Pokémon that fit the bill are actually found in the Safari Zone, making that point kind of moot. Otherwise, if you have plenty of balls to spare, the free angry turns they usually get to run away before you even start trying to catch them just result in a disadvantage you can't make up for.
What about bait? Bait is immediately somewhat more promising than rocks, since it halves your chance of "winning" but quarters the Pokémon's. However, bait also differs from rocks in that the catch rate doesn't go back to normal after the Pokémon stops eating, and just like rocks shorten the duration of the battle, bait prolongs the battle - it makes both parties less likely to win on subsequent turns. And the longer the battle goes on, the more the up-to-four turns (remember, the counter is decreased before the run check) that the Pokémon is actually less likely to run diminish in significance compared to all the turns after the Pokémon stops eating, when it will still have a lowered catch rate but a regular chance of running. That's besides the fact that again you must forgo a turn to throw the bait in the first place. In fact, as it turns out this makes bait wholly useless: there is not even in theory a Speed/catch rate combination for which bait will do you any good.
Where does this leave that especially promising-looking "rocks, then bait" strategy? Ultimately, it's stuck in the same rut rocks are: it's normally only useful for Pokémon with such ludicrously low Speed that they don't actually exist in the Safari Zone, and unfortunately, while rocks at least have a niche when you're running low on balls, you're always going to be better off just throwing however many rocks you're going to throw and then throwing your ball than throwing the rocks and then wasting your time on bait if you only have a couple of balls left. This strategy requires wasting several turns without throwing any balls, during some of which the Pokémon will have an increased chance of running, and to make matters worse, if the number of angry turns generated is one, you're going to lose even the rock's advantage and end up with the bait's lowered catch rate after all that preparation. It just kills it.
So, again, in nearly every case the best strategy is to just throw balls and hope you get lucky. That is, however, assuming that what you want to maximize is your chance of success per encounter: since rocks shorten the battle and make for fewer Safari Balls required, rocks may actually save you time and money.
The Safari Zone calculator below includes a variety of strategies, despite their mostly limited usefulness; play around with it if you think you might go with a different one.
Safari Zone Calculator
Use this tool to calculate your chances of capturing a given Pokémon.
As it is, it only includes Pokémon that are actually found in the Safari Zone in either Red, Blue, Yellow, or the Japanese-exclusive Blue version. If there is demand for adding other Pokémon just for the hell of it, I can do that too, but in the meantime, I feel this makes more sense.
In addition to your chances of capturing the Pokémon with any or all of the provided strategies, the calculator will also provide you with the basic capture rate and run chance per turn. When you select a Pokémon and game, additionally, it will give you the locations, levels and rarities at which the Pokémon is found in the Safari Zone in that game, so that you can perhaps attempt to find your Pokémon at a lower level or in an area where it's more common.
The base percentages the calculator gives may not match exactly up with those given by my R/B/Y catch rate calculator , since this calculator makes the simplifying assumption that the Pokémon's HP and Speed are equal to the average HP/Speed a wild Pokémon of the given species/level would have, while the catch rate calculator does the entire calculation for each possible HP IV and takes the average of the actual outcomes. I chose not to do the more accurate calculation here because this calculation is both already relatively slow and involves two different stats - trying every possibility would mean doing that whole relatively slow calculation up to 256 times, which just seems like way more trouble than it's worth.
Pokémon: Chansey Cubone Doduo Dragonair Dratini Exeggcute Goldeen Kangaskhan Krabby Lickitung Magikarp Marowak Nidoran (f) Nidoran (m) Nidorina Nidorino Paras Parasect Pinsir Poliwag Psyduck Rhyhorn Scyther Slowpoke Tangela Tauros Venomoth Venonat
Game: Red Blue/JP Green JP Blue Yellow
Safari Balls remaining:
Strategy: Show all Balls only One rock Two rocks Three rocks Bait repeatedly One bait Two bait Three bait Rock, then bait Two rocks, then bait Three rocks, then bait
Page last modified August 9 2021 at 02:53 UTC
- PRO Courses Guides New Tech Help Pro Expert Videos About wikiHow Pro Upgrade Sign In
- EDIT Edit this Article
- EXPLORE Tech Help Pro About Us Random Article Quizzes Request a New Article Community Dashboard This Or That Game Popular Categories Arts and Entertainment Artwork Books Movies Computers and Electronics Computers Phone Skills Technology Hacks Health Men's Health Mental Health Women's Health Relationships Dating Love Relationship Issues Hobbies and Crafts Crafts Drawing Games Education & Communication Communication Skills Personal Development Studying Personal Care and Style Fashion Hair Care Personal Hygiene Youth Personal Care School Stuff Dating All Categories Arts and Entertainment Finance and Business Home and Garden Relationship Quizzes Cars & Other Vehicles Food and Entertaining Personal Care and Style Sports and Fitness Computers and Electronics Health Pets and Animals Travel Education & Communication Hobbies and Crafts Philosophy and Religion Work World Family Life Holidays and Traditions Relationships Youth
- Browse Articles
- Learn Something New
- Quizzes Hot
- This Or That Game New
- Train Your Brain
- Explore More
- Support wikiHow
- About wikiHow
- Log in / Sign up
- Hobbies and Crafts
- Video Games
- Multi Platform Games
- Pokemon Video Games
- Pokemon FireRed and LeafGreen
How to Catch Dratini in Pokémon FireRed and LeafGreen
Last Updated: December 4, 2023 Fact Checked
This article was reviewed by Ishrak . Ishrak is a Gaming & Video Expert specializing in sharing Pokémon and Minecraft videos. With over seven years of gaming and streaming experience, Ishrak has a follower base of over 30,000 YouTube subscribers and over 8 million views. He is also a Pokémon ROM-Hacker and some of his most popular videos highlight tips and advice for people learning how to play Pokémon games. This article has been fact-checked, ensuring the accuracy of any cited facts and confirming the authority of its sources. This article has been viewed 797,299 times.
Dratini is a rare, Dragon-type Pokémon that, if raised right, can be a great addition to your team. You can find this elusive Pokémon in the Safari Zone, or you can cough up a pocketful of credits at the Rocket Game Center. See Step 1 below to find out how to add Dratini to your Pokedex without breaking a sweat.
Catching Dratini in the Safari Zone

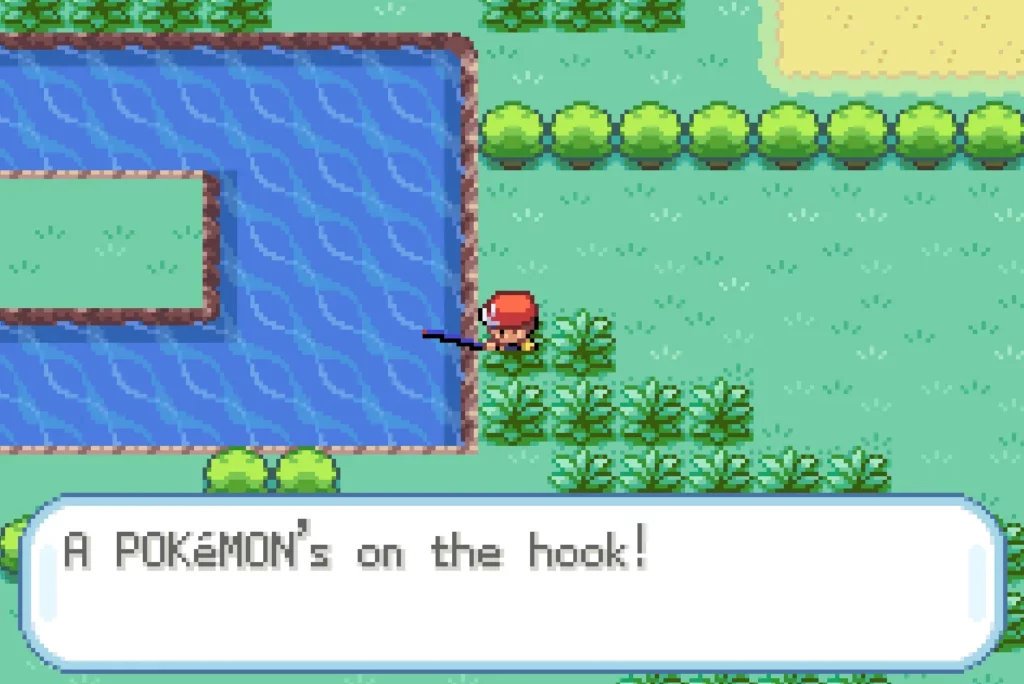
- When you hook a Pokémon, you will need to press the A button to set the hook, otherwise the Pokémon will get away.
- There is a 1% chance that you will catch a Dragonair, Dratini's evolution.

- Throwing Bait followed by a Rock will cancel the effects of each. If you want to improve the catch chance, either throw one Rock, or a Bait followed by two rocks.

Buying Dratini in Celadon City

Community Q&A
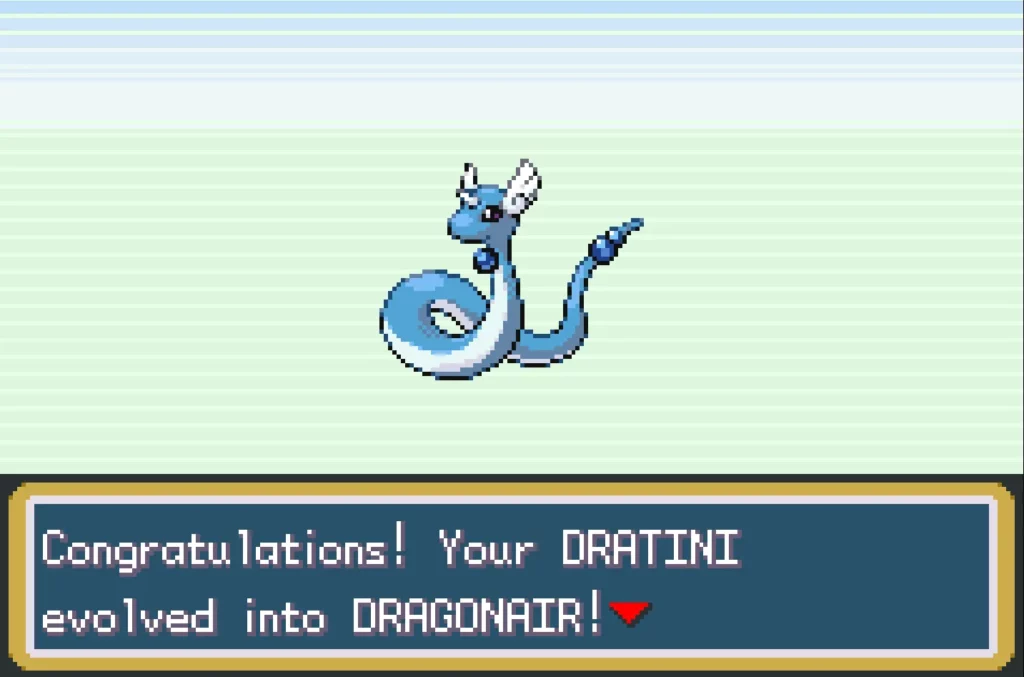
- Dratini evolves at Level 30 to Dragonair and Level 55 to Dragonite. Thanks Helpful 1 Not Helpful 0
Tips from our Readers
- Dratini will usually be higher level and less pricey if you catch it rather than paying coins for it.
- The best moves for this are thunder fire and ice punch with dragon tail.
- Don't evolve the Dratini until level 75 to get the best move.

You Might Also Like

- ↑ https://masternoobs.com/pokemon-frlg-dratini-dragonair-dragonite/
- ↑ https://bulbapedia.bulbagarden.net/wiki/Dratini_(Pok%C3%A9mon)
- ↑ https://www.smogon.com/dex/dp/pokemon/dratini/
- ↑ https://bulbapedia.bulbagarden.net/wiki/Celadon_Game_Corner
About This Article

- Send fan mail to authors
Reader Success Stories
Madhuram Verma
Jun 9, 2017
Did this article help you?

Rully Suwandi
Jun 1, 2017
Jared Watson
Mar 20, 2016

Featured Articles

Trending Articles

Watch Articles

- Terms of Use
- Privacy Policy
- Do Not Sell or Share My Info
- Not Selling Info
Get all the best how-tos!
Sign up for wikiHow's weekly email newsletter
Kanto Safari Zone

The Kanto Safari Zone (Japanese: サファリゾーン Safari Zone ) is a special Pokémon preserve in Kanto that Trainers can enter to catch wild Pokémon. It is owned by Baoba .
For $ 500, the player can play the Safari Game (Japanese: サファリゲーム Safari Game ) and receive 30 Safari Balls . Trainers are limited to 500 R B Y /600 FR LG steps in the Safari Zone before the Game is over. A Safari Zone Exploration Campaign is also taking place, where the goal is for Trainers to find the Secret House (Japanese: トレジャーハウス Treasure House ), located in the deepest area, Area 3. The prize for finding the house is HM03 ( Surf ).
In the Safari Zone, when a wild Pokémon appears, Trainers cannot send out Pokémon to battle it. Instead, Trainers must face Pokémon only with simple tools, and catching a Pokémon becomes much more reliant on luck, as Pokémon are able to run away from the Trainer at any time. Trainers may throw Bait to make a Pokémon less likely to run, but this also makes it harder to catch. Conversely, throwing Rocks will make a Pokémon easier to catch but more likely to run.
In Generation II , the Safari Zone has closed down while Baoba takes a vacation. In the contemporaneous Generation IV games, he has opened another one in Johto and Kanto's Pal Park is located here. In Pokémon: Let's Go, Pikachu! and Let's Go, Eevee! , GO Park is located here.
- 2.1 Generation I
- 2.2 Generation III
- 2.3 Bait Strat
- 3 Closing notices
- 5.1.1 Center Area
- 5.1.2 Area 1
- 5.1.3 Area 2
- 5.1.4 Area 3
- 5.2.1 Center Area
- 5.2.2 Area 1
- 5.2.3 Area 2
- 5.2.4 Area 3
- 7.1 Pokémon Pinball
- 8.1.1 Pokémon
- 8.2.1 Pokémon
- 9.1.1 Pokémon
- 9.2.1 Pokémon
- 9.3.1 Pokémon
- 11 In other languages
The Safari Zone is divided into four areas:
- The Center Area: where the player enters the Safari Zone
- Area 1: east from the Center Area
- Area 2: north from the Center Area
- Area 3: west from the Center Area
In the Generation I games, "Center Area" is actually used to refer to both the entrance area that acts as a hub to all the other areas, and the area east from this hub.
Safari Game
As with other Safari Games, Pokémon are made easier or harder to capture by modifying the Pokémon's catch rate . Pokémon can be in any of three states—angry, eating or neutral—with the angry state making them more likely to run but the eating state making them less likely to.
Generation I
At the start of an encounter, two counters—an "angry counter" and an "eating counter"—are set to 0. Whenever Bait is thrown, the angry counter is reset while the eating counter increases by a random value between 1 and 5 (but to no more than 255). The opposite occurs if a Rock is thrown: the eating counter is reset and the angry counter increases on the same basis. The catch rate is doubled (to no more than 255) whenever a Rock is thrown, but halved (rounded down) whenever Bait is thrown.
At the end of each turn, if either the angry or eating counter is nonzero, it is decreased by 1; if the angry counter is decreased to 0, the modified catch rate resets to the Pokémon's initial catch rate. A random value between 0 and 255 inclusive is generated, and if this is less than half of the Pokémon's Speed rounded down (if the Pokémon is eating), double the Speed (if the Pokémon is in a neutral state), or four times the Speed (if the Pokémon is angry), the Pokémon escapes. A Pokémon will also always escape if its Speed is 128 or more, even if it is eating.
Generation III
The Safari Game mechanics were overhauled to more closely resemble the one in the Hoenn Safari Zone . Like it, there is an additional "catch factor" that begins at 100/1275 of the Pokémon's catch rate (rounded down). Each species of Pokémon that appears in the Safari Zone also has its own "escape rate", unlike in the Hoenn Safari Zone , which is never modified. Bait cannot reduce the "catch factor" of a Pokémon below 3 and rocks cannot increase it above 20. Because of this, Chansey becomes easier to catch after being baited as its catch factor increases from 2 to 3, Pokémon with a base catch rate of 45 will not become harder to catch after bait has been thrown as their catch factor remains at 3, and Magikarp cannot become any easier to catch by throwing rocks as its catch factor is already 20.
Like Generation I, a Pokémon will be angry or eating whenever Bait or Rocks are thrown. If Bait is thrown, it will be "eating" for 1-5 turns, during which the catch factor is halved. If Rocks are thrown, it will be "angry" for 1-5 turns, during which the catch factor is doubled. Being "angry" or "eating" is mutually exclusive, though modifications to the catch factors will stack. Whenever a Safari Ball is thrown, the catch factor is converted back to a catch rate by multiplying by 1275/100 and rounding down. The amount of bait or anger a Pokémon has can stack if multiple rocks or bait are thrown. The amount cannot surpass 5 turns worth of either.
At the beginning of each turn a flee check will be completed. A random number from 0 to 99 is generated, and is compared to 5 times its "modified escape factor" if the random value is less, the Pokémon will escape at the end of the turn unless it is captured. During a flee check turn the game will determine a Pokémon's "modified escape factor" 1275/100 of the escape rate (rounded down), which is doubled if the Pokémon is "angry" or quartered (rounded down) if the Pokémon is "eating". This value cannot be reduced below 1 which is equal to a 5% chance to flee. When a Pokémon is first encountered, its flee rate cannot be lower than 2.
A restriction that causes a Pokémon's "Catch Factor" to be a minimum of 3 after bait has been thrown, causes Chansey 's catch rate to be increased from 25 (4.9% per ball) to 38 (8.09% per ball) after throwing bait. This means that throwing bait makes Chansey both easier to catch and less likely to flee. Similarly the Pokémon Kangaskhan , Scyther , Pinsir , Tauros , Dragonair , and Dratini all have catch rates that are unaffected by the use of bait. Due to this oddity players are able to increase their chances of successfully catching some Pokémon through the use of what has been called the "Bait Strat". By throwing two bait and then a sequence switching between a couple balls and then more bait players can keep a Pokémon's flee rate low by maximizing their chances that they will continue eating. Unfortunately, a Pokémon's flee check is preformed at the beginning of the turn, so bait will only come into effect the turn after it has been thrown. This leaves an inherent risk of a Pokémon fleeing before any balls have been thrown. Trainers brave enough to throw bait can find themselves with a 19.08% chance to catch Chansey per encounter as opposed to just 10.28% with balls alone.
Closing notices
In Generation II , the sign outside the Safari Zone contains a notice about it being closed in that reads:
The WARDEN is traveling abroad. Therefore, the SAFARI ZONE is closed.
In HeartGold and SoulSilver , the sign informs that since the Safari Zone is closed, the facility houses Pal Park instead.
There's a notice here... The Safari Zone is closed. Instead, we have Pal Park.
Center Area
In the spin-off games, pokémon pinball.
In Pokémon Pinball , the Safari Zone appears on the Red and Blue tables; catchable Pokémon include Nidoran♀ , Nidoran♂ , Paras , Doduo , Grimer , Rhyhorn , Chansey , Scyther , Pinsir , and Tauros .
In the anime
Main series.

The Safari Zone only appeared in the banned episode EP035 . Due to this episode's international ban outside of Asia, the Safari Zone has never appeared in the English dub , although it was mentioned in the preceding episodes The Flame Pokémon-Athon! and The Kangaskhan Kid .
In the anime, the Safari Zone is run by a gun-toting warden, Kaiser . Like in the games, Trainers are restricted to only thirty Safari Balls per challenge. It is explained that this is the result of an incident decades ago where a rumor of the extremely rare Pokémon Dratini being spotted in the Safari Zone caused countless Trainers to recklessly catch excessive amounts of Pokémon in the area and completely wreck it in the process.
Upon entering the Safari Zone, Ash and his friends encountered Team Rocket , who challenged them to a contest to see who could catch the most Pokémon. However, while Ash was busy catching Pokémon, Team Rocket forced Kaiser to reveal Dratini's location. Ash and his friends managed to stop Team Rocket's plan to detonate a bomb in Dratini's home lagoon and discovered that the Dratini which Kaiser had met decades earlier had evolved into Dragonair and now had its own child Dratini. Before leaving the Safari Zone, Ash sent the Pokémon he had caught, namely a herd of Tauros and nothing else, to Professor Oak's Laboratory .
The Safari Zone is also seen in an early trailer for the second movie , where it is experiencing a harsh blizzard thanks to the unstable weather patterns caused by the fighting between the legendary birds . The scene, like most scenes from initial Pokémon movie trailers, is never actually used in the movie.
Pokémon Origins
The Kanto Safari Zone appeared in File 4: Charizard , when Red was seen confronting Chansey in there. Initially, he had trouble choosing between throwing a rock or a bait, almost causing the Chansey to run away, but eventually, he managed to catch it and add its data to his Pokédex .
In the manga
Pokémon adventures.
The Safari Zone appeared in Long Live the Nidoking! and A Hollow Victreebel , where Red visited it. Like all visitors, Red was forced to leave his Pokémon and Poké Balls to the entrance before starting his tour. Guided by two robotic Pidgey called Pidgebots , Red started a ride on a raft in a river running through the Safari Zone. When he noticed two Nidoking fighting over the love of a Nidoqueen , Red secretly pulled out a Poké Ball he had smuggled in and tried to catch one of the Nidoking with it. However, the ball missed the Nidoking and caught Nidoqueen instead. Enraged by this, the two Nidoking attacked Red's raft, destroying it and one of the Pidgebots.
While on the run, Red ended up getting caught by a group of Victreebel , who intended to eat him as a part of their nightly evolution ritual. However, thanks to his Poké Flute and a Poké Doll , Red managed to escape. Coming across one of the Nidoking from before again, Red caught one of the Victreebel and used it to weaken Nidoking enough for capture. The next morning, when Red was found by the Safari Zone officials, he was revealed to have caught a huge herd of Pokémon.
Pokémon Pocket Monsters

Red and his Pokémon visited the Safari Zone in Rampage At The Safari Zone?! . Like many other places they visit, it ended up getting wrecked by Clefairy .
Pokémon Zensho

The Safari Zone appeared in Fuchsia City , where Satoshi entered it. After saving a Ditto from a Tauros , Satoshi met Shigeru , who showed off all the Pokémon he had managed to catch at the Safari Zone. Soon after, Satoshi came across a Fisherman , who gave him a fishing rod. To the Fisherman's astonishment, Satoshi managed to reel in a rare Dratini , and asked for him to trade it for him. At first, Satoshi was reluctant, but when he noticed the Safari Zone Warden 's missing dentures inside one of the Fisherman's Poké Balls , he accepted the offer.
On his way to return the dentures, Satoshi was ambushed and challenged to a battle by Gym Leader Koga . Satoshi's Ditto transformed into a duplicate of Koga, resulting in his Weezing getting confused and self-destructing , earning Satoshi the Soul Badge .

- The background music is Evolution .
- They are also the only areas where it is not possible to remove tall grass by using Cut . However, tall grass can be removed normally from these areas in Pokémon FireRed and LeafGreen .
- In the Generation II games, there is some data for a beta Safari Zone in Fuchsia City , but it was ultimately unused.
- Another reference to the aforementioned episode in Yellow may be the fact that Dragonair , which also appeared in EP035, is available in the Yellow Version, but not in the Red and Blue Versions.
- In Generation I , a scientist in a house in the top-right corner of Area 2 states, " You can keep any item you find on the ground here. But, you'll run out of time if you try for all of them at once! ". However, so long as the player can use HM03 ( Surf ) as soon as they pick it up, it is actually possible to collect all possible items in the Safari Zone in one visit.
- Although bait makes Pokémon harder to catch, an NPC in Area 4 says it makes them easier to catch.
- In the Western Generation I games, though the player receives 30 Safari Balls, it is only possible to catch 25 Pokémon: 5 to fill the party and 20 to fill a Box . In the Japanese games, however, the Box capacity is 30 Pokémon.
- As this doesn't happen in Red and Blue, the player will be unable to get HM03 (Surf) nor the Gold Teeth if they run out of money.
In other languages
- Candidates for moving
- Articles needing more information
- Articles with accompanying video
- Safari Zones
- Kanto locations
- Red, Blue and Yellow locations
- FireRed and LeafGreen locations
- Pokémon Pinball locations
Navigation menu
Page actions.
- View source
Personal tools
- Create account
- Editor's Hub
- Frequently asked questions
- Bulbawiki forum
- Recent changes
- Random page
Bulbagarden
- Bulbagarden home page
- Bulbagarden Archives
- Bulbagarden Forums
- Bulbagarden Discord server
- What links here
- Related changes
- Upload file
- Special pages
- Printable version
- Permanent link
- Page information
- Cite this page
- This page was last edited on 23 February 2024, at 13:50.
- Content is available under Attribution-NonCommercial-ShareAlike 2.5 . (see Copyrights for details)
- Privacy policy
- About Bulbapedia
- Disclaimers
- Mobile view

- Remember me Not recommended on shared computers
Forgot your password?
- Guide Tavern
[Hunt Guide] Safari Zone Guide

By CaptainGrey February 21, 2015 in Guide Tavern
Recommended Posts
Captaingrey.
This guide is made to help you know which Pokemon are available in the Safari Zone in Kanto & Hoenn ; What their encounter rates are ( Very Common / Common / Average / Rare / Very rare ) , what items they can hold, and what items you can find inside.
- Zehkar , Magnet , GBush and 3 others

Link to comment
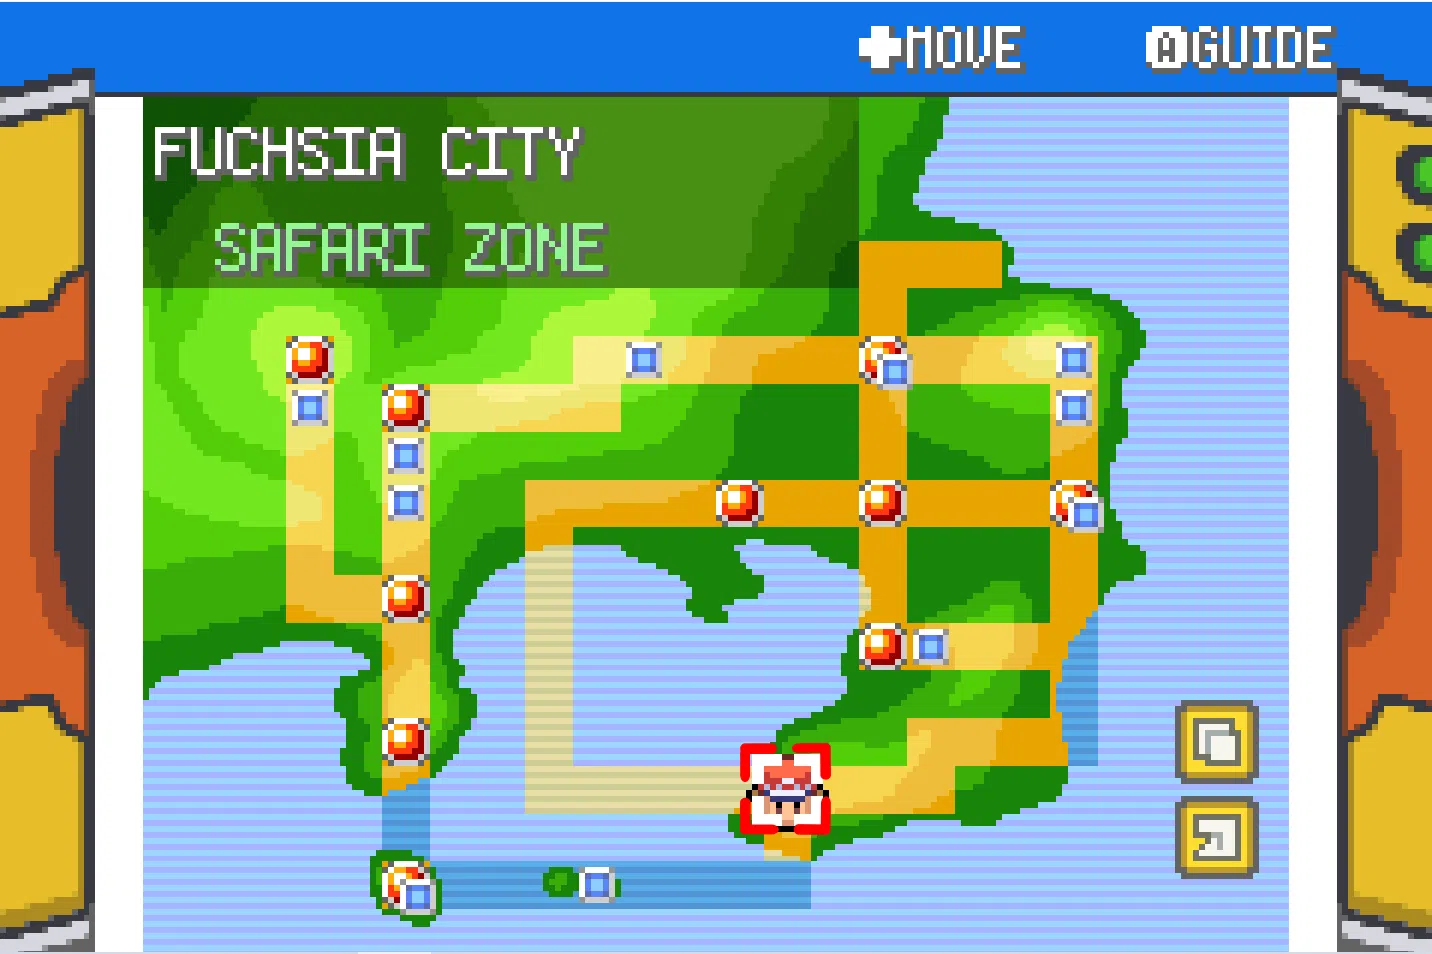
The Safari Zone in Kanto is located at Fuchsia City
Entry fees : 500 $$
Safari balls : 30
Steps : 600
>>> ENTRANCE <<<
Nidoran m -> common
Nidoran f -> common
Rhyhorn -> common
Exeggcute -> common
Venonat -> average
Nidorino -> average
Nidorina -> average
Parasect -> rare (Can hold Big & Tiny Mushroom)
Pinsir / Scyther -> rare
Chansey -> very rare (Can hold Lucky Egg)
Slowpoke/Psyduck -> very commons (day and night)
Magikarp -> 100%
Goldeen -> common
Poliwag -> average
Magikarp -> average
Seaking -> common
Dratini ->average (Can hold Dragon Fang & Dragon Scale)
Psyduck -> rare
Slowpoke -> rare
Dragonair -> very rare (Can hold Dragon Fang & Dragon Scale)
Nugget : On the island (requires Surf )
Leaf Stone : on the island (requires Surf ) (hidden)
>>> AREA 1 <<<
Nidoran m -> common
Nidoran f --> common
Doduo -> common
Paras -> average (Can hold Tiny & Big Mushroom)
Parasect -> rare (Can hold Tiny & Big Mushroom)
Kangaskhan -> rare
Scyther / Pinsir -> very rare
Psyduck / Slowpoke -> very common
Magikarp -> very commons
Poliwag -> common
Magikarp -> common
Dratini -> average (Can hold Dragon Fang & Dragon Scale)
Leaf Stone : On the upper pathway near the rest house
TM 11 (Sunny Day) : On the ledge beside the pond
Max Potion : Far west of the small mountain
Full Restore : Near the rest house
>>> AREA 2 <<<
Nidoran f -> common
Paras -> average (Can hold Tiny & Big mushroom)
Lickitung -> average
Venomoth -> rare
Nidorina -> rare
Chansey -> rare (Can Hold Lucky Egg)
Tauros -> very rare
Psyduck / Slowpoke -> very commons
Protein : On the upper pathway near the rest house
TM 47 (Steel Wing) : Beside a tree west of the rest house
Quick Claw : On a grassless patch in the middle of the area
>>> AREA 3 <<<
Exeggcute -> average
Nidorin f -> rare
Tauros -> rare
Kangaskhan -> very rare
Max revive : in a corner at the southeast base of the mountain
Max potion : in the grass at the southwest base of the mountain
Gold Teeth : south of the sign asking to find them (obligatory for obtain HM 04 Strength)
TM 32 (Double team) : southeast of the Secret House
Revive : on the southeast statue near the Secret House (hidden)
HM 03 (SURF) : from the man in the Secret House
- Bestfriends , Bilburt and Bestfriendss
The Safari Zone in Hoenn is located Route 121 before Lilycove City
>>> AREA 1 / ENTRANCE <<<
Oddish -> common
Kakuna -> common
Girafarig -> common
Wobbuffet -> average
Doduo -> average
Natu -> average
Pikachu -> rare (can hold Light Ball)
Gloom -> rare
Gloom-> rare
Psyduck -> 100%
Magikarp -> very common
Goldeen -> commmon
Goldeen -> very common
Max revive : Far southwest of the Area, beyond the pond (requires Surf )
Gloom -> average
Pinsir -> rare
Dodrio -> rare
Psyduck -> very common
Golduck -> rare
TM 22 (Solar Beam) : Far northeast of the area, beyond the pond (requires Surf and Mach Bike )
>>> AREA 4 <<<
Geodude (Rock Smash) -> 100% (can hold e verstone)
Phanpy / Donphan -> common
Heracross -> rare
Xatu -> rare
Calcium : In the far northwest part of the area (requires Acro Bike )
>>> AREA 5 <<<
Mareep -> common
Sunkern -> common
Spinarak -> average
Aipom -> average
HootHoot -> rare
Snubull -> rare
Gligar -> rare
Stantler -> rare
Chikorita -> very rare
Wooper -> common
Marill -> common
Totodile -> very rare
Quagsire -> very rare
Remoraid -> common
Octillery -> very rare
PP up : Three squares south of the southernmost Pokéblock stand (hidden)
Full Restore : In the furthest southeast patch of grass (hidden)
Big Pearl : East in a patch of grass beyond the top of the waterfall
>>> AREA 6 <<<
Shuckle (Rock Smash) -> 100% (can hold Root or Claw Fossils)
Aipom -> common
Teddiursa -> common
Sunkern -> average
Ledyba -> average
Houndour -> rare
Miltank -> rare
Pineco -> rare
Cyndaquil -> very rare
Rare Candy : In the southeast portion of the area there is a 2×3 patch of light green grass in the lower right portion of it (hidden)
Zinc : In a small nook among the wall in the rocky path to the north (hidden)
Nugget : Between two ledges at the end of the rocky path to the west
- Bilburt , Dibz , RayUwU and 3 others
will u include something about catchrate and best way to catch diffrents pokes?
- Angeluksdarkrose

Well done! Don't forget to include that you can find Claw & Root fossils on Shuckle in the Hoenn SZ when you add that to the guide, also a neat little trick for mass Shuckle hunting; Rock Smash all Rocks in Area -> Switch Channels & you don't have to move. :)
- CaptainGrey , Bestfriendss and kevpr
Moved to that main forum and added to the Guide Tavern Index.
Bestfriendss
I am planning on endorsing your guide when I get the chance to. Stay tuned to the RR News channel!
[spoiler]Keep up the good work! ;) [/spoiler]

less common, more %'s pls
its hard to judge percentiles, especially when the developers changed up the safari zones (lotad at night in Kanto, that is evidence of a change...).
means that they have the % as well. Besides, i'm not asking for cpt to put it in half n hour later, whenever they are accurate
I do pose this question to you Malorne, do you understand the fact that CaptainGrey is not a dev? I know that he posted where all the pokes are, but at the same time, he probably ventured out into the safari a couple of times. Captain is just giving his input from a CM's prospective. ( C M = Community Manager not Development Manager). Thus, Captain probably does not have the percentiles on top of his head. The devs have a hard job, but at the same time, they shouldn't be responsible for giving us percentiles, that is just plan silly. My conclusion to the problem, lack the percentiles (in the Emerald Guide Book, I read it and when it was showing pokemon, it didn't say "Whismer 100% " instead it stated "Whismer Very Common ." Percentiles are just plan silly and are not needed to make an effective guide. CaptainGrey made a to the point guide that I am planning to advertise on my YT channel, it is to the point, and no need for silly numbers.
I do pose this question to you Malorne, do you understand the fact that CaptainGrey is not a dev?
CaptainGrey made a to the point guide that I am planning to advertise on my YT channel, it is to the point, and no need for silly numbers.
how is this about your channel again? i prefer numbers of rarity, gives more precise rates.
1. The devs can't give numbers because then that would be like looking into a mathematics guide of PokeMMO rather than a typical guide. Thus, if they did give exact numbers, this would ruin the fun of the game, and this would single-handedly, expose the game too much.
2. Please refrain from insulting my YouTube channel, it is not polite. I am not going to insult you although I do feel like doing it sometimes. Violates Rule 1 clause a
These are two important points I would like to express to you. Please read them. Like I said, I am going to refrain from insulting you for all the distress you are causing here on a simplistic and to the point guide.
1. The devs can't give numbers because then that would be like looking into a mathematics guide of PokeMMO rather than a typical guide. Thus, if they did give exact numbers, this would ruin the fun of the game, and this would single-handedly, expose the game too much. 2. Please refrain from insulting my YouTube channel, it is not polite. I am not going to insult you although I do feel like doing it sometimes. Violates Rule 1 clause a These are two important points I would like to express to you. Please read them. Like I said, I am going to refrain from insulting you for all the distress you are causing here on a simplistic and to the point guide.
i didn't insult your channel lol, was simply asking what was the validity about it with the topic at hand (which is irrelivant btw) also, giving out exact encounter rates doesn't change that much of a thing with the fun of the game, coz it isn't... so i don't see why not actually, why am i even arguing with you lol. Cpt, give enc rates mate
You should play the game itself. You are ruining fun because you are bluntly giving way number information instead of a generic Very Common . Do you want to deface hope for those that want to catch Chansey, but come to find out that there is a 5% chance of encountering it. That would ruin hope for chansey lovers and also discorage people from venturing out into the Safari Zone for that Chansey or Kangaskan. Instead of ruining people's hopes, make a genaric Very Common or Very Rare label, saves the trouble and the more generic you can be, the happier the player base.
More numbers = More stress <---Important formula for an MMO's success
I will not give the % encounter rates, and please stop to debate about it on this topic to keep it clean. Thanks
do i need to remind you that some values are based on encounter rates?
Well done! Don't forget to include that you can find Claw & Root fossils on Shuckle in the Hoenn SZ when you add that to the guide, also a neat little trick for mass Shuckle hunting; Rock Smash all Rocks in Area -> Switch Channels & you don't have to move. :)
I am planning on endorsing your guide when I get the chance to. Stay tuned to the RR News channel! [spoiler]Keep up the good work! ;) [/spoiler]
Safari Zone tips...
I want to make an announcement, I endorsed your safari guide. I hope I helped in making your guide more known throughout the PokeMMO community.
- 2 weeks later...

- 5 months later...

hey quick think I noticed - in Area 4, i'm encountering a lot of Donphan (not phanphy, as the guide suggests). Otherwise this has been super helpful!
Ye I noticed this today too, i'll add it to the thread, thanks :)
Hey I cant seem to bunny hop or wheelie using the acro bike to access area 4 in Hoenn
- 4 weeks later...
DarkDragonborn
Yes! Been looking for this kind of guide.
O.o what tauros more rare then chanseys in area 2 weird cuz i was running into tauros left and right one after another more then other pokes and way more then chanseys!
I'm pretty sure for zone four in hoenn that xatu is a common, I have been encountering it more than donphan
Create an account or sign in to comment
You need to be a member in order to leave a comment
Create an account
Sign up for a new account in our community. It's easy!
Already have an account? Sign in here.
- Existing user? Sign In
- Online Users
- All Activity
- My Activity Streams
- Unread Content
- Content I Started
- Leaderboard
- Create New...
Important Information
By using this site, you agree to our Terms of Use and Privacy Policy .
How to Get Dratini in Pokémon FireRed and LeafGreen
- By Yanna Ferrera
You can get Dratini in the Safari Zone. Head to Fuschia City and pay the fee to join the Safari Game. Bring a Super Rod to fish for Dratini in any body of water inside the Zone.
Fuchsia City’s Safari Zone
Dratini can only be found in one area in the game – Fuchsia City’s Safari Zone.
Head north from the town Poké Center until you find the Safari Zone entrance.
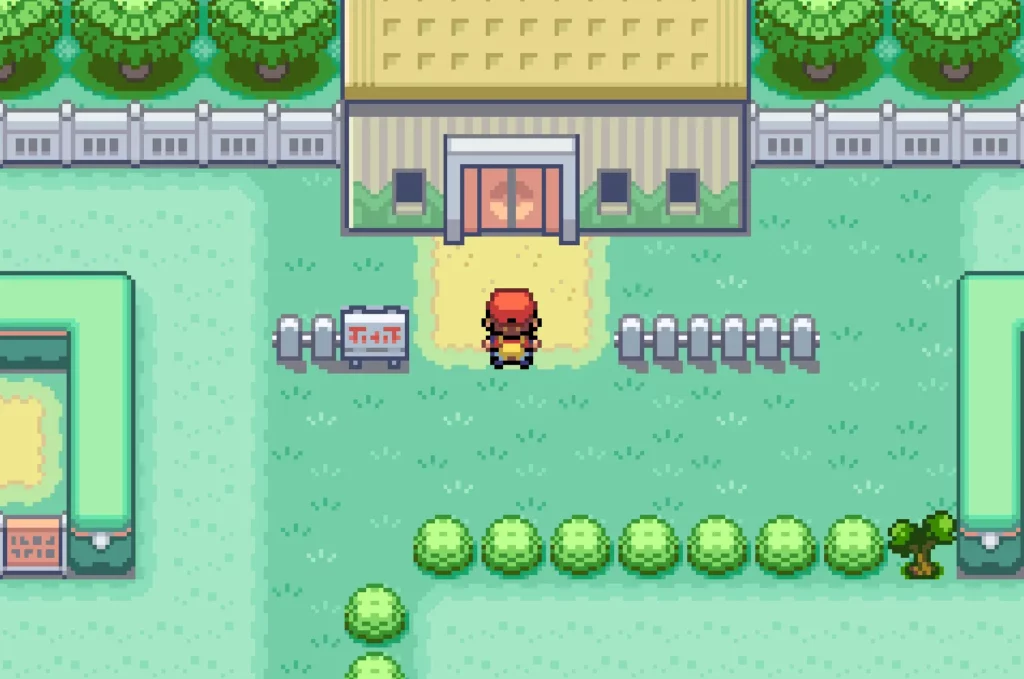
Go inside and pay the fee to play the Safari Game.

The Safari Game operates on a timed basis, but since Pokémon FireRed and LeafGreen don’t have in-game clocks, the timer is based on the number of steps you take inside the area. After 500 steps, the safari game ends.
With this in mind, it is recommended to start your search for Dratini on the first body of water you can see – this helps you fish for an unlimited amount of time until you find Dratini, provided you don’t take up any steps in doing so.
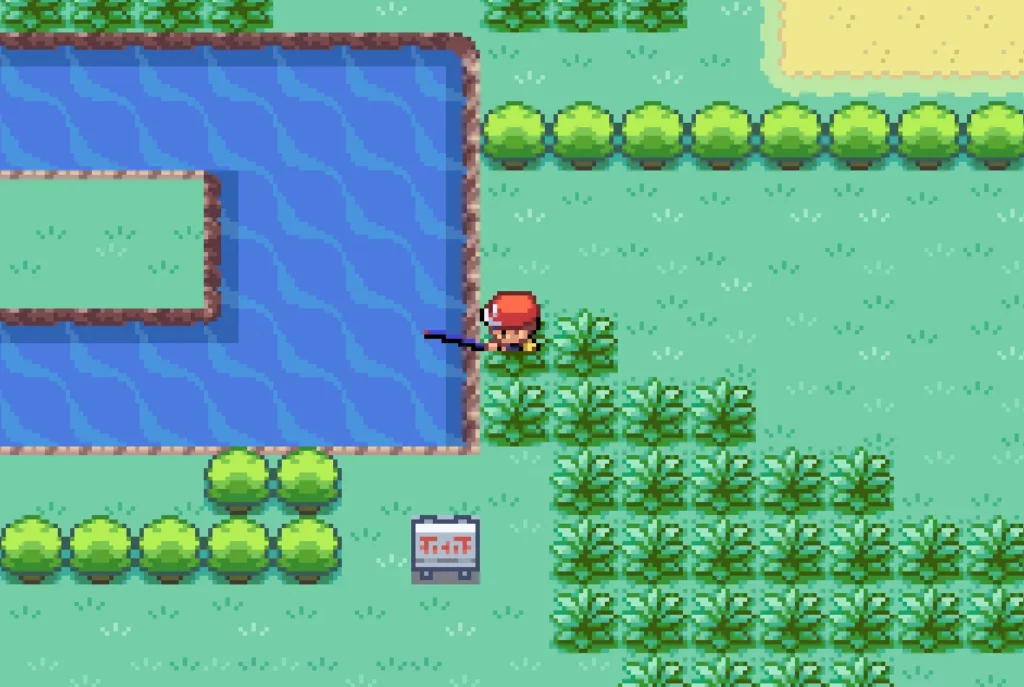
Make sure you have a Super Rod before getting inside the Safari Zone. You can find a body of water just ahead of you from the safari entrance. You can now start looking for Dratini here.
You might encounter other water Pokémon here before you find Dratini. You can even encounter its evolved form, Dragonair.

Dratini has a higher encounter rate than Dragonair though, with a 10% chance to encounter it after hooking a Pokémon.
Catching Dratini
Now that you’ve encountered Dratini, the challenge lies in catching it.
It’s a lot more difficult to catch unique Pokémon in the Safari Zone for a number of reasons. Firstly, Safari Balls do not have a good catch rate compared to Ultra Balls or Great Balls.
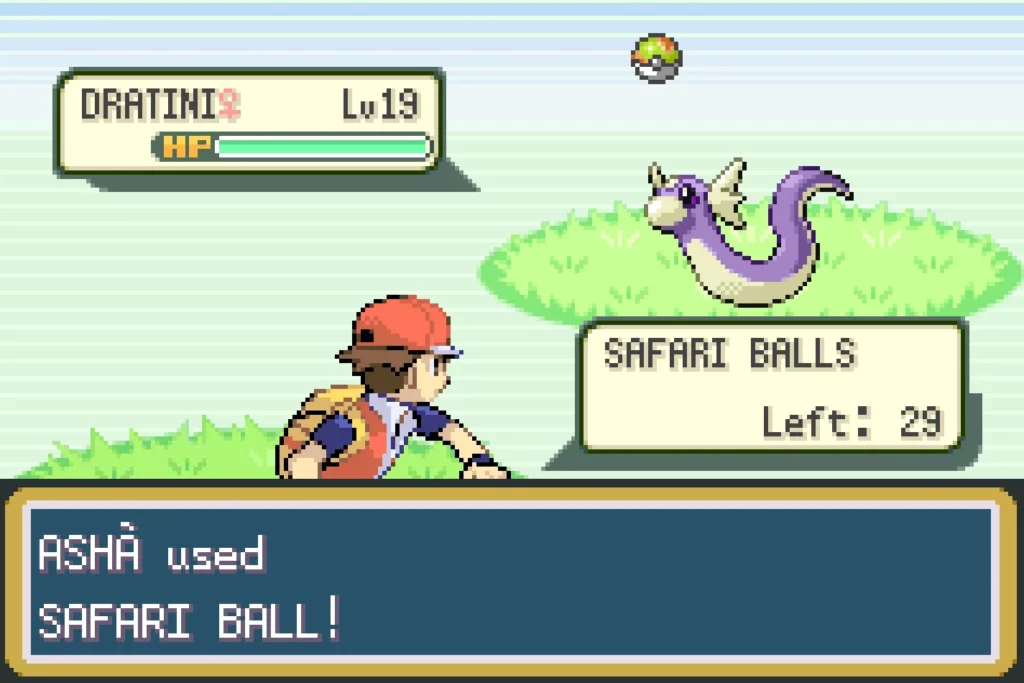
There’s also no option to weaken Pokémon to make them easier to catch, as battles are not allowed inside the Zone. Add to that, these unique Pokémon are extremely prone to flee, which makes searching for them tedious for the second time around.
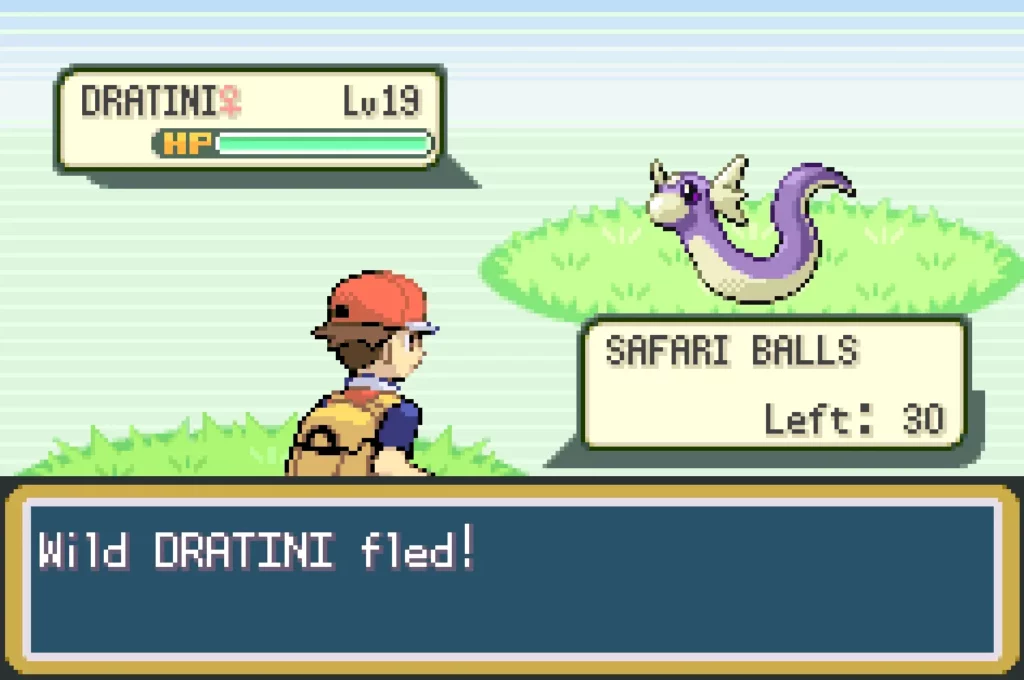
While there’s no foolproof way of 100% catching Dratini, a mixture of baiting it and distracting it will help. Feeding it some food prevents it from fleeing, while throwing rocks makes it easier to catch because they’re angry and agitated.
You should be able to catch Dratini eventually after some luck and patience.
Training Dratini
Dratini is one of few the Dragon-type Pokémon you can catch in the wild.
Train your Dratini to Level 30 and it will evolve into Dragonair. Dragonair has more Dragon-type moves than Dratini, such as Dragon Rage.
When Dragonair reaches Level 55, it will evolve into its final form, Dragonite, which is one of the strongest Pokémon in-game. Dragonite’s move set is also impressive, as it’s capable of learning Outrage and Hyper Beam at Level 61 and 75, respectively.
While catching Dratini might be tiresome at the beginning, it will definitely pay off in the long run as Dragon-type Pokémon are one of the most powerful Pokémon in-game. One of the Elite Four, Lance, even specializes in them and he proves to be a challenge to beat.
Train your Dratini and see how far it will take you!

Popular In Gaming
How to Earn Easy Money in Pokémon FireRed and LeafGreen
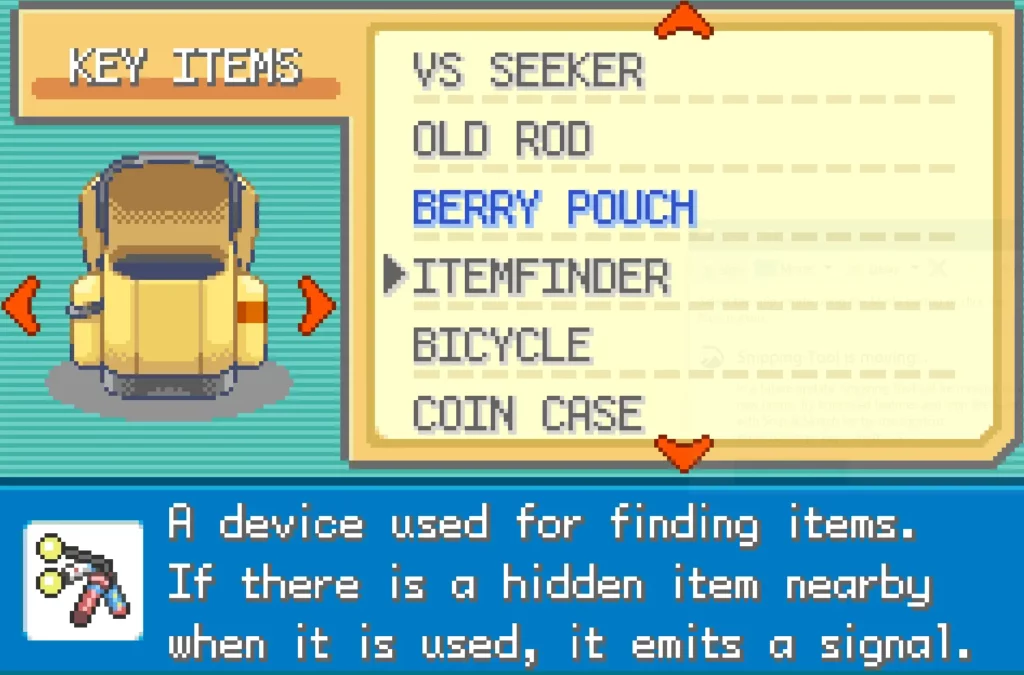
How to Get the Item Finder in Pokémon FireRed and LeafGreen
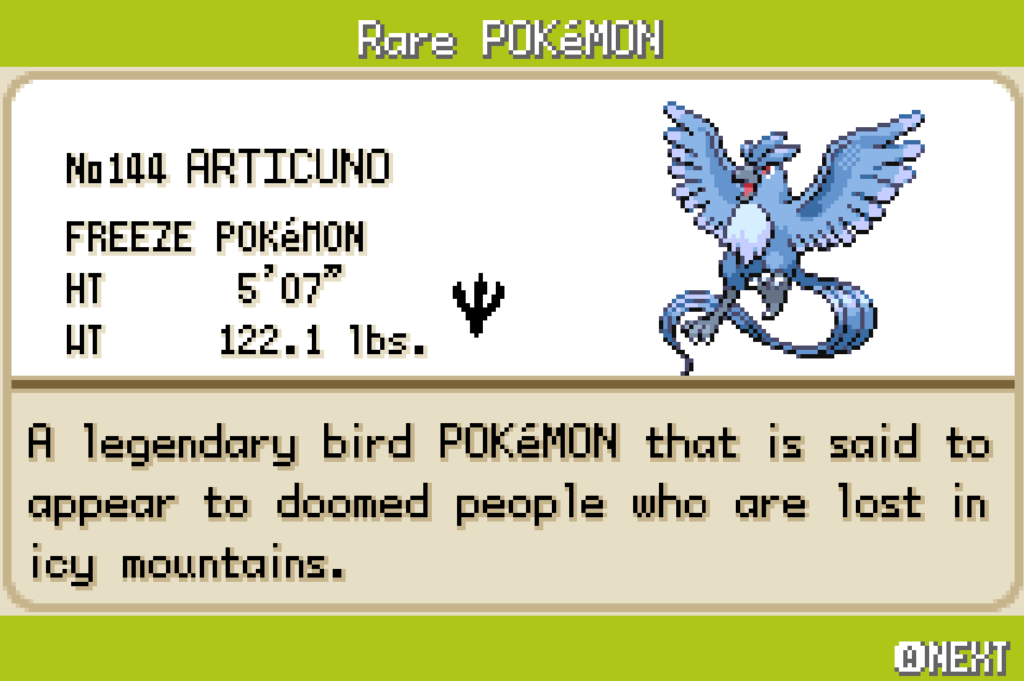
How to Catch Articuno in Pokémon FireRed and LeafGreen
Most commented gaming news.
Where to Find Nevermeltice in Pokémon FireRed and LeafGreen
Related articles.

Where to Get the Fame Checker and How to Use it in Pokémon FireRed and LeafGreen
Pokémon FireRed and LeafGreen Exclusives
All About Dragon-Type Pokémon: Strengths, Weaknesses and Strategies in Pokémon FireRed and LeafGreen

The Best Dragon-Type Pokémon in FireRed and LeafGreen
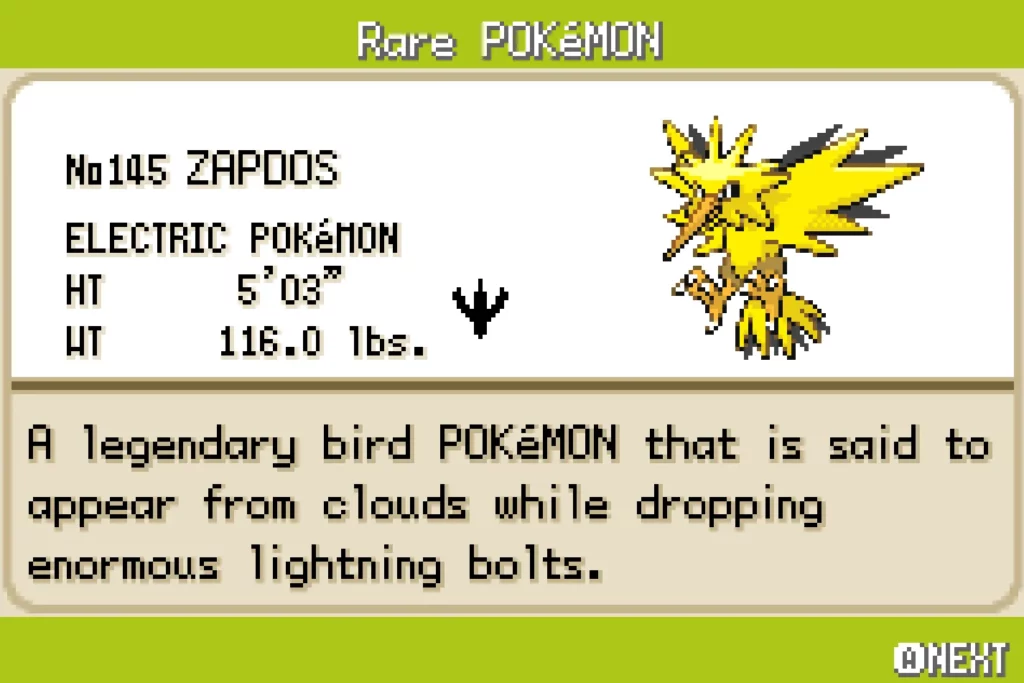
How to Find and Catch Zapdos in Pokémon FireRed and LeafGreen
Master Noobs is your source for high quality gaming News, Reviews, and Articles
Privacy Policy | Terms | Contact Us
Copyright © Master Noobs 2022 Manage Cookies / Privacy Policy
Not logged in
- Recent changes
- Random page
- From WikiHow
- Pokemon FireRed and LeafGreen
Catch Dratini in Pokémon FireRed and LeafGreen
Dratini is a rare, Dragon-type Pokémon that, if raised right, can be a great addition to your team. You can find this elusive Pokémon in the Safari Zone, or you can cough up a pocketful of credits at the Rocket Game Center. See Step 1 below to find out how to add Dratini to your Pokedex without breaking a sweat.
- 1.1 Catching Dratini in the Safari Zone
- 1.2 Buying Dratini in Celadon City
- 3 Related Articles
- 4 Sources and Citations
Catching Dratini in the Safari Zone
- Obtain a Super Rod. You will need the best rod in the game in order to catch Dratini. You can get the Super Rod on Route 12 in the house with a Fisherman inside. Talk to him and you will receive the Super Rod.
- Head to the Safari Zone. Dratini can only be caught in the Safari Zone. You don't need to worry about which Pokémon you will use to fight, as there are no battles in the Safari Zone. You can get to the Safari Zone from Fuchsia City. [1]
- When you hook a Pokémon, you will need to press the A button to set the hook, otherwise the Pokémon will get away.
- There is a 1% chance that you will catch a Dragonair, Dratini's evolution.
- Throwing Bait followed by a Rock will cancel the effects of each. If you want to improve the catch chance, either throw one Rock, or a Bait followed by two rocks.
- Throw a Safari Ball. If the ball doesn't capture the Dratini, it will have a chance to run away. If it runs, you will need to fish again to catch another one. If it stays, you can try another Safari Ball on your next turn.
- Train your Dratini. Once you've caught your Dratini, you can start training it to eventually evolve it into a Dragonite. Dratini can be used in a variety of party builds, thanks to its speed and Dragon-type attacks. To get the most out of your training, make sure to check out this guide on managing EVs , which can greatly affect the way your Dratini plays. [2]
Buying Dratini in Celadon City
- Visit the Rocket Game Corner in Celadon City. You can win a Dratini from here any time after you reach Celadon City for the first time . Dratini costs 2,800 Credits.
- Gamble or buy the credits. You can use the slots machines to earn the credits you need, or if you don't have the time and have plenty of cash, you can buy the credits. If you want to gamble for them, one of the machines has better odds than the others, but it changes every time you enter the room.
- Dratini evolves at Level 30 to Dragonair and Level 55 to Dragonite.
Related Articles
- EV Train Your Pokémon
- Duplicate Items in Pokémon Red or Blue
- Beat the First Gym Leader in Pokémon FireRed and LeafGreen
- Catch Legendaries on Pokémon Diamond or Pearl
- Catch a Pokémon (Advanced)
- Get to Celadon City in Pokémon FireRed
Sources and Citations
- ↑ http://bulbapedia.bulbagarden.net/wiki/Dratini_(Pok%C3%A9mon)
- ↑ http://www.smogon.com/dp/pokemon/dratini
- Defeat the Elite Four in Pokémon FireRed or LeafGreen
- Catch Zapdos in Pokémon Fire Red
- Beat the Gym Leaders in Pokémon Fire Red
- Get Unlimited Rare Candies on Pokémon Leaf Green
- Catch Mewtwo in Pokémon FireRed and LeafGreen
- Get Mew in Pokémon FireRed
- Capture the Legendary Dogs in Pokémon FireRed and LeafGreen
- Get the Legendary Dogs on Pokémon FireRed
- Catch Articuno in Pokémon Fire Red and Leaf Green
What links here
- Get HM Cut in Pokémon Red
You may like
- This page was last modified on 21 September 2022, at 14:15.
- Content is available under Creative Commons Attribution-NonCommercial-NoDerivs 2.5 License unless otherwise noted.
- Privacy policy
- About Kipkis
- Disclaimers
- Mobile view
- Dratini locations
Log in or register

- About + contact
- Link or embed veekun
- Pokédex history
- Awesome search
- Compare Pokémon
- Pokéball performance
- Stat calculator
- Warrior Skills
©1999 eevee/lexy munroe • pokémon ©1995 pokémon , nintendo , game freak , creatures
many thanks to these amazing contributors • icons from fugue set • country flags from famfamfam
source code • data • support ₽₽₽

IMAGES
VIDEO
COMMENTS
Area 3. In the entrance gatehouse to the Safari Zone, pay the requisite ₽500 to enter and receive 30 Safari Balls before heading inside the Safari Zone proper. In Yellow Version, if you bother the attendant here, he will allow you to enter the Safari Zone even if you don't have ₽500. Instead, he will take all your remaining money and give ...
Area 1[ edit] Safari Zone - Area 1. In Area 1, the Poké Ball on the ledge contains a Carbos. To the left of the house nearby, you will find a Full Restore. On the patch of ground that extends into the lake, a TM 37 can be found in the grass. And close to the entrance to Area 2 there's a Max Potion on the ground. Red.
Evolves into: Dragonair (at level 30) Locations: Blue and Red owners can use the coins they won in the Celadon City casino to buy a Dratini in the Game Corner. However, like Yellow owners, they ...
Throwing a Ball. Capturing in the Safari Zone follows the regular R/B/Y capture algorithm, though since neither the Pokémon's HP nor its status can be affected and the only balls available are Safari Balls (identical to Ultra Balls), a lot of things are abstracted out in the Safari Zone. Unfortunately, thanks to the game's flawed RNG, Safari ...
Dratini actually has not so small chances to encounter, 15%, you just need super rod (for best chances) and you will have unlimited time to catch Dratini, si...
1. Obtain a Super Rod. You will need the best rod in the game in order to catch Dratini. You can get the Super Rod on Route 12 in the house with a Fisherman inside. Talk to him and you will receive the Super Rod. [1] 2. Head to the Safari Zone. Dratini can only be caught in the Safari Zone.
Safari Zone, Kanto (location) Safari Zone, Kanto. (location) This is the Pokémon Location guide for Safari Zone in Kanto. Choose which generation of games you're playing to see the Pokémon and capture methods. Generation 3. Center. East. North.
Wondering how to catch Chansey in Firered and Leafgreen? Maybe you're looking for Dragonair, Tauros, Scyther Pinsir, Dratini, or Kangaskhan? Use the bait str...
Everyone wants a Dragonite, so therefore you need to catch a Dratini, evolve it into Dragonair, and then evolve it to a Dragonite!#Pokemon #Fire #Red #firere...
The Kanto Safari Zone (Japanese: サファリゾーン Safari Zone) is a special Pokémon preserve in Kanto that Trainers can enter to catch wild Pokémon. It is owned by Baoba.. For $ 500, the player can play the Safari Game (Japanese: サファリゲーム Safari Game) and receive 30 Safari Balls.Trainers are limited to 500 R B Y /600 FR LG steps in the Safari Zone before the Game is over.
This Pokédex is for Ruby, Sapphire, Emerald, FireRed & LeafGreen. If you're looking for the Sword & Shield, Check out Dratini Pokémon Sword & Shield data. Every Turn Dratini has a 1 in 3 chance of healing from a Status Condition. DRATINI continually molts and sloughs off its old skin. It does so because the life energy within its body ...
General. Guide Tavern. [Hunt Guide] Safari Zone Guide. This guide is made to help you know which Pokemon are available in the Safari Zone in Kanto & Hoenn; What their encounter rates are (Very Common / Common / Average / Rare / Very rare) , what items they can hold, and what items you can find inside. GRASS SURFING FISHING.
Dratini can only be found in one area in the game - Fuchsia City's Safari Zone. Head north from the town Poké Center until you find the Safari Zone entrance. Go inside and pay the fee to play the Safari Game. The Safari Game operates on a timed basis, but since Pokémon FireRed and LeafGreen don't have in-game clocks, the timer is based ...
Pokémon FireRed and LeafGreen/Safari Zone. Speak to the gate attendants to receive 30 Safari Balls. To catch any wild Pokémon you find, toss Safari Balls at them. Often you'll have to throw bait or rocks to distract certain Pokémon, so try different combinations when a particular Pokémon keeps escaping -- that is the trick.
Start fishing. Dratini can be caught in any of the four areas of the Safari Zone. Throw your line out into any body of water you see to start fishing. There is a 15% chance that the Pokémon you catch will be a Dratini. When you hook a Pokémon, you will need to press the A button to set the hook, otherwise the Pokémon will get away.
147: Dratini Pokédex; Flavor; Locations; Conquest; Kanto. FireRed LeafGreen Yellow Red Blue; Fishing with a Super Rod Safari Zone Area 1, east. 15% L15-25. 15% L15-25. 10% L15. 25% L15. 25% L15. Safari Zone Area 2, north. 15% ...
Pokémon Red: Location Method Rarity Min. Level Max Level Safari Zone - Area 1: Super Rod 25% 15: 15: Safari Zone - Area 2 ... Safari Zone - Area 4: Super Rod 25% 15: 15: Pokémon Blue (Jp.) Location Method Rarity ... Dratini: Miniryu
Speak to the gate attendants to receive 30 Safari Balls. To catch any wild Pokémon you find, toss Safari Balls at them. Often you'll have to throw food or rocks...
FireRed. Even the young can exceed 6.5 feet in length. It grows larger by repeatedly shedding skin. LeafGreen. Long considered a mythical POKéMON until recently, when a small colony was found living underwater. Emerald. A DRATINI continually molts and sloughs off its old skin.
Download Pokémon Games:http://adf.ly/1TGQaV
Note: You must obtain the Super Rod in order to locate Dratini, which can be found in Route 12. (The Route below Lavender Town). It is a 15% chance to find D...