Follow Polygon online:
- Follow Polygon on Facebook
- Follow Polygon on Youtube
- Follow Polygon on Instagram

Site search
- Dragon’s Dogma 2
- FF7 Rebirth
- Zelda: Tears of the Kingdom
- Baldur’s Gate 3
- PlayStation
- Dungeons & Dragons
- Magic: The Gathering
- Board Games
- All Tabletop
- All Entertainment
- What to Watch
- What to Play
- Buyer’s Guides
- Really Bad Chess
- All Puzzles
Filed under:
- Zelda: Tears of the Kingdom guide
How to get the Travel Medallion, Hero’s Path, and Shrine Sensor in Zelda: Tears of the Kingdom
Upgrade your Purah Pad for essential perks
Share this story
- Share this on Facebook
- Share this on Reddit
- Share All sharing options
Share All sharing options for: How to get the Travel Medallion, Hero’s Path, and Shrine Sensor in Zelda: Tears of the Kingdom
/cdn.vox-cdn.com/uploads/chorus_image/image/72273018/Tears_of_the_Kingdom_Robbie.0.png "get travel medallion totk")
In The Legend of Zelda: Tears of the Kingdom , the Purah Pad replaces the Sheikah Slate from The Legend of Zelda: Breath of the Wild — a key tool with several upgrades helpful for your journey through Hyrule.
To start upgrading the Purah Pad — which includes the Travel Medallion , Hero’s Path , and Shrine Sensor — you need to complete the “ A Mystery in the Depths ” questline. This will unlock the Hateno Village Research Lab, which is where the (upgrade) magic happens. This quest begins and ends in Hyrule Field’s Lookout Landing with researcher Josha.
How to start the Hateno Village Research Lab quest
Once you’ve finished up with Josha in Lookout Landing during the “ A Mystery in the Depths ” quest, Robbie will appear near the balloon you just fixed and instruct you to head over to East Necluda, where the Hateno Ancient Tech Lab is located. You can teleport to Zanmik Shrine to reach the village quickly. The lab is just east of Hateno Village .
:no_upscale()/cdn.vox-cdn.com/uploads/chorus_asset/file/24645793/Zmap_Shrines_CROPPED_copy__1_.png "get travel medallion totk")
How to get the Shrine Sensor
The Shrine Sensor is a tool used to find Shrines of Light in Hyrule. The sensor will react with beeping noise when you’re heading toward a shrine — following that means locating a shrine. The Sensor emblem is located on the right-hand side of the Tears of the Kingdom user interface. It’ll blink (and make the sound) more rapidly as you approach a shrine. It can be toggled on through the map screen with the Y button .
Robbie will have you test out the Sensor by running around in his home and, later, outside in Hateno Village. Follow the Sensor to get a feel for how it works.
It’ll lead you to the Mayahisik Shrine , which is hidden inside a cave with its entrance blocked. You’ll need to blow up the rocks to get in. The entrance to the cave is at coordinates (3741, -2085, 0208) . We used a bomb flower to get it — stand back!
:no_upscale()/cdn.vox-cdn.com/uploads/chorus_asset/file/24645768/shrinebehindrocks.png "get travel medallion totk")
Head into the cave and glide down the hole to the right, then follow the cave system to reach the Mayahisik Shrine at coordinates (3730, -2058, 0189) . Head back to Robbie and the Hateno Ancient Tech Lab .
How to get the Travel Medallion
Once you’ve got the Sensor installed, Robbie will offer to help with another upgrade for the Purah Pad; you can choose the order, but for ease of explanation, we’ll go in order they’re listed.
Robbie will send you off to the Akkala Ancient Tech Lab in Akkala to seek out prototypes for the Travel Medallion , which lets you set up fast travel gates anywhere. Using it is as easy as opening your inventory and marking the current location to place the medallion and make a gate. In total, the Travel Medallion can make three gates, but it needs to be upgraded to max it out. Let’s start, first, with just unlocking the feature.
:no_upscale()/cdn.vox-cdn.com/uploads/chorus_asset/file/24645787/Zmap_Shrines_CROPPED_copy.png "get travel medallion totk")
The Akkala Ancient Tech Lab is located at the top right-hand side of Hyrule. You’ll probably want to fast travel as close as you can get before making your way from there. The Ulri Mountain Skyview Tower is a good spot, and you can cover a lot of distance with your paraglider from there. Though it’s a long journey, you can use that travel time to seek out shrines or monsters to meet Robbie’s other upgrade requirements.
Once you find the Akkala Ancient Tech Lab , located at coordinates (4510, 3153, 0247) , be ready for battle. Trying to enter through the door will kick off a fight against Yiga Clan enemies who shoot red projectiles, which you’ll need to dodge, then hit away with a sword.
Once you’ve dispatched them, enter the lab to meet Konba , a fashion designer, who will give you Yiga Armor . He’ll leave, then search for a chest that holds the Travel Medallion prototype.
:no_upscale()/cdn.vox-cdn.com/uploads/chorus_asset/file/24645769/Screenshot__318_.png "get travel medallion totk")
If you’re up for exploring, the Rasiwak Shrine is nearby. Once you’re ready, head back to Robbie at the Hateno Ancient Tech Lab . He’ll unlock the medallion and start offering you upgrades — 10 map-data locations for a second gate and 15 for a third. Now you’ll be able to drop three gates, and delete and reuse the medallions as needed.
How to get the Hero’s Path
:no_upscale()/cdn.vox-cdn.com/uploads/chorus_asset/file/24645770/Screenshot__316_.png "get travel medallion totk")
The Hero’s Path gives the ability to see the exact path of your journey through Hyrule, up to 256 hours of gameplay. On the map screen, push the X button to switch on Hero’s Path mode. Do the same to switch it off. The button on the bottom of the screen lets you simple toggle Hero’s Path on and off, but also lets you watch the path unravel from the start — it’s a very cool feature, and it tracks deaths, too.
Robbie will ask you for data from 15 shrines. If you’ve already got that, you’re all set — he’ll immediately take the Purah Pad and start setting things up. Otherwise, head out and find more shrines before proceeding. Our list of shrine locations can help point you toward some shrines close by.
How to get Sensor +
Sensor + is like an upgraded version of the Shrine Sensor you unlocked earlier — it can detect more than just shrines.
To unlock it, Robbie wants you to fill the compendium with five different types of monsters. You add monsters to the compendium by grabbing their attention and taking a photo. Once you’ve got five different monsters in there, head back to Robbie in the Hateno Ancient Tech Lab.
You can set the Sensor + to search for anything available in the Hyrule Compendium .
Filling out the Compendium quest
:no_upscale()/cdn.vox-cdn.com/uploads/chorus_asset/file/24645774/Screenshot__323_.png "get travel medallion totk")
After finishing with Purah Pad upgrades, Robbie will brag about his own completed compendium. He’s willing to sell pictures from his to help fill out yours — you can choose a category (Fauna, Enemy, Material, Weapon, or Other) for 100 rupees, and he’ll choose what specific photo to give you.
- TOTK guides
- Interactive map
- Beginner’s guide
- Great Sky Island Walkthrough
Zelda: Tears of the Kingdom walkthrough and guides
- Beginner’s guide to what you should do first
- 10 tips to know before starting
- Where to find Goddess Statues for Lights of Blessing
- Hearts or Stamina: What to upgrade first?
- How to get the paraglider
- How to get gloom resistance
- How to get cold resistance
- How to get heat resistance
- How to become fireproof
- How to make stamina food and elixirs
- How to upgrade armor
- How to increase weapon durability
- How to increase your inventory
- How to Fuse and Unfuse gear
- Amiibo rewards and unlocks
- How to parry, dodge, and Flurry Rush
- What to sell to make easy money
- Regional Phenomena best order
- Camerawork in the Depths quest steps
- Where to find Captain Hoz’s location
- Sidon of the Zora walkthrough
- Where to find ancient arowana
- Where to find Toto Lake for ‘The Broken Slate’
- Where to find King Dorephan for the ‘Clues to the Sky’ quest
- How to use the ‘watery bridge’ to find the Land of the Sky Fish
- How to beat the Sludge Like boss
- Ancient Zora Waterworks walkthrough
- Wellspring Island walkthrough
- Tulin of Rito Village quest steps
- Yunobo of Goron City walkthrough
- Riju of Gerudo Town walkthrough
- How to get through the Lost Woods
- How to get rid of the gloom in Korok Forest
- Find the Fifth Sage at Ring Ruins walkthrough
- How to beat Demon King Ganondorf, Demon Dragon
- ‘Hornist’s Dramatic Escape’ quest
- ‘Gloom-borne Illness’ quest
- ‘A Trip Through History’ quest
- ‘A New Signature Food’ quest
- ‘Team Cece or Team Reede?’ quest steps
- ‘The Beast and the Princess’ quest
- ‘Out of the Inn’ quest steps
- ‘Potential Princess Sightings!’ quest steps
- ‘White Goats Gone Missing’ quest
- ‘A Call From the Depths’ quest steps
- ‘Princess Zelda Kidnapped?!’ quest steps
- ‘Ruffian-infested Village’ quest steps
- ‘Lurelin Village Restoration Project’ quest steps
- ‘Messages from an Ancient Era’ stone tablet locations
- Great Sky Island walkthrough
- Water Temple walkthrough
- Wind Temple walkthrough
- Lightning Temple walkthrough
- Fire Temple walkthrough
- Crisis at Hyrule Castle walkthrough
- Guidance of Ages Past, Spirit Temple walkthrough
- How to get to Ganondorf
- Tears of the Kingdom interactive Hyrule map
- Shrine locations and shrine map
- Skyview Tower locations
- Great Fairy Fountain locations
- Stable locations
- Dragon locations and routes
- Dragon Tear memory locations
- Bargainer statue locations, rewards list
- Where to find diamonds
- Where to find Hestu
- Where to find the Light Dragon
- Where to find Tarrey Town and Koltin’s Shop
- How to reach the Sky Islands
- How to glide to the Temple of Time
- How to get to Gerudo Town
- How to get to Hateno Village
- How to get to Kakariko Village
- How to get to Rito Village
- How to get into the Forgotten Temple
- How to unlock the Royal Hidden Passage
- How to find the Apapes Lightroot
- How to unlock all abilities
- How to get your BOTW horses in TOTK
- How to unlock Autobuild
- How to unlock fast travel
- How to tame a horse
- How to get Zelda’s golden horse
- How to find the Great White Stallion
- How to find Ganon’s Horse
- What to do with Bubbul gems
- How to use Sage’s Will, locations
- How to increase max energy cell capacity
- How to light up the Depths
- How to make a campfire
- How to use (and find) star fragments
- How to solve Hudson Construction puzzles
- How to respec at the cursed statue
- How to use rockets creatively
- How to shield surf
- How to beat Gloom Hands
- How to beat Phantom Ganon
- How to beat Flux Construct 1
- How to defeat Hinox
- How to defeat Frox
- How to defeat Lynel
- How to defeat Gleeok
- How to defeat King Gleeok
- How to defeat the Stone Talus and use the Stone Talus Heart
- How to defeat the Battle Talus
- How to use the duplication glitch
- What is the Ring Garland?
- How does the Blood Moon work?
- How to get sunset fireflies
- How to get ancient blades
- How to earn and use Pony Points
- How to farm dragon materials
- Where to get bomb flowers
- Full armor set and set bonus list
- Best weapons
- Best early shield location
- Hylian Shield location
- How to get Majora’s Mask
- Best early Fuse combinations
- Champion’s Leathers location
- How to get the Master Sword
- How to get Misko’s Treasure
- Archaic Tunic location
- Miner’s Armor set location
- Zora Armor set location
- Barbarian Armor set location
- Climbing Armor set location
- Fierce Deity Armor, Sword location
- Glide Armor set location
- Time Armor set location
- Frostbite Armor set location
- Ember Armor set location
- Rubber Armor set location
- Yiga Armor set location
- Soldier’s Armor set location
- Tingle “Armor” set location
- Royal Guard Armor set location
- Snowquill Armor set location
- Radiant Armor set location
- Stealth Armor set location
- Froggy Armor set location
- Hylian Armor set location
- Flamebreaker Armor set location
- Zonaite Armor set location
- Charged Armor set location
- Dark Armor set location
- Depths Armor set location
- Awakening Armor set location
- Desert Voe Armor set location
- Twilight Armor set location
- Phantom Armor set location
- Wind Armor set location
- Hero Armor set location
- Wild Armor set location
- Mystic Armor set location
- Evil Spirit Armor set location
- Sky Armor set location
The next level of puzzles.
Take a break from your day by playing a puzzle or two! We’ve got SpellTower, Typeshift, crosswords, and more.
Sign up for the newsletter Patch Notes
A weekly roundup of the best things from Polygon
Just one more thing!
Please check your email to find a confirmation email, and follow the steps to confirm your humanity.
Oops. Something went wrong. Please enter a valid email and try again.
Loading comments...
- Patch Notes
- Hardware and Tech
- PC Invasion Staff

How to get and use the Travel Medallion in Tears of the Kingdom (TotK)
Hyrule as seen in The Legend of Zelda: Tears of the Kingdom is an enormous place. Often, you can warp quickly around it by using activated shrines and towers to fast travel. However, there sometimes are remote locations you have reason to visit regularly. That’s when a particular upgrade comes in handy. Here is our guide explaining how to get and use the Travel Medallion in The Legend of Zelda: Tears of the Kingdom .
Tears of the Kingdom – how to get and use the Travel Medallion
The Travel Medallion is a handy item you can use to warp directly to the location of your choosing, even if you haven’t found a nearby shrine or skytower to activate. Normally, you might have to hike a long distance, which can be tedious or dangerous. If you have the medallion, however, you can save yourself that hassle. To get the Travel Medallion, complete a task for Robbie at the Hateno Research Lab.
To use the Travel Medallion, access it from the Key Items menu and place one at your current location. You can then warp to that point whenever you like.

Screenshot by PC Invasion
When you first meet Robbie , he shares a room with Josha in Lookout Landing . The two researchers present quests early in the game, as you discover how to get the Autobuild ability . After you complete that objective and deal with Robbie a bit more, he takes off to his research center.
Find Robbie at the Hateno Ancient Tech Lab on the hill outside Hateno Village , which is north of the Necluda Sea in the southeast (check our guide telling where to find Hateno Village if you need further assistance).
When you talk to Robbie at the Hateno Ancient Tech Lab, ask him about the Travel Medallion. He sends you to clear out the Ancient Tech Lab in the Deep Akkala region (it’s located a short distance south of the world map’s northeastern corner). Once you defeat the Yiga Clan members that have taken over the lab, open the treasure chest they guarded to find the Travel Medallion Prototype . Take it back to Robbie, who gets it working for you.

By default, you can use the Travel Medallion to set one convenient fast travel point. As you activate skytowers and review more of the world map, Robbie upgrades the Travel Medallion. This grants you as many as three uses. By the time I met him, I had already activated every skytower, so I didn’t have to wait.
I suggest placing a Travel Medallion north of Death Mountain , near where you can find four Rock Octoroks . They offer you a way to repair weapons and shields . Once you venture into the Depths to meet Ganondorf , you might also set a medallion near the point of no return, so you can conveniently return once you have supplies. A third use might be to set one somewhere near a remote location where you like to farm rare items. If you ever decide you don’t like where one is placed, visit its location and retrieve it to use it elsewhere. Travel Medallions can prove quite handy.
The Legend of Zelda: Tears of the Kingdom is available on the Nintendo Switch.

GameSpot may receive revenue from affiliate and advertising partnerships for sharing this content and from purchases through links.
Zelda: Tears Of The Kingdom - How To Get The Travel Medallion
Use Travel Medallions as instant teleporters in The Legend of Zelda: Tears of the Kingdom.
By Jason Rodriguez on May 11, 2023 at 9:00PM PDT
The Legend of Zelda: Tears of the Kingdom Travel Medallions are highly important items that you can obtain during the course of your adventure. While you'll encounter the usual fast travel methods, these items will let you create your own teleportation circles on the world map. Here's our guide to help you with get Travel Medallions in Zelda: Tears of the Kingdom.
How to get Travel Medallions in The Legend of Zelda: Tears of the Kingdom
To get the Zelda: Tears of the Kingdom Travel Medallions, you'll have to proceed further with Robbie the Researcher's side quests. You can learn about these in our Purah Pad Camera and Sensor guide .
Once you're done with those steps, Robbie will tell you about his old lab in Akkala Highlands all the way to the northeast. Upon arriving there, you'll battle two Yiga Ninja enemies. After clearing the encounter, you should be able to enter the lab.

Inside, you'll find an NPC named Konba, who'll hand over the Ninja Armor, a chestpiece that increases your stealth capabilities. As for the Travel Medallion, you can pick it up from the chest next to the wooden board with a map. Return to Robbie in Hateno Village, and he'll hand over three Travel Medallions.
The Zelda: Tears of the Kingdom Travel Medallions can be found under the key items tab of your inventory screen. When selected, you can choose to place one on the exact spot where Link is standing.

This will create a blue circle with glyphs, essentially creating an instant, customized fast travel point. This nifty function is quite important, as there are some hard-to-reach locations in the game world, further away from most Shrines and Skyview Towers. It's going to be a hassle in case you want to go back to those locations on foot or by gliding.
Now, even though you only have three Travel Medallions, you don't need to worry about wasting any of them. You can regain them by opening the world map and selecting the makeshift teleportation circle that you've created. Click on the "Collect Medallion" option and it will be returned back to your inventory.
There are numerous mechanics and facets to learn in The Legend of Zelda: Tears of the Kingdom. For more information, you can visit our guides hub .
Got a news tip or want to contact us directly? Email [email protected]
- Leave Blank
Join the conversation
Use your keyboard!
Log in to comment
Zelda TOTK Travel Medallion: How to Get All 3 Fast Travel Beacons
The Legend of Zelda: TOTK has a way to let Link fast travel wherever he wants – at least once they’ve unlocked the Travel Medallion.
Place down this mysterious device and you’ll be able to freely teleport over to that location. But with a little know-how, you’ll be able to place up to 3 Travel Medallions anywhere you choose in Hyrule!
How to Get the Travel Medallion in Zelda: TOTK
Before claiming the Travel Medallion in Tears of the Kingdom, players need to unlock the Shrines of Light Sensor for their Purah Pad .
After that, you’ll be able to get the first Travel Medallion from Robbie by following these steps:
- Head back to the Hateno Ancient Tech Lab (Coordinates: 3780, -2123, 0251).

- Talk to Robbie and ask him about the Travel Medallion upgrade.
- Robbie will tell Link to travel to the Akkala Ancient Tech Lab to the northeast (Coordinates: 4519, 3163, 0247) to retrieve the Travel Medallion Prototype.

- Once you interact with the Tech Lab door, two members of the Yiga Clan will appear – one large and heavy-hitting, the other small and speedy.
- Defeat both enemies to gain access to the Akkala Ancient Tech Lab.
- Inside you’ll find a tailor who will give you the Yiga Armor. You’ll also find a chest with the Travel Medallion Prototype inside it.

- Fast travel back to the Hateno Ancient Tech Lab and give the Prototype to Robbie.
- You’ll then permanently unlock the Travel Medallion upgrade.

How to Get More Travel Medallions in Zelda: TOTK
Link can unlock up to 2 more Travel Medallions for a grand total of 3 custom fast travel points by finding all of Tears of the Kingdom’s Skyview Towers .
Talk to Robbie after registering 10 Skyview Tower locations to collect a second Travel Medallion.
To get the final Travel Medallion, Link will need to talk to Robbie once more after visiting all 15 Skyview Towers on the Hyrule map.

At that point, you’ll have access to 3 Medallions, allowing Link to instantly transport himself to 3 custom locations of your choosing.
And thankfully, they can be picked up again once placed, allowing you to reset each point’s location.
How to Use Travel Medallions in TOTK
To place down a Travel Medallion, simply open your inventory with the + button, use R to tab over to Key Items, and select the item in your inventory .
Hit ‘ Place ‘ and the Travel Medallion will appear at your feet, registering that location as a fast travel point. You can only place Medallions in areas you’re already standing.

The Travel Medallion will then be marked on your map, which you can check with the – button.
Selecting it will let you fast travel to that location as many times as you desire.

If you want to claim the Travel Medallion back to place it somewhere new, simply find on the map and choose Collect Medallion. You don’t need to be present at the Medallion’s location to collect it, thankfully.
Alternatively, you can find the Travel Medallion in your Key Items once again, and choose to collect it from there.

The Legend of Zelda: Tears of the Kingdom Walkthrough & Guides Wiki
- Main Quests
- Side Quests
- Side Adventures
- Tips & Tricks
- Interactive Map
Purah Pad Abilities
- How to Get the Travel Medallion
▲ Get Pristine Weapons from the depths or an amiibo ! △ All 1000 Koroks | All 4 Great Fairies ▲ All 81 Addison Signs | All 147 Caves | All 58 Wells △ Starter Tips: Farm Rupees | Starting Armor ▲ Advanced Tips: Best Weapons | Best Armor | Best Food

List of Contents
Best Places to Put the Travel Medallion
- Related Guides
How to Get Travel Medallion
How to get travel medallion video walkthrough.
Complete Presenting: The Travel Medallion! Side Adventure

Presenting: The Travel Medallion Walkthrough and How to Unlock
Get the Travel Medallion at the Akkala Ancient Tech Lab
You can find the Travel Medallion inside a treasure chest at the Akkala Ancient Tech Lab in the Akkala region.
Map All 15 Regions in the Surface to Get Two Travel Medallions
After completing Presenting: The Travel Medallion!, Robbie can create a second Travel Medallion once you have unlocked at least 10 regions in the surface world. You can also get a third Travel Medallion when you map all 15 regions in the surface world.
All Tower Locations and How to Unlock the Map for Each Region
How to Use Travel Medallion
Set a custom fast travel point in the map.

To fast travel, open the Map and highlight the Travel Medallion icon. Choose Travel to teleport to the location.
If you want to place the Travel Medallion somewhere else, select Collect Medallion to put the item back in the Key Items menu.
We recommend placing your Travel Medallions in one of these places so you can farm loot of some creatures better.
Floating Coliseum
- Sky Island Above a Dragon's Path
Imprisoning Chamber
Satori mountain.

The Floating Coliseum in the Depths is a great place to put your Travel Medallion in because it allows you to farm Lynels. Their loot are great for Fusing with weapons so you'll be more effective in combat.
Sky Island Above a Dragon's Path
It's also ideal to place your Travel Medallion on a sky island that's directly above a dragon's path. This will save you time trying to glide to a dragon to farm their loot.
Light Dragon Location and Drops

Placing a Travel Medallion in the Imprisoning Chamber before you head for the final boss battle is also recommended. Doing so will shorten your journey to the Demon King if you want to battle him again.
How to Beat Demon King Ganondorf
King Gleeok Locations

If you're looking to upgrade your Ancient Hero Aspect and Royal Guard armor, we recommend placing your Travel Medallion in places where there is a King Gleeok. This will help you farm their loot faster.
All King Gleeok Locations and How to Beat

Satori Mountain is also a great place to put your Travel Medallion in because of the resources this mountain offers. There are plenty of Apples in one area of the mountain and a few Endura Carrots in the area where the Cherry Blossom Tree is.
Apples, when cooked, can restore your health while Endura Carrots can restore your stamina plus give you a bit extra.
Cooking Guide: List of Food and Dishes
The Legend of Zelda: Tears of the Kingdom Related Guides

List of All Abilities
We at Game8 thank you for your support.
In order for us to make the best articles possible, share your corrections, opinions, and thoughts about 「How to Get the Travel Medallion | Zelda: Tears of the Kingdom (TotK)」 with us!
When reporting a problem, please be as specific as possible in providing details such as what conditions the problem occurred under and what kind of effects it had.
Do you want to send this information?
Walkthrough Menu
- TotK Wiki Top
Walkthroughs
Tips and tricks.
- Beginner's Guide
New Features
- How to Confuse Enemies
- How to Cure Gloom
- How to Blind Enemies
Combat Guides
- Flurry Rush, Sneakstrike, and Deal Critical Damage
- Weapon Modifiers Explained
- How to Raise Defense
- Passive Abilities for Weapons Explained
- How to Upgrade Armor
- How to Defeat Shielded Enemies
- How to Throw Items and Materials
- How to Repair Weapons
- How to Get Earthwake Technique
- How to Increase Weapon Durability
- How to Parry
- How to Sneakstrike
- How to Perfect Dodge and Flurry Rush
- Stealth Mechanics Explained
Exploration Guides
- How to Get Cold Resistance
- How to Dive
- How to Shield Surf
- How to Break Cracked Rocks
- How to Use Minecarts
- How to Chop Down and Use Fallen Trees
- How to Cross the Freezing Water
- Fast Travel Guide: How to Warp
- Weather Effects and How to Change the Weather
- How to Get Heat Resistance
- How to Make an Axe
- How to Tame Wild Horses
- What to Do During a Thunderstorm
- How to Pass Time
- How to Light Up Dark Areas
- How to Get Epona
- How to Check Coordinates
- How to Climb Efficiently
- How to Break Wooden Boxes
- How to Make a Fire
- How to Make a Raft
- How to Make a Hover Bike
- How to Use Rocket Shields
General Tips and Tricks
- Zonai Dispenser Guide
- How to Get the Paraglider and All Paraglider Designs
- How to Expand Inventory
- Pony Points Guide
- How to Increase Health and Stamina
- Best Settings to Use
- How to Swap Hearts for Stamina
- amiibo Unlocks and List of Compatible amiibo
- Blood Moon Explained
- Missables and One-Time Events Guide
- Where to Find Wild Greens
- Whistle Effects and How to Use
- How to Farm Crops
- How to Heal
- Post Game Content Guide
- Kochi Dye Shop Guide: How to Recolor Armor
- Ending Explained: How to Watch the True Ending
- List of Unlockables
- How to Get Ganon's Horse
Farming Guides
- How to Farm Arrows
- Bubbul Gem Guide
- How to Get More Energy Cells
- Early Game Rupee Farming
- How to Farm Weapons
- Dragon Part Farming Guide
- How to Get Pristine Weapons
Notable Item Location Guides
- How to Get the Champion's Leathers Early
- How to Get the Hylian Shield Early
- How to Restore the Master Sword
- How to Get the Classic Green Tunic
- How to Get Ring Garland
- Misko's Treasure Locations
- How to Get Monster Medals
Puzzle Solution Guides
- How to Solve the Water Temple Spinning Tower
- Where to Find King Dorephan
- How to Solve the Gerudo Light Puzzle
- Voe and You Class Solutions
Map Location Guides
- All Stable Locations
- All Sage's Will Locations
- How to Get to Hyrule Castle
- How to Get to Lost Woods and Enter Korok Forest
- Great Fairy Locations and How to Unlock
- How to Find the Light Dragon: Location and Drops
- How to Find Farosh: Location and Drops
- How to Find Naydra: Location and Drops
- How to Find Dinraal: Location and Drops
- Satori Cherry Blossom Tree Locations and Guide
- How to Reach Abandoned Hebra Mine
- How to Unlock Royal Hidden Passage
- All Addison Sign Locations
- How to Get into Gerudo Secret Club
- All Coliseum Locations and Rewards
- Koltin Locations and List of Rewards
- Satori (King of the Mountain) Locations
- Where to Find Dondons
- All Forge Construct Locations
- How to Get to Toto Lake
- All Goddess Statue Locations
Tier List Guides
- Best Early Game Armor
- Best Armor Sets (Equipment)
- Best Weapons and Shields
- Best Horses
- Best Equipment for Exploration
- Best Fuse Materials and Weapon Combinations
- Best Modes of Travel
Glitches and Exploits
- List of Glitches and Exploits
- How to Duplicate Weapons, Bows, and Shields
- How to Duplicate Materials
- Can You Pet the Dogs?
- What Transfers Over From Breath of the Wild?
- Should You Play BotW First?
- What Happens When You Die?
- How Does Autosave Work?
- What Happened to Link's House?
- Do Materials Respawn?
- How to Change the Difficulty
- How to Lower and Raise Hylian Hood
- When Do Shops Restock?
- Is There a Master Mode?
- All Abilities and How to Unlock
Zonai Arm Abilities
- Travel Medallion
- Shrine Sensor
- Hero's Path Mode
Sage's Abilities
- Vow of Tulin
- Vow of Riju
- Vow of Sidon
- Vow of Yunobo
- Interactive Map of Hyrule and All Locations
- Hyrule Surface Map and Regions
- Hyrule Sky Map and Regions
- Hyrule Depths Map and Regions
- Korok Seed Map and How to Use
- All 147 Caves
- All 58 Wells
- All Lightroot Locations and Maps
- All Chasm Locations and Maps
- List of Towns and Settlements
- All Tower Locations
- Lookout Landing Tower
- Hyrule Field Tower
- Gerudo Highlands Tower
- Lindor's Brow Tower
- Rospro Pass Tower
- Pikida Stonegrove Tower
- Thyphlo Ruins Tower
- Eldin Canyon Tower
- Ulri Mountain Tower
- Rabella Wetlands Tower
- Sahasra Slope Tower
- Popla Foothills Tower
- Gerudo Canyon Tower
- Upland Zorana Tower
- Mount Lanayru Tower
- List of All Shrines
- All 31 Shrine Quests
Great Sky Island Shrines
- Ukouh Shrine
- In-isa Shrine
- Gutanbac Shrine
- Nachoyah Shrine
Hyrule Field Shrines
- Ren-Iz Shrine
- Tsutsu-um Shrine
- Riogok Shrine
- Kamizun Shrine
- Sepapa Shrine
- Taki-Ihaban Shrine
- Ishodag Shrine
- Teniten Shrine
- Tajikats Shrine
- Yamiyo Shrine
- Kyononis Shrine
- Jiosin Shrine
- Jojon Shrine
- Serutabomac Shrine
- Tenmaten Shrine
- Sonapan Shrine
- Usazum Shrine
- Kyokugon Shrine
- Tadarok Shrine
- En-oma Shrine
- Susuyai Shrine
- Mayachin Shrine
- Makurukis Shrine
- Runakit Shrine
- Sinakawak Shrine
- Jinodok Shrine
Tabantha Shrines
- Oromuwak Shrine
- Gatakis Shrine
- Nouda Shrine
- Wao-os Shrine
- Iun-orok Shrine
- Turakawak Shrine
- Gasas Shrine
- Mayausiy Shrine
- Ikatak Shrine
- Ga-ahisas Shrine
- Ganos Shrine
- Taunhiy Shrine
Hebra Shrines
- Sahirow Shrine
- Rutafu-um Shrine
- Otak Shrine
- Eutoum Shrine
- Sisuran Shrine
- Oshozan-u Shrine
- Mayaotaki Shrine
- Tauyosipun Shrine
- Orochium Shrine
- Ijo-o Shrine
- Tenbez Shrine
- Taninoud Shrine
- Mayaumekis Shrine
- Kahatanaum Shrine
Great Hyrule Forest Shrines
- Sakunbomar Shrine
- Pupunke Shrine
- Ninjis Shrine
- Musanokir Shrine
- Kikakin Shrine
- Kiuyoyou Shrine
- Ekochiu Shrine
- Mayam Shrine
- Simosiwak Shrine
Akkala Shrines
- Rasiwak Shrine
- Jochi-iu Shrine
- Igashuk Shrine
- Sinatanika Shrine
- Rasitakiwak Shrine
- Jochi-ihiga Shrine
- Gatanisis Shrine
- Domizuin Shrine
- Kamatukis Shrine
- Gemimik Shrine
- Gikaku Shrine
- Mogisari Shrine
- Natak Shrine
Eldin Shrines
- Kisinona Shrine
- Minetak Shrine
- Mayak Shrine
- Sibajitak Shrine
- Sikukuu Shrine
- Timawak Shrine
- Mayachideg Shrine
- Sitsum Shrine
- Marakuguc Shrine
- Kadaunar Shrine
- Moshapin Shrine
- Jiotak Shrine
- Kimayat Shrine
- Isisim Shrine
- Momosik Shrine
Lanayru Shrines
- Ihen-a Shrine
- Mogawak Shrine
- Jonsau Shrine
- Maoikes Shrine
- Joniu Shrine
- Apogek Shrine
- Yomizuk Shrine
- Kurakat Shrine
- Morok Shrine
- O-ogim Shrine
- Jikais Shrine
- Tukarok Shrine
- Zakusu Shrine
- Igoshon Shrine
- Mayanas Shrine
- Jirutagumac Shrine
- Sihajog Shrine
Necluda Shrines
- Susub Shrine
- Zanmik Shrine
- Jochisiu Shrine
- Jogou Shrine
- Anedamimik Shrine
- Tokiy Shrine
- Utojis Shrine
- Sifumim Shrine
- Bamitok Shrine
- Marari-in Shrine
- Eshos Shrine
- Makasura Shrine
- Mayahisik Shrine
- Joju-u-u Shrine
- Josiu Shrine
- Ukoojisi Shrine
- Kumamayn Shrine
- Yansamin Shrine
Faron Shrines
- Jiukoum Shrine
- Ishokin Shrine
- Utsushok Shrine
- Joku-u Shrine
- Joku-usin Shrine
Gerudo Shrines
- Soryotanog Shrine
- Mayatat Shrine
- Miryotanog Shrine
- Suariwak Shrine
- Otutsum Shrine
- Mayamats Shrine
- Rakakudaj Shrine
- Irasak Shrine
- Karahatag Shrine
- Chichim Shrine
- Siwakama Shrine
- Motsusis Shrine
- Kitawak Shrine
- Turakamik Shrine
- Rotsumamu Shrine
- Siyamotsus Shrine
- Mayasiar Shrine
- Rakashog Shrine
- Kudanisar Shrine
- List of All Bosses and Minibosses
- Master Kohga
- Marbled Gohma
- Sludge Like
- Queen Gibdo
- Seized Construct
- Phantom Ganon
- Demon King Ganondorf and Demon Dragon
- Obsidian Frox
- Flame Gleeok
- Thunder Gleeok
- Frost Gleeok
- King Gleeok
- Flux Construct
- Flux Construct II
- Flux Construct III
- Stone Talus
- Stone Talus (Luminous)
- Battle Talus
- All Weapons and Equipment
- List of All One-Handed Weapons
- List of All Two-Handed Weapons
- List of All Spears
- List of All Bows
- List of All Shields
- All Champion Weapons
- List of amiibo Weapons
- List of All Armor
- List of All Headgear
- List of All Body Armor
- List of All Legwear
Temples and Dungeons
- All Temple Locations and Dungeon Guides
- Wind Temple
- Lightning Temple
- Fire Temple
- Water Temple
- Fifth Temple
- List of All Items
- List of All Materials
- List of All Zonai Devices
- List of All Key Items
- Basic Cooking Guide
- Advanced Cooking: Adding Buffs
- List of Cooked Dishes and Recipes
- List of Roasted Dishes and Recipes
- List of Frozen Dishes and Recipes
- List of Elixirs and Recipes
- All Monsters and Enemies
- Gloom Hands
- All Yiga Schematics and Schema Stones
- New and Returning Characters
- Latest News and Updates
- Ver. 1.2.0 Update Patch Notes
- New Zelda and Ganondorf amiibo
- Ver. 1.1.2 Update Patch Notes
- Release Date Guide
- Pre-Order Bonuses
- Will There Be DLC?
- Story Summary and Timeline
- Easter Eggs and Secrets
- New Features & Gameplay
- Will the Champions Appear?
- Is the Hookshot a Useable Item?
- Will There Be a Demo?
- Multiplayer Features
- List of Official Trailers
- Why Is the Master Sword Broken?
- How Long to Beat
- 3/28 Gameplay Trailer Analysis
- TOTK Edition Switch OLED
- Four New Abilities Introduced
- Sky Islands Explored
- Who are the Zonai?
- 4/13 Final Trailer Analysis
- Where is Daruk's Successor?
- Is Demise Returning?
- All Voice Actors Cast
- Is TOTK the Last Zelda Game?
- Preload Date and Guide
- Collector's Edition Differences
- How to Get TOTK Cheaper
- Hands-On Previews: Everything We Learned
- Where to Pre-Order Guidebook
- Tears of the Kingdom 1.1 Patch Notes
- Are Hearty Durians Still in the Game?
- What Happened to the Divine Beasts?
- Where is Kass?
- Message Boards
- Game Help & Questions (8)
- Discussion & Review Board (6)
- Fan Theory Sharing Board (7)
Other Zelda Wikis
- Breath of the Wild
- Link's Awakening
- Hyrule Warriors: Age of Calamity
- Skyward Sword HD
Japanese Wiki (日本語版)
- ティアーズオブザキングダム攻略
- 1 Hyrule Sky Map, Regions, and Key...
- 2 All 58 Well Locations and Reward
- 3 Voe and You Class Solutions
- 4 How to Get Ring Garland: Locatio...
- 5 List of All 147 Caves Locations ...
- We could not find the message board you were looking for.
Gaming News

Top 10 Upcoming Gacha Games

Eiyuden Chronicle Hundred Heroes Review

Stellar Blade Collabs With BIBI & Eve Figure Gets a Sneak...

Hades 2 Review (Technical Test)
More Gaming News
Popular Games

Honkai: Star Rail Walkthrough & Guides Wiki

Genshin Impact Walkthrough & Guides Wiki

FF7 Rebirth Walkthrough & Guides Wiki

Pokemon Scarlet and Violet (SV) Walkthrough & Guides Wiki

Palworld Walkthrough & Guides Wiki

Dragon's Dogma 2 (DD2) Walkthrough & Guides Wiki

Persona 3 Reload Walkthrough & Guides Wiki

Monster Hunter Rise: Sunbreak Walkthrough & Guides Wiki

Pokemon UNITE Walkthrough & Guides Wiki

Fire Emblem Heroes (FEH) Walkthrough & Guides Wiki
Recommended Games

Elden Ring Walkthrough & Guides Wiki

Hyrule Warriors: Age of Calamity Walkthrough & Guides Wiki

New Pokemon Snap Walkthrough & Guides Wiki

Pokemon Legends: Arceus Walkthrough & Guides Wiki

Super Smash Bros. Ultimate Walkthrough & Guides Wiki

FF7 Remake Walkthrough & Guides Wiki

The Legend of Zelda: Breath of the Wild Walkthrough & Guides Wiki
All rights reserved
© Nintendo. The Legend of Zelda and Nintendo Switch are trademarks of Nintendo. The copyrights of videos of games used in our content and other intellectual property rights belong to the provider of the game. The contents we provide on this site were created personally by members of the Game8 editorial department. We refuse the right to reuse or repost content taken without our permission such as data or images to other sites.
- Popular Articles
The Legend Of Zelda: Tears Of The Kingdom - How To Get The Travel Medallion
The Travel Medallion is a helpful item in The Legend Of Zelda: Tears of the Kingdom. It lets you create custom teleport points, here's how to get it.
Quick Links
How to start the travel medallion quest line, where to find the travel medallion, how to upgrade the travel medallion.
The Travel Medallion returns in The Legend of Zelda: Tears of the Kingdom , but it's not a DLC-locked item this time around. There is a quest chain involving Robbie that lets you access this Key Item, allowing you to create your own fast travel spots.
Related: The Legend Of Zelda: Tears Of The Kingdom - Satori Cherry Blossom Trees Guide
You can grab the Travel Medallion from Robbie after you complete his first quest and unlock the Photo mode on your Purah Pad. When you first unlock the Travel Medallion, it can create one fast travel point. This can be further upgraded by Robbie two more times, giving you a total of three custom fast-travel points that can be placed wherever you want.
When you first get to Lookout Landing, you want to continue along the main quest until you unlock the one called Regional Phenomena.
With this unlocked, you should be able to talk to Robbie and Josha. Upon talking to them, you should begin a quest called Camera Work in the Depths.
This quest requires you to dive into a chasm and explore the depths, unlocking the Photo mode in the Purah Pad in the process. Complete Josha and Robbie's request to photograph statues in the Depths and return to them.
With that done, you must complete the follow-up quest called A Mystery in the Depths, which unlocks the Autobuild function. With Autobuild unlocked, return to Lookout Landing and repair the makeshift balloon transporter.
Robbie will mention he is moving back to Hateno Village, taking up residence in the Hateno Ancient Tech Lab, and that you should look for him there.
To continue his quest, this should be your next destination. Take your time, or beeline directly there.
When Robbie moves to Hateno Village, make your way over there and visit the lab on the top of the hill. Here Robbie will talk to you about upgrading your Purah Pad as well as unlocking the Shrine Locator for you.
One such upgrade Robbie provides is the Travel Medallion, which he explains is currently elsewhere. After you ask him about it, he will tell you to go to the Akkala Region north of Hateno Village, specifically to the Akkala Ancient Tech Lab.
Travel to the Akkala Region and go to the Ancient Tech Lab, just up the road from the East Akkala Stables. When you arrive, knock on the door to trigger a Yiga Clan ambush.
Defeat these knuckleheads, and you'll be able to go inside the lab. When you enter, head for the chest to the right that holds the Travel Medallion.
You should talk to the man on the left side of the room to obtain a piece of the Yiga Clan armour set , the Yiga Armour.
With the prototype in hand, travel back to Robbie in Hateno Ancient Tech Lab . Talk to him about the Travel Medallion Prototype, and he will reward you with a functioning Travel Medallion.
Now you can use the Travel Medallion to place custom fast-travel points . To do this, select it from your Key Items and use it wherever you want. This will create a gate you can now return to or replace at any time.
You can upgrade the Travel Medallion two more times, giving you a total of three custom fast-travel points. These fast-travel points can be placed anywhere in the overworld, even in the Depths.
When you place the Travel Medallion, you can remove your previously-set fast-travel point by selecting it in the Key Items menu and clicking Collect.
This will bring up your Map and you can choose which ones to remove.
To upgrade the medallion, Robbie asks you to give him ten map-data locations and return to him. When Robbie says map-data locations, he's referring to activating Skyview Towers.
This means each time you reveal an area on the map will count towards it. Revealing and using all 15 Skyview Towers will let you upgrade the Travel Medallion again, giving it three charges.
NEXT: The Legend Of Zelda: Tears Of The Kingdom – How To Get Diamonds
- Dragon's Dogma 2
- Final Fantasy XIV
- Helldivers 2
- Stardew Valley
- Terms of Service
- Privacy Policy

How to get the Travel Medallion in Tears of the Kingdom (TotK)
Kick things off with Robbie
If there’s one thing you should aim to pick up early in your Zelda: Tears of the Kingdom playthrough, it’s the Travel Medallion. Simply put, it’s a portable fast travel spot that you can place nearly anywhere on the map (useful for upgrading or shop hotspots) and return to pretty much anytime you want. It’s like a completely free unlimited-use recall spell! Here’s how to unlock the Travel Medallion and zip around the map.

Step 1: Start the Robbie questline at Lookout Landing
To kick off the Travel Medallion questline, you’ll want to speak to Robbie in Lookout Landing . They are directly below where Purah stands, near the Poe Statue . The exact coordinates for Robbie can be found above.
We have a full guide on getting that questline started here .

Step 2: Get the Shrine Sensor
Robbie will ask to meet you in Hateno Village , where you’ll continue the questline at the Hateno Ancient Tech Lab on the hill.
We have a full guide on how to get the Shrine Sensor here . We also have detailed directions for getting to Hateno here .

Step 3: Head to the Akkala Ancient Tech Lab (due northeast) to unlock the Travel Medallion
Here’s where the Travel Medallion quest actually starts . Robbie tasks you with going to the Akkala Ancient Tech Lab (the exact location can be found on the map above) to pick up the “prototype” for the Medallion, which will unlock the mechanic.
After attempting the enter the lab, Yiga Clan members will immediately attack you. Go after the smaller archer enemy first, then focus on the larger brute: dodging its attacks and using the flurry rush ability to take it down quickly. Enter the lab and acquire the Yiga Armor, then open the chest to acquire the Travel Medallion prototype.
Go back to Robbie in Hateno and turn the quest in. Ding! You’ll get a Travel Medallion.

How to use the Travel Medallion, and how to remove it
To use the Travel Medallion, all you need to do is open your inventory (+) and select “key items.” Move the cursor so you’re pointing at the blue Travel Medalion icon (pictured above), then select it. Select “place” to put it directly on the ground. It’ll look just like the icon. Congrats!
To return to that spot, you just need to open up the map, find your Travel Medallion, and select “travel” to teleport there. If you want to remove it, select it on the map and press “collect Medallion.” Note that Medallions can be placed basically anywhere in the game, even in the skies and in the depths. Of course, you can upgrade it two more times to add more maximum portal slots.
How to upgrade the Travel Medallion
To upgrade the Travel Medallion, you just need to record Skyview Tower data: which is found at the Skyview Towers themselves after you unlock them. Robbie will provide upgrades for 10 towers (two charges of the MedallIon) and 15 towers (three charges). Speak to Robbie at the Hateno Ancient Tech Lab after you hit each milestone to acquire the upgrade.
Luckily for you, we have a full tower location guide here !

- Ethics Policy
- Ownership Policy
- Corrections Policy

Tears of the Kingdom – Travel Medallion Location & Quest
Players have a lot of ground to cover while exploring The Legend of Zelda: Tears of the Kingdom, and using tools like the Travel Medallion are critical to successful adventures. This helpful item addresses a major issue from the previous game, making risky jumps from precarious cliffs or carefully timed treks up mountainsides much less frustrating.
This guide covers how to get the Travel Medallion in The Legend of Zelda: Tears of the Kingdom and how to use it.
Where to Find the Travel Medallion in Tears of the Kingdom

To find the Travel Medallion in Tears of the Kingdom, players will need to complete a side adventure . This side activity is called Hateno Village Research Lab , and it is not associated with the main story, which means you can complete it at any point, so long as you’ve completed the tutorial . There, you’ll be able to meet with Robbie , and you can ask them to make the Travel Medallion.
You’ll get the quest called Presenting: The Travel Medallion and this will take you to the Akkala Ancient Tech Lab , where you’ll need to track down the Travel Medallion prototype and then return it to Robbie. it should be in a chest inside the Ancient Tech Lab. You can only open the Lab after defeating the Yiga Clan guards that were waiting to ambush you at the door.

How The Travel Medallion Works in Tears of the Kingdom
After completing Presenting: The Traveling Medallion quest and giving the prototype to Robbie, you can use the Travel Medallion . Whenever you use the Travel Medallion, it registers your current location as a Travel Gate .

When your location becomes a Travel Gate , this essentially turns your current location into a Fast Travel location . For example, if you plan to travel to another part of the map, you can mark your current location as a Travel Gate, travel to a different location, and then fast travel back to where you used the Travel Medallion. It makes zipping around the map much easier, and you can explore Hyrule at a much faster rate.
Robbie does have two more upgrades for your Travel Medallion, but these are only unlocked after you’ve registered 10 and 15 regions . You’ll need to continue exploring the map to make your Travel Medallion more powerful.

And that’s it! Check out our other The Legend of Zelda: Tears of the Kingdom guides below to help with crafting, exploring, and tackling challenges across Hyrule.
Tears of the Kingdom Complete Guide | Every Ability & How To Unlock Them | How to Get The Paraglider | How to Get & Use The Travel Medallion | All Armor Locations & Where to Find Them | All Construct Materials & Where to Find Them | All Shrine Locations & Strategies | How to Get More Heart Containers

Zelda: Tears of the Kingdom - How to Get the Travel Medallion Prototype (& How it Works)
Help Link teleport anywhere on the map with this guide to finding the Travel Medallion in Tears of the Kingdom.
Quick Links
How to begin robbie's questline in tears of the kingdom, where to find the travel medallion prototype in tears of the kingdom, how to use and upgrade the travel medallion.
Originally added through Breath of the Wild's expansion pass, the Travel Medallion allowed players to place a single fast-travel waypoint anywhere on the map, which Link could return to anytime. In The Legend of Zelda: Tears of the Kingdom , the medallion has been worked into one of the main side plots.
In order to get the improved Travel Medallion, Link will first have to locate the Travel Medallion Prototype and return it to Robbie, Breath of the Wild 's wacky ancient tech aficionado. This guide will explain how Link can find the prototype and get his hands on one of Tears of the Kingdom 's most useful tools.
RELATED: Zelda: Tears Of The Kingdom - Great Vehicles You Can Make From Scratch
Before he can get his hands on the Travel Medallion Prototype, Link must complete the previous steps in Robbie's questline. To find Robbie, Link must have access to Lookout Landing, available as soon as he descends from the Great Sky Island. Here he will meet Josha, one of Purah's researchers. Working with Josha will eventually lead Link to Robbie's questline.
Robbie's first quest will find Link descending to the Depths, where he will unlock Tears of the Kingdom 's Camera feature . Once that is complete, Robbie will head to the Hateno Ancient Tech Lab (3779, -2123, 0251), just north of Hateno Village.
Here he will offer Link three upgrades to the Purah Pad: Sensor+, Hero's Path Mode, and the Travel Medallion . The first two tasks can be done quickly, especially if players fill their compendium on their own. The Travel Medallion, however, will require Link to complete a slightly bigger quest.
If Robbie does not leave Lookout Landing, Link may need to complete at least one of the four main temples to trigger his exit. The Rito Village quest from "Regional Phenomena" is the most common starting place.
Robbie tells Link he cannot upgrade the Purah Pad until he gets the Travel Medallion Prototype from the Akkala Ancient Tech Lab . The lab is found in the northeastern corner of the map, and Robbie explains that dangerous trespassers have taken it over.
The Akkala Ancient Tech Lab is found at the following coordinates: 4505, 3144, 0245. Technically, Link can head to the lab any time after receiving the "Presenting: The Travel Medallion!" mission. There are several Skyview Towers between Hateno and Akkala, and though it will make it easier for Link to know where he is going, it is not required.
When Link arrives at the tower and attempts to open the door, he'll be met with a Yiga Blademaster and a Yiga Foot Soldier. Once they are dealt with, Link can head inside. Here he'll find a man in Cece apparel , who is startled by Link's approach. His name is Konba, and he has apparently been making the Yiga's outfits, of which he gives Link his own Yiga Amor chest piece.
In the corner of the room, Link will find a stone chest. Open the chest to receive the Travel Medallion Prototype. Return the prototype to Robbie and let him upgrade the Purah Pad.
RELATED: The Legend Of Zelda: Tears Of The Kingdom Proves Why Delays Are A Necessary Evil
To use the Travel Medallion, Link simply needs to choose the place he'd like to travel to, and enter the Key Items menu. Look for the Travel Medallion in the menu, hover over it, and select 'Place.' A blue travel gate will show up below Link, as well as on the map. Link will now be able to fast-travel to this location like any other waypoint.
How to Upgrade the Travel Medallion
When Link first acquires the Travel Medallion, Robbie tells Link that he'll be able to increase the number of travel gates that he can use. He informs Link the upgrade can be performed twice, once when Link acquires ten map data points and again when he acquires 15. This will bring the total number of gates to three.
Map data is acquired each time Link brings a Skyview Tower on . Once he has completed the required amount, simply return to Robbie and he'll perform the upgrade.
The Legend of Zelda: Tears of the Kingdom is available now for the Nintendo Switch.
DualShockers
The legend of zelda: tears of the kingdom - how to unlock the travel medallion.
TTravel Medallion in Zelda: Tears Of The Kingdom makes fast travel a lot easier. Well, here's how you can unlock these in the game.
Quick Links
How to obtain the travel medallion, how to unlock the other two travel medallions, how to use the travel medallion.
The Kingdom of Hyrule is massive. With the new addition of the Sky Islands and The Depths within The Legend of Zelda: Tears of the Kingdom , it can take forever to cross long distances on the map. Even with fast travel locations, sometimes, there is somewhere you wish you could get to quicker.
RELATED: The Legend Of Zelda: Tears Of The Kingdom - How To Exchange Heart Containers For Stamina Vessels
One way that you can solve this dilemma is by unlocking the Travel Medallions. These will allow you to place them down anywhere (the surface, The Depths, or the Sky Islands) and fast travel to them at any time.
If you want to obtain the Travel Medallion, first, you will need to obtain the quest "Hateno Village Research Lab" from Robbie at Lookout Landing . He will ask you to meet him at his old lab in Hateno Village.
Once there, speak to Robbie, and he will tell you about the Travel Medallion. It allows you to place it anywhere and fast travel to it later. However, he cannot help you. His prototype for the Travel Medallion is back at the Akkala Research Lab . The only problem is that it has been taken over by the Yiga Clan.
Traveling to the area and walking up the path to the Akkala Research Lab can be dangerous. There are a lot of Monsters that you will cross along your journey.
Once you reach the research lab, you will see signs everywhere saying it is now a Yiga Clan hideout. Once you walk up to the front door and interact with it, you will be ambushed by two Yiga Clan members . Remember, if they disappear, look for the red glowing area. This indicates where they will appear next.
After defeating them, you will find a chest inside the research lab; open it up to obtain the Travel Medallion Prototype. You can also find the Yiga Clan Armor in this location.
With the Travel Medallion Prototype in hand, you're ready to head back to the Hateno Village Research Lab and report back to Robbie.
RELATED: The Legend Of Zelda: Tears Of The Kingdom – How To Get The Dark Armor Set & The Depths Armor Set
Once you return to Robbie, he will mention that he believes he can upgrade your Travel Medallion to feature two more. However, he needs you to do him a favor first.
In order to obtain your second Travel Medallion, you must visit 10 of the Skyview Towers around Hyrule . These are the large towers that act as fast-travel locations and allow you to fill in your map. If you want your third Travel Medallion, you must find all of these Skyview Towers.
Once you have completed that, Robbie will be surprised. He will go ahead and upgrade your Travel Medallion.
After you have obtained your Travel Medallion, you can use it right away to mark any place as a fast travel location.
All you need to do is go to the Key Items portion of your inventory . Once there, find the Travel Medallions and select them. It will then ask you if you would like to place them. Once they are placed, you'll have a new fast-travel location!
NEXT: The Legend of Zelda: Tears Of The Kingdom - How To Get Biggoron's Sword
Travel Medallion Zelda TOTK – How To Get & Use
Want to know more about the Travel Medallion? Here is a guide on how you can get & use Travel Medallion in Tears Of The Kingdom
Since its introduction in The Master Trials DLC in Breath Of The Wild players have found Travel Medallion to be a lot more useful in exploring the vast lands of Hyrule. With the inclusion of the medallion in the game itself, Tears Of The Kingdom allows players to use it to open a gate and fast-travel to the location they want. This comes in handy in exploring various regions of Hyrule as players may find traveling with a horse or unlocking shrines long and tedious. Here is our guide on Travel Medallion and how you can get and use it in Zelda TOTK
Travel Medallion Zelda TOTK Guide

You will have to complete some of the side quests in the game. Players will have to talk to Robbie in order to get their hands on the medallion. Once you have completed the quest of unlocking the camera feature on your Purah Pad and helped Robbie fix his balloon , Robbie will head from Lookout Landing to Hateno Village . Here you can approach him and activate three of Robbie’s side quests that players would have to go through to get upgrades for their Pad.
The First two quests unlock Sensor+ and Hero Paths on the Pad while the third will let you have the Travel Medallion upgrade. While talking to Robbie in Tears Of The Kingdom you will come to know that he made a prototype from the Medallion which required more data in order to be completed. He then left his prototype in his lab back in Deep Akkala when he went on to work on the Purah Pad that you now have.
How to Get the Travel Medallion

Once you activate the Presenting: Travel Medallion quest Robbie will instruct you to get back the prototype from Akkala Ancient Tech Lab in Deep Akkala which is now in control of the Yiga Clan .
- Players will have to head towards the lab in the northeast tip of Deep Akkala .
- The lab would be guarded by two Yiga Clan Soldiers who would stop Link from entering it.
- You will have to defeat both of them to get inside the lab.
- Once in, Link will find a man named Konba and after talking to him players will receive the Yiga Armor Chest Piece .
- After which players may be able to spot a stone chest that they can open to find Travel Medallion Prototype .
- You can then head back and meet Robbie after which he will upgrade it to an actual Travel Medallion ready to use.
How to Use the Travel Medallion

After having the working Travel Medallion players can use it by heading toward where they want to set a fast travel location to.
- After which you can navigate through your Key Items menu to find it.
- Once done, you can then click on it and select Place from the options.
- This will let you place a portal gate exactly beneath where Link is standing.
- You would then be able to fast travel to that location whenever necessary.
- This comes in clutch in many situations as the campaign progresses .
It is worth noting that the medallion has two more upgrades that let players place two more medallions at a time. To get the second medallion players will have to unlock 10 Skyview Towers while the third one can be obtained when Link unlocks all 15 Skyview Towers . Once done you can then simply head toward Robbie for these upgrades.
That is everything on the Travel Medallion and how you can get & use it in Tears Of The Kingdom. If you want to know about all the Shrines in TOTK here is our guide covering the list of all the shrines.

Om has mastered his character development through every Assassin's Creed game. From dying mercilessly in boss battles to comically failing stealth attempts, he has seen it all. You can spot him finding solace in watching Kitchen Nightmares during breaks.
- GT Originals
- AC Valhalla
- Genshin Impact
- Honkai Star Rail
- Street Fighter 6
- Project Slayers
How to Get Travel Medallion Zelda Tears of the Kingdom
Home » Zelda Tears of the Kingdom » How to Get Travel Medallion Zelda Tears of the Kingdom
The Travel Medallion was one of the more popular items in Zelda Breath of the Wild. Using this item, you could create a fast travel point that Link could instantaneously warp to at any time. And, good news, the Travel Medallion is also available in Zelda TotK as well. Also, unlike in the previous game – in which you could only obtain this item through a DLC – this isn’t the case in Tears of the Kingdom. That said, you’re no doubt wondering how to get the Travel Medallion in Zelda Tears of the Kingdom . Here’s how you will be able to get this fast travel item.

How to Get Travel Medallion in Zelda TotK
The Travel Medallion won’t be available right from the start. In fact, it will be a long time before you get it. Also, needless to say, there will be spoilers for some of the game’s plot and quests (though we will try our best to keep it as vague as possible), so if you want to go into the game as spoiler-free as possible, suffice to say that – you will unlock it later on in the game. From this point on, there will be spoilers.
The first thing that you will need to do is to complete one of the four main story quests. After that you will also need to finish the initial depths investigation for Josha – the one where you will take a picture of a statue. This will lead you to the Great Abandoned Central Mine in the Depths, where you will unlock the Autobuild ability . Josha will ask that you use this new ability to make a balloon for Robbie. Now go to Lookout Landing and talk to Robbie there. He is going to go back to the Hateno Village Ancient Lab. Make your way to that lab to unlock the Sheikah Pad’s Shrine Senor ability.
Robbie will offer to upgrade your pad, and one of these upgrades is the Travel Medallion itself. To do this, he needs you to go to his home in the Akkala Ancient Tech Lab and get the Travel Medallion Prototype from there. This will begin the “Presenting: The Travel Medallion!” side adventure. Travel there, and get ready for a fight against two tough mobs. Head inside, and you will find a chest with the Travel Medallion Prototype. Return to Robbie, who will give you the real, working Travel Medallion.

How to Upgrade Travel Medallion in Zelda Tears of the Kingdom
Once you have unlocked the Travel Medallion, you can also upgrade it. This will allow you to set up a second and third fast travel point with it. To get the second fast travel point, you need to map at least 10 regions by visiting and using the Skyview Towers. And to get the third and final fast travel point, you will have to map all 15 regions via Skyview Towers.

YOU MAY ALSO READ

Leave a Reply Cancel reply
Your email address will not be published. Required fields are marked *
Save my name, email, and website in this browser for the next time I comment.
Russia Travel Blog | All about Russia in English
- About our blog
- RussiaTrek.org
Sidebar →
- Architecture
- Entertainment
- RussiaTrek.org News

- Send us a tip with a message
- Support RussiaTrek.org
- Travel Guide to Ukraine
- Comments RSS
← Sidebar
The trains and stations of the Moscow Metro
2 Comments · Posted by Alex Smirnov in Cities , Travel , Video
The Moscow Metro is the third most intensive subway system in the world after Tokyo and Seoul subways. The first line was opened on May 15, 1935. Since 1955, the metro has the name of V.I. Lenin.
The system consists of 12 lines with a total length of 305.7 km. Forty four stations are recognized cultural heritage. The largest passenger traffic is in rush hours from 8:00 to 9:00 and from 18:00 to 19:00.
Cellular communication is available on most of the stations of the Moscow Metro. In March 2012, a free Wi-Fi appeared in the Circle Line train. The Moscow Metro is open to passengers from 5:20 to 01:00. The average interval between trains is 2.5 minutes.
The fare is paid by using contactless tickets and contactless smart cards, the passes to the stations are controlled by automatic turnstiles. Ticket offices and ticket vending machines can be found in station vestibules.

Tags: Moscow city
You might also like:

The bridge over Zolotoy Rog Bay in Vladivostok
The views of St. Petersburg from the TV tower >>
Tomás · August 27, 2012 at 11:34 pm
The Moscow metro stations are the best That I know, cars do not.
Alberto Calvo · September 25, 2016 at 8:57 pm
Great videos! Moscow Metro is just spectacular. I actually visited Moscow myself quite recently and wrote a post about my top 7 stations, please check it out and let me know what you think! :)
http://www.arwtravels.com/blog/moscow-metro-top-7-stations-you-cant-miss
Leave a Reply
XHTML: You can use these tags: <a href="" title=""> <abbr title=""> <acronym title=""> <b> <blockquote cite=""> <cite> <code> <del datetime=""> <em> <i> <q cite=""> <s> <strike> <strong>
- February 2024
- January 2024
- December 2023
- November 2023
- October 2023
- September 2023
- August 2023
- Articles >
The Moscow Metro Museum of Art: 10 Must-See Stations
There are few times one can claim having been on the subway all afternoon and loving it, but the Moscow Metro provides just that opportunity. While many cities boast famous public transport systems—New York’s subway, London’s underground, San Salvador’s chicken buses—few warrant hours of exploration. Moscow is different: Take one ride on the Metro, and you’ll find out that this network of railways can be so much more than point A to B drudgery.
The Metro began operating in 1935 with just thirteen stations, covering less than seven miles, but it has since grown into the world’s third busiest transit system ( Tokyo is first ), spanning about 200 miles and offering over 180 stops along the way. The construction of the Metro began under Joseph Stalin’s command, and being one of the USSR’s most ambitious building projects, the iron-fisted leader instructed designers to create a place full of svet (radiance) and svetloe budushchee (a radiant future), a palace for the people and a tribute to the Mother nation.
Consequently, the Metro is among the most memorable attractions in Moscow. The stations provide a unique collection of public art, comparable to anything the city’s galleries have to offer and providing a sense of the Soviet era, which is absent from the State National History Museum. Even better, touring the Metro delivers palpable, experiential moments, which many of us don’t get standing in front of painting or a case of coins.
Though tours are available , discovering the Moscow Metro on your own provides a much more comprehensive, truer experience, something much less sterile than following a guide. What better place is there to see the “real” Moscow than on mass transit: A few hours will expose you to characters and caricatures you’ll be hard-pressed to find dining near the Bolshoi Theater. You become part of the attraction, hear it in the screech of the train, feel it as hurried commuters brush by: The Metro sucks you beneath the city and churns you into the mix.
With the recommendations of our born-and-bred Muscovite students, my wife Emma and I have just taken a self-guided tour of what some locals consider the top ten stations of the Moscow Metro. What most satisfied me about our Metro tour was the sense of adventure . I loved following our route on the maps of the wagon walls as we circled the city, plotting out the course to the subsequent stops; having the weird sensation of being underground for nearly four hours; and discovering the next cavern of treasures, playing Indiana Jones for the afternoon, piecing together fragments of Russia’s mysterious history. It’s the ultimate interactive museum.
Top Ten Stations (In order of appearance)
Kievskaya station.
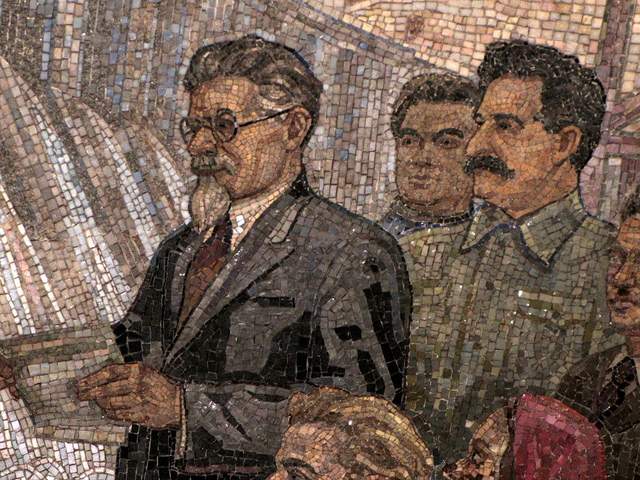
Kievskaya Station went public in March of 1937, the rails between it and Park Kultury Station being the first to cross the Moscow River. Kievskaya is full of mosaics depicting aristocratic scenes of Russian life, with great cameo appearances by Lenin, Trotsky, and Stalin. Each work has a Cyrillic title/explanation etched in the marble beneath it; however, if your Russian is rusty, you can just appreciate seeing familiar revolutionary dates like 1905 ( the Russian Revolution ) and 1917 ( the October Revolution ).
Mayakovskaya Station
Mayakovskaya Station ranks in my top three most notable Metro stations. Mayakovskaya just feels right, done Art Deco but no sense of gaudiness or pretention. The arches are adorned with rounded chrome piping and create feeling of being in a jukebox, but the roof’s expansive mosaics of the sky are the real showstopper. Subjects cleverly range from looking up at a high jumper, workers atop a building, spires of Orthodox cathedrals, to nimble aircraft humming by, a fleet of prop planes spelling out CCCP in the bluest of skies.
Novoslobodskaya Station
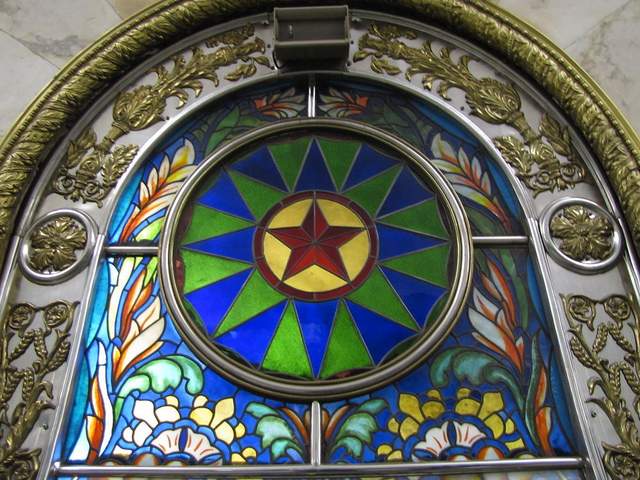
Novoslobodskaya is the Metro’s unique stained glass station. Each column has its own distinctive panels of colorful glass, most of them with a floral theme, some of them capturing the odd sailor, musician, artist, gardener, or stenographer in action. The glass is framed in Art Deco metalwork, and there is the lovely aspect of discovering panels in the less frequented haunches of the hall (on the trackside, between the incoming staircases). Novosblod is, I’ve been told, the favorite amongst out-of-town visitors.
Komsomolskaya Station
Komsomolskaya Station is one of palatial grandeur. It seems both magnificent and obligatory, like the presidential palace of a colonial city. The yellow ceiling has leafy, white concrete garland and a series of golden military mosaics accenting the tile mosaics of glorified Russian life. Switching lines here, the hallway has an Alice-in-Wonderland feel, impossibly long with decorative tile walls, culminating in a very old station left in a remarkable state of disrepair, offering a really tangible glimpse behind the palace walls.
Dostoevskaya Station
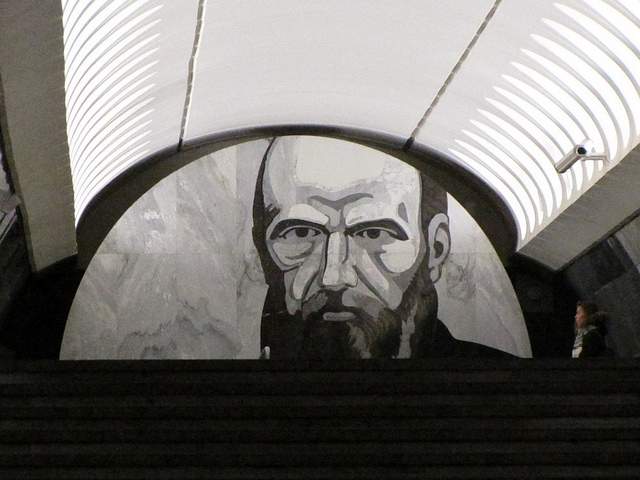
Dostoevskaya is a tribute to the late, great hero of Russian literature . The station at first glance seems bare and unimpressive, a stark marble platform without a whiff of reassembled chips of tile. However, two columns have eerie stone inlay collages of scenes from Dostoevsky’s work, including The Idiot , The Brothers Karamazov , and Crime and Punishment. Then, standing at the center of the platform, the marble creates a kaleidoscope of reflections. At the entrance, there is a large, inlay portrait of the author.
Chkalovskaya Station
Chkalovskaya does space Art Deco style (yet again). Chrome borders all. Passageways with curvy overhangs create the illusion of walking through the belly of a chic, new-age spacecraft. There are two (kos)mosaics, one at each end, with planetary subjects. Transferring here brings you above ground, where some rather elaborate metalwork is on display. By name similarity only, I’d expected Komsolskaya Station to deliver some kosmonaut décor; instead, it was Chkalovskaya that took us up to the space station.
Elektrozavodskaya Station
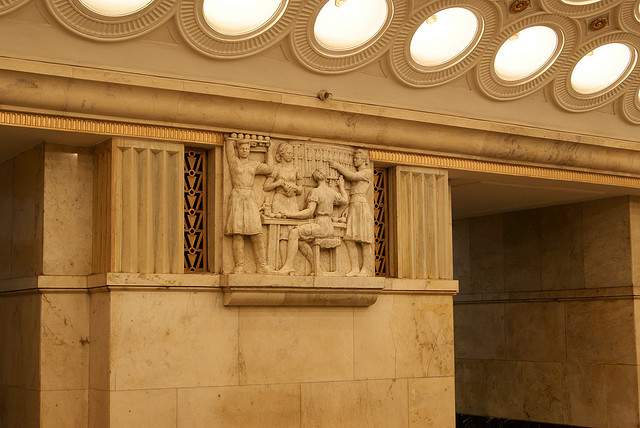
Elektrozavodskaya is full of marble reliefs of workers, men and women, laboring through the different stages of industry. The superhuman figures are round with muscles, Hollywood fit, and seemingly undeterred by each Herculean task they respectively perform. The station is chocked with brass, from hammer and sickle light fixtures to beautiful, angular framework up the innards of the columns. The station’s art pieces are less clever or extravagant than others, but identifying the different stages of industry is entertaining.
Baumanskaya Statio
Baumanskaya Station is the only stop that wasn’t suggested by the students. Pulling in, the network of statues was just too enticing: Out of half-circle depressions in the platform’s columns, the USSR’s proud and powerful labor force again flaunts its success. Pilots, blacksmiths, politicians, and artists have all congregated, posing amongst more Art Deco framing. At the far end, a massive Soviet flag dons the face of Lenin and banners for ’05, ’17, and ‘45. Standing in front of the flag, you can play with the echoing roof.
Ploshchad Revolutsii Station
Novokuznetskaya Station
Novokuznetskaya Station finishes off this tour, more or less, where it started: beautiful mosaics. This station recalls the skyward-facing pieces from Mayakovskaya (Station #2), only with a little larger pictures in a more cramped, very trafficked area. Due to a line of street lamps in the center of the platform, it has the atmosphere of a bustling market. The more inventive sky scenes include a man on a ladder, women picking fruit, and a tank-dozer being craned in. The station’s also has a handsome black-and-white stone mural.
Here is a map and a brief description of our route:
Start at (1)Kievskaya on the “ring line” (look for the squares at the bottom of the platform signs to help you navigate—the ring line is #5, brown line) and go north to Belorusskaya, make a quick switch to the Dark Green/#2 line, and go south one stop to (2)Mayakovskaya. Backtrack to the ring line—Brown/#5—and continue north, getting off at (3)Novosblodskaya and (4)Komsolskaya. At Komsolskaya Station, transfer to the Red/#1 line, go south for two stops to Chistye Prudy, and get on the Light Green/#10 line going north. Take a look at (5)Dostoevskaya Station on the northern segment of Light Green/#10 line then change directions and head south to (6)Chkalovskaya, which offers a transfer to the Dark Blue/#3 line, going west, away from the city center. Have a look (7)Elektroskaya Station before backtracking into the center of Moscow, stopping off at (8)Baumskaya, getting off the Dark Blue/#3 line at (9)Ploschad Revolyutsii. Change to the Dark Green/#2 line and go south one stop to see (10)Novokuznetskaya Station.
Check out our new Moscow Indie Travel Guide , book a flight to Moscow and read 10 Bars with Views Worth Blowing the Budget For
Jonathon Engels, formerly a patron saint of misadventure, has been stumbling his way across cultural borders since 2005 and is currently volunteering in the mountains outside of Antigua, Guatemala. For more of his work, visit his website and blog .

Photo credits: SergeyRod , all others courtesy of the author and may not be used without permission
IMAGES
VIDEO
COMMENTS
You'll need to blow up the rocks to get in. The entrance to the cave is at coordinates (3741, -2085, 0208). We used a bomb flower to get it — stand back! Head into the cave and glide down the ...
While the Fast Travel Medallion as originally a DLC item in Breath of the Wild, you'll be able to access it free of charge in TotK, but only after completing certain quests. Prerequisite Quests ...
Stay. Travel Medallion To get the Travel Medallion, complete a task for Robbie at the Hateno Research Lab. To use the Travel Medallion, access it from the Key Items menu and place one at your ...
The Zelda: Tears of the Kingdom Travel Medallions can be found under the key items tab of your inventory screen. When selected, you can choose to place one on the exact spot where Link is standing ...
How to Get More Travel Medallions in Zelda: TOTK. Link can unlock up to 2 more Travel Medallions for a grand total of 3 custom fast travel points by finding all of Tears of the Kingdom's Skyview Towers.. Talk to Robbie after registering 10 Skyview Tower locations to collect a second Travel Medallion.. To get the final Travel Medallion, Link will need to talk to Robbie once more after ...
Presenting: The Travel Medallion is a Side Adventure in The Legend of Zelda: Tears of the Kingdom (TotK) that is found in Hateno Ancient Tech Lab. Read on to learn how to unlock Presenting: The Travel Medallion, its location and rewards, as well as how to complete this Side Adventure! ... Once you get the Travel Medallion Prototype, travel back ...
Set a Custom Fast Travel Point in the Map. Open the Inventory menu and navigate to the Key Items tab. Select the Travel Medallion and choose Place to place the portal in the area you want to use as a fast travel point. To fast travel, open the Map and highlight the Travel Medallion icon. Choose Travel to teleport to the location.
Travel to the Akkala Region and go to the Ancient Tech Lab, just up the road from the East Akkala Stables. When you arrive, knock on the door to trigger a Yiga Clan ambush. Defeat these knuckleheads, and you'll be able to go inside the lab. When you enter, head for the chest to the right that holds the Travel Medallion.
Enter the lab and acquire the Yiga Armor, then open the chest to acquire the Travel Medallion prototype. Go back to Robbie in Hateno and turn the quest in. Ding! You'll get a Travel Medallion.
side adventure Hateno Village Research Lab you've completed the tutorial Robbie. Presenting: The Travel Medallion. Akkala Ancient Tech Lab. use the Travel Medallion. Travel Gate. Travel Gate ...
How to Use and Upgrade the Travel Medallion. To use the Travel Medallion, Link simply needs to choose the place he'd like to travel to, and enter the Key Items menu. Look for the Travel Medallion ...
How To Obtain The Travel Medallion. If you want to obtain the Travel Medallion, first, you will need to obtain the quest "Hateno Village Research Lab" from Robbie at Lookout Landing. He will ask ...
When you have 10 maps unlocked, you'll get a second medallion, and when you have all 15 unlocked, you'll get a third. For more handy guides, check out our Zelda: Tears of the Kingdom walkthrough ...
Zelda ToTK Travel Medallion Location video shows you how to get the Traveller's Medallion, which allows you to teleport to any place you've already visited.?...
To get the second medallion players will have to unlock 10 Skyview Towers while the third one can be obtained when Link unlocks all 15 Skyview Towers. Once done you can then simply head toward Robbie for these upgrades. That is everything on the Travel Medallion and how you can get & use it in Tears Of The Kingdom.
Robbie Skyview Towers Robbie additional Travel Medallion 3 of them Depths Hyrule, Skies Travel Medallions. Second Travel Medallion - Visit 10 Skyview Towers. Thrid Travel Medallion - Vist All Skyview Towers (15 in total) Tears of the Kingdom. Tingle reclaim his armor. The Legend of Zelda: Tears of the Kingdom.
How to Get Travel Medallion in Zelda TotK. The Travel Medallion won't be available right from the start. In fact, it will be a long time before you get it. Also, needless to say, there will be spoilers for some of the game's plot and quests (though we will try our best to keep it as vague as possible), so if you want to go into the game as ...
Tired of being a second rate Link? Wonder how to get the best out of Zelda Tears Of The Kingdom? Wonder no more! In this video, we'll show you how to get 3 c...
The Travel Medallion is one of the most useful features of the Pura Pad in Tears of the Kingdom, as it allows you to place a warp point anywhere on the map, ...
Drive • 1h 3m. Drive from Elektrostal to Moscow 58.6 km. RUB 450 - RUB 700. Quickest way to get there Cheapest option Distance between.
2 Comments · Posted by Alex Smirnov in Cities, Travel, Video. The Moscow Metro is the third most intensive subway system in the world after Tokyo and Seoul subways. The first line was opened on May 15, 1935. Since 1955, the metro has the name of V.I. Lenin.
Have a look (7)Elektroskaya Station before backtracking into the center of Moscow, stopping off at (8)Baumskaya, getting off the Dark Blue/#3 line at (9)Ploschad Revolyutsii. Change to the Dark Green/#2 line and go south one stop to see (10)Novokuznetskaya Station. Check out our new Moscow Indie Travel Guide, book a flight to Moscow and read 10 ...
Travel from. To. See all options. Search accommodation with Expedia. Duration: 49 min: Distance: 42 mi: Average price: $14: Nearby airports: 5 found: ... Get the Rome2Rio app Find the best way to get from A to B, anywhere in the world, on your mobile or tablet. Compare your options: plane, train, bus, car, ferry, bike share, driving and walking ...