

Northern Circuit
Western breach.
- Acclimatisation
- Packing List
- Climbing Cost
- Coronavirus
- Visa’s, Vaccinations, Malaria
- Kilimanjaro Blog
- Climb for Charity
- Get A Trek Quote
Kilimanjaro Routes – A Complete Overview

Are you trying to work out which Kilimanjaro route to choose for your trek ? Fear not, this page will help you make the right choice.
Each Kilimanjaro route has it's own pros and cons. Some are great for scenery, but not so great for acclimatisation (see: altitude sickness on Kilimanjaro ). Others offer high summit success rates but are also quite busy at certain times of the year.
Let's jump in and look at the various Kilimanjaro routes to the summit.
Plan your Kilimanjaro trek
Get a quote from our recommended local kilimanjaro operator, kilimanjaro climb routes.
There are six main Kilimanjaro routes that one can use to trek the highest mountain in Africa. The seventh Kilimanjaro route, Mweka, is used for decent only.
Lemosho Route
Machame route, marangu route.
- Mweka Route (descent only)
Rongai Route
Shira route, umbwe route.
In addition to these routes, trekkers can also take the Northern Circuit or the Western Breach.

Kilimanjaro Route Summaries
Which is the best kilimanjaro route.
The best Mt Kilimanjaro route on the southern circuit is the Machame or Lemosho route.
Here's a brief overview of each;

- The Machame route , often described as the 'short and steep' route, is highly recommended for scenic value and has a high success rate, especially if you choose the 7-day itinerary.
- The six-day options is not recommended for first-time trekkers.
- It is a great Kilimanjaro route for acclimatization as it has a climb high, sleep low opportunity for trekkers on day 3. Here trekkers climb from Shira Camp 2 to Lava Tower at 4,600 meters, where they have lunch and then hike back down to Barranco Camp (3,900 meters) to sleep
- Like all Kilimanjaro routes, the Machame is a challenging trek with stunning scenery through four diverse climatic zones .
- There is a good opportunity to split pre-summit day climb by adding an extra rest day at Karanga Camp (only available to seven day trekkers) to leave hikers well rested before summiting
- The route has however got very popular over the past few years which means it can get busy, especially at Barranco where climbers join up with trekkers from the Lemosho, Shira and Umbwe routes (see details on Barranco Wall )
- The Machame route only offers fully catered camping

The few km's between Karanga and Barafu are not very scenic. Aso be prepared to get blasted by cold, high altitude winds.
Why choose the 7-Day Machame Route? Six day Machame route trekkers skip Karanga Camp and continue straight on to Barafu (Base Camp).This is only only about 4km further, which is fine if you are feeling good. However, if you are tired and suffering from altitude sickness symptoms (as most people are), it means you have very little rest before your midnight summit attempt. The 7-day option is much better for acclimatisation.

- The Lemosho is a beautiful route that departs from the West side of Mount Kilimanjaro
- Due to its route profile the Lemosho can be completed on a seven or eight day itinerary and offers lots of opportunities to properly acclimatize. Because of it’s versatile route profile it is one of the best Kilimanjaro routes and has high summit success rates
- It is also recommended as the starting point is relatively remote and hence provides trekkers with a rather untouched and wild start to their Kilimanjaro adventure. Spotting large wildlife, like antelope, buffalo and even elephant is unusual but not impossible
- The route also provides unparalleled and spectacular views of the dramatic gorges that characterize the western side of Mount Kilimanjaro
- The Lemosho offers trekkers the experience of hiking across the Shira Plateau – one of the largest high altitude plateaus in the world
- Trekkers on the Lemosho typically converge with Machame route on day 3 at Barranco camp and use the Barafu camp route to the summit; however, it is now quite common for Lemosho trekkers to veer north before Lava Tower to join the Northern Circuit (see details below) which circles the north side of Mount Kilimanjaro and follows the summit passage via Gilman’s Point.
- The Lemosho route can also be used by trekkers planning to climb the Western Breach to the summit
- Like the Machame Route, the Lemosho is fully catered camping only

- The Northern Circuit is the longest route on Mount Kilimanjaro, and has one of the highest summit success rates as the route offers lots of climb high, sleep low opportunities, and time to acclimatise
- The route departs from same start point as Lemosho but then joins the Northern Circuit near Lava Tower, before traversing the north slopes of Mount Kilimanjaro
- The summit passage is via Gilman’s Point
- The route can be completed on an eight or nine day itinerary
- If you are looking for a quiet and wild Kilimanjaro experience, then this route is for you.

- The Rongai route is the only northern start point to Kilimanjaro, beginning on the North East side of Kilimanjaro National Park
- The Rongai offers a true wilderness experience on the early stages of the climb, and like the Lemosho route it is possible to see large wildlife like buffalo, antelope and elephant
- The Northern slopes tend to be dryer than the southern slopes which makes the Rongai a great Kilimanjaro Route for trekking during the wet season.
- However, because the northern slopes are dryer they can also be considered less scenic. That being said, a northern approach is often characterized by clear views of Kilimanjaro – something that is not that common from the southern side
- The Rongai is also a flatter route for the first few days which makes for easy trekking. The route is usually completed on a seven day itinerary but has limited climb high, sleep low opportunities which means that acclimatisation opportunities are not as good as on other Kilimanjaro routes
- Typically the Rongai route uses the passage from School Hut up past Hans Meyer Cave and Gilman’s Point to Uhuru Peak
- The route descends via the Marangu route, hence the route has fully catered camping until the last night on the mountain – beers at Horombo Hut anyone?
Easiest route up Kilimanjaro
There is no easy route up Mount Kilimanjaro, but the Marangu Route (i.e. Coca-Cola Route) has a reputation for being the easiest Kilimanjaro route.

Image: Tony Young
- The Marangu route was Nicknamed the ‘Coca-Cola’ route as Coke used to be sold along the way in tea huts
- The route is often selected by unprepared, inexperienced climbers as a result of the reputation for being the “easiest” Kilimanjaro route, attributing to the lower success rate
- It is also the shortest Kilimanjaro route with a relatively poor acclimatization profile, which is a major contributor to the low success rates on the Marangu.
- The six day itinerary does give trekkers an opportunity to climb high, sleep low; however the elevation is moderate and not as effective as other climb high, sleep low opportunities that are present on other Kilimanjaro routes
- Out of all the Kilimanjaro routes, the Marangu route is the only one with dormitory style accommodation in huts for the whole duration of the climb. The huts come with mattresses and basic amenities, making them a popular choice for budget tour operators who don’t have the right equipment to tackle the other Kilimanjaro routes
- The Marangu offers beautiful views from the Saddle but can be considered less scenic than other Kilimanjaro routes due to ascent and descent on same trail
Kilimanjaro Routes I Don't Recommend
- Same as Lemosho, except Shira route offers higher start point and therefore poorer acclimatisation
- It is a route that we wouldn’t recommend because of it’s high start point
- The Umbwe Route has a short and steep beginning profile up to Barranco camp where trekkers join climbers from the Lemosho, Shira and Machame route
- Some Umbwe route trekkers don’t join the southern circuit at Barranco but instead continue north, up to Lava Tower and then onto the Western Breach
- The Umbwe has poor acclimatization opportunities due to its rapid ascent and therefore success rates can be low on this Kilimanjaro route
- Fully catered camping only
- The Western Breach is the most technically difficult approach to Mount Kilimanjaro, but perhaps the most rewarding!
- The approach to the Western Breach usually starts on the Umbwe Route and then continues north and up from Lava Tower
- The Western Breach was closed due to fatal rockfall in 2006, but reopened in 2007 with a new and safer route configuration. Nonetheless, many tour operators don’t offer the Western Breach on their route roster
- Only advised for experienced trekkers – it is recommended that all Western Breach climbers use helmets and it is not uncommon to need point crampons during the wet season and sub-surface ice can be an issue
- Success rates are typically moderate to high as the route is usually only tackled by experienced high altitude trekkers
Kilimanjaro Summit Routes (Passages)
As alluded to above, there are three summit passages on Kilimanjaro.
Stella Point

An especially snowy day at Stella Point (about one hour from the summit).
The first is via the southern slopes of Kibo, up to Stella Point and then west around the crater rim to Uhuru Peak. This approach is used by trekkers on the Lemosho, Shira, Machame and Umbwe Routes. It is the easiest summit passage as it only take one hour from Stella Point to Uhuru Peak.
Gilman's Point
The second passage approaches from the Eastern side of Kibo, up to Gilman’s Point and then west around the crater rim to Uhuru Peak. Trekkers on the Rongai and Marangu Route, and Northern Circuit use this passage to the summit. It takes around two hours from Gilman's Point to the summit proper, making this a harder passage.
Crater Camp (Western Breach)
Thirdly, trekkers can use the more technically challenging approach to the summit via the Western Breach. Trekkers who use the Western Breach usually approach from the Umbwe Route up to Lava Tower, before taking a steep ascent past Arrow’s Glacier and up the Western Breach to Crater Camp and Uhuru Peak. The Western Breach can also be approached using the Machame, Shira and Lemosho Route.
Kilimanjaro Trail Routes FAQ
What is the best kilimanjaro route.
The best Kilimanjaro route is the 8-day Lemosho or the 7-day Machame. Both routes offer good acclimatisation opportunities, and therefore have low incidence of altitude sickness. Summit success rates on these routes are high, and both are very scenic.
What is the easiest Kilimanjaro route?
The Marangu route is often touted as the easiest route on Kilimanjaro. This is because it's the shortest in length and the only route with hut accommodation. But the short time on the mountain does mean that many people who climb Kilimanjaro via the Marangu experience altitude sickness and don't reach the summit. If you choose the Marangu route make sure to go for the 6-day option (not the 5-day trek)
Which Kilimanjaro route has the highest summit success rates?

No Kilmanjaro route is 'easy' but the Machame 7-Day option does offer shorter distances and good opportunity for acclimatization.
The Northern Circuit has the highest summit success rates as it is the longest route and offers lots of time to acclimatise. The 8-day Lemosho and 7-day Machame also have high summit success rates.
More Kilimanjaro guides :
- Kilimanjaro hike guide
- Weather on Mount Kilimanjaro
- When to climb Kilimanjaro
- Training and preparation for Mount Kilimanjaro
- Kilimanjaro climb costs
- Fun Kilimanjaro facts for kids (and adults!)
Mark Whitman
Hi, I'm Mark! Welcome to Climb Kilimanjaro Guide - the Web's No.1 Trekking Guide to Mount Kilimanjaro. This site is your one stop shop for everything Kilimanjaro. To date over 5 million people have visited Climb Kilimanjaro Guide, many of which have gone on to summit Kili! I hope you find all the answers you are looking for, but if you have any questions don't hesitate to drop a comment below!
Leave a Reply
Your email address will not be published. Required fields are marked
Name * * * * *
Email * * * * *
I am trying to choose a route to climb. I have looked at all of them and need your expert opinion to help me choose. I am climbing alone although I would join a group if there was one. I want to find the route that will give me the prettiest sights. I have narrowed it to Machame, Umbwe and Lemosho which all combine at Barranco. So, which route would give me the most fascinating first 2-3 days? And if it’s the Umbwe route, how worried should I be about the altitude? Does the fact that it doesn’t have a climb high and sleep low make it nearly impossible or can someone in great shape who takes it slow be ok? I assume the other routes will not be a problem, and I even wonder about the altitude differences in all of them. Can you descend on Umbwe if experiencing AMS and extend the route a day? I know I asked a lot and I thank you for your attention to this.
Hi Corey, Thanks for your comment. The two key things to consider when selecting a route on Kilimanjaro: 1. Make sure that the route duration is long enough to ensure adequate acclimatisation. Five day routes are just too rapid. Ideally I recommend seven day treks; however, six day treks are an affordable alternative. 2. Make sure the route provides a climb high, sleep low option. Again, this is a critical factor in many trekkers success on Kilimanjaro and I highly recommend you go for a route that provides this option. With these two considerations in mind, I recommend either the seven day Lemosho Route which departs from the West of the Mountain and provides ample opportunity to acclimatize. Alternatively, I am also a fan of the seven day Machame Route. If I was pushed I would say the Lemosho is the most scenic of the two (but not by much). Hope this helps. If you would like a trekking quote from our trekking partner check out this page ( https://www.climbkilimanjaroguide.com/go/ ) and we’ll get them to follow up with you. All the best!
I am 60 years old with decent hiking experience.Have done Machu Pichu,Patagonia and Everest base camp till 15000 feet when we were stopped due to snow. What route do you think is best and sucess to sumit Thanks
Hi, I recommend either the 7-day Machame or 8-day Lemosho. If you have more time then you may want to consider the 9-day Northern Circuit. All the best!
Hi there, I (48 yr old female) would like to climb Kilimanjaro with a friend in September. Whilst my friend is experienced at high altitude climbing, I am only used to day hikes in the Alps, up to 3000 m. From what I read, the 7 day Rongai route might be an option – I am not much concerned about scenic beauties, but feasibility… Also our time slot is rather small (20.-28.09.16), so I guess we have to consider a private tour, although I wouldn’t mind a group. So my questions are: would you recommend Rongai as well, or another option? I haven’t seen any summit success rates for this route, but I imagine they might not be too high, due to the fact that inexperienced trekkers like myself tend to choose this one?! And could you possibly also recommend tour operators? And one last question (for the moment ;-): what do you think about the prophylactic use of Diamox? Many thanks, Manuela
Hi Manuela, The 7-day Rongai is a good route, but as you say it is not the most scenic. It also doesn’t provide an excellent climb high, sleep low profile and in my opinion the approach to the summit via Gilman’s Point is more challenging as it is longer and a little steeper than that on the Southern Circuit routes (which use Stella Point). On the whole though it is not a bad route and definitely worth considering. Alternatively I would recommend the 7-day Machame or Lemosho. These two routes are more scenic (especially the latter that starts on the far West side of Kilimanjaro) and do have very good acclimatisation profiles. The Machame is a busy route so if you are trying to avoid people then it is perhaps not the best. The two routes converge at Barranco Camp so you can expect a busier summit night. If I was pushed I would say the 7 or preferably 8-day Lemosho is the best route on Kilimanjaro. If you have the time, the Northern Circuit is also very good from an acclimatisation perspective. To get a tour operator recommendation go here: https://www.climbkilimanjaroguide.com/go/ and for information on Diamox go here: https://www.climbkilimanjaroguide.com/using-diamox-on-kilimanjaro/ . All the best!
I want to do the Rongai Route in August. Since I learned from your overview, the route doesn’t offer the best acclimatisation, so I wonder if it would be wise to do Mt. Meru upfront?
Thank you for your recommendation,
Hi Valentin, The 7-day Rongai route is not too bad when it comes to acclimatisation. I think I was referencing the 6 day on the route guide. That being said, if your have the time then doing Mount Meru before Kili will always benefit your summit success chances and provide the opportunity to summit another iconic African peak!
Hello, Thank you for your nice page and information. I’m still in doubt if I would do the regular lemosho route or start with the lemosho route and then take the northern route. I want the most scenic route. On one hand I kind of like the ‘lonilyness’ of the northern route, on the other hand I heard barranco camp is such a nice place. What would you recommend?
Hi Eva, That’s a tough one. Both routes are fantastic. The key difference is length and popularity. In terms of length the Northern Circuit is longer in distance and days. This can be positive in terms of acclimitisation and hence summit success, but can mean more trekking fatigue as you are on the mountain for longer than the standard Lemosho. The second point is probably more pertinent. The Northern Circuit is significantly less travelled. On the Lemosho the route joins up with all Southern Circuit routes and therefore many more people are on the trail. I would estimate about 50 times more people on the Southern Circuits vs. the Northern Circuit. Finally the summit approach is different on the Northern Circuit as it takes the route up the East side of Kibo via Gilman’s Point. This approach is slightly longer than the Stella Point approach. Either way both routes are great so it really comes done to whether you want a quiet trekking experience or busier camp / trail experience. Hope this helps!
I’m 65, and just back from the Salkantay trek to Machu Picchu, including a 15,000 ft (4600 m) pass, with no problems. In your experience, does having done well at 15,000 ft mean altitude problems on Kilimanjaro are very unlikely, or is the difference so great that it is not predictive? Thanks!
Hi Brian, congrats on completing the Salkantay trail. I have done it too and it was fantastic! It is a good sign that you coped well with the altitude but unfortunately this isn’t necessarily a great predicator of how you will perform at altitude in the future. Kilimanjaro is quite a bit higher than the Salkantay trail and the altitude is much more sustained. Unlike the Salkatay where you go high to get over a pass, Kilimanjaro is sustained ascent so the risk of altitude sickness is much higher. That being said, if you follow best practice by choosing a route that has at least 7 days on the mountain (i.e. the 7 day Machame or 8 day Lemosho) as well as try to take the try nice and slow, then you will give yourself the best chance of summiting without experiencing altitude sickness. Hope this helps. It’s worth reading this article: https://www.climbkilimanjaroguide.com/acclimatization-kilimanjaro/
I am looking to choose a truck up Mount Kilimanjaro. I don’t mind steep but I don’t like cliffs or feeling like I’m on the edge of a very high point which Trails do you recommend for somebody like myself in great condition just not loving the Heights
Hi Heidi, There are no real big exposures on Kilimanjaro. The Southern Circuit routes (Lemosho, Machame) go over the Barranco Wall, which is a slightly exposed scramble, but looks more scary than whht it actually is: https://www.climbkilimanjaroguide.com/barranco-wall-mt-kilimanjaro/ . If you want to avoid the Barranco Wall then the Rongai route is your best option.
Hello, I am Charles, 30 Yrs Tanzanian. I have two big Adventure to accomplish in my life, to drive across all countries in Africa and to Climb Mount Kilimanjaro. I would like to spend my birthday week in September to climb the mountain. I need your recommendations on the best routes which is affordable and safe for me. Kindly assist for me to achieve my life time dream!
Hi Charles, I recommend the 7 Day Machame or 8 Day Lemosho. All the best!
I’m a relatively experienced hiker from coastal Texas. Being that I’ve lived my entire life 60’ above sea level I have spent very little time at altitude. However, this past Thanksgiving I did an hour long hike in Switzerland on the Jungfrau glacier (+13,000) in knee to thigh deep snow with no side effects other than total exhaustion of course. Hiking in snow sucks when you’re from Houston. Anyway, I’m planning a trip to Kilimanjaro and I really really really really want to tackle the Western Breach. I’m the typical stupid Texan with the go big or keep your ass on the porch mentality. I do not however have a death wish so…. Is it possible for someone in my situation to attempt this route having never done a 19er before.
Hi Jennifer, yes, its is possible to attempt the Western Breach. In fact as far as hiking goes the route is much more difficult the standard routes on Kilimanjaro. The reason why people avoid this route is because of rockfall risk and sustained altitude gain which doesn’t help with acclimatisation.
how are the sanitary and higienic facilities during these routs! Do the huts offer the toilets in the dorm?
Hi Boris, all camps have long drop loos. They are generally quite good, as far as camping long drops go. Some tour operators offer portable loos as part of their package. Here is more detail: https://www.climbkilimanjaroguide.com/toilets-on-kilimanjaro/
Hi, I am 76 years old fit and healthy, maybe some arthritis in the knees. I have successfully peaked mt Kinabalu in Sabah 3 years ago and completed the Everest base camp without any problems 2 years ago. I am very active and do walking treks in Sydney, Australia. I need your advice to peak Mt Kilimanjaro. Which routes.? Thanks
Hi Bhoopinder, thanks for getting in touch. You sound super fit for your age. I recommend going for either the 7 day Machame or 8 day Lemosho. Both are well profiled for acclimatisation and have high summit success rates.
Hi, I went to Kilimanjaro Machame 6 days hike in September 28, 2019. I went up to Baraja camp and for some reasons I did not join the summit day hike at night. I had no altitude sickness neither any other physical issues. I came back next morning via Melaka camp. Since then I am extremely repenting for not attempting to summit . I am thinking to go back in Christmas holiday just to reach to the top via Marangu Route. I have no desire to enjoy any scenic views. Just asking your opinion, is that too soon to return to the mountain barely in two months? Or, should I wait for few more months to ensure I will reach to the summit for sure? Please advise. Than Best regards
Hi Sandy, sorry to hear that you didn’t summit. I see no issue going back around Christmas to give it another go. To give yourself the bast chance of summiting though I would recommend a longer route like the 7 day Machame or 8 day Lemosho. These have good acclimatisation profiles and therefore reduce the risk of altitude sickness. All the best!
There are between 3 and 5 of us who will be in Kenya from May 3-17, 2020, and considering hiking Mt. Kilimanjaro afterwards. If you think the weather will allow, is there a tour operator who you can recommend we contact who will give us a great opportunity to get to the top? We’re all quite good hikers. I have been to Everest base camp a few years ago, and the others have ascended Mt. Fuji. We live near the Rocky Mountains and hike there. Thank you.
Hi Robert, sounds great. You can get a tour operator recommendation here: https://www.climbkilimanjaroguide.com/go/
Which route do you recommend for a “shorter/easier” summit? I’ve seen some summits go from Kosovo, instead of a lower camp.
Hi Dave, the 5-day Marangu is the shortest route on Kilimanjaro but has relatively low summit success rates as it doesn’t provide much time to acclimatise. If you are looking for a short route with reasonable summit success rates then I recommend the 6-day Machame.
HI Mark, I have successfully climbed Aconcogua in 1993, Denali in 1995, but was unsuccessful in climbing Kilimanjaro in 1997 reaching the small hill right below the summit, but for some reason was turned back when my group witch had already summited were coming down? I was so disappointed that I went back in Nov. the next year and attempted the great western breach with the same guides. Probably the most dangerous thing I have ever done. The gwb was a 45% snow slope and unlike Denali the guides had no equipment except for one ice axe that they used to cut hand and foot holds in the ice. After several hour we turned around because of impending avalanche danger when the sun hit the slope I shudder each time I think of that experience! I returned with my wife in 2003 on the Marangu Route, she stopped at Kibo, but I reached Gillmans Pt., but because of the footwear I chose I kept slipping and didn’t have time for the summit. The mountain has been my nemesis. I am now 80 years old and would to go for another try. You’ll probably tell me to forget it , but It’s been nagging at me for all these years, so what in my case would be my best option? Best time of year and best route? Jim
Hi James, nemesis indeed – like Ed Visteurs on Annapurna. Your ’98 attempt on the Western Breach sounds frightening. Thankfully the guides and operators on the mountain have professionalized over the last 20 years, so things are a lot safer. It’s a big ask at 80, but you sound very fit so it’s totally doable. Best time to go I would say June-October, and the best route is the 7-day Machame or 8-day Lemosho. Here’s some inspiration: https://www.climbkilimanjaroguide.com/anne-lorimor-oldest-person-kilimanjaro/ . All the best!
I am 62, medium build and fit. I am plannin a Kili hike for the fall of 2023. I was told October might be a good time to avoid the high season of travelers but I would like to incorporate the "great migration" which I believe occurs in December. My girl friend did both in December a few years back. What would the Kili hike conditions be in December (pros & cons) for the Machame Route. PS I am traveling solo as well.
Hi, December is not a bad month. It can see more snow at the summit, but in general you should get relatively good conditions. October usually has better conditions though. For the Wildebeest, see here for a migration map: https://www.climbkilimanjaroguide.com/wildebeest-migration/
Hi. We are planning to hike next summer with our 12-year-old daughter. We are getting mixed opinions on the route we should take. Rongai is highly recommended for children by one company followed by Lemosho which they state is a bit more challenging. However, a second company is recommending the Shira route. Any suggestions on routes for hiking with minors?
Hi Lyn, I would go with either the Lemosho (8-day) or the Rongai (7-day). I wouldn’t do the Shira (this is basically the same as the Lemosho but with a higher starting point).

What are the different Everest Base Camp trek routes?
You can trek to and from Everest Base Camp via a handful of different routes. You can also catch a helicopter ride back from base camp. We describe the different Everest Base Camp trek routes we offer at Follow Alice to help you decide which is for you!
The Everest Base Camp trek is a truly exhilarating and once-in-a-lifetime experience. There are various routes you can trek there and back, and you can even opt to fly back after reaching base camp.
Here's an outline of each of the four different Everest Base Camp (EBC) trek routes offered by us at Follow Alice . We discuss the pros of each to help you decide which suits you best in terms of duration, difficulty, cost, variety of scenery and more!
1. Classic EBC trek

The traditional or classic Everest Base Camp trek route involves hiking a trail that is 53 km (33 mile) from the airport town of Lukla to Everest Base Camp. You then retrace your steps on the return journey. So the total trek distance is 106 km (66 miles). This is the shortest EBC trek you can do.
At Follow Alice , we include two small deviations on the return route in order to show you more diversified scenery and let you overnight in some different, quieter villages. You can see these detours on the map above.
The classic EBC trek package that we offer has you on the trail for 11 days. We say "on the trail for 11 days" and not "trek for 11 days", as we're including an important rest and acclimatisation day in the middle of the ascent. (Though you can opt to do a rewarding roundtrip hike on that day if you're feeling up to it!) The whole trip with us, however, lasts 14 days, as it includes your travel to and from Kathmandu.
We recommend this version of the trek for those with limited time and budget for the adventure but who still want to challenge themselves to complete the full roundtrip EBC trek. In other words, the three main advantages of this EBC variation are:
- It's by far the most affordable option.
- It's the shortest roundtrip route on offer.
- Boasting rights to having completed the full EBC trek are up for grabs!
But for those with even less free time in their calendar, or who might find an 11-day trek too taxing, we recommend hiking the classic route to base camp but then catching a helicopter ride back ...
2. EBC trek with a helicopter return
Excitingly, you have the option of trekking to Everest Base Camp along the classic route and then hopping into a helicopter for a breathtaking ride back to Lukla (the starting point of the trek route).
This option has two main advantages:
- It's the shortest and therefore easiest EBC trek possible, so it's a good option for less seasoned trekkers.
- You get to see Mt Everest, other famous peaks, renowned glaciers and the incredible scenery from the truly memorable vantage point of up in the sky!
Please read Everest Base Camp trek and helicopter return for a detailed description of the route you would trek. You can also check out our EBC trek and helicopter return package for a breakdown of the trip itinerary. You'll notice that this option is quite a bit more expensive – this is because helicopter rides through the Himalayas don't come cheap!
Finally, note that you're on the trail for just eight days with this EBC itinerary. This includes an important acclimatisation day.
3. EBC and Gokyo Lakes trek
One of the most popular variations of the classic EBC trek (and for good reasons!) is the Everest Base Camp and Gokyo Lakes trek . On this trek you follow the traditional route to base camp, but then make a big detour on the return journey to visit the exceptionally beautiful Gokyo Lakes.
There are a few pros to doing the Everest Base Camp and Gokyo Lakes trek:
- Firstly, it creates a loop in the trail, meaning for most of your return hike you walk through fresh territory. There’s so much cultural and natural richness in Khumbu, we feel it would be a pity to tramp the same path when you can divert just a little and enjoy more of it.
- Secondly, this route offers a bigger challenge and, as a result, rewards you with some incredible scenery you miss on the classic EBC trek. Most notably, you cross Cho Pass, summit Gokyo Peak (5,357 m), see the magnificent Ngozumpa Glacier, and visit the pristine Gokyo Lakes.
- Finally, this return route is quieter than the main one, allowing you to experience an even more remote and traditional part of the Himalayas.
Note that you're on the trail for 13 days with this EBC variation, which includes important acclimatisation and rest days. Please read Everest Base Camp and Gokyo Lakes trek route for a detailed day-by-day description of the route.
4. EBC and Three Passes trek
The famous Everest Base Camp and Three Passes route can be thought of as an extension of the EBC and Gokyo Lakes trek route – the trail you trek to Everest Base Camp is just longer and harder, as it includes two mountain pass crossings.
Unsurprisingly, therefore, this EBC trek variation is the hardest of all on offer, and so we recommend it for seasoned high-altitude trekkers looking for a supersized Himalayan adventure!
The advantages of the EBC and Three Passes trek route are:
- For those keen to up the challenge, this route is the most challenging on offer. You must cross three mountain passes well above the 5,000 m marker and navigate tricky sections of trail where there's snow, loose rocks, boulders and scree.
- You spend over a fortnight doing a big loop through Sagarmatha National Park on this trek – one that includes the bustling, traditional section of the EBC trail as well as some of the wildest, quietest and most traditional corners of the region. This means you get to see and experience much more of this beautiful part of the Himalayas than most trekkers.
- This route offers the very best scenery and views of all the different Everest Base Camp trek routes!
You're on the trail for 15 days on this variation of the EBC trek. This includes two acclimatisation days. However, there are fantastic day hikes that you can do on each day, so they don't need to be idle days if you don't want them to be.
For a detailed day-by-day description of the route, please read Everest Base Camp and Three Passes trek route .
A note about acclimatisation ...
Proper acclimatisation is an important aspect of any high-altitude trek.
Altitude can start to be a problem from anywhere above 3,000 m. As we discuss in detail in Altitude gain on the EBC trek , you climb to well above 5,000 m on this famous trail, no matter which variation you trek.
You need to include at least one acclimatisation day on the classic EBC trek. Two is even better, especially on the longer treks. Acclimatisation days are included in all of our proposed itineraries.
And that’s it, folks! If you’d like to know anything further about one or more of the Everest Base Camp routes, or about the trek in general, please contact us. We’d love to hear from you. Or if you’re ready to take the plunge, book your spot on an Everest Base Camp trek now!
- Best Hikes In The World
- Appalachian Trail
- European Hikes
- Nepal Hikes
- Patagonia Hikes
- See All Hikes
- Mount Kenya
- Mount Kilimanjaro
- Mount Toubkal
- See All Mountains
- South Africa
- New Zealand
- Switzerland
- United Kingdom
- Packing Lists
Annapurna Circuit – Nepal’s Classic Circuit Trek

Asia , Hikes , Nepal

The Annapurna Circuit is one of the most popular and most epic treks in Nepal . This classic trek meanders through Himalayan foothills and over high passes, offering picturesque mountain views along the way.
Annapurna Circuit Trek
Route overview.
The Annapurna Circuit is one of the greatest treks in Nepal, if not the world.
Although road construction over the past two decades has severely impacted the trekking experience (more on this later).
Note: if you are a mountain biker, the road on the western side makes for one of the most exhilarating and scenic mountain biking experiences!
Where Does The Annapurna Circuit Start and End?
The trek begins at Besisahar (which is a 7-8 hour drive from Kathmandu) and concludes in the Kali Gandaki Gorge – the disputed highest gorge in the world that separates Dhaulagiri (8,176 meters) in the West and Annapurna (8,091 meters) in the East.
The circuit is traditionally followed on an anti-clockwise trail – for acclimatization reasons – that circumvents the Annapurna Massif. It takes trekkers through the Annapurna, Manang and Mustang region of central Nepal.
Route Details
At its pinnacle, the trek crosses the Thorung La Pass (5,416 meters) before descending down to the town of Muktinath. From here the road construction activities (2004 -2008/09) have had a measurable impact on the Annapurna Circuit trekking experience.
The Nepalese government have realized that the road on both the Western (Pokhara-Muktinath) and Eastern (Chame-Manang) side of the circuit has had a negative impact on trekking tourism. Thus, they have created a number of New Annapurna Trekking Trails (called NATT-trails).
These NATT-trails, marked blue and white or red and white, take trekkers away from the dusty and unpleasant roads. The alternative routes provide a much more pleasant trekking experience.
How Long Is The Annapurna Circuit?
The Annapurna circuit typically takes between 16-20 days to complete. This is depending if you decide to tack on a diversion to Annapurna Base Camp and the Annapurna Sanctuary ). It covers between 150-240 km depending on when you decide to end the tour or use transportation vehicles.
Scenery and Landscape
The scenery on the Annapurna Circuit is extraordinarily beautiful. Trekkers pass through rice terraced paddy fields, subtropical forests, and glacial environments.
You will see a number of major mountains including the Annapurna Massif (I-IV), three 8,000 metre peaks – Dhaulagiri (8,176 meters), Manaslu (8,156 meters) and Annapurna I (8,091 meters). There are numerous other peaks of 6,000 to 7,000 meters.
Please Note: The Annapurna Circuit is situated in the Annapurna and Mustang regions of central Nepal. It is home to the Annapurna Massif. The schematic below illustrates Nepal’s trekking regions (not to scale).
Annapurna Regional Map
The Annapurna Circuit is situated in the Annapurna and Mustang regions of central Nepal. It is home to the Annapurna Massif. The schematic illustrates Nepal’s trekking regions (not to scale)

Annapurna Trek Altitude Profile
The schematic diagram below shows the route altitude profile for the Annapurna Circuit.

Annapurna Circuit Itinerary
Below is a detailed Annapurna Circuit itinerary. Where possible we have highlighted the NATT-Trails that can be used to avoid the road. Please note that this is a typical Annapurna Circuit itinerary. Some tour operators offer variations on this route.

Day 1-2: Arrive Kathmandu (Drive to Besisahar / Fly to Pokhara)
Arrive in Kathmandu, usually spend a day sightseeing in the capital city.
See more in our guide on what to do in Kathmandu .
Drive from Kathmandu (1,300 meters) to Besisahar / Khudi (circa 800 meters) via bus. The trip takes between 7 and 8 hours, meandering through countryside villages.
The Annapurna Circuit typically starts at Besisahar, an hour’s trek from Khudi. Some operators may drive you to Khudi and commence the trek from there.
Day 3: Trek from Besisahar (820 meters) to Khudi and onto Bahundanda (1,310 meters)
Trek from Besisahar (820 meters) to Khudi and onto Bahundanda (1,310 meters). This traditional route has been impacted by the road construction so some operators have started using new trails that bypass the road. Instead, you go to the village of Sikrung (2,200 meters).
The latter is a fairly steep climb to a rather high altitude. But it does offer a more untainted Annapurna trekking experience. Expect to trek between 6-7 hours.
Day 4: Trek from Bahundanda (1,310 meters) / or Sirung (2,200 meters) to Jagat (1,300 meters) or potentially Chamje (1,410 meters)
Trek from Bahundanda (1,310 meters) / or Sirung (2,200 meters) to Jagat (1,300 meters) or potentially Chamje (1,410 meters). If on day 4 you followed the traditional route to Bahundanda, you will trek to Ghermu (1,130 meters) and onto Jagat. You might stay the night here or take a steep hour-long trek up to Chamje (1,410 meters).
We recommend staying the night at Chamje instead of Jagat, which is a dirty and crowded village. If on day 4 you stopped at Sikrung, you will likely follow a route via Syange (1,100 meters) to Jagat and up to Chamje.
Expect to see great rice terraced landscapes and views of the Manaslu Range during early stages of this day’s trekking.
Day 5: Trek from Jagat / Chamje (1,300 / 1,410 meters) to Dharapani (1,960 meters)
Trek from Jagat / Chamje (1,300 / 1,410 meters) to Dharapani (1,960 meters). Continuing north into the Manang region, you will trek through agricultural fields of corn and potatoes and then forests of rhododendrons.
Eventually reach the quaint village of Tal (1,700 meters). From Tal you will trek for another 6 kms (circa 3 hours) via Karte to the village of Dharapani (1,960 meters).
Day 6: Trek from Dharapani (1,960 meters) to Chame (2,710 meters) via Bagarchap and Danakyu, and then either along the lower trail or upper trail to Koto (2,640 meters)
Trek from Dharapani (1,960 meters) to Chame (2,710 meters) via Bagarchap and Danakyu, and then either along the lower trail or upper trail to Koto (2,640 meters).
From Koto you trek a further hour to the busy village of Chame. Some trekkers and operators prefer an overnight stay in the quieter village of Koto. On this rather steep trekking day you will get some great views of Annapurna II and IV, as well as Lamjung Himal.
Day 7: Trek from Chame (2,710 meters) to Pisang via Bhratang (2,850 meters) and Dhukur Pokhari (3,240 meters)
Trek from Chame (2,710 meters) to Pisang via Bhratang (2,850 meters) and Dhukur Pokhari (3,240 meters). From Dhukur Pokhari the trail splits and you may either trek to Upper Pisang (3,310 meters) or to Lower Pisang (3,250 meters) for an overnight stay.
If you take the latter to Lower Pisang we highly recommend re-joining the upper trail on day 8. This provides arguably the best views of the whole Annapurna Circuit.
Day 8: Trek using the upper trail from Pisang (3,310 meters) to Manang (3,450 meters) via Ghyaru (3,730 meters), Ngawal (3,680 meters), Humde (3,330 meters and Bhraga (3,450 meters)
Trek using the upper trail from Pisang (3,310 meters) to Manang (3,450 meters) via Ghyaru (3,730 meters), Ngawal (3,680 meters), Humde (3,330 meters and Bhraga (3,450 meters).
The mountain views on this portion of the Circuit are exceptional, as are the quaint villages along the trail. A visit to Barge monastery is worthwhile before the final stretch to Manang.
Day 9: Acclimatization day in Manang
Manang is one of the main towns on the Circuit. Many trekkers take this opportunity to spend a rest acclimatization day in the town.
Short excursions to the Gangapurna Lake and Bhojo Gompa (a Buddhist ecclesiastical fortification of learning) are common among trekkers. There are also day trips around the town. You might want to consider visiting the offices of the Himalayan Rescue Association for a talk on high altitude risks.
Day 10: Trek from Manang northwest out of the Marshyangdi Valley and up to the small village of Yak Kharka (4,110 meters)
Trek from Manang northwest out of the Marshyangdi Valley and up to the small village of Yak Kharka (4,110 meters). If you haven’t started feeling the effects of altitude yet, you might start doing so from today. Some trekkers continue onto the tiny village of Letdar (4,200 meters). Teahouse accommodation is limited in both these villages.
Day 11: Trek from Yak Kharka (4,110 meters) to High Camp (4,850 meters)
Trek from Yak Kharka (4,110 meters) to High Camp (4,850 meters). This is a fairly tough and steep day. Some tour operators will stop for the night at Thorang Phendi (4,450 meters). This is a good idea if trekkers are struggling with the altitude.
However, continuing on to High Camp is, in our opinion, preferable. This is because it makes the next day’s treks to Muktinath (3,800 meters) a lot shorter and easier. Accommodation facilities and amenities in Thorang Phendi and High Camp are both good. Please note: continuing onto High Camp means sleeping at high altitude, which is not advised if you are suffering from acute mountain sickness (AMS) symptoms .
Day 12: Trek from High Camp (4,850 meters) across the Thorung Pass (the highest point on the trek at 5,416 meters) and then back down to Muktinath (3,800 meters) via Charabu (4,230 meters)
Trek from High Camp (4,850 meters) across the Thorung Pass (the highest point on the trek at 5,416 meters). You then go back down to Muktinath (3,800 meters) via Charabu (4,230 meters). Prepare for a tough, icy-cold day of trekking. The descent from Thorung Pass is steep and trekking poles come in handy. Muktinath, although an important pilgrimage site for both Hindu’s (see the Vishnu Temple) and Buddhists (see the Monastery), is a rather characterless village. Depending on your operator, you will likely stay overnight in Muktinath. For independent trekkers, the Bob Marley Guesthouse in the center of town is a great shout!
Day 13: Trek from Muktinath (3,800 meters) to Marpha (2,665 meters) via the awesome village of Kagbeni (2,800 meters)
Trek from Muktinath (3,800 meters) to Marpha (2,665 meters) via the awesome village of Kagbeni (2,800 meters). From Kagbeni to Jomsom we recommend taking a jeep to avoid the unpleasant dusty roads.
Once you get to Jomsom you can join the ne NATT-trail (which is 2 hours longer than the road option) to Marpha. Marpha is famous for being the centre of the apple region in Nepal. Do try the apple brandy if you get a chance.
Day 14: Trek from Marpha (2,665 meters) to Kalopani (2,530 meters), via Chokhopani, and continue to Kokhethanti to avoid the road
Trek from Marpha (2,665 meters) to Kalopani (2,530 meters), via Chokhopani, and continue to Kokhethanti to avoid the road. Some trekkers grab a jeep from Marpha all the way to Tatapani (see day 15).
Day 15: Trek from Kolapani (2,530 meters) to Tatapani (1,200 meters)
Trek from Kolapani (2,530 meters) to Tatapani (1,200 meters). Using a new NATT-trail (marked in red and white), you can avoid the road and follow a trail that climbs steeply before joining a path that will take you through the towns of Kopochepani, Rupsechhahara, Dana and finally Tatapani.
Day 16: Trek up from Tatapani (1,200 meters) to Ghorepani (2,870 meters)
Trek up from Tatapani (1,200 meters) to Ghorepani (2,870 meters), via the towns of Ghara, Sikha and Chitre. You will most likely stay overnight in Ghorepani in preparation for an early start the next day.
Day 17: Trek from Ghorepani (2,870 meters) up Poon Hill (3,870 meters) and back down to Tadapani (2,710 meters)
Trek from Ghorepani (2,870 meters) up Poon Hill (3,870 meters) and back down to Tadapani (2,710 meters). You will start this days trekking early so as to get up Poon Hill for the impressive sunrise. First light illuminates surrounding rice terraces and Annapurna and Dhaulagiri massifs. The classic Annapurna Circuit trek then descends to Tadapani for an overnight stay.
Note: we have heard that instead of heading up Poon Hill, the hill opposite in the direction of Chomrong provides an equally impressive (if not better view) without any crowding issues.
Day 18: Trek from Tadapani (2,710 meters) to Naya Pul (1,070 meters) via Gandruk and then catch a short bus ride back to Pokhara
Trek from Tadapani (2,710 meters) to Naya Pul (1,070 meters) via Gandruk and then catch a short bus ride back to Pokhara. This is the end of the Annapurna Circuit and an extraordinary 18 days!
Note: It is possible to follow the old Annapurna Circuit from Ghorepani to Phedi via Landruk, although this takes an extra 2 days compared to the direct exit from Ghorepani to Naya Pul.
Please Note: From Muktinath onwards the classic Annapurna Circuit has been severely impacted by the road that joins Jomsom to Muktinath. If you choose to trek this route be prepared for an unpleasant and dusty experience, as jeeps wiz by you. Thankfully there are alternative options via the New Annapurna Trekking Trails (NATT-trails).
Suggested route options from Muktinath
If you are not on a set tour we suggest the following route:
- Trek to the charmingly wonderful town of Kagbeni (2,800 meters) for an overnight stay. We recommend taking the high trail out of Muktinath via Jhong, as this offers better mountain views
- From Kagbeni to Jomsom take a jeep as dust driven from the common winds in this region and the constant flow of vehicles on the road make for unpleasant trekking
- From Jomsom take the new NATT-trail (marked in red and white) to Marpha (2,665 meters) where you can stay overnight and then continue following the route set out from Day 13 below
Also Note: As the road starts in Muktinath, you can cheat and catch a truck all the way to Jomsom. Continue your trek or catch a flight to Kathmandu if you need to shorten your trek (we highly recommend not skipping Kagbeni though). You can also get a bus from Muktinath all the way back to Pokhara if you have run out of time. If you are a mountain biking fanatic you can rent a mountain bike to take one of the most amazing rides down and out of Muktinath – this area of Nepal is fast becoming mountain biking Mecca
Annapurna Route Variations
There are a number of route variations on the Annapurna Circuit. Here are three worth mentioning.
If you don’t have much time in the Annapurna Circuit you may want to consider the Poon Hill Trek , The Royal Trek or the Ghorepani Poon Hill Trek (also called the small Annapurna Circuit). Nepal is heaven for trekkers and has some of the best thru-hikes in the world .
- Annapurna base Camp Trek
- Naar-Pho Valley
- Tilicho Lake
It is possible to include a five day diversion to Annapurna Base Camp onto the Annapurna Circuit trek. This involves continuing north from Tadapani so as to join the old Annapurna Circuit at Landruk.
Read more about the Annapurna Base Camp Trek
A variation to the Annapurna Circuit that has been growing in popularity since opening to foreigners in 2002 is the Naar-Pho Valley.
The route begins near Koto (on day 5/6 of the classic Annapurna Circuit) and follows a trail via two distinctly Tibetan villages – Phugaon and Naar – which are both located at over 4,000 meters. After nine days trekking the route exits via the Kang La Pass (5,300 meters) to Ngawal, where you re-join the Annapurna Circuit on your way to Manang. The detour via the Naar-Pho Valley in effect adds seven days to the traditional Annapurna Circuit as you would have spent two days trekking from Koto to Ngawal and on to Manang had you stayed on the main track.
A special permit, which can only be organised through a trekking agency, is required to enter the Naar-Pho Valley. You will also need to take a guide as tourist infrastructure is poor. Most trekkers opt for the traditional camping style of trekking with porters, tents and cooks.
A 3-4 day trek to Tilicho Lake (4,920 meters), one of the highest lakes in the world, has become a relatively popular diversion on the Annapurna Circuit.
The trek starts in Manang, and follows a path on the northern side of the valley to Khangsar (note: there are maps that show a path on the southern side of the valley but we recommend avoiding this as it is in poor condition and prone to landslides).
From Khangsar there are two paths that leave the town – the lower and upper path. Take the upper path, as it is safer, until you reach Shree Kharka where you can overnight at one of the two teahouses there.
From Shree Kharka walk about 45 miuntes until you reach point where the path splits into a lower and upper trail. Make sure to take the lower trail (the upper trail is marked ‘Danger’). A further 3 hours trekking and you will arrive at Tilicho Base Camp where you can stay overnight at one of the teahouses.
Depart Tilicho Base Camp early the next morning to avoid the high winds and clouds that roll in by mid-morning. The trek up to the lake is steep and tough. It takes about 3 hours and can be very cold due to the altitude, so dress warmly. The descent follows the same path back to Base Camp (approx. an hour) or to Shree Kharka (4 hours from the lake). Overnight at Shree Kharka.
The next day take a trail (which is signposted) directly to Yak Kharka via Old Khangasar, where you re-join the Annapurna Circuit.
Recommended Guidebook

Need an up-to-date guide book with maps that include the NATT-Trails? We recommend either Andrées de Ruiter and Prem Rai’s guide, Trekking the Annapurna Circuit , or Sian Pritchard-Jones and Bob Gibbons guide, Annapurna: A Trekker’s Guide .
Annapurna Circuit FAQ
How much does it cost to hike the annapurna circuit.
The cost of an Annapurna Circuit varies depending on which route variation you take. It also depends when you trek (out of season tends to be a little cheaper) and whether to trek with a local or western trekking agency, or indeed independently.
We have provided a detailed Annapurna Circuit Cost article here but in summary you should budget for the following key expenses:
Visa, Vaccinations, Insurance etc: ~$300-$500
Equipment (buying and hiring): ~$500-$800
Flights to Kathmandu: ~$1,000
Tour Agency: ~$1000 for a cheap local agency to ~$3,000 for a pricey Western trekking agency. You could do an independent trek for ~$700 employing a local guide
check out our list of Nepal trekking companies recommendations .
Tips: ~$200-$300
Misc (additional food, unplanned travel / hotels ect): $200
Total Costs: $2,500 – $5,000
Do I need a permit for the Annapurna Circuit?
Yes. An Annapurna Conservation Area Project permit and Trekker Information Management System registration are required for the Annapurna Circuit trek.
If you are joining an organised tour, these will be arranged for you. If you are looking to go it alone you will have to bring four passport-sized photographs and go to the offices of the Nepal Tourism Board in Kathmandu to apply. We recommend bringing copies of your passport and insurance policy. The offices follow government working hours and days, and are not open on Sunday.
When is the best time to hike the Annapurna Circuit?
The best time to trek the Annapurna Circuit is either in the Spring (March to Mid May) or in the Autumn (mid / late September to December). Unfortunately these also happen to be the busiest times of the year as they are the best time for Nepal trekking ..
Towards December the weather starts getting particularly cold and the routes get distinctly quieter. If you are a hardened trekker a winter Annapurna Circuit (late December through February) can provide a very authentic Nepal trekking experience.
The main challenge of a winter trek, apart from the cold, is the snow and ice that often obstructs the higher trails and the Thorung Pass. During bad winter seasons these trails may be closed.
Unlike the Everest region that gets very wet during the rainy monsoon season, the Annapurna and Mustang regions stay relatively dry, making June through September, a relatively good time to trek as well.
Here’s a detailed article on weather on the Annapurna Circuit .
Is altitude sickness a risk on the Annapurna Circuit?
Yes, some trekkers do suffer from altitude sickness on the Annapurna Circuit as it is a high altitude trek. At its highest point, Thorung Pass, you will reach an altitude of 5,416 meters (17,769 feet).
Fortunately because of the circuits length the opportunities for appropriate acclimatisation are good. Hence, the prevalence of moderate or sever altitude sickness is low.
Nonetheless, it is important to have a detailed understanding of the risks associated with high altitude trekking and how the body acclimatises.
We recommend you read our detailed article on Altitude Sickness and Acclimatisation .
How difficult is the Annapurna Circuit hike?
The Annapurna Circuit trek is challenging. You will be trekking for 4-7 hours a day for over two weeks, so you will need to be peak physical condition. The best way to prepare is to get as many kilometres under foot on hikes in your home country.
What do I need to pack for the Annapurna Circuit trek?
Trekking in the Annapurna region requires a number of essential pieces of trekking clothing and equipment. AC is a long and tough trek. You will be exposed you to a range of altitudes where temperatures fluctuate dramatically between night and day.
Many pieces of equipment can be rented or bought in Kathmandu or Pokhara. Even so, we recommend bringing the most important pieces of gear with you.
We've written a detailed Annapurna hiking packing list .
Insurance Information
Trekking insurance is a must in Nepal. This is particularly the case in the Annapurna Region, which at stages is very remote. If an accident should occur that requires medical assistance and evacuation you will definitely want trekking insurance that can cover the costs of air ambulance and treatment.
Moreover, it is prudent to have insurance that covers you for any travel related risks. insurance should cover stolen, damaged or delayed baggage; flight delays and interruptions; and tour operators default.
This article on travel and trekking insurance in Nepal provides detailed information on what type of insurance you need.
About the author
Mark Whitman
Mark has trekked extensively in Asia, Europe, South America and Africa. He founded Mountain IQ in 2014 with the sole aim to be the best online information portal to some of the most popular mountain destinations around the world. When not writing for Mountain IQ, Mark is out exploring the outdoors with his wife!
Leave a Reply
Your email address will not be published. Required fields are marked
Thanks for the useful information. Really helpful!
Hi Mark, this is a really nice blog with very comprehensive information!!
I'd like to do the trekking on my own, as an independent trekker, but I've heard that there are some new regulations comming for this year (2023) and that a local guide or agency is mandatory to do the central part of the annapurna circuit. Also, that the TIMS can not be got by independent trekkers but only if you hire an agency. Would you have any up to day news about it?
Hi Daniel, thanks for checking in. I’m not aware of the new regulations, but it is definitely possible. Nepal authorities have been talking about this for years. Here’s the latest from the Guardian: https://www.theguardian.com/travel/2023/mar/30/nepal-imposes-ban-on-mountain-trekking-without-a-guide
I'm looking to do a trek around the 2 week period in january.
What would be your recommendation, preferebly in asia.
Hi Hugh, this is winter time in Asia so I would stick with a well trodden path like EBC: https://www.mountainiq.com/guides/trekking-in-nepal/routes/everest-base-camp-trek/
Hi Mark, Great information thanks. I am trekking the APC in October with a local company. I think I have all the bases covered but would you recommend anything of that is more important than anything.
Hi Tony, make sure you have some warm layers, gloves and beanie for the pass, and that you’re guide is clued up on the weather forecast for the days leading up and over the pass. Otherwise, enjoy, you’re in for a treat!
We work with local guides to offer great value adventures at unbeatable prices
Ultimate W Trek Patagonia Map Guide: Tips, Routes, Distances and Essentials for Hikers

Travel Resources
- Accommodation at the best prices.
- Book activities and excursions in Spanish.
- Find cheap flights.
- Rent your Car for Patagonia
- -5% eSIM discount with unlimited data and no roaming charges
- Store your luggage for US$ 5.90 per day
- Travel and cancellation insurance with -5% discount
- I will organize your trip
Are you ready to embark on an unforgettable hiking journey in one of the most stunning landscapes on Earth? Patagonia’s Torres del Paine National Park in Chile is home to the iconic W Trek, a five-day adventure that takes you through the heart of this breathtaking region. In this ultimate guide, we’ll cover everything you need to know about the W Trek Patagonia map, from the detailed day-by-day itinerary to essential tips on weather, accommodations, food, safety, and more. Get ready to experience the adventure of a lifetime!
Key Takeaways
- Explore Patagonia’s wild beauty on the iconic W Trek with this comprehensive map overview
- Challenge yourself by grasping distances between key points and enjoy an unforgettable journey
- Prepare for your adventure with essential tips, trail distances, itinerary breakdowns & packing essentials!
W Trek Patagonia: A Comprehensive Map Overview
The W Trek in Patagonia is a thrilling multi-day hiking route that takes you through the mesmerizing Torres del Paine National Park, one of the most remarkable hiking destinations in South America. This 80 km (50 mi) trail offers an exhilarating blend of spectacular scenery, challenging terrains, and unforgettable experiences.
This section offers a thorough trek map overview of the W Trek, covering key points of interest and trail distances, assisting in your adventure planning.
Key Points of Interest
The W Trek is famous for its iconic granite towers, the awe-inspiring French Valley, and the majestic Grey Glacier. These breathtaking landmarks will leave an indelible impression on you as you traverse the challenging yet rewarding trails through the national park.
One of the most exhilarating highlights of the W Trek is the French Valley, where you’ll have the opportunity to marvel at both majestic mountains and tranquil lakes. Another must-see is Grey Glacier, an imposing wall of ice that will leave you speechless as you take in its sheer scale and beauty. And let’s not forget Paine Grande, the grandest peak in the park, standing tall and proud as a testament to the incredible power of nature.
Trail Distances
Familiarizing yourself with the trail distances between key points is critical in planning your daily routes along the W Trek. The first day of the W Trek, for example, covers an impressive 22 km (13.6 mi) from Hotel Las Torres to Refugio Los Cuernos.
Throughout the trek, you’ll encounter invigorating hikes like the one up to the towers on the final day, boasting an elevation gain of 900 meters (2,956 ft). Along the way, you’ll also have the opportunity to witness the breathtaking Glacier Grey.
Grasping the trail distances paves the way for better preparedness in tackling the W Trek, optimizing your unforgettable journey through Patagonia’s wild and untamed beauty.
W Trek Itinerary: Day by Day Breakdown
The best way to experience the awe-inspiring landscape of the Torres del Paine W Trek is by taking your time and enjoying it over 4 nights and 5 days. This section provides a detailed day-by-day itinerary for hiking the W Trek in Patagonia, inclusive of recommended stops and accommodations you’ll encounter on your journey.
Whether you’re a seasoned trekker or a first-time hiker, this itinerary will help you make the most of your adventure in one of the world’s most extraordinary landscapes.
Day 1: Hotel Las Torres to Refugio Los Cuernos
Your first day on the W Trek includes:
- Journey from Hotel Las Torres to Refugio Los Cuernos
- Distance of 22 km (13.6 mi)
- Takes around 6 hours
- Follow the Ascencio River to enter the Ascencio Valley
- Pass by the lookout point for the Towers at 900 meters
- Refugio Los Cuernos is aptly named after “The horns,” a pair of stunning granite peaks in the area.
To kick off your adventure, you’ll take the Bus Sur bus from Puerto Natales to Pudeto at 3 pm the day before, arriving in time for the last ferry of the day at 6 pm. The bus fee is CLP 12,000 (US$14), and the ferry fee is CLP 20,000 (US$25). Alternatively, you can opt for a thrilling walk from Laguna Amarga entrance to Hotel Las Torres, and the bus fee from Laguna Amarga to Hotel Las Torres is CLP 5,000 (US$6).
Day 2: Refugio Los Cuernos to Paine Grande
Day 2 of your W Trek adventure takes you from Refugio Los Cuernos to Paine Grande. This portion of the trek covers an impressive distance of 20 km (12.4 mi) and takes around 7 hours to complete. Along the way, you’ll be able to take in the majestic view of the Grey Glacier from several different vantage points.
On this day, you’ll also have the opportunity to explore the French Valley, one of the most breathtaking highlights of the W Trek. This lush, verdant valley offers stunning views of the surrounding mountains and lakes, making it a perfect spot to rest and soak in the beauty of Patagonia.
Day 3: Paine Grande to Grey Campsite
On the third day of the W Trek, you’ll cover the hike from Paine Grande to Grey Campsite. This segment of the trek is a thrilling 19 km (11.8 mi) journey that takes around 8 hours to complete. You’ll start your day at Paine Grande, then head to the Italiano campsite, followed by the Mirador Frances.
If the weather is good, you’ll have the chance to take a detour to Mirador Britanico, where you’ll be able to admire a stunning ring of toothy granite peaks, including the park’s second most famous landmark, the three-horned Cuernos del Paine. Afterward, you’ll finish off the day in the beautiful Francés Valley and campsite.
Day 4: Grey Campsite to Paine Grande
On the fourth day of the W Trek, you’ll hike from Grey Campsite back to Paine Grande. This leg of the journey covers 11 km (6.8 mi) and takes around 3-4 hours to complete. Along the way, you can enjoy the magnificent views of the Grey Glacier and its surrounding landscapes. Once you arrive at the Paine Grande campsite, you can rest and prepare for the next day’s adventure.
As you make your way back to Paine Grande, take the time to appreciate the stunning vistas of Los Cuernos and the majestic mountains that surround you. This day offers a more relaxed pace, allowing you to fully immerse yourself in the breathtaking beauty of Torres del Paine National Park.
Day 5: Paine Grande to Hotel Las Torres
The final day of the W Trek covers the hike from Paine Grande back to Hotel Las Torres. This leg of the journey includes a thrilling afternoon of kayaking, ice hiking, or a short hike to the hanging bridges. As you reflect on your incredible adventure through the wild and untamed beauty of Patagonia, take a moment to appreciate the unforgettable memories you’ve made along the way.
After completing your epic journey, you’ll return to Puerto Natales via bus and ferry. The bus fee from Laguna Amarga or Pudeto to Puerto Natales is US$14 (CLP 20,000/US$23 from Hotel Grey). With your W Trek adventure complete, you’ll head home with a heart full of memories and a newfound appreciation for the remarkable landscapes of Patagonia.
Essential Tips for Hiking the W Trek in Patagonia
Being well-prepared and well-informed is paramount for the best possible experience on the W Trek. This section shares essential tips for tackling the W Trek, covering aspects like:
- Accommodations
Whether you’re a seasoned trekker or a first-time hiker, these tips will help you make the most of your adventure in one of the world’s most extraordinary landscapes.
Weather and Clothing
Patagonia’s unpredictable weather is one of the factors that make the W Trek such an exhilarating adventure. The best time to do the W Trek is from November to early March, when the average temperatures range from 10°C (50°F) to 18°C (64°F). Although it usually rains and snows throughout the hiking season, March and April are the peak months for precipitation, so it’s advisable to bring waterproof gear.
Selecting clothing and footwear for the W Trek requires consideration of factors like the terrain type, weather conditions, and the trek’s length. Be sure to pack a moisture-wicking base layer, a fleece layer for insulation and warmth, and a waterproof jacket and pants to protect against rain and wind. This layering system will help you adjust your clothing quickly and efficiently as the weather changes on the trek.
Accommodation Booking
Accommodations along the W Trek include paid campsites with basic mountain hotels (refugios) and one free campsite. Booking your accommodations in advance is advised, as spaces may fill up quickly, especially during peak season. Websites like Patagonline can help you check availability and book accommodations directly.
When booking accommodations, be sure to consider factors like location, price, and available facilities. For example, Refugio Los Cuernos offers a stunning location nestled between granite peaks, while Paine Grande and Grey campsites provide breathtaking views of Los Cuernos and the Grey Glacier, respectively. By researching and booking your accommodations ahead of time, you’ll ensure a seamless and enjoyable W Trek experience.
Food and Water
Attending to food and water supplies during the W Trek is a significant aspect of your adventure. Most camping sites and refugios have shops and restaurants where you can stock up on supplies and enjoy a hot meal. However, cooking your own food can be a great way to save money and add an extra element of excitement to your trek.
To ensure you stay well-hydrated, remember to bring a reusable water bottle and a water filter or purification tablets. Drinking water can be found all around the park and is of excellent quality. By planning your meals and water supply, you’ll have the energy and stamina needed to conquer the challenging terrain and make the most of your W Trek adventure.
Safety and First Aid
Safety takes top priority when embarking on the W Trek. Here are some essential safety tips to keep in mind:
- Stay reachable and inform people back home about your plans.
- Carry a charged phone with emergency numbers.
- Consider carrying a satellite phone, a hiking guide, or a paper map for added peace of mind and navigation assistance.
It’s also a good idea to carry a small first aid kit, including items such as band-aids, pain relievers, and any personal medications you may need. By taking these safety precautions and being prepared for minor injuries or ailments, you’ll ensure a successful and enjoyable W Trek experience.
Alternative Hiking Routes in Torres del Paine National Park
If you’re looking for alternative hiking options in Torres del Paine National Park, you’re in luck! In addition to the famous W Trek, there are several other exciting trails for you to explore. This section introduces:
- The more challenging and longer O Circuit
- A variety of day hikes
- Shorter treks, perfect for those with time constraints or seeking a less strenuous park experience.
The O Circuit
The O Circuit is an incredible full loop around the Cordillera del Paine, covering a distance of approximately 136 kilometers (85 miles) and taking around 6-10 days to complete. This challenging trek includes the popular ‘W’ route and the more remote backside, offering a unique and rewarding experience for adventurous hikers.
While the W Trek is great for those looking for a shorter and somewhat easier trek, the O Circuit is perfect for those seeking a more rugged and remote experience. The O Circuit takes you through a diverse range of landscapes, including dense forests, vast plains, and towering peaks, offering a true immersion into the wild and untamed beauty of Patagonia.
Day Hikes and Shorter Treks
For those with limited time or seeking a less strenuous experience, Torres del Paine National Park offers a variety of day hikes and shorter treks, including the popular trek Torres del Paine. Some of the most popular day hikes in the park are:
- Mirador Las Torres
- Mirador Cuernos/Salto Grande
- Laguna Azul
- Salto Grande Waterfall
These trails provide stunning views of the park’s most famous landmarks and can be completed in just a few hours.
Whether you’re looking for a leisurely stroll to take in the breathtaking scenery or a more challenging day hike to push your limits, Torres del Paine has something for everyone. With its diverse range of trails and breathtaking landscapes, the park is a hiker’s paradise just waiting to be explored.
Day Trek: Mirador Las Torres
Mirador Las Torres is one of the most popular day hikes in Torres del Paine National Park, and it’s easy to see why. This trail takes you to the base of the park’s iconic granite towers – the Torres del Paine – providing a close-up view that’s truly awe-inspiring.
The trek is a challenging one, covering a distance of about 19 km (12 miles) round trip with a significant elevation gain. However, the effort is well worth it. As you ascend, you’ll pass through lush beech forests and across rushing rivers before finally reaching the turquoise lagoon at the base of the towers. The sight of the sun rising or setting on the towers is a spectacle not to be missed, making this trek a must-do for any visitor to the park.
Getting to Torres del Paine: Transportation Options
Reaching Torres del Paine National Park is easier than you might think, with several transportation options available. This section offers information on bus services and car rentals, assisting in your journey planning to the park.
Whether you prefer the convenience of public transport or the flexibility of driving, there’s an option to suit every traveler’s needs.
Bus Services
There are several bus services available for reaching Torres del Paine from nearby cities like Puerto Natales. We highly recommend either Bus-Sur or Buses Fernandez for your travel to Torres del Paine. The bus ride from Puerto Natales to Torres del Paine costs only $25 USD (return), and you can book your tickets online through websites such as:
When planning your bus journey, keep in mind that there are specific departure times from Punta Arenas to Puerto Natales, such as:
By planning your bus journey in advance, you’ll ensure a smooth and hassle-free trip to Torres del Paine National Park.
Buses Inside Torres del Paine National Park
Once inside Torres del Paine National Park, there are shuttle buses available to transport you between key points along the W Trek. These buses run at regular intervals throughout the day, providing a convenient way to navigate the park and rest your legs between hikes. Be sure to check the timetable and plan your hikes accordingly to make the most of this service. The bus service within the park is an excellent way to save energy for the trail and allows you to cover more ground in a shorter time, enhancing your overall experience of this stunning landscape.
Car Rentals
For those who prefer a more flexible and independent travel option, renting a car is a great choice. To rent a car in Patagonia, you must have a valid driver’s license from your country and be at least 21 years old. The general costs of renting a car in Patagonia can vary, but on average, you can expect to pay around $76 per day for a small car rental.
Top-rated car rental companies in Patagonia include:
- Discover Cars
By renting a car, you’ll have the freedom to explore Torres del Paine National Park at your own pace and take breaks along the way to fully appreciate the breathtaking scenery.
Packing Essentials for the W Trek
Packing the right gear is crucial for a successful and enjoyable W Trek experience. This section provides a comprehensive packing list for hikers embarking on the W Trek, encompassing clothing, camping gear, and electronics.
By ensuring you have all the essentials, you’ll be well-prepared to tackle the challenging terrain and make the most of your adventure in the wild and untamed beauty of Patagonia.
Clothing and Footwear
Choosing clothing and footwear for the W Trek requires consideration of terrain type, weather conditions, and the trek’s length. Here are some recommendations:
- Pack a moisture-wicking base layer
- Bring a fleece layer for insulation and warmth
- Don’t forget a waterproof jacket and pants to protect against rain and wind
This layering system will help you adjust your clothing quickly and efficiently as the weather changes on the trek.
The ideal footwear choices for the W Trek in Patagonia are waterproof all-leather boots with deep treads. Additionally, gaiters can be a great way to keep your feet dry and prevent water from slipping in over the top of the boots. By investing in the right clothing and footwear, you’ll ensure your comfort and safety on the W Trek, allowing you to fully enjoy the incredible landscape and adventure that awaits.
Camping Gear
Camping gear is essential for your W Trek adventure. Invest in:
- A good tent, such as the Big Agnes Battle Mountain 2 or the ALPS Mountaineering Highlands Tent
- A lightweight and compact sleeping bag suitable for cold temperatures
- A roll mat for sleeping
- A mess kit for cooking
Additionally, don’t forget to pack:
- Base layers
- Trekking pants
- Hiking socks
- A waterproof backpack cover
By packing the right camping gear, you’ll be well-prepared to tackle the challenging terrain and make the most of your W Trek adventure in the stunning landscapes of Patagonia.
Electronics and Navigation
Electronics and navigation tools can be invaluable during your W Trek adventure. A GPS device, such as the Garmin inReach Mini or handheld devices from Outdoor Gear Lab and Switchback Travel, can help you stay on track and navigate your way through the park. Additionally, smartphone GPS apps like Gaia GPS and AllTrails can also be useful for navigating your way on the trail.
Remember to bring a charged phone with emergency phone numbers, a satellite phone if available, and a head torch for early morning or late-night hikes. By packing the right electronics and navigation tools, you’ll ensure a safe and enjoyable W Trek experience, allowing you to fully explore the breathtaking landscapes of Torres del Paine National Park.
In conclusion, the W Trek in Patagonia’s Torres del Paine National Park offers an unforgettable adventure through some of the most breathtaking landscapes on Earth. By following our comprehensive guide, you’ll be well-prepared to tackle the challenging terrain, plan your accommodations and meals, and make the most of your time in this extraordinary region. So lace up your hiking boots, pack your bags, and get ready to embark on the adventure of a lifetime!
Frequently Asked Questions
How long is the w trail in patagonia.
The W Trek in Patagonia is a moderately difficult hike covering 46 miles (76km) and typically takes 4-5 days to complete. It includes mainly gentle terrain with some challenging climbs of up to 800m. Be sure to come prepared for varying weather conditions.
Where do you sleep on the W trek in Patagonia?
On the W Trek in Patagonia, you can sleep in shared dormitories or upgrade to a private alternative. There are five refuges/campsites available along the route: Grey, Paine Grande, Frances, Cuernos and Central – check out our post for all the details!
What is the hardest trek in Patagonia?
The El Chaltén Trek in Patagonia is one of the most difficult treks to undertake, featuring demanding nature and views of Cerro Solo. So be prepared for a full test and take advantage of stunning scenery in this lesser-known area!
What is the best time of year to hike the W Trek?
The best time of year to hike the W Trek is from November to early March, when temperatures are mild and the weather is more stable for optimal trekking conditions.
How long does it take to complete the W Trek?
You can conquer the W Trek in 4-5 days, depending on how fast you go and what route you take.
PAINE TREKK
Book Travel Consultation
Book a 30-minute consultation with a travel expert to optimize your planned trip. I will assist you in organizing your trekk in Torres del Paine, ensuring an unforgettable adventure.
Book a 30-minute consultation with a travel expert to optimize your planned trip. I will assist you in organizing your trek in Torres del Paine, ensuring an unforgettable adventure.
My organised trips to Patagonia
In the carousel below you can see already assembled itineraries for inspiration, click on the one you are interested in and ask me for a quote.

Compact trip through the southernmost Argentinean Patagonia: Ushuaia and El Calafate

Enjoy the 3 most relevant ecosystems in Argentina: The End of the World, The Glaciers and the Iguazu Falls.

Trip to Patagonia Argentina in 7 days touring the most beautiful landscapes of Patagonia Argentina (Peninsula Valdés & El Calafate)

The Carretera Austral by rental car is probably one of the most spectacular routes in Patagonia, designed to be travelled with plenty of time in your rental car.

Tour along Route 40 in Patagonia, starting on Route 3 on the Atlantic coast and continuing along Route 40 until reaching the Andes Mountains and El Calafate.

The Australis Cruises are Expedition Cruises that sail through the Strait of Magellan and the Beagle Channel, exploring one of the most beautiful and unspoiled regions of the world such as Patagonia and Tierra del Fuego.

The Antarctic Cruise aboard the MV USHUAIA offers you an incredible introduction to the 'White Continent' at a reasonable price.
Book your tours
Search for your hotel, related posts.

Where is Torres del Paine
Torres del Paine National Park is located in southern Chile, five hours north of Punta Arenas,

Torres del Paine how to get there
Torres del Paine National Park is remote, a characteristic that adds to its intrigue but also

Where is Puerto Natales
In the south of Chile, Puerto Natales is one of the must-see places for those who

Where is Punta Arenas
Punta Arenas is located at the southern tip of South America, just north of the Strait

About the author
I am Matias, born in Patagonia, and a lover of my land.
For more than 20 years I help foreign travellers to organise their trip to Patagonia.
I also manage this exotic accommodation on the Atlantic coast.
- Torres del Paine
Latest posts
- Best Tango Show in Buenos
- Best Patagonia Travel Books
- Hop On Hop Off Buenos Aires
How much does a trip to Patagonia cost?
Excursions from el calafate – quick guide 2024, top 15 must-see argentina locations for your 2024 trip, argentina vacation guide: explore top destinations and tours, top-rated patagonia tour companies for 2024/2025 adventures, is there a train from buenos aires to patagonia, can you fly from buenos aires to patagonia, explore the majestic ice: your ultimate perito moreno glacier tour guide, destinations, save on your trip.
- Book your excursions
- Search for cheap flights
Terms & Conditions / Privacy Policy
10 of the best trekking routes in the world

Jul 3, 2024 • 10 min read

Find supersized landscapes and camaraderie along the world's top hiking trails, like the G20 in Corsica © Alex Treadway / Getty Images
Ask ten experienced hikers to nominate the best treks in the world and they'll give you ten different answers.
Some treks are incredible because of the scenery. Some routes are epic because of the almost superhuman levels of effort and endurance required to reach the end point. For some trekkers, it's all about the destination. For others, it's the journey and the camaraderie along the trail.
But the world's top treks all have one thing in common – a sense of mission that transforms the simple act of walking into a life-affirming expedition. With this in mind, we've compiled our own list of the world's top treks, from jungle trails to breathless tracks through the mountains of Nepal . All require a sturdy pair of lungs and a fit pair of legs, but the experience of trekking is its own reward; decades later and you will still be talking about these hikes!

1. GR20, Corsica, France
Best trek for people who love challenges
Distance: 168km (104 miles) round trip Duration: 15 days Level: Difficult
This character-building slog through Corsica is legendary for the diversity of landscapes it traverses, and for the level of grit it requires from trekkers who brave its rugged trails. There are forests, granite moonscapes, windswept craters, glacial lakes, torrents, peat bogs, maquis, snow-capped peaks, plains and névés (stretches of ice formed from snow) to conquer, and the tough terrain weeds out all but the most dedicated hikers.
Created in 1972, the GR20 links the town of Calenzana, in the Balagne, with Conca, north of Porto Vecchio, but the thrills don’t come easy. The path is rocky, uneven and frequently steep, with crossings over rickety bridges and exposed scrambles over slippery rock faces and loose, skittering scree – all part of the fun! You'll be drawing water from springs and sleeping in rustic mountain refuges, but two weeks later, you'll be able to tell the world you conquered Europe's toughest trail.

2. Inca Trail, Peru
Best hike for modern-day explorers
Distance: 33km (20 miles) round trip Duration: 4–5 days Level: Moderate
The 33km (20-mile) trail to the 15th-century Inca citadel of Machu Picchu was used for centuries before it was brought to global attention when explorer Hiram Bingham "discovered" the route in 1911. Today, the secret is definitely out – but there are some rules and restrictions in place to control visitor numbers. Book at least six months in advance for one of the 500 permits available each day. That figure includes support staff – porters, guides, etc – so in reality, only about 200 lucky tourist trekkers are issued one.
The trek to Peru 's most famous ruin has giddying views of high cloud forests and Machu Picchu waiting ahead like a beacon. The trail climbs to 2430m (7972ft) from the Sacred Valley , winding its way up, down and around mountains, and crossing three high passes en route.
For those just visiting the "lost city" for the day, authorities have introduced three new circuits each with sub-routes around the site.

3. Kilimanjaro, Tanzania
Best trek for snow in the tropics
Distance: 37–90km (23–56 miles) Duration : 5–9 days Level: Moderate
Okay, it's the favorite trek of fundraisers everywhere, and an almost obligatory trip for visitors to East Africa, but the week-long ascent of Africa's highest mountain is still an epic undertaking. From the moment you first spy its misty prominence rising above the dusty plains, you'll know that Kilimanjaro simply has to be climbed. Lions and elephants may mill around at its base, but the summit is snow-capped and desolate, and lofty enough to bring a risk of altitude sickness at 5895m (19,340ft).
There are seven recognized routes to the top, and trekkers can complete the ascent in anything from 5 to 9 days, with longer treks being recommended to reduce the risk of AMS. The final stage usually starts before dawn, reaching the summit as the first light of morning erupts across a vast sweep of African savanna. In practice, nearly two-thirds of trekkers opt for the Marangu (6 days) or Machame (7 days) routes on the south side of the mountain.

4. Kalalau trail, Hawaii
Best coastal trek
Distance: 18km (11 miles) each way Duration: 2 days Level: Moderate
When asked to pick the best treks in the US , most reach for hikes along the rim of the Grand Canyon , or the mobbed trails that climb to the summits of El Capitan and Half Dome in Yosemite National Park . However, we prefer to choose something a bit more off-piste. Linking Keʻe Beach and the Kalalau Valley on the north shore of Kauaʻi , the beautiful Kalalau trail follows a towering cliff wall dripping with tropical foliage to reach an overnight stop at a splendidly remote Hawaiian beach.
The route along the Nā Pali Coast starts out easy, but gets progressively more challenging on steep dirt paths; the reward comes in the form of elemental views over primordial valleys, thundering waterfalls, secluded beaches and the churning waters of the Pacific Ocean. There's a definite Lost World feel, and a bit of caution is required, as people have fallen from the track or been washed away by sudden flash floods.

5. Markha Valley trek, Ladakh, India
Best trek for: spontaneous trekkers
Distance : 80km (50 miles) Duration: 6–7 days Level: Moderate
Fewer people trek on the Indian side of the world’s mightiest mountain range, but those that do are rewarded with views to rival anything in Nepal, Tibet or Pakistan. There are spectacular treks all over the Indian Himalaya, from the breathless Goecha La trek in Sikkim to pilgrimage treks to remote mountain temples in Uttarakhand and Kashmir , but for our rupee, the best trekking country of all is in lofty Ladakh , crossing high-altitude deserts in the rain-shadow of the high Himalaya.
The Markha Valley trek strains for a week across a wonderfully desolate moonscape, circling south from Leh through the jagged ridges that flank the south bank of the Indus River before emerging near the famous Buddhist gompa (monastery) at Hemis . Best of all, no complex planning is required; you can reach the trailhead by bus from Leh, crossing the river in a dangling basket and stopping at whitewashed teahouses in timeless Buddhist villages along the trail.

6. Routeburn Track, New Zealand
Best trek for fans of big landscapes
Distance: 32km (20 miles) Duration: 3–4 days Level: Moderate
New Zealand ’s South Island is as alpine as you can get without actually being in the Alps, and the 3-day Routeburn Track is one of the best ways to cross this pristine natural wonderland. This is a trail for fans of big vistas and open skies, following glacier-carved fjords, truncated valleys and rugged ridges through the plunging landscapes of two stunning national parks: Fiordland and Mt Aspiring.
The preferred route runs from the Routeburn Shelter (north of Queenstown ) to Milford Road, with overnight stops in spectacularly located campgrounds. Highlights include the views from Harris Saddle and Conical Hill, and chilly dips in spring-fed mountain tarns. The main challenge for this popular hike is securing a place among the limited numbers who are allowed at any one time – make bookings well ahead through the NZ Department of Conservation's Great Walks booking site .

7. Gunung Rinjani, Indonesia
Best trek for early risers
Distance: 24km (15 miles) Duration: 2 days Level: Moderate
There simply has to be a Southeast Asian volcano hike on the list, and for our money, it's Indonesia's Gunung Rinjani . While Lombok 's blissful beaches simmer at sea level, the island climbs to a breathless height of 3726m (12,224ft) at the summit of this enormous lake-capped volcano, which still periodically rumbles into life, most recently in 2016.
Trekking to the summit of Gunung Rinjani is up there with hiking the Himalaya as one of Asia's favorite adventures. To make the best of the views, the final push to the top starts in the dark, in order to gain the crater rim as first light pushes back the gloom, revealing the crater lake and its sinister cinder cones like a lost valley of the dinosaurs.

8. The Walkers' Haute Route, France–Switzerland
Best trek for the summer months
Distance: 200km (125 miles) Duration: 14 days Level: Difficult
Leading from Chamonix in France through the southern Valais to Zermatt in Switzerland , the 2-week-long Walkers' Haute Route trek traverses some of the highest and most eye-popping scenery accessible anywhere in the Alps. Hiking here is a summertime endeavour, tracing a different course to the famous winter Haute Route for ski-tourers. Every stage will test your endurance, with "pass hopping" that demands a high level of fitness on many sections of the walk.
So why put your body through all this exertion? The mountain views, obviously! Some days pass through yodel-worthy alpine meadows, while others struggle over glacier-carved outcrops guarded by mountain giants. And with this being northern Europe, the infrastructure along the way is excellent, with hotels, gites d’etape (rest shelters), auberges (inns) and mountain refuges dotted all along the route. You'll appreciate a warm bed and a hot meal as you tackle over 14,000m (46,000ft) of elevation gain.

9. Everest Base Camp, Nepal
Best trek for would-be mountaineers
Distance: 130km (80 miles) round trip Duration: 2 weeks Level: Moderate
Climbing to 5545m (18,193ft) at its highest point, the 2-week trek to Everest Base Camp is Nepal's best-loved trek , with 8849m (29,032ft) Sagarmatha (Mt Everest) rising ahead like a petrified giant. Tracing winding river valleys and the creaking mass of the Khumbu glacier, this mighty mission visits mountain monasteries, soaring lookouts and precariously balanced Sherpa villages, with grueling days of altitude gain that will test your muscles and endurance to breaking point.
It's not all hard work though. The trekking infrastructure is unparalleled: permits can be bought easily, porters and guides wait on arrival at Lukla's tiny mountain airstrip, cozy teahouses provide warm beds and nourishing plates of dal bhat (lentils and rice) along the entire route, and side trails open up a mountain playground of summit ascents and high pass crossings for a taste of real mountaineering. Sure, the trails are mobbed in season , but the sense of camaraderie amongst trekkers is hard to beat.
The golden rule, however, is respect the altitude. Acute Mountain Sickness is a risk if you rush, so take it slow and steady and pause for the recommended rest days to let your body catch up with the elevation.

10. The Torres del Paine Circuit, Patagonia, Chile
Best trek for photographers
Distance: 136km (85 miles) Duration: 9 days Level: Difficult
Many visitors to Chile 's Torres del Paine National Park draw up short when they see the scale of the terrain and opt for the shorter "W Trek", but we recommend following the full 9-day "O Trek" circuit, to soak up the sheer variety of landscapes in this magnificent wilderness reserve. As you follow the trail from Las Torres, you'll pass some of the world's most photogenic vistas: crystal-clear rivers, sculpted mountains, open grasslands, old-growth forests, deep and silent lakes and the icy tongue of Grey Glacier.
That's a lot of variety per trekking mile, but you need to plan ahead as camping sites and refugios are in heavy demand. Make bookings with the companies operating the lodges and camping areas months in advance if you hope to secure a slot during the busy November to March trekking season.
Top tips for trekkers
Before you load up your backpack with trekking socks and Kendal mint cake, give some thought to the infrastructure on the route you plan to conquer. Some treks require total self-sufficiency, sleeping under canvas and purifying water as you go; other routes have refuges or rustic teahouses every step of the way. Here are some of the key considerations:
- Travel light: Every extra gram will weigh you down on the trails; if it isn't essential, leave it behind.
- Respect your feet: Boots offer more support, but all-terrain trainers are lighter and dry more quickly after a soaking.
- Protect your knees: Trekking poles can help control the knee-crushing descents that are a feature of pretty much every trek.
- Climb slowly : Acute Mountain Sickness (AMS) can kill, so ascend slowly and take rest days to acclimatize on any trek above 2500m (8202ft) in elevation.
- Check the weather: When treks go wrong, it's normally because of the weather, so check the forecasts; if conditions look bad, stop somewhere safe and sit it out, rather than pushing on over the next pass.
- Be prepared: Don't launch straight from the sofa to the summit – warm up with gentler walks, hikes and runs to get your body used to the exertion.
- Plan ahead: Many trekking routes require a permit and advance booking for lodges and campsites; for some routes, you need to book months ahead.
This article was first published Aug 6, 2019 and updated Jul 3, 2024.
Explore related stories

Jul 13, 2024 • 7 min read
Ecuador's varied geography offers plenty of opportunities for world-class hiking – check out these incredible routes through this high-altitude wonderland.

Jun 24, 2024 • 10 min read

Jun 3, 2024 • 8 min read

May 20, 2024 • 7 min read

Apr 18, 2024 • 7 min read

Apr 1, 2024 • 5 min read

Mar 14, 2024 • 16 min read

Mar 7, 2024 • 9 min read

Dec 15, 2023 • 16 min read

Nov 9, 2023 • 6 min read
O Circuit in Torres del Paine, Patagonia [2024-25 Guide]
Last Updated: August 19, 2024

Where : Torres del Paine National Park Distance : 76 miles | 123 km Days to Complete : 6-11 Difficulty : Strenuous Best Time to Hike : December-March Typical Weather : High wind, rain
Permit : Proof of reservations required Park Fee: 21,000 CLP/$31 US Hiker Traffic : Moderate-Heavy Resupply Options : Only on W side Huts/Cabins/Hotels : Yes Cell Service : Spotty
I’d heard rave reviews about the stunning beauty of Torres del Paine’s O Circuit, but I wasn’t prepared for it to take me to a transcendent new world.
Towering granite spires, sprawling glaciers, breathtaking mountain passes, intense and ever-changing weather — I experienced it all on every step of my six-day journey.
Within Torres del Paine exist the captivating O and W Circuits, two multi-day hiking trails that bring trekkers face to face with some of the most jaw-dropping landscapes our world has to offer.
You can complete the O Circuit safely and affordably during the 2023-2024 season.
Let me tell you exactly how.
Torres del Paine O Circuit
What is the O Circuit?
Booking reservations.
- Recommended Itineraries
Pre and Post Trek Accommodation
Essential gear.
- Getting to Torres del Paine N.P.
- Preparing for the O Circuit
- Pehoé Terminal to Camp Italiano
- Camp Italiano to Camp Las Torres
- Camp Las Torres to Camp Serón
- Camp Serón to Camp Dickson
- Camp Dickson to Camp Paso
- Camp Paso to Pehoé Boat Terminal
- Final Thoughts

In short, the O Circuit is a 126-kilometer loop around the scenic Cordillera del Paine mountains within Patagonia’s Torres del Paine National Park.
The trail includes the famous W Circuit (67 km), and wraps around the backside of the spectacular mountain range, eventually connecting to make a loop.
I’ve included a map below to show you the routes for both treks.
The trail is full of challenges: steep inclines, long intervals, and notoriously erratic weather.
To solo hike the this trail, Most people choose to complete the trek in 7 to 10 days.
Some hike it quicker, some take longer.
I decided to hike the loop in 6 days, which is the fastest itinerary I would recommend.
There are three trailheads to choose from to begin the O Trek: Grey (accessible by boat), Paine Grande (accessible by boat), and Las Torres (accessible by car or bus).
You MUST hike backside of the circuit (the O portion) counter-clockwise.
The hiker traffic on the backside of the mountain is drastically less than the front side, which is why it was my favorite stretch of the trek.
The W and O Circuits are Patagonia’s most famous treks but only allow for limited traffic.
Don’t risk getting turned away — make all your reservations months in advance.
Procrastination might result in a booked up calendar.
BOOK YOUR RESERVATIONS BEFORE ANYTHING ELSE!

How to Make Camping/Lodging Reservations
There are three different websites from which you can book campsites and refugios (cabins with beds) online.
Study the trail map, distances, and elevation changes carefully to plan your itinerary.
You’ll need to visit two or three websites to book your entire trip.
Most campsites will turn you away if you show up without a reservation, and rangers won’t even let you onto the O side of the trek without proof of camping/lodging bookings.
Get creative with your itinerary if specific sites are full and entertain all options as you plan your trip.
All reservations can be made on the following websites:
Italiano Closed for 2024 season.
Paso Closed for 2024 season.
Torres Closed for 2024 season.
Dickson Price : Campsites starting at $11 US per night. Dorm bed starting at $43 US per night . Amenities : Water, bathrooms, showers, electricity, gear rental, re-supply shop, restaurant.
Los Perros Price : Campsites starting at $11 US per night. Amenities : Water, bathrooms, showers, electricity, gear rental, resupply shop, restaurant.
Grey Price : Campsites starting at $11 US per night. Dorm beds starting at $43 US per night . Amenities : Water, bathrooms, showers, electricity, gear rental, resupply shop, restaurant.
Paine Grande Price : Campsites starting at $11 US per night. Dorm beds starting at $65 US per night . Amenities : Water, bathrooms, showers, electricity, gear rental, resupply shop, restaurant.
Las Torres Central and Norte Price : Campsites starting at $40 US per night. Refugios starting at $180 US per night . Amenities : Water, bathrooms, showers, electricity, gear rental, re-supply shop, restaurant.
Chileno Price : Campsites starting at $40 US per night. Refugios starting at $125 US per night . Amenities : Water, bathrooms, showers, electricity, gear rental, resupply shop, restaurant.
Serón Price : Campsites starting at $35 US per night. Amenities : Water, bathrooms, showers, electricity, gear rental, resupply shop, restaurant.
Los Cuernos Price : Campsites starting at $40 US per night. Refugios starting at $180 US per night . Amenities : Water, bathrooms, showers, electricity, gear rental, resupply shop, restaurant.
Frances Price : Campsites starting at $40 US per night. Refugios starting at $180 US per night . Amenities : Water, bathrooms, showers, gear rental, restaurant. Not available : Electricity, resupply shop.
Note: Above prices are for High Season (November-March.) Mid Season (September, October, April) is slightly cheaper. All reservations can be upgraded to ‘Half board and lodging’ (about $50 US extra) or ‘Full board and lodging’ (about $70 US additional.)
There are plentiful options to take guided tours where reservations, food, and gear are all provided.
While I prefer to trek solo, join a private tour if reservations are full, you’re an inexperienced trekker, or don’t want to bother with carrying gear.
Recommended O Circuit Itineraries

I completed the O Circuit – plus 17 additional kilometers (10.6 miles) – over six days and five nights.
Based on my experience, I’ve written a detailed six-day guide.
Keep in mind, however, that most trekkers choose to spend 8-10 days hiking this trail.
Because of this, I’ve provided a list of recommended itineraries for six, seven, eight, nine, and ten-day trips of the O Circuit.
Pick an itinerary that suits you and start planning accordingly.
Six-Day Itinerary
- Day One : Camp Las Torres to Serón (Hike Mirador Las Torres) – 32 km/19.9 miles
- Day Two : Serón to Dickson – 18 km/11.2 miles
- Day Three : Dickson to Paso – 19.8 km/12.3 miles
- Day Four : Paso to Paine Grande – 18 km/11.1 miles
- Day Five : Paine Grande to Frances (Hike Mirador Britanico) – 20.3 km/ 12.7 miles
- Day Six : Frances to Camp Las Torres – 14.6 km/9.1 miles
Distance Per Day : 20.4 km/12.7 miles
Seven-Day Itinerary
- Day One : Camp Las Torres to Serón – 13 km/8.1 miles
- Day Five : Paine Grande to Frances (Hike Mirador Britanico) – 20.3 km/ 12.7 miles
- Day Seven : Stay at Camp Las Torres (Hike Mirador Las Torres) – 19 km/11.8 miles
Distance Per Day : 17.5 km/10.9 miles
Eight-Day Itinerary
- Day Three : Dickson to Los Perros – 11.8 km/7.3 miles
- Day Four : Los Perros to Grey – 15 km/9.3 miles
- Day Five : Grey to Frances – 20.5 km/12.7 miles
- Day Six : Camp at Frances (Hike Mirador Britanico) 14.8 km/9.2 miles
- Day Seven : Frances to Camp Las Torres – 14.6 km/9.1 miles
- Day Eight : Stay at Camp Las Torres (Hike Mirador Las Torres) – 19 km/11.8 miles
Distance Per Day : 15.3 km/9.5 miles
Nine-Day Itinerary
- Day Five : Grey to Paine Grande – 11 km/6.8 miles
- Day Six : Paine Grande to Frances – 9 .5 km/5.9 miles
- Day Seven : Frances to Los Cuernos (Hike Mirador Britanico) – 17.8 km/11.1 miles
- Day Eight : Los Cuernos to Chileno – 16.6 km/10.3 miles
- Day Nine : Chileno to Camp Las Torres (Hike Mirador Las Torres) – 14 km/8.7 miles
Distance Per Day : 13.7 km/8.5 miles
If you choose to attempt the trek in six days as I did, know that your average day will include a considerable average distance (20.5 km/12.7 miles) and elevation gain (823 meters/2700 feet).
If your body isn’t ready for these distances and elevation gains, do not attempt to complete the trek in six days.

After you have your reservations squared away, don’t forget to book accommodations for the days leading up to (and after) the trek.
The best hotels and hostels fill up quickly in the high season, so book early to get your top choices for lodging.
I highly recommend staying in Puerto Natales, Chile during the days leading up to your trek.
I made the mistake of starting in El Calafate, Argentina, and my ensuing bus trip to Torres del Paine took nearly six hours.
It is possible to make the trip from El Calafate, however, so book your lodging there if it makes sense logistically.
Here are a few highly-rated hotels and hostels in Puerto Natales and El Calafate:
Puerto Natales Accommodation
Maromava patagonia, hotel vendaval, hotel simple patagonia, el calafate accommodation, folk hostel, america del sur hostel, cabañas de nené.
Accommodation is available for every budget in Puerto Natales and El Calafate .
Don’t procrastinate when you are booking your lodging, however, or you may miss out on the hotel or hostel that best suits you.
Torres del Paine, like most of Patagonia, is known for its notoriously windy and rainy weather patterns.
Conditions in Patagonia can get downright intense, so you’d better show up prepared.
While every piece of backpacking gear you bring along is important, some pieces of gear are simply more important than others.
These are those pieces of gear:
Lightweight & Comfortable Backpack
Trekking 76 miles of harsh terrain would be a brutal experience with an uncomfortable backpack, so make sure to bring along a pack that fits well and doesn’t hold you back.
Don’t risk cheapening your once-in-a-lifetime trip with an uncomfortable bag weighing you down.
Sturdy Four-Season Tent
As I mentioned earlier, the weather in Torres del Paine can become nasty in the blink of an eye.
Wind gusts nearing 100 mph (160 kph) are common, so bring along a backpacking tent that can stand up to them.
A failing tent means a wrecked trek.
I know from experience .
Burly Waterproof Hiking Boots
Rain, mud, scree, steep ascents/descents, loose rocks, stream crossings – you’ll see it all.
Bring a pair of rugged, waterproof boots that will hold their own against unpredictable conditions along the trail.
The last thing you need is waterlogged feet or, worse, a rolled ankle.
Head-to-Toe Rain Protection
Did I mention that it rains a lot in Torres del Paine?
Be prepared to cover your body from head to toe in rain gear at a moment’s notice.
Bring a rain cover for your backpack, also, to keep the rest of your gear dry.
Windy rain will probably come at you from every direction at some point or another.
Trusty Pair of Trekking Poles
I met a backpacker who was having knee issues along the O, and the pain eventually derailed her trip.
Trekking poles give you four points of contact on the trail and take considerable pressure off your knees.
Seventy-six miles in Patagonia is a long haul, so give your knees some support.
Keep your backpack as light as possible.
Resist the temptation to pack excessively and only carry what you need.
The less weight on your back, the better.
Dial in Your Backpacking Gear

Check out my do-it-all 8.2-pound ultralight backpacking gear list for 2024. I’ve hiked countless miles with this setup and stand behind every recommendation .
My 2024 Ultralight Backpacking Gear
Gear Rental Options in El Calafate and Puerto Natales
Puerto Natales and El Calafate have several mountaineering and trekking stores that will rent out the gear you need for your hike.
Backpacks, tents, sleeping bags – it should all be easy to find at these shops.
Here’s a helpful post for renting gear in Puerto Natales .
And here’s one for renting gear in El Calafate .
Of course, gear rental is expensive, so I always economize by bringing my own equipment.
Researching and buying a lightweight setup ahead of time is an excellent investment in budget travel.
Getting to Torres del Paine National Park
Torres del Paine National Park hugs Chile-Argentina border in the Patagonia region of South America
The O Circuit is tucked away deep in Patagonia, far from any major cities or hubs.
Luckily, getting there is relatively easy and affordable.
Direct flights from Santiago and Buenos Aires will get you to Puerto Natales or El Calafate – backpacking towns that are within a few hour’s drive of Torres del Paine.
From Puerto Natales, Chile

Puerto Natales is the most convenient launching point for those preparing to visit Torres del Paine.
Affordable three-hour direct flights are available from Santiago.
From Puerto Natales, Torres del Paine is just a three-hour bus ride.
Two daily buses depart from the main terminal – one at 7:15 a.m. and one at 11:30 a.m.
I recommend using BusBud.com to buy tickets in advance.
From El Calafate, Argentina
If you are trying to reach Torres del Paine via Buenos Aires, flying into El Calafate is the fastest and most affordable option.
Direct, three-hour flights depart daily from Jorge Newberry Airport.
Bus tickets from El Calafate aren’t available through commercial companies like BusBud.com or BusSur.com, because the trip requires a border crossing.
You can, however, purchase tickets through certain hotels and hostels, but they are rather expensive due to the border crossing.
I paid $90 US (62,700 CLP) for mine through America del Sur Hostel .
Book your ticket a few days in advance to ensure you get the bus you want.
The trip to Torres del Paine takes at least five and a half hours from El Calafate – four hours of driving time and about an hour and a half at the border for passport control/customs.
It took me almost seven hours to get from my hostel to the trailhead.
Plan to stay in Puerto Natales before your trek, if at all possible.
You’ll save yourself money, time, and border-crossing headaches.
Hitchhiking
Many trekkers choose to hitchhike into Torres del Paine National Park from Puerto Natales or El Calafate — I saw dozens lining the road along the way.
Hitching a ride in Patagonia is extremely popular, so be prepared to compete with other travelers for potential rides.
Find a suitable spot to post up, stick out your thumb, and cross your fingers.
Preparing for Patagonia’s O Circuit

Preparation requires more than merely booking campsites and finding your way to Torres del Paine; this trek took much more time and effort than any other backpacking trip I’d ever experienced.
It’s worth it, of course, so prepare early and often.
My Total Cost of Trekking the O Circuit
A common misconception is that hiking the O or W Circuit is an expensive endeavor.
While it certainly can be (some tours cost upwards of $4,000 US!), it is possible to pull it off affordably if you plan correctly.
Here are my approximate expenses (minus airfare) for the whole trek.
I always try to be a frugal traveler and found it easy to complete this trek at a reasonable cost.
- Hostel in El Calafate : $22 US
- Tour bus to Torres del Paine : $90 US
- Park Fee : $31 US
- Campsite reservations : $48 US
- Catamaran : $26 US
- Packed food for six days : $78 US
- Restaurants/re-supply : N/A
- Hitchhiking to Punta Arenas : Free
My total expenses : $295 US
There are no ATMs in Torres del Paine National Park .
Bring enough cash to pay the park entrance fee and buy any food, lodging, supplies, or transportation (catamaran, bus) within the park.
Some shops accept credit cards, but the majority of businesses only accept cash.

Weather in Torres del Paine
A calm day in Torres del Paine is a rare occurrence.
I found out quickly that weather from all four seasons is fair game during peak season, much like the majority of Patagonia.
Be prepared for intense rainfall, brisk temperatures (0-13°C/32-55°F), and powerful winds that can reach up to 110 mph (180 kph).
Keep an eye on the conditions as your trek draws closer and prepare accordingly.
WindGuru has, by far, the most detailed and accurate forecasts available for Torres del Paine, I highly recommend saving the upcoming week’s weather information before starting your trek.
Free Offline Trail Maps with Maps.me

Maps.me is a handy offline navigation app that has trail maps from hikes all over the world.
I highly recommend downloading this app ahead of your trek.
Sure, the trail is very popular and well-marked, but downloading offline maps provides an extra layer of security on top of a physical map.
The entire O Circuit trail is available on the app and easy to follow, so download it ahead of time.
Drop a few waypoints before you start the trek, so you know where specific destinations and landmarks will be.
You won’t need cell service to use the maps.
Water Along the O Circuit

This trail boasts plenty of clean drinking water along, almost all of which can be consumed safely without any pre-treatment.
I brought my water filter along in case I needed it, but never ended up using it.
The water along the O Circuit is glacier-cold, clean, and fresh – a testament to the purity of Patagonia.
Food: To Pack or Not to Pack?
There are plenty of grocery and backpacking stores to purchase food in Puerto Natales and El Calafate.
I chose to fly all my favorite backpacking food out from the US so that I could plan out every meal ahead of time.
On a given day on the trail, I’ll consume some combination of the following hiking snacks :
- Instant Espresso
- Energy bars
- Dehydrated fruit
- Prepackaged dehydrated meal
I packed all six days’ worth of food, but doing so isn’t necessary, as there are many restaurants and resupply stations along the trail.
The food inside Torres del Paine is not cheap, so saving weight will end up costing you more money.
I typically ration myself around 3,000 calories a day.
Plus, I always bring an extra day’s worth of food in case of an emergency.
There are few things worse than running out of food in the middle of the wilderness.
Here’s a post I’ve written on how to meal plan and pack food for backpacking trips .
IMPORTANT : If you are crossing into Chile from Argentina, you’ll have to go through customs and border control, and they won’t allow you to bring any meat products, eggs, cheese, fresh fruit, or vegetables into Chile.
A customs officer confiscated a block of cheese and a stick of sausage from my bag at the border.
Physical and Mental Preparation

Hiking 123 brutal kilometers (76 miles) in the harsh Torres del Paine wilderness is a formidable test of both body and mind.
To prepare myself, I hiked, camped, and exercised regularly during the months leading up to the trek.
By the end of the trek, I was absolutely beat, but still intact. I’m glad I prepared my body.
If you’re concerned that you may not be ready for the harsh terrain and distances ahead, start training now.
Knees can act up, backs can give out, and gear can fail you if you’re not adequately trained — both physically and mentally — for the rough conditions of Torres del Paine.
Just a week before embarking on the O Circuit, I trekked the Huemul Circuit in Argentina to get my body prepared.
I highly recommend this trek.
I’ve gone on challenging treks with minimal preparation, and they don’t always end up going so well .
Here are the hiking distances between each stop along the way:

Leave No Trace
Always pack out everything you pack in!
The O Circuit is an extremely clean and beautiful trail.
Let’s all work together to keep it that way for the rest of the world to enjoy. There are no excuses for leaving waste behind.
If you feel like going the extra mile, fill a small adventure bag to help keep the trails clean.
Visit LNT.org for more information on keeping nature clean and unpolluted.
Now that I’ve covered all the preparation logistics you need, let’s switch over to my six-day trekking experience.
This is where the fun begins.
Day One: Pehoé Boat Terminal to Camp Italiano
Distance : 18.5 km/11.5 miles Elevation gain : 869 meters/2850 feet Highlights : Lake Pehoé catamaran ride, Mirador Britanico

Ah, day one.
The day the boots finally hit the trail.
Months of preparation and anticipation are about to pay off.
Reservations, weather forecasts, gear, food, training – it’s all in play now. It’s time to take the first step.
Much of Day One will be spent tangled up in getting to the trailhead.
It’s a bit tedious jumping through all the hoops, but also completely worth it in the end.
The views and scenery are magnificent right off the bat, setting the tone for the rest of the trail.
Take a Bus to Torres del Paine
I made the mistake of starting my adventure in El Calafate, Argentina.
As I mentioned earlier, beginning in Puerto Natales, Chile is the smart way to go.
You’ll save yourself a significant amount of money and time and won’t have to deal with a border crossing on the first day of your hike.
Because I started the trek in El Calafate, I arrived at the trailhead much later than anticipated and had to adjust my itinerary.
My bus (which ended up being a tour bus) didn’t end up leaving town until nearly two hours past its scheduled time.
And since it was a tour bus, it made regular stops along the way to Torres del Paine.
I was at my wit’s end by the time I got off the bus.
Such is travel.
Argentina/Chile Border Crossing
Part of the reason the ride into Torres del Paine took so long, was a very long stop at the customs and border control office on the way into the park.
In all, it took nearly an hour and a half for our bus full of chatty tourists to get cleared through customs.
Checking in at the Administration Office
Whether you are arriving in Torres del Paine from Puerto Natales or El Calafate, it’s required to stop at the administration office on the way into the park.
The mandatory fee of $31 US (21,000 CLP) must be paid in cash!
Don’t forget to bring enough money — I nearly screwed this one up.
If you’re hiking the O or the W Circuit, you must register at the park ranger station within the administration office before you start.
The park rangers will need to see your reservations for every single night you plan on staying in the park.
Be sure to have them at the ready, either on your phone or printed out.
They’ll give you a map and a detailed list of the rules of the park .

Catamaran Across Lake Pehoé
If you want to start the O Circuit at Paine Grande as I did, you’ll need to take a boat across Lake Pehoé.
There are affordable shuttles for $4 US (3000 CLP) that will run from the administration office to the catamaran dock.
Luckily, my tour bus dropped me off at the pier, so I didn’t have to worry about transferring to a shuttle.
The catamaran only departs five times a day, so be sure to check the schedule to find a time that works for you.
There’s no need to book tickets in advance. The tickets are cash only.
Lake Pehoé Catamaran Information
To start the trek at Paine Grande, you must take a catamaran across Lake Pehoé to reach the campground/refugio area.
There are no buses that drop off at Paine Grande.
Note: The information below is for December 1st through February 28th.
Boats will run less frequently outside of these dates.
Departure Times (Pehoé → Paine Grande) : 9:00, 11:00, 14:00, 16:15, 18:00 Return Times (Paine Grande → Pehoé) : 9:35, 11:35, 14:35, 17:00, 18:35 Duration : 25 minutes Price : 18,000 CLP ($26 US) one way/28,000 CLP ($40 US) round trip (cash only)
The boat ride across Lake Pehoé offers stunning views of Patagonia’s famous ‘Blue Towers.’
I was blessed with a sunny and clear boat ride, so the mountains were unobstructed by clouds.
Have your camera ready, as the photos ops are endless.
Setting Up at Camp Italiano
Once you arrive at the Paine Grande campgrounds, it’s (finally) time to start hiking.
Because the backside of the O Circuit must be traversed counter-clockwise, your only option will be to begin hiking east along the trail, which will be easy to find.
Camp Italiano is a comfortable 7.5-kilometer (4.7-mile) hike from Paine Grande.
Once you arrive, check in with the park ranger and set up camp. Italiano is a free CONAF site with basic amenities, so don’t expect to find anything beyond a tent site, a bathroom, and water.
Put together a daypack with some water and snacks and get ready to see the first of two miradores (lookouts) of the Torres del Paine.

Mirador Britanico
Mirador Britanico is the first of two magnificent lookouts on the front side of the trek.
Getting to the lookout point requires a steep 5.4-kilometer (3.4-mile) ascent up the Frances Valley.
On the way up the valley, you’ll pass the stunning Frances Glacier, where it’s possible to hear the booming and crackling of slabs of ice breaking free and sliding down the face of the mountain.
The entire hike up the valley is stunning, and the breathtaking lookouts to the massive peaks are appropriate rewards for the tiring uphill march it takes to arrive.
You’ll descend on the same trail, which will serve as an early test for your knees.
Take your time and use trekking poles if you brought them.
Note : Because of my late start, I was forced to hike to Mirador Britanico at the beginning of Day Two. This made for two long and brutal days in a row. Try to avoid doing the same.
Day Two: Camp Italiano to Camp Las Torres
Distance : 16.6 km/10.3 miles Elevation gain : 396 meters/1300 feet Highlights : Frances Glacier, Lake Nordenskjöld

In terms of distance and elevation gain, Day Two will be one of the quicker days of the trek.
For much of the day, gorgeous Lake Nordenskjöld will be on your right and the imposing Mount Almirante Nieto on your left.
Because of its sheer beauty, Day Two was one of my favorite stretches of the trail.
All the logistics — hostels, buses, boats, reservations, border crossings, and packing — are finally behind you.
Now you can spend the rest of the trek focusing on the stunning beauty, physical challenges, and the erratic weather of Torres del Paine.

Hiking Along Lake Nordenskjöld
It’s a joy to hike along Lake Nordenskjöld.
There aren’t any more severe inclines, so it’s a comfortable, non-technical experience.
Plus, the trail stays close to the shoreline of this pristine body of water.
The weather for most of Day Two was close to perfect.
I experienced zero rain and only light winds on the path to Camp Las Torres.
That’s when it hit me: the O Circuit was a once-in-a-lifetime trek that was already exceeding my incredibly high expectations.

Setting Up at Camp Las Torres
As I passed Lake Nordenskjöld and made my way to Camp Las Torres, the wind started to pick up.
The notorious Patagonian gusts flexed their muscles and pushed me around, so I put my head down and forged onward to find a place to pitch my tent.
Camp Las Torres is divided into two sections: Central and Norte.
Check in at the ranger’s station to see which side to find a site on.
Las Torres is luxurious with its hot showers, resupply stations, a restaurant, electricity, and gear rentals, especially when compared to Camp Italiano.
It’s a great place to freshen up and recharge your morale.
Trekking Tip: Camping in High Winds
Even if the weather is calm when you arrive at camp, do your best to find a site that’s protected from the wind.
Look for spots that are protected by bushes, rocks, buildings, etc. Don’t camp underneath trees, where you and your tent are susceptible to falling branches.
Ask the park rangers about the forecast and plan accordingly.
Torres del Paine’s winds are known for wrecking tents and ruining trips.
When I searched for a suitable site to set up camp, the wind kept howling.
After a lot of head-scratching, I finally found a campsite that was shielded from the wind on three of four sides.
It was a tight squeeze to fit my tent in, but I was happy to have found the spot.
Wind gusts that night reached nearly 100 km/h (60 mph).
I put in my earplugs, snuggled into my sleeping bag, and went to sleep early that night.
I was about to face the most brutal day of the circuit in the morning.
Day Three: Camp Las Torres to Camp Serón
Distance : 32 km/19.9 miles Elevation gain/loss : 1356 meters/4450 feet Highlights : Mirador Las Torres, Paine River

If you want to squeeze the O Circuit into six days as I did, count on some very long and tiring stretches.
Today will be the longest and most exhausting of the bunch.
Day Three is an extreme challenge both mentally and physically, but the rewards along the trail are plentiful.
You’ll soak in the most famous view of the trek, Mirador Las Torres, an unbelievable vista of the jagged granite peaks that photos just don’t do justice.
Note : If you want to make Day Three less daunting, spend the second night at Camp Chileno – this will cut 5 kilometers (3.1 miles) and considerable elevation gain off the start of your sharp incline.
A Brutal Morning
The rigors of Day Three will require an early start – preferably three or more hours before the sun comes up.
The goal of most trekkers is to witness the sunrise cast light onto the sheer towers of rock.
Apparently, this is quite the sight to behold, but I wouldn’t know. I slept through my alarm.
I chose to leave my tent wholly set up for my hike to the towers to save weight on the trail.
Doing so was risky, but ultimately everything was intact when I got back.
The hike up to the towers is 9.4 kilometers (5.8 miles) of calf-burning ascent, which challenged me more than any other section of the trek.
The further I climbed, the windier it got.
By the time I reached the towers, the wind was whipping small gravel into the air and stopping me dead in my tracks.
It was a real test of mental endurance but proved worthwhile in the end.

Mirador Las Torres
Here’s the O Circuit’s vivid Torres del Paine postcard moment.
Towers of granite shoot straight into the sky, cutting into the clouds.
An ice-cold lake below collects the runoff from Glacier Las Torres.
It’s a truly majestic view that makes you forgive the cold, windy, and draining ascent that brought you there.
All too briefly, I soaked up the view of the mirador until the wild weather (and my depleted snack supply) forced me back down the trail to Las Torres Camp.
I was thankful for my trekking poles – they took the pressure off my knees for the duration of the long descent.

Torres del Paine’s Backside: Where the W becomes the O
The crowds thin out considerably between Las Torres and Serón.
You no longer have to share the way with W Circuit hikers, so the trail opens up, and a sense of solitude sinks in.
I encountered more horses than humans along my walk to Serón.
The scenery quickly changes once you start the backside of the trek.
The trail is calm, flat, dry, and winding – a welcome break from the first half of the day.
The broad River Paine snakes its way through the open valley, guiding the path towards the next patch of earth to set up camp and recharge.
Setting up at Camp Serón
By the time I got to Serón, the wind had picked up yet again.
The forecast called for more powerful wind gusts of 100+ km/h (60 mph) throughout the night.
Because of my late start, I arrived to find a packed campground.
I set up shop in one of the last spots available, secured my tent, and braced for another intense and windy evening.
After a hot shower, I dozed off quickly and slept like a baby through a night of fiercely buffeting winds.
Day Four: Camp Serón to Camp Dickson
Distance : 18 km/11.2 miles Elevation gain/loss : 472 meters/1550 feet Highlights : Backside views of the towers, Camp Dickson

The hike from Serón to Dickson is far less challenging in terms of distance and elevation gain than the day before, but the weather will ultimately dictate the pace on this leg of the trip.
I didn’t get so lucky with the rain and wind on this stretch.
Preparing for Harsh Weather
After I packed up camp, I asked the staff at Serón about the forecast.
They told me to expect steady rain and wind throughout the day.
I moved my rain pants and jacket to the exterior of my pack for easy access and started towards Dickson.
The staff’s forecast would prove all too accurate.
Check the forecast whenever you have the chance .
I’m glad I did.

A Harsh Slog Over the Pass
Fairly quickly after Serón, you will encounter a short but exposed pass that is notorious for its high winds.
The elevation gain is mild compared to other portions of the O, but the infamous Torres del Paine weather can make this section quite formidable.
Heavy rain coupled with furious wind made for brutal conditions as I trudged through the most challenging weather of my entire trek.
Beads of water stung my face like needles as the powerful Patagonian gales whipped and cut in every direction.
Then, in an instant, the wind and rain stopped, and a vivid double rainbow opened up over the trail.
My frustration turned to amazement — a common occurrence on this trail.
After the pass, the trail flattens out on the descent to Dickson.
You’ll need to check in at the Coirón ranger station and present your passport and camping reservations.
There you will find covered picnic tables, making it a great place to stop for lunch.

Setting Up Camp at Dickson
The wind settled down after the pass, but the heavy rain persisted until I reached Dickson.
I arrived at camp depleted and soaking wet, itching to set up my tent and retreat to my dry zone.
There’s a large, open shelter at Dickson to hang out clothes and, in general, escape the elements.
I was among dozens of campers taking advantage of this dry oasis.
The refugios are also great places to dry out and recharge.
I thoroughly enjoyed flipping through the guestbook and reading the vivid memories left behind from Torres del Paine trekkers of years past.
The sites at Dickson are fairly spread out, with some very scenic spots available for the taking.
Once you set up camp, walk to Lake Dickson and soak up the magnificent views before night settles in.
Day Five: Camp Dickson to Camp Paso
Distance : 19.8 km/12.3 miles Elevation gain/loss : 1204 meters/3950 feet Highlights : Los Perros Glacier, John Gardner Pass

The eternal Patagonian beauty of Torres del Paine continues on Day Five as you reach the high elevation point of the trek, John Gardner Pass.
At 1200 meters (3900 feet) in elevation, this pass is (surprise, surprise) known for its heavy winds.
Try to reach the top anytime before noon, which is typically the calmest period.
Be sure to catch the sunrise over the mountains behind Camp Dickson before moving on towards Paso.
It was one of the highlights of my trip.
From Dickson to Paso, I had a perfect mix of stunning scenery, solitude, and superb weather.
It was my favorite leg of the trek.

Get an Early Start
Most trekkers are slow to leave Dickson.
The most common plan of attack is to make the manageable 11.8-kilometer (7.3-mile) hike to Los Perros campground and stop for the day, saving John Gardner Pass for the next morning.
Because of this, the early birds often have a quiet and uncrowded trail ahead of them.
I got such an early start and didn’t see another human for the first three hours.
Rise with the sun, and have Torres del Paine all to yourself.
Checking in at Los Perros
It’s mandatory to check in at the Los Perros ranger station, even if you don’t plan on spending the night.
Park rangers need to take down your information and give you the green light before you can proceed.
On dangerously windy days, rangers will not allow trekkers to attempt the daunting mountain pass.

John Gardner Pass
Luckily, I experienced none of the awful wind that I had read so much about.
The weather was perfect, and I was treated to spectacular views of the valley below as I slowly climbed in elevation.
Glacial streams and cascading mini-waterfalls were everywhere as I approached the pass.
Once you reach the top, you’ll get your first view of Glacier Grey.
A glimpse of this sprawling glacier is a sign of good things to come.
In my notes, I wrote that hiking John Gardner Pass “was like living in a dream.”
This stretch of trail will always be one of my favorite lifetime hiking memories.
I’m so grateful the weather cooperated that day.
The descent from John Gardner Pass is just as steep as the walk up, so prepare your knees for another tough test.
Descend slowly, use trekking poles if you have them, and do not rush this stretch of trail.
Setting up Camp at Paso
The facilities at Paso reminded me a lot of Camp Italiano.
Both campgrounds are free (thank you, CONAF) and offer bare-bones amenities.
Tent sites, toilets, and water — that’s pretty much the extent of it at Camp Paso.
Paso sits at a higher elevation than any other campground on the O Circuit.
Be prepared for significantly colder weather and a higher probability of wind and rain.
For me, night five was chilly and restless; sleep was hard to come by.
Day Six: Camp Paso to Pehoé Boat Terminal
Distance : 18 km/11.1 miles Optional hike back to ranger station : 17 km (additional)/10.6 miles (additional) Elevation gain/loss : 640 meters/2100 feet Highlights : Grey Glacier, Lake Grey

It’s time to put a bow on your Torres del Paine trek.
This final day on the trail offers tremendous views of the massive Grey Glacier and the impressive length of Lake Grey.
This last stretch of trail is breathtaking and relatively mild in terms of elevation gain — a perfect end to a most memorable trek.
It’s also possible to hike an additional 17 kilometers (10.6 miles) to turn your experience into the ‘Q’ Circuit.
This very flat stretch of trail runs from Paine Grande back to the administration office, cutting out the need to take the catamaran back across Lake Pehoé.
Exhaustion, sadness, excitement, joy, frustration — I ran through the gamut of emotions on Day Six.
What an utterly bittersweet day.

Grey Glacier
Day Six brings spectacular views of the imposing Grey Glacier, which is but a slice of the vast South Patagonian Ice Field that spans more than 4,700 square miles (12,200 square kilometers).
I recommend stopping at every possible lookout to soak up the enormous and humbling vistas.
Along the way, you’ll cross three suspension bridges that dip with each step and sway with every gust of wind.
Trust the bridge engineers and enjoy the ride.
You’ll soon reach Camp Grey, a great place to drop your pack, grab a quick lunch, and give your body a break.
There’s a short trail to a lookout above the shoreline, a great spot to snap a few more photos.
Completing the O Circuit in Torres del Paine
As you leave Camp Grey, you’ll climb one last incline, a modest 400 meter (1300 foot) gain in elevation.
This stretch of trail is part of the W Circuit, so it will be a bit more crowded than the backside of your trek.
Once you top out in elevation, you’ll slowly descend back near sea level as you return to Paine Grande and the Pehoé catamaran dock.
Once there, you’ll have completed the O Circuit!
It’s time to take off your pack and grab a beer at the nearby restaurant.
You’ve earned it.
Check the schedule and hop on the next Pehoé catamaran back to the administration office.
From there, find a bus or hitchhike towards your next destination.
Check the catamaran departures schedule in the Day One section of this post.

The ‘Q’ Trek: The Long Way Back
Not quite ready to say goodbye to Torres del Paine and the unrelenting beauty of Torres del Paine?
Extend your adventure by skipping the catamaran and walking your way back, as I chose to do.
By doing this, you’re turning the O Circuit trek into the ‘Q’ Circuit, and soaking in more of Patagonia’s splendor.
The trail back to the administration office was nearly empty for the entire 17-kilometer (10.6-mile) haul — I only saw three other people the whole time.
It was also very flat and straight, a huge relief since I was walking my longest day yet on the circuit.
The return hike along Lake Pehoé is spectacular. I turned around regularly to soak in the last precious views of Torres del Paine.
Few people choose to hike this extension, but I highly recommend it to anyone who still has fuel left in their tank.
It’s the cherry on top of a life-changing trek.

Hitchhiking to Puerto Natales
The bonus ‘Q’ Trek will eventually take you to a paved road that leads back to the administration office.
From there, catch a bus or post up at an intersection and hitchhike like I did.
I stuck my thumb out and had a ride within 10 minutes.
A Chilean man in his late 50s picked me up, and we chatted the entire way back to Puerto Natales while the Patagonian sun crept lower.
I couldn’t believe it — I’d completed the famous O Circuit in six exhausting and awe-inspiring days!
When I got dropped off on the edge of town, I limped to my hotel, sprawled onto a real bed, smiled exhaustedly at the ceiling, and drifted off to a night of deep sleep.
Torres del Paine’s O Circuit: Final Thoughts
For weeks after the O Circuit trek, I struggled to find a way to express what I’d just experienced.
Words may fail me, but travel doesn’t.
In Torres del Paine, I’d traversed alongside towering granite spires, immense glaciers, peaceful waterfalls, serene mountain lakes, and endured a torrent of unpredictable weather.
All the anticipation and preparation I put into that trek was repaid with a flood of profoundly vivid lifetime memories.
This incredible trek left me uplifted, humbled and hungry for more.
It will do the same for you.

Noel Krasomil
Affiliate Disclosure : Some of the links in this post may be affiliate links. If you click an affiliate link and make a purchase, we may receive a small commission at no extra cost to you. Affiliate links help support this website and keep it 100% ad-free.
70 thoughts on “O Circuit in Torres del Paine, Patagonia [2024-25 Guide]”
Hi ive read the whole article,it was great and gave me a lot of insight and pretty easy to follow,my only concern is that when i checked other blogs,most of them said that you cannot hikr the O circuit during winter months,and i would be so disappointed if i would found out once i get there that i cannot hike it,its my goal to do the whole circuit,who knows when i will be ae to go back there again so i wanted to shoot for the bigger hike,since i can only go on july(kids are off school) i cannot make adjustment of my schedule.I hope you can help me on how to plan my TDP trek as smooth as possible,it can get a little bit of confusing especially if you are reading a lot of articles.thanks in advance
Glad the article helped you! I know what it’s like to try and complete a trip through several blogs all at once. It’s frustrating! That’s why I tried to create an article where you don’t need to leave the page to figure things out. You comment made me realize that I need to address “Hiking in the Off-Season” in my article. I’m going to add that to the article as soon as I know more. Unfortunately, I haven’t hiked the circuit in the winter, so I don’t have any real life experience. A guy named Nehpet Loway commented on my link in the hiking group and told me that he did the hike in the winter. I would recommend finding him on Facebook and asking him about his experience. I’m guessing he’d be glad to help!
Here’s the best article I found on trail conditions in the winter: https://www.swoop-patagonia.com/chile/torres-del-paine/winter I’m guessing the ‘O’ Circuit is doable with a good GPS map (maps.me), but I can’t guarantee anything. Again, talk to Nehpet Loway. Don’t talk my word for it.
Aside from talking to him, here are three pieces of advice I can give you without having gone on the trek myself: 1. Don’t go on the hike alone! Bring at least one hiking partner along with you and preferably bring a rescue beacon in case you get lost or stuck. If you are having trouble finding someone, join the Backpacking South America Facebook group. 2. Prepare for very cold and possibly snowy conditions. This hike can stay below freezing with high humidity, which are not conditions to be taken lightly. Make sure you have the right gear. The good news is that traditionally, the winter is less windy. The wind was the hardest weather for my to handle. 3. Have a Plan B and Plan C in place. If you get to Torres del Paine and are stopped from hiking the trail for whatever reason, you need to have a backup plan. It would be a shame to make a trip all the way down there and get turned away with nothing else to fall back on. 4. Plan on starting your trip at Los Torres Campgrounds. Unless the boats to Paine Grande and Grey run in winter, this seems to be your only option. 5. Make an 8-10 day itinerary for yourself. Six days seems a bit ambitious in unpredictable and un-maintained winter conditions. Take your time and do it right.
I hope this helps! Let me know if you have any more questions.
wow, this post is really nice ……thanks for sharing …….
I was speaking with an official in the Vertice office this week and it is rumored that the CONAF Paso camp will not be open this coming season. Not confirmed, but rumored locally.
Thanks for the heads up, Terry! I appreciate it. I’ll keep an eye on the situation from afar and update the info if and when it becomes official. That’s a bummer they’re thinking about shutting Paso Camp down. Fewer campgrounds means it’ll be harder to book the trip (and more crowded on adjacent campgrounds).
G’day Noel. Thanks for this post. I am also planning the O Circuit in January, hoping to start from Paine Grande.
I am intending to get the bus in from Puerto Natales on Day one.
I know you took a tour bus that dropped you off at the catamaran. But do you know if there would be enough time once reaching Laguna Amarga and paying permit fees etc, then make the catamaran at Pudeto to Paine Grande, and then do the walk to Italiano, and up and back the Valle Frances in Day 1?
I figure if everything works on time, I might just catch the 1100 catamaran, and only start walking to Italiano once it gets there. If I miss the 1100 and have to catch the 1400 catamaran would there be enough time to walk up to Mirador Britanico and back to Italiano all in Day 1?
Hey, Keith! Glad you’re using my post to help start planning your trip. Sorry it’s taken me a few days to reply.
I think you should be able to pull off the 1100 catamaran if you take the 700 bus from Puerto Natales that will get you to the Laguna Amarga terminal at 900. That gives you two hours to make it from Laguna Amarga to the catamaran. There should be buses that will take you between the two. I did a mock search on BusBud.com to make sure this would work for you:
https://www.busbud.com/en/bus-schedules-results/4qu3wn/4qus3u?outbound_date=2020-01-15&adults=1
I recommend booking your tickets in advance, so you’re guaranteed a spot. I wouldn’t risk waiting until the last minute.
If you miss the 1100 and catch the 1400 catamaran, you should have enough time to walk to the mirador and back to Italiano. A lot of this depends on how strong/fast of a hiker you are. Any idea what your average pace is when you hike?
Keep in mind that, in Patagonia, the sun doesn’t set until 10:00 p.m. or later in the summmer, so you should have lots of daylight to work with. What month are you hiking?
With your itinerary, I think it’s completely possible to hike from the catamaran to Italiano, set up camp, hike to the miradores, and back to camp before the sun sets. You can always carry a headlamp if you’re worried about running out of daylight.
Let me know if you have any more questions! I’m glad to help.
THANK YOU so much for this very detailed post! I just completed my O circuit planning , and would love your feedback. I am planning on starting at Torres and waking up before dawn and hiking straight to Dickson, which is about 19 miles the first day. I am avid hiker and trailer runner/backpacker, but the possibility of rain and wind to delay my trip is a little concerning. Do you think this is a doable day? I appreciate your feedback!
You are very welcome, Julie! I’m glad you’re finding the guide useful.
Physically, I definitely think you can pull off that stretch of 19 miles on day one if you’re properly conditioned. From what I remember, there’s not a ton of elevation gain/loss during that stretch, so you should be good to go. I don’t think that’s what you’re worried about, though…
As far as the weather is concerned, there’s no telling what you’ll encounter. You could get lucky with a calm and rain-free day for that stretch as I did, or you could get assaulted by a constant downpour and insane winds like I experienced from Seron to Dickson. The weather in TDP is no joke, so be sure to prepare for it. My advice to you would be to make reservations at Seron just in case the weather derails your 19-mile day. Sure, it’ll cost you another $20 or so (if you book a campsite), but think of it as an insurance policy to help save yourself from a potentially miserable situation.
That said, I didn’t book any extra reservations along my trip. I simply dealt with the weather as it came. I got lucky with calm-ish conditions on my two longest days (20-miles and 24-miles), but I can’t imagine how brutal my experience might have been if the weather hadn’t cooperated.
Keep in mind that John Gardner Pass (between Los Perros and Paso) can get nasty and park rangers won’t let you attempt it if the weather is ominous. That could potentially delay you later on along your trip as well. (Not a common occurrence, but something to be aware of.)
You can check out all the TDP weather here: https://www.windguru.cz/542246 (the website is acting strange as I post this).
Let me know if you have any more questions! Hope this helped. You’re going to have a great experience.
Hi! Myself and three friends are planning on hiking the O Circuit in March 2020. We’re planning on doing the trek in 7 days, 6 nights, but are struggling a little bit with booking campsites, specifically through Vertice Patagonia. As far as we can tell, the website is forcing us to book all four of Dickson, Los Perros, Grey, and Paine Grande. We’d like to hike straight from Dickson to Paso without spending the night at Los Perros. It looks like you did this as well- did this provide any challenge when you were trying to book sites? It currently won’t let us book unless we have four different nights for the four different sites. Also, we’re planning on bringing one four person tent. Do you think this would work based on the platforms/set ups you saw at the campsites? Finally, were you able to buy fuel/white gas anywhere in the park or did you purchase it all beforehand? Thank you SO much for this post- it’s been invaluable to us in our planning process!
Thanks for commenting! I ran into the exact same problem you did when booking sites, but I found a way around it. I had to send Vertice Patagonia an email (in Spanish) to tell them that I only needed to book a campsite for Dickson because I’d be hiking at a faster pace. They replied asking me to send them proof of my camping reservations for the night before and after, so I did, and they allowed me to book only one campsite (Dickson) through email. It took them a couple of days to reply to my initial email, so keep that in mind.
Here’s the email I sent them, word for word:
Hola, necesito un reservación para acampar al sitio de Dickson para la noche de 6 de Marzo. Ya tengo mi tienda y todo que necesito. Dígame que necesito hacer para la reservación por favor. Solo necesito un reservación para Dickson en la noche de 6 de Marzo y nada mas.
Muchas gracias!
– Noel
After a little back and forth, I had my site at Dickson booked!
Email me if you need any help translating/writing any emails to Vertice.
If memory serves me correctly, you shouldn’t have a problem setting up a four-person tent anywhere. I slept in a three-person tent every night and didn’t have any issues finding a flat spot to set up camp. That said, the later you arrive at camp, the fewer campsites you’ll have to choose from, so you may not find your ‘ideal’ spot with a larger tent every night. Start hiking early and make it a goal to arrive at camp at a reasonable time every day.
I never set up on an actual tent platform, although I do remember seeing some along the way. Can’t tell you with certainty if they’d fit a four-person tent or not.
Don’t try to buy fuel in the park, definitely purchase it beforehand. Grab it from Puerto Natales, El Calafate, or wherever else might be your ‘home base.’ Those towns will have plenty of backpacking shops.
Glad you’re finding the post useful. Let me know if you have any more questions!
Noel, My two son, 29 & 26 years old would like to backpack Patagonia 10 – 14 days with a private guide and cook. I am 68 and would like a porter to carry my pack, my sons are capable of carrying there own packs. We are an active family living in Vail Colorado the past 30 years. I’m thinking February / March for us to travel. I can be reached on my cell at 970-390-0627 to discuss details. Thanks, Bob Borchardt
Hey, Bob. I would love to discuss all of this with you – I am very open to the idea. I just called and left you a voicemail, and I’m looking forward to hearing back from you. Thanks for reaching out!
Do you recall if there any campsites where you have to set up on a platform vs on the ground? On the Fantastico Sur website, it indicates “platform” for Francés, Los Cuernos, and Chileno. I know you didn’t camp at those refugios but I’m wondering if there’s no suitable flat ground there or something. Mostly wondering so that I can bring fishbone tent anchors as well as tent stakes.
From what I remember, some campsites offer platforms with tents that are already set up (these will generally cost twice what a normal campsite or an empty platform would cost) or empty platforms that you can set your tent up on. All of these campsites also had plenty of ground camping available as well. Platforms would be best for those with freestanding tents who are expecting harsh weather and wouldn’t be a great option for those with trekking pole tents.
Great post. Your enthusiasm is very infectuous and the pictures do a fabulous job too in fuelling my eagerness to do this circuit soon, maybe in 2023. I had not heard of that specific trail before, only about the national park.
Patagonia has always fascinated me. Ellie & I have been talking for years about going there, and ideally combining it with a very short trip to Antarctica, if possible (I wish it weren’t so pricey…).
So, if I understand your other post (about getting paid for doing what you love) correctly, then you did this trail twice, right? And you did that easier trek on the other side of the border as well. You are one lucky feller…
What is the fastest you are allowed to hike the O-Trek. I know there is a minimum # of nights they make you book- but I can’t find the number
That’s a great question… I don’t know. I do remember having to message one of the companies directly to book fewer nights than they were allowing. Their website only had booking options available for multiple campsites/refugios all at once. They made it happen for me; didn’t take long. Best of luck!
Can’t seem to book CONAF sites. Other blogs say you need to make an account on the CONAF website ( https://parquetorresdelpaine.cl/ ) but I can’t see how to do that either. Any advice?
Shay, try this link , then click the button that says “Comprar o Reservar.” You should see an option to book for Parque Nacional Torres del Paine. I don’t have time to go through the signup process to see if it works right now, but I hope it works for you! Best of luck.
Please note that we tried to follow your route, however, it is only possible to start the O trek from Seron. We were lucky that the campsites were not busy as Vertice and Fantasico Sur allowed us to make changes.
Billy, I’m sorry to hear that you ran into issues with the route I recommended on this post. Can you please be a little more specific about “it is only possible to start the O trek from Seron”? What was your specific itinerary and where did you get caught up? If requirements have changed since I last hiked the ‘O’ in March of 2020, I’d love to know so I can update my post accordingly.
Sorry for any trouble you had out there, and thanks for your input.
Great article with lots of insights! I did this 6 days trail in 1989 (32 years ago), I was extremely fit after an intensive militery service, and now I’m coming back with my son for 8 days of the same trail. I was wondering if you’d do it again, would you still go fot 6 day or do it calmer?
Hey, Alon! Congrats in advance on making your second trip to Torres del Paine! I’ve actually hiked the ‘O’ twice… the first time was my 6-day hike and the second time I was leading a 10-day tour. The only reason I hiked in in six days to begin because I was having trouble getting all the permits lined up. I think eight days is the perfect amount of time to be out on the trail! If you’re traveling that far, give yourself a couple of extra days to stop and smell the roses. Cheers! Let me know how it goes.
Hi, doing some research for 2023, wondered if you came across rodents in the campsites and how you stored your food?
Hey, Karen! I didn’t encounter any rodents during the ‘O’ Circuit, nor do I remember anyone else talking about it. I did read online about people encountering mice, however. I stored my food outside of my tent in mylar bags that I found on Amazon. Hope this helps!
Hi! Thanks for posting all the information for the O Circuit and Huemul Circuit. I am planning on hiking both next early November in that order. I see that you did Huemul first on your trip. Would you recommend that order or do you think it matters? Thanks!
Hey, Jen! I’m glad you found my guides useful. You’re going to have a hell of a good time backpacking in Patagonia. I’d probably recommend hiking the Huemul Circuit first, since it’s about half the length of the ‘O’ Circuit. Maybe give your body a few days to recover, and tackle the ‘O’ Circuit after that? I figure you could knock out the smaller one first, rest, and head into the ‘O’ with your hiking legs beneath you. Let me know if you have any more questions!
This is the best info on the trail I have found! Thank you for sharing! I was about to book then saw this and loved your 9-day itinerary. I am doing a ‘modified Q’ – taking the Bus Sur to Camping Pehoe to take in Mirador Condor, spend 1 night there, then walk 7km up to the ferry dock the next morning to Paine Grande and continue with the O circuit, counterclockwise. I didn’t see anything on the booking sites that would not let me do that (per your update on having to start at Central). Any red flags you can see on my plan? Would love your feedback!
Thanks for the kind words, Karen! I’m glad you found my guide useful. I don’t see any red flags with your itinerary, but definitely do some more digging into whether or not you’re allowed to start at the Pehoe boat dock. Refer the the comment above you from Billy, and you’ll see that he was apparently turned away. I emailed him privately and he confirmed that he was only allowed to start at Seron. Anyhow, I hope you have a wonderful trip. Let me know how it goes!
Hi, I connected with Fantastico Sur and shared the order of my campsites – no issues. Your sample itineraries are all possible still. eg Starting at PG, do the W circuit then continue with the O and exit at PG to do the Q section and end at Administration. The only restriction / requirement is counterclockwise on the O circuit. I also booked directly with Vertice & FS instead of Booking Patagonia or Hike Torres which have pre-set W and O routes. Yay! I’m 99% set!
Hell yeah, Karen! Let me know how the trip goes. I’d love to hear about it once your done.
Safe travels!
Hi Noel, great post. This information is very handy. We are looking into completing the O-circuit next season (2023). While I feel comfortable with the booking/logistics and physical ability to complete the mileage, I still have terrain reservations. I have an irrational fear of heights and am a bit concerned with suspension bridges and cliff ledge/overlooks coupled with high winds. Have you had any experience with this situation within your group? I’m trying to give myself some peace of mind before I take the leap and book. Cheers!
Hey, Michelle! I’m glad you find my post useful, and I’m excited for you to visit Torres del Paine in 2023. I totally understand your fear of heights, especially on suspension bridges and cliff ledges/overlooks. That said, the suspension bridges are extremely sturdy and well-made. I have never crossed them in high winds, but I’m 100% sure they would stand up to the task! I can’t recall any sketchy ledges/overlooks, either, so even if/when there are high winds, you won’t be in any danger. Take very deep breaths as you cross the bridges, face your fears head on, and you’ll be good to go. Hope this helps! Let me know if you have any more questions.
Awesome post, it helps so much! Couple questions I have:
I am planning on doing this trip with a group of 3-4 (myself included) in March 2023. When viewing the new Fantastico Sur website that it redirects you to, it seems that it will cost $37 a night for a campsite on ground (double site 1 person). In your post you said it would be $11 per night. Am I looking at the right reservation place? Is it $37 a night?
Also, we are hoping to all sleep in the same tent, a 3-4 person tent. Does this mean we can just reserve one “campsite on ground” through Fantastico Sur for each night, or would we have to reserve 3-4 campsites? If we want to bring 2 tents, would we have to reserve 2 “campsite on ground” per night, or could we put both tents on 1 campsite?
I’m also confused on what Fantastico Sur means when they say “campsite on ground double site 1 person” vs “campsite on ground double site 2 person”. I’m looking for the cheapest campsites for the 3-4 of us, and don’t need any accomdations (we’ll bring our own tent, food, etc.).
Thanks for the help and clarification, and thanks once again for such an awesome and straight forward post about the O trek!
Thanks for reaching out, Wyatt! Glad you like the post.
Eek, it looks like the prices have skyrocketed since I updated the post for last season. It’s crazy that they have tripled! Supply and demand at work, I guess… I’ll make sure to update the post again with current prices when I have a chance. Thanks for pointing this out.
To answer your second and third questions: I’m not sure, but it seems as though you’d need to book two “Campsite on ground – Double site two people” if you plan on having four people. When checking in with Fantastico Sur, they’ll probably want to see that your reservations correspond with the amount of campers you’ll have. I’m not sure, though, so my best advice would be to call/email them to get a more definitive answer. Sorry I can’t be of more help in this regard!
Good luck in your trip planning! It’ll all be worth it.
Feel free to reach out with more questions.
Awesome, thanks for the reply Noel!
Couple more questions:
Do you think leaving Puerto Natales on the 7:15 am bus and hiking your Day 1 itinerary from Las Torres to Seron is reasonable in a day? Or should we camp at Las Torres that first night after travelling to the park, then hike to Seron the next morning?
Where is the administration office at? Is it near Las Torres?
Thanks again, Wyatt
Shoot I also meant to ask the question:
Do we have to buy a reservation into the Torres del Paine park through the CONAF website? Is this mandatory to even be in the park?
I’ve just had contact with “contactchile” and “erratic rock” (they do the daily informational stuff @ their hostel). They told me that it’s still possible to start the O-Trail from Paine Grande – just because you’ve written a friend told you its only possible from las Torres. Just as an Information for all the other trekking-people out there 😉 Kind regards, Mevion
Thanks for the heads up, Mevion! I’ll update the article soon with this new information.
Based on your experience, would you be able to tell me how many gas canisters will be necessary to bring for the 8 nights in the park? for one meal at each campsite I gess.. I know you did it in fewer days, but I would have an idea though adding one or two more uses.
You should be good to go with only one canister. If you do run out of fuel, which I doubt you will, there are plenty of extra canisters that have been left behind at the refugios. Don’t worry, you’ll be good!
Thanks for the useful info. I am planning a trip for March 2023 but can’t find any way to book the CONAF sites. Patagonia Travel seemed to charge a hefty mark-up over the direct sites for Fantastico Sur and Vertice, so I’d prefer not to use them. Any thoughts? Thanks, Tony
Hmmmmm… Just poking around and it looks a little more confusing to book those sites than it once was. I found this page , which seems promising. Does that help at all?
Hi, Great article! Thanks for posting. I’d like to go straight from Central to Dickinson on my first day. Will the park rangers allow you to show that you first campsite is Dickinson on the first day? (I have the rest of the sites booked as well.
You shouldn’t have any problems whatsoever, as long as you stay exactly where you’re supposed to stay on a given night and have all of the necessary paperwork on hand for anyone who may ask. Have a fantastic trip, Christian!
Thank you for the inspiration and the nitty gritty details!
You’re welcome, Kathryn!
Hi Noel, Thanks for the helpful article! I’m of thinking of doing the same 19.9 miles hike from Camp Las Torres to Serón and hiking Mirador Las Torres in the middle. How long would that take? You said you started late, what time did you start and did you get to Serón in the dark? I’m wondering what’s the latest I can start from Camp Las Torres.
It depends how fast of a hiker you are, but I imagine this would take anyone pretty much all day long. Luckily, the sun stays out for a long time in Patagonia during the summer. Get an early start, keep a good pace, and you’ll be good to go! Have fun out there.
Really helpful guide, thank you! We booked our flights to Argentina pretty late and are now looking for campsites in late March. Since both Frances and Cuernos are booked out, we thought about hiking straight from Paine Grande to Torres Central (while skipping the Mirador Britanico). Any thoughts on that? Should be around 24km of relatively flat profile according to my calculations.
Thanks and best regards Lukas
Though it would be a bummer to miss Mirador Britanico, I think you could pull this off pretty easily if you’re an experienced backpacker in decent hiking shape. Glad the guide helped you out! Let me know how your trip ends up.
Hey, Thanks for such useful info. Planning to do O-circuit in feb/March 24. I am planning to rent the tent but carry sleeping bag & pad. If I rent the tent, do they automatically set up the tent or do we need to also request/pay extra to set up the tent at every campsite? Thanks Pav
Hey, Pav! You’re going to love the ‘O’ Circuit. From what I remember, they should have the tent set up for you when you arrive. Have fun out there!
Great article and very helpful. I’m not sure you’re the guy I should be messaging, but I’m stressed about my trip to Patagonia. Some of the websites say that we are able to book for next year (2024) but none of the main sites or third party sites have allowed me to book. I’ve seen forums of people saying they booked WhatsApp. I’m worried when the sites actually open all the spots will be filled. I have tried to whatapp some of these people/companies and all I get are bots. Any insight?
Thanks mike
Hey, Mike! These hikes have been notoriously hard to book over the years, and unfortunately it doesn’t look like it’s getting any easier. Hopefully that’s not by design to lessen the demand on the trail. Since the season just ended a couple of months ago, it might be too early in the year to book some of these 2024 hikes? Sometimes, these websites only open up reservations up to 6-9 month in advance, meaning you might need to wait for them to open up. That’s just a random guess on my end, but it’s the best I can do for now. Best of luck!
How much approx. does it cost for a porter for 12 days? Are they available in each campsite?
Hey, Giovanna. I have no idea what a porter costs, but I do know that they exist. I saw several on my last trek of the ‘O’ Circuit, but don’t know what agency they were working with, maybe you should check out Erratic Rock ?
Wow! This post is impressive. I hope to complete the O Circuit to mark my 50th birthday, but I will be finding a guide and hopefully a porter. I know I can do this trek with a day pack, but full gear would be too much for me. Your detail and thoughtfulness in documenting this adventure is appreciated.
You’re welcome, Jenny! Thanks for the kind words. Keep in mind, I need to update the prices for lodging along the trek, so what you see at the moment isn’t accurate. I think the ‘O’ Circuit is a great way to spend your 50th. Have fun, and let me know how it goes!
Hello Noel, Thank you for the amazing web page about the “O” route. We’re planning a hike either on O or W for this season. I admit to a little nervousness about doing the O as we are mid-60s people with good hiking experience but limited training opportunity leading up. But my question is a simple one: if you stay at a campsite, do you have access to the restaurant at the refugio, and do you need to reserve it separately? (I’m very food-focused 🙂 )
Hey, Rachel! If you stay at a campsite, you should have access to the restaurant at the refugio, but be aware that many of the restaurants require that you book a meal/reservation in advance. So, be sure to research this in advance. Many of the refugios don’t accept walk-ins and fill up months in advance! Have fun.
hey Noel, Any some suggestion/input. I am planning to bring salted nuts, dried fruits (dates, goji berriesm, raisins, etc), bars and oatmeal in addition to dehydrated meals from the US to Chile for the “O” circuit. I am reading conflicting reports on google on this if this would be allowed even if declared or not. Would it be OK to bring them or buy them in either Arenas or Natales? Thanks!
I’ve flown in twice with dehydrated fruit, nuts, bars, and freeze-dried meals and had no issues with getting in. From what I remember, I declared the food I was bringing in (which all were okay to bring in, according to Chile’s department of agriculture ) and explained that my food was for a backpacking trip to an agent upon entry. It obviously helped that I spoke Spanish. If you run the pages from the link I sent you through a translator, you should get a fairly accurate idea of what is allowed and what isn’t. Always declare what you’re bringing in, and don’t try to sneak it past anyone. Best of luck!
hey Noel, How much cash to bring for the O circuit? secondly, is USD fine or do we need Chilean pesos? Thanks a bunch for all your help! Pavan
Hey, Pavan. Tough call on exactly how much cash to bring without knowing the exact style of your trip. From what I remember, there are multiple ATMs located throughout the park and many of the refugios/cafeterias accept credit cards for purchases. I’d recommend bringing Chilean pesos over USD. Have fun out there!
Hey Noel! Thanks so much for all of this information! Question: if I only have enough time to do the Humuel circuit or the O circuit (not both), which would you recommend? I’m an avid backpacker and I’m thinking of going to Patagonia with a friend in the beginning of March 2024. Thanks!
Thank you so much for this very helpful blog. Was wondering if I made reservations for the campsites or refugios and wasn’t able to make the reservations due to weather, would I be able to continue and would the reservations transfer to another day? Think I need to brush up on some spanish before I embark on this trip!
Hey, Huich! Thanks for reaching out. From my experience hiking the ‘O’ Circuit twice, the staff at the campsites are pretty flexible when it comes to slightly modifying dates for campsites. I imagine refugios are a bit more rigid. But please don’t rely on this happening; this is just my gut feeling. It has been four years since I last hiked the trail. And, yes, definitely brush up on your Spanish! Take care, and have fun.
First time seeing this place and wow it is beautiful! Would love to hike there!
Leave a Comment Cancel reply
This site uses Akismet to reduce spam. Learn how your comment data is processed .
Kedarnath Trek – A Complete Guide
Table of Contents
Where is Kedarnath?
Kedarnath (3,553 metres, approximately) is a Hindu temple dedicated to Lord Shiva located in the Rudraprayag district of Uttarakhand. It lies just below the base of the mighty Kedarnath peak (6,940 metres), and is the First Kedar to be visited in case you are staying true to the sequence of the Panch Kedar circuit. The other four being Madhmaheshwar , Tungnath , Rudranath, and Kalpeshwar .

I want to drive there myself. What is the motorable route?
Haridwar – Rishikesh – Devprayag – Srinagar – Rudraprayag – Augustmuni – Kund – Guptkashi – Sonprayag – Gaurikund
Distance from Haridwar to Gaurikund: 237 km
The motorable road ends at Gaurikund, but you’ll need to park your vehicle at Sonprayag. No private vehicles or even taxis from outside are allowed to go beyond Sonprayag . The only option is to board one of the shared taxis that specifically run from Sonprayag to Gaurikund. This more than sorts it out in case you are driving here yourself.
The road is more or less well-maintained except for a few patches that fall under the landslide zone. Road from Guptkashi to Sonprayag is patchy at best.

I want to opt for public transport.
- Take a bus or shared taxi (Max) from Haridwar/Rishikesh to Sonprayag
- Take a shared taxi (Max) from Sonprayag to Gaurikund
Buses, both local and of Uttarakhand State Transport, and shared taxis start plying from Haridwar/Rishikesh to Sonprayag as early as 4 am.
That being said, you should know that all the local buses take their own sweet time and multiple halts. All the buses and taxis will drop you at Sonprayag. After this, there is no other choice but to board another shared taxi to Gaurikund.
It should cost one person 1000-1200 bucks, Haridwar to Haridwar.
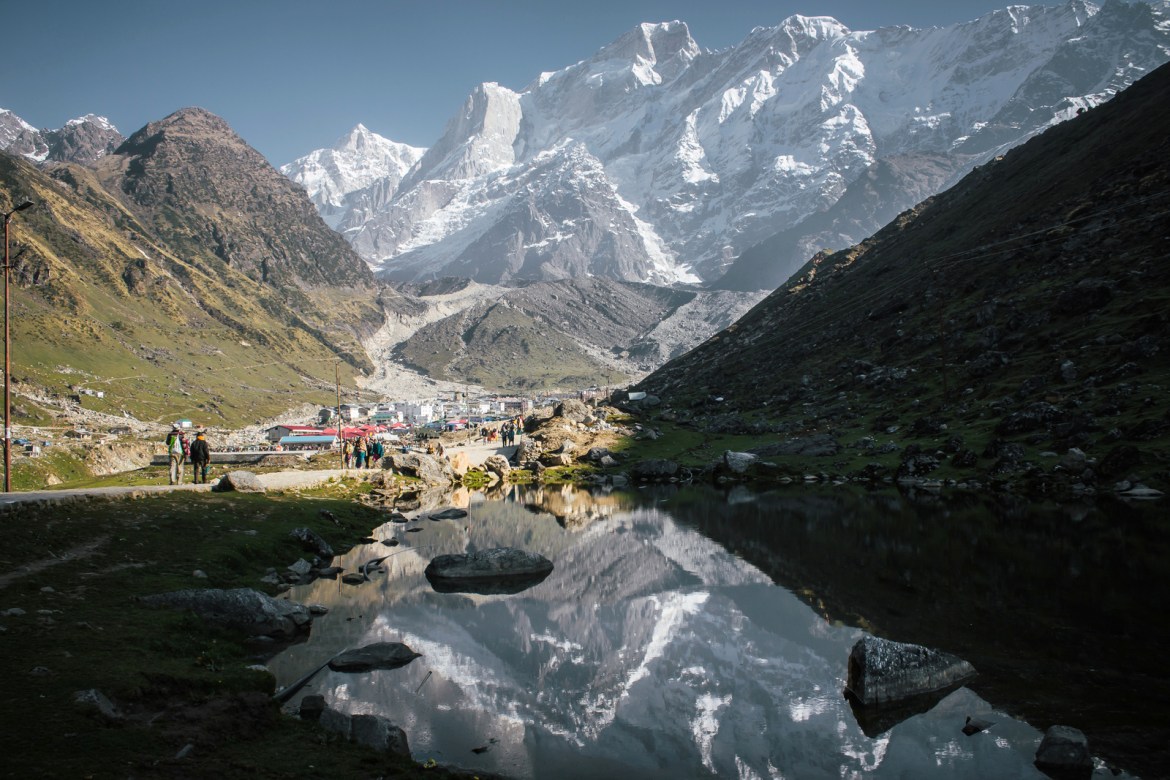
How long is the trek? How is the trek route like? Do I need a guide? Is there any Medical Aid available?
Gaurikund – Rambara Bridge – Jungle Chatti – Lancholi – Base Camp – Kedarnath (16 km)
It is a well laid out trek all the way through, paved and pretty straight forward.
From Gaurikund to Rambara Bridge (about 7 km) it is gradual yet easy ascent.
It is a steep, gradual ascent after crossing the bridge at Rambara, all the way to the base camp, where it flattens. The last 1 km or so is an easy walk to the temple.
You do not need a guide. Horses, Mules, Palanquins, and Porters are available at Gaurikund. It’s better to book them at Gaurikund itself; you will find many at several points on trek too but they will ask for a price higher than the altitude you will be standing at.
Medical and First Aid facilities are available at several places including Lancholi and Base Camp. There even is a small government hospital just 200 metres from the temple. And police check posts on several points.

Where to stay, eat, and how much will it cost?
There are many Lodges, Ashrams, Guest Houses, and Camps running from Gaurikund to Base Camp that provide cheap accommodation, both private and government run, including GMVN Lodges at Lancholi and Base Camp . The prices can vary from INR 500 per room to INR 2000 , depending on the rush of pilgrims. While the rates shoot up in May-June (peak season), they also go drastically low in the months of September-October (the best time to do this trek).
However, don’t expect anything in terms of luxury; expect basic rooms, warm quilts, simple but good food. There are plenty of tea/coffee shops on the way that also offer food. Expect to pay around INR 100 for a hearty meal for one person .

Is it possible to do Gaurikund-Kedarnath-Gaurikund in one day?
Yes. It depends on your fitness. We had set out at around 2 am and were back by 5 pm the same day, from Gaurikund to Kedarnath and back. Approximately 35 kilometres in 15 hours, which includes 4 hours of wait in the queue outside the temple (it was May). I’ve been told time and again this is a small feat. I am not proud of it. We were behind schedule and had to make up for it. I don’t like to test my speed against distance. Time to me is mostly irrelevant. I like to walk easy. Sit in silence. Maybe lie down. Take a gander at the grandeur. Look into the soul of these mountains. Feel a beat or two. Click a few pictures. Start again. Repeat again. Must we tie self-made accomplishments to places such as these?
This is the gist of it. If you have any further queries, feel free to leave a comment below or contact me through Facebook or Instagram . I’ll get back to you as soon as I can. Stay safe, travel responsibly!

Type your email…

Photographer by day. Travel Writer by night. And a Copywriter in between.
You may also like
The pahadi organic – a true-blue pahadi experience, kalpeshwar trek – a complete guide, tungnath trek – a complete guide, char dham yatra – finding devotion in destruction, pindari glacier trek – ringing in the new..., deoria tal – of epics, myths, and the..., deoria tal trek – a complete guide, chandrashila – why this should be your first..., binsar – romancing old-world wilderness and the himalaya, madhmaheshwar trek – a complete guide, leave a reply cancel reply, 22 comments.

Very crisp and adequately informative.
Thanks, Papia. 🙂

Hey Bro, Thanks for this description..!!
Thanks for reading, bro.

Hi Mohit..Beautifully written! To the point! I was planning this trek in September this year..Had a couple of doubts…If I start at say 5 in morning from Sonprayag..Take a shared taxi to Gaurikund. how long does the shared taxi take from Sonprayag to Gaurikund? If I start at 5 from Sonprayag, what time can I expect to start the trek from Gaurikund? I plan to reach the temple by say afternoon and stay overnight..Is there any place I can book on the spot to stay overnight and begin my descent the next day? I’ll be traveling solo! Thanks!
Hi Jatin. Thank you for reading! 🙂
- The distance from Sonprayag to Gaurikund is approximately 4 km. It shouldn’t take you more than 10 minutes to reach Gaurikund. However, this will be a shared taxi and it will not start until it can accommodate all the passengers it has the capacity to. So, I’d say add another few minutes. That being said, September is not the peak season; there shouldn’t be any hassles.
You can start the trek from Gaurikund the moment you reach there.
There are plenty of Lodges, Dharamshalas, and Guest Houses around the temple. Finding a room, on the spot, will be no trouble at all.
All the best! 🙂

Hi Mohit. This is an apt description for anyone who wants to go to Kedarnath. I’m planning to go in early October. Just had a couple of queries. Is it better to take a shared taxi from Rishikesh to Sonprayag? Rather than a bus which might halt at every place and as you said will take own sweet time to reach. Don’t mind paying a little extra for taxis if required. Also, apart from the registration for the yatra which can be done online is there any other registration or fitness certificate required before starting the trek? Thanks!
Hi, Rakesh. Thank you for reading. Shared taxis are relatively faster but almost always cramped. Buses are more breathable. Personally, I prefer buses. No fitness certificate is required.

A very detailed guide to Kedarnath trek, Mohit! I read your blog very carefully to understand your experience and other important things about Kedarnath like how will it cost. Thank you for sharing this article I will visit this place with my friends and family.
Thank you for reading, Manoj. 🙂

Very succinct and a treat to read. I loved the combination of pictures clubbed with crisp text for an amazing experience. Great work brother. Can I have a few of these pictures for one of my videos.
Thank you for appreciating. 🙂

The colour tone is just just just awesome.
Thank you for appreciating.

Hi mohit We r planning to go in d month of may .. I ve one clarification.. 1.Can we start trek around 12 pm? Bec we ll reach gowrikunda @11am. 2. Can we stay middle of d trek. Is any accommodation on d middle?
- You can start anytime.
- Please refer to ‘Where to Stay, Eat, and how much will it cost’ section on the post. All the best.

Hello Mohit , For an ordinary people is easy trek or very diffcult?
Hi. The trek itself is not difficult. It might seem a little long and tiring. But should be manageable as long as you take it easy. All the best.

Dear Mohit – All guides are so well written – Every thing at one place – I have saved all these for my preparations when I go
Thank you! Glad I could be of help. All the best.

Hi Mohith, Thank for the blog. Any good suggestion for stay at Gaurikund and at Kedarnath top? Rakesh
Hi. Thank you for reading it. It’s been 6 years since I wrote this. New properties will have come up by now. Even if you don’t have booking, you’ll be able to find one to your liking on the spot. Thank you!

Everything You Need to Know for Hiking the W Trek in Torres Del Paine National Park
- Last Updated March 17, 2024
- Chile , South-America
Rising almost 2000m from the Patagonian steppe, the jagged granite spires of Torres Del Paine dominate this region of Chile and make for one of the most jaw-dropping sights in South America. This Unesco Biosphere reserve is one of the finest national parks in the world, covering 181,000 hectares of turquoise lagoons, glacier-fed waterfalls and verdant forest.
However, It’s Torres Del Paines rocky peaks that draw most visitors to the park. The three sheer peaks of Los Torres and the unmistakable outline of Los Cuernos are almost a pilgrimage site for hikers from around the world who flock here to walk the famous ‘W’.

Getting to Torres Del Paine from Puerto Natales
During the high season from October to April, 5 different bus companies provide daily trips from Puerto Natales to Torres del Paine, stopping first at Laguna Amargh (2hr journey) where you will have to hop of the bus to pay your park entry fee (CH$25,000 for foreigners or CH$35,000 if staying for more than 3 days as of Jan 1 2020; note that this can also be paid at the bus station in Puerto Natales), then onwards to Pudeto (3hrs) where you will leave the bus if you are catching the catamaran to Paine Grande, before finally reaching the administration building (4hrs 15).
Return tickets between the park and Puerto Natales cost CH$15,000. During the high season between September and April, the buses leave Puerto Natales at 7am, 7.30am and 2.30pm, getting to Laguna Amarga at 9am, 9:30am. and 4.45pm respectively and Pudeto at 10:00am, 10.30am and 5.30pm. For the return leg of the journey, buses pick up from Pudeto at 1pm, 1.30pm and 7pm and from Laguna Amarga at 2pm, 2.30pm, 7.45pm each day.
Check Bus prices and availability to Torres Del Paine
It is worth noting that between the park’s busiest months, Bus Sur also run a 6.40am service that reaches Pudeto at 8.45am, in time for the first catamaran of the day.
What is the W Trek?
Although there are myriad hiking routes in Torres Del Paine National Park, the most famous and most popular is the W, a 4 to 5-day hike that takes in the park’s most spectacular sights: from the iconic spires of Mirador Las Torres and the enormous Grey Glacier to the steep trail along Valle Francis and the contorted, multicoloured horns of Los Cuernos. It runs up three valleys, creating the W shape that gives it its name. In each of those valleys lies one of the iconic sights of the park
With a route of 80km (50 miles) the W is moderately difficult, mostly on gentle terrain but with the occasional climb up to 800m. With that in mind, you don’t necessarily have to be an experienced hiker, but it helps to be reasonably fit, especially as you will be hiking with a backpack, sometimes for up to 8 hours in a day.

When is the Best Time to Hike the W?
Accommodation on the w trek.
You have two options of where to stay while hiking the W: In a refugio or on a campsite. Deciding which is best for you is generally a toss-up between ease and cost. While refugios offer an extra level of comfort, they can be much more expensive than camping.
A refugio is basically rustic hostel-meets-hotel and they are dotted around all the major stopping points on the trek. They’re open year-round and have dorm-style rooms, shared bathroom facilities with hot showers and a basic, on-site restaurant/canteen and bar. The rooms are generally warm and clean with comfortable beds and the refugios themselves often have open and sociable communal areas where you can relax in front of a roaring fire after a hard day of hiking.
There is also the added bonus of not having to haul camping equipment, bedding (although I recommend bringing your own sleeping bag to avoid the extra rental cost at the refugios), and food with you throughout your trek. All refugios provide meals on a full-board (breakfast, dinner, & a packed lunch), half-board (breakfast and dinner) or meal-by-meal basis. The food is expensive, even by Patagonian standards, so there is the option of using the refugios kitchen to cook your own food if you wish.
Most refugios also have campsites with separate facilities if you would prefer to camp out of the main building.

If you prefer a wilder experience in which you get to sleep under the stars and stare at the park’s incredible views through your doorway, you can camp at certain points along the W Trek’s trail. At refugio campsites you have the option of sleeping in pre-erected tents, meaning you don’t need to carry your own equipment. Sleeping mats and warm sleeping bags are available to rent (although I would recommend bringing your own as they don’t add much extra weight) to keep you cosy. As these campsites are often on the grounds of nearby refugios, you have access to toilets, warm showers, and the communal spaces of the refugios where you can enjoy a hot meal or cook your own dinner.
There is also a free campsite at Italiano, run by the National Park authority (CONAF). You will need to bring your own tent and facilities are a little basic, but they do have on-site toilets, running water and a cooking shelter. Note: You still have to book this free campsite in advance.
BOOKING YOUR ACCOMODATION
With Torres Del Paine being one of Chile’s most popular attractions and the W-trek being the most desirable hiking routes on the South American continent, it’s safe to say that booking your accommodation in advance – even up to 2 months in advance during the high season – is essential. All refugios and campsites can be booked online but to complicate matters slightly, there are 3 different companies that you will potentially have to use, depending which camping spots you choose: CONAF, Vertice Patagonia, and Fantastico Sur.
To check which campsites you will need to book, check out my hiking itinerary lower down this page.
Fantastic Sur run Chileno, Frances, Los Cuernos and Las Torres and their booking site can be found here . The booking system is fairly simple. You just select your dates and then choose whether you would like to camp or stay in a dorm room using the drop-down boxes. After this, you can add additional extras such as sleeping bags and mats, full-board, half-board, or sperate meals. If you have any issues with the booking, you can email them at [email protected] or drop into their office in Puerto Natales.
Vertice Patagonia run both Paine Grande and Grey. Their booking site can be found here . The process for booking with Vertice is slightly different from the one for booking with Fantastico Sur. First, you will need to select the number of people, set your nationality to ‘another’ if you are not Chilean, and the currency to US dollars. On the next page, you will select the W-trek option and then on the following page, you can choose which accommodation you would like to book. If you follow my itinerary below, you will need to select the Grey and Paine Grande option, however, there are multiple combinations as well as the ability to book each one separately. If you have any issues, you can contact them at [email protected] .
The only free campsite on the trek route is Italiano, managed and maintained by the National Park authority (CONAF). Although the site is free, you still need to make a booking in advance via the CONAF booking site . Make sure to print out your reservation and bring it with you.
What Equipment do you need?
If you plan on spending as little money as possible when hiking the W, you will need to bring plenty of camping equipment to avoid having to rent it at the refugio campsites. However, if you choose to stay in the dorm rooms or pre-erected tents, you will obviously avoid having to bring your own tent. I still recommend carrying a sleeping mat and sleeping bag as otherwise, you will have to pay to rent these each night despite forking out for a pre-erected camping spot.
Please remember that whatever you pack you will have to carry with you on your back for up to 7 hours a day so try to pack as lightly as possible.
Camping Essentials : Tent, sleeping bag, sleeping mat, small camping stove and gas canisters, a lightweight set of pans and cutlery, a bowl and a mug.
The weather is incredibly changeable in Patagonia, meaning that you can encounter almost every possible combination of sun, rain and snow that nature can throw at you over the course of just one day. I’m not joking: on one day of my hike, I went from hiking in shorts and a t-shirt in glorious sunshine to having to navigate my way through a blizzard wearing as many layers as possible. Even on a bright clear day, the winds can reach up to 100km/h.
The key to surviving Torres Del Paine’s climate it layering. Try to pack a mix of thin under-layers and warmer, insulated outer layers.
Clothing Essentials : Zip-off convertible hiking trousers x 2, t shirts x 5, warm jumper, fleece jacket, waterproof jacket, hiking socks x 5, underwear x 5, hiking leggings or long johns, gloves, a warm hat, scarf and a lightweight travel towel.
Hiking Essentials : Good quality walking boots, hiking poles, a 50 – 60 litre rucksack for your main gear, a 15 litre daypack, headlamp or torch, and a water bottle.
Additional Items : Sunglasses, suncream, phone, phone charger and universal adapter, padlocks, compact first aid kit, toiletries, and a good camera.
If you are spending an extended length of time travelling around Patagonia or the South American continent, it’s understandable that you may not want to carry a full range of camping equipment with you for your entire trip and will have to get some when you reach Torres Del Paine. If this is the case, you have 3 options: Buy equipment; Rent equipment in Puerto Natales; Or rent equipment at each campsite in the park.
As Puerto Natales is heavily tourist-focused and you should have no problem finding all of the equipment that you need in the myriad hiking and camping shops. However, for high-ticket items such as tents and sleeping bags, you may be better off purchasing them in Punta Arenas (if you have come from southern Patagonia) as the city’s duty-free status reduces the prices significantly.
I chose to rent all of the equipment that I needed from Erratic Rock in Puerto Natales. Not only is this a fantastic hostel, but they also host a daily seminar, nicknamed the 3 o’clock talk. You can join their expert guides each day at 3pm for a cup of coffee and seminar that covers everything you need to know about Torres Del Paine. This includes current weather conditions, accommodation, equipment, trail routes and transportation.
Erratic rock don’t allow reservations on gear and so operate on a first-come-first-serve basis, so you may just have to hope that they have everything you need. Their prices are below and listed as Chilean pesos per day.
Sleeping bag – CH$3000; Sleeping mat – CH$1500; Trekking poles x 2 – CH$3500; Waterproof jacket – CH$3000; Backpacks – CH$4000; Down Jackets – CH$2500; Gloves – CH$1500; Headlamp – CH$1500; Cooking kits for 3 people (Stove, bowls, cups, cooking pot, & water bottle) – CH$4000

Food on the Trek
Although a hot meal at the end of a hard day of hiking may sound tempting, food in refugios can be incredibly expensive, even by Patagonian standards. They are generally set menus and can be pre-booked online when booking accommodation. Many of the refugios do have shops where you can buy basic food supplies such as rice, pasta and sauces as well as snacks but the prices of these are also inflated.
I recommend bringing enough food for the entire trek, packing plenty of non-perishable items that are easy to carry and cook such as rice, pasta and cans/jars of sauces. Noodles, powdered soups and pasta pots will go a long way to keep you fed and energised throughout the hike. Cured meats or sausages also make a great addition to liven up the meal slightly.
For breakfast, bring some sachets of quick-cook porridge and instant coffee. You will not need to bring any bottles of water with you as you can re-fill bottles in the park’s rivers and streams or at the refugios.
Note: You are only able to use stoves at certain spots within camp sites. If you think you will need a warm coffee or tea while hiking, boil water in a morning and take an insulated flask with you.
Meal Costs at Refugios and Campsites

What Route Should You Take?
The W Trek can be walked in two directions; from east to west, starting at Refugio Las Torres and ending at Refugio Paine Grande; or from west to east, starting with the catamaran ride across lago Pehoe and ending with a spectacular view of the morning light bouncing off the spires of Las Torres at sunrise.
The hike from west to east is the most popular as it offers superior views and ends at the park’s most iconic viewpoint.
ITINERARY OVERVIEW
5 days / 4 night itinerary for the w trek in torres del paine.
Day 1 : Puerto Natales to Grey Day 2 : Grey to Paine Grande Day 3 : Paine Grande to Frances/Los Cuernos Day 4 : Frances to Chileno Day 5 : Chileno, La Torres and back to Puerto Natales
DAY 1 ITINERARY
Puerto natales to grey.
Distance : 11km/6.8 miles Time : 3 – 4 hours
7am : Take the bus from Puerto Natales to Torres Del Paine National Park. You will have to hop off the bus at the park entrance to pay the entry fee (CH$35,000) but try to hop off quickly to get to the front of the queue and pay quicky as you will need to re-board the bus in order to get to the next stop.
10am : You should arrive at Pudeto sometime between 10am and 10.30am giving you enough time to head to the ferry office and buy a ticket for the boat ride over to Paine Grande. The ferry is operated by Hielos Patagonicos and costs CH$18,000 one-way. If you have enough time before departure, you may be able to visit Salto Chico waterfall but if not, the boat ride in itself offers spectacular views of the Cuernos del Paine’s horn-shaped peaks. The usually leaves around 11am but timetables can change depending on the weather conditions.
You should arrive at Paine Grande between 11.30am and 11.40am and from here you will begin your first day of trekking.
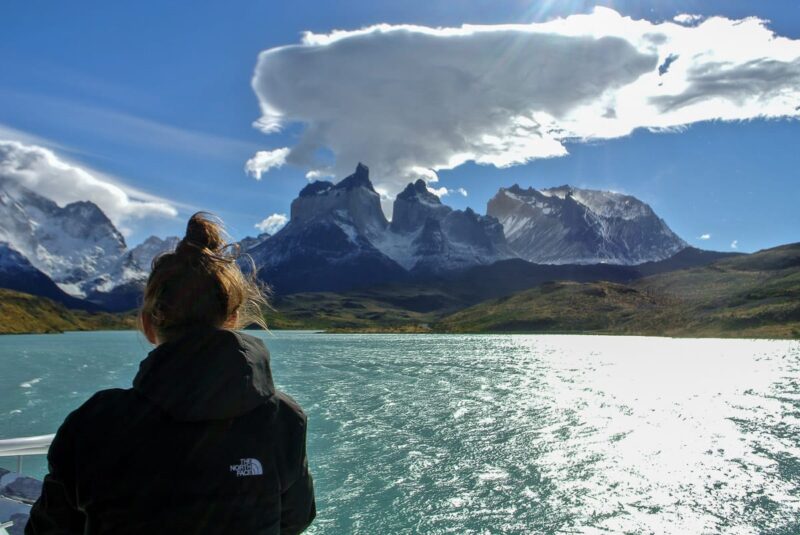
If you want to Hike the W in 4 Days / 3 Nights...
It is possible to do the hike in one day less by hiking from Paine Grande up to Glacier Grey and back in one day, but this will mean a long day trekking 22km. You will be able to set up camp in Paine Grande before beginning your hike and just take your daypacks with you – just be sure to take any valuables. Upon reaching the Grey Campsite, you will be continuing along a short trail path to the first rocky outcrop with a spectacular view across Lago Grey to the glacier. This viewpoint is only around 1km from the campsite but as the path between Grey and Paine Grande closes at 4pm (you are not allowed to begin your hike after this time), you won’t really have time to hike further north to any of the other viewpoints.
The entire hike will take around 6 hours and with the time spent admiring the glacier, you will probably arrive back at Paine Grande between 6pm and 7pm, ready for the next day of hiking (day 3 in this itinerary).
From the pier at Paine Grande, the clearly marked path initially leads north through scrubland before meandering into Quebrada de Los Vientos, the windy gorge, after an hour or so (I can confirm that it was very windy when I hiked this path). From here you will catch your first glimpse of Lago Grey with enormous chunks of pale blue ice bobbing in its water with the glacier itself peeking out behind the almost black shape of La Isla Nunatak.
Continuing the walk alongside the lake, you will enter an eerily silent lenga wood. Part of this area was badly damaged by the forest fire that sadly ran rampant through the park on 27th December 2011. The devastating fire only affected 7% (about 40,000 acres) of the park’s area but went on for nine days before it was finally extinguished by the fire brigade. Unfortunately, some of the affected vegetation will take 200 years to reach maturity again, but the charred, contorted remains of the trees do add a haunting, melancholic beauty to the area.
You should arrive at Refugio y Camping Grey around 3 or 4pm, giving you chance to set up your tent before cooking dinner if you have opted to camp, or relax with a well-earned coffee or glass of wine if you have pre-booked a dorm room and dinner. While it is still light, you may want to take the small trail that forks off from the main path and head over to the glacier viewpoint on the shore of Lago Grey (1km walk).
DAY 2 ITINERARY
Grey to paine grande.
Distance : 19km/11.8 miles Time : 7 hours
Starting your hike at 8am, you will head north from Grey, towards the viewpoints that overlook Glacier Grey. You can leave the majority of your equipment and gear at the campsite or refugio as and just take your daypack and valuables as you will be looping back to Grey again on your way towards Paine Grande.
Walking alongside Lago Grey, you will eventually reach a series of rope bridges suspended over gorges that offer spectacular views of the Glacier and, on a clear day, the entire ice field. The icy ramparts tower as high as 100m in some places and the glacier stretched the entire 6-mile breadth of the lagoon, grey in both name and colour, only brightened by the shimmering turquoise of the glacier and the bobbing icebergs that navigate its waters.
This section of the hike is around 3.5km each way, meaning that you should arrive back at Grey before lunch, just in time to retrace your steps from the previous day and walk the 11km trail back to Paine Grande.

DAY 3 ITINERARY
Paine grande to frances or los cuernos.
Distance : 20.5km/12.7 miles Time : 7.5 hours
Leaving Paine Grande at around 8am, you will begin a 2-hour walk eastbound along the scrubland bordering Lago Pehoe, before catching a glimpse of the blue waters of Lago Skottsberg with the towering 3000m peak of the Paine Grande massif on your left-hand side. After around 2.5 hours and crossing a wobbly bridge, you will reach Italiano, a free campsite where you can leave your bags with the ranger before continuing the hike.
The steep path leading up Valle Frances, the middle section of the W, can either be a breeze of a slog, depending on the weather conditions but the 1-hour section leading to Mirador Frances isn’t too challenging no matter the weather. Here you will find spectacular views of Glacier Frances and Glacier Los Perros and it is the perfect point to stop for a quick lunch beside the turbulent Rio del Frances. On my W-Trek, this is the point I had to stop my journey up Valle Frances: blizzard-like conditions had left me freezing cold and the trail had become dangerous so I had to turn around.
Terrible weather isn’t uncommon in this section of the park, but if you have a clear day, continue onwards through the woods towards Mirador Britanico. It is an additional 3.5km/1.5 hours each way but the lookout is one of the best in Torres del Paine, giving you a close-up view of Los Cuernos. Ensure you have hiking poles as the steep walk down can be a little treacherous.
If you are staying at Campamento Italiano, you can set up for the eveing and relax, otherwise, it is another 30-minute walk along the shore of Lago Nordenskjold to Frances. If you feel like you will have the energy to do it, you can book to stay in Refugio y Camping Los Cuernos, a further 2-hour hike along Lago Nordenskjold. This will make your walk on day 4 significantly shorter and they even have double cabins available if you fancy a quiet night away from a dorm.
DAY 4 ITINERARY
Frances to chileno.
Distance : 17km/10.6 miles Time : 5 hours
If you are staying at Italianos or Frances, you will need to start your penultimate day of hiking at 8am. If you have opted to stay at Los Cuernos, you can treat yourself to a well-deserved lie-in, leaving the refugio at 10am to begin your walk.
The hike begings with a long, meandering walk along the lake through hilly scrubland and across small glacial streams before you turn northwards into Valle y Rio Ascencio for the uphill, 2-hour slog to Chileno. You will have an early start the next morning in order to see the towers of Mirador Las Torres at sunrise, so ensure that you get an early night
DAY 5 ITINERARY
Chileno to las torres & back to puerto natales.
Distance : 13km/8 miles Time : 6 hours
To see the sunrise at the famous Mirador Las Torres, you will have to wake up well before dawn at around 4.30 to begin your walk pre-5am. Just take a small bag of warm clothes and food, as well as a headtorch, for the steep 2-and-a-half-hour ascent to the towers alongside the Rio Ascendio. The final part of the climb is a 1-hour long scramble across boulders and rocks, emerging in front of the magnificent Torres, their peaks reflecting in in the still waters of Laguna Torres. When I visited in March, sunrise was at 7.30am.

If you feel up to it, you can hike further north through the aptly named Valle de Silenco (1 hour each way) to the little-visited Mirador Japones, otherwise, the hike back to Chileno to collect your backpacks and equipment is a little easier than the morning’s ascent, taking just 1.5 to 2 hours.
The W Trek ends with the walk back down Valle Ascencio to Hotel Las Torres (2 hours; 5.5km). From here, you can either catch 2pm shuttlebus (CH$5000) to Laguna Armarga in order to board the 2.30pm bus back to Puerto Natales or walk the extra 1.5 hours to Laguna Amarga Ranger Station yourself just make sure you arrive in time to get one of the buses.
Alternatives to Hiking the W
For more experienced hikers, the O-Circuit is a challenging seven to ten-day hike that includes the entirety of the W, with the addition of a trail that leads walkers further north, around the back-side of the Torres. This allows you to catch glimpses of the park’s much-quieter outer reaches as well as have bragging rights over anyone that has hiked the W.
While the circuit starts and ends at Paine Grande, some people decide to stay on the shuttle bus past Lake Pehoe until it reaches the Park Administration building, adding a scenic 5-hour walk onto the circuit, which is called doing a Q.
If a multiday trek isn’t for you, each of the W’s sections can be split into day hikes while staying over night at some of Torres Del Paine’s luxury lodges or eco accommodation spots.

Dave McClane
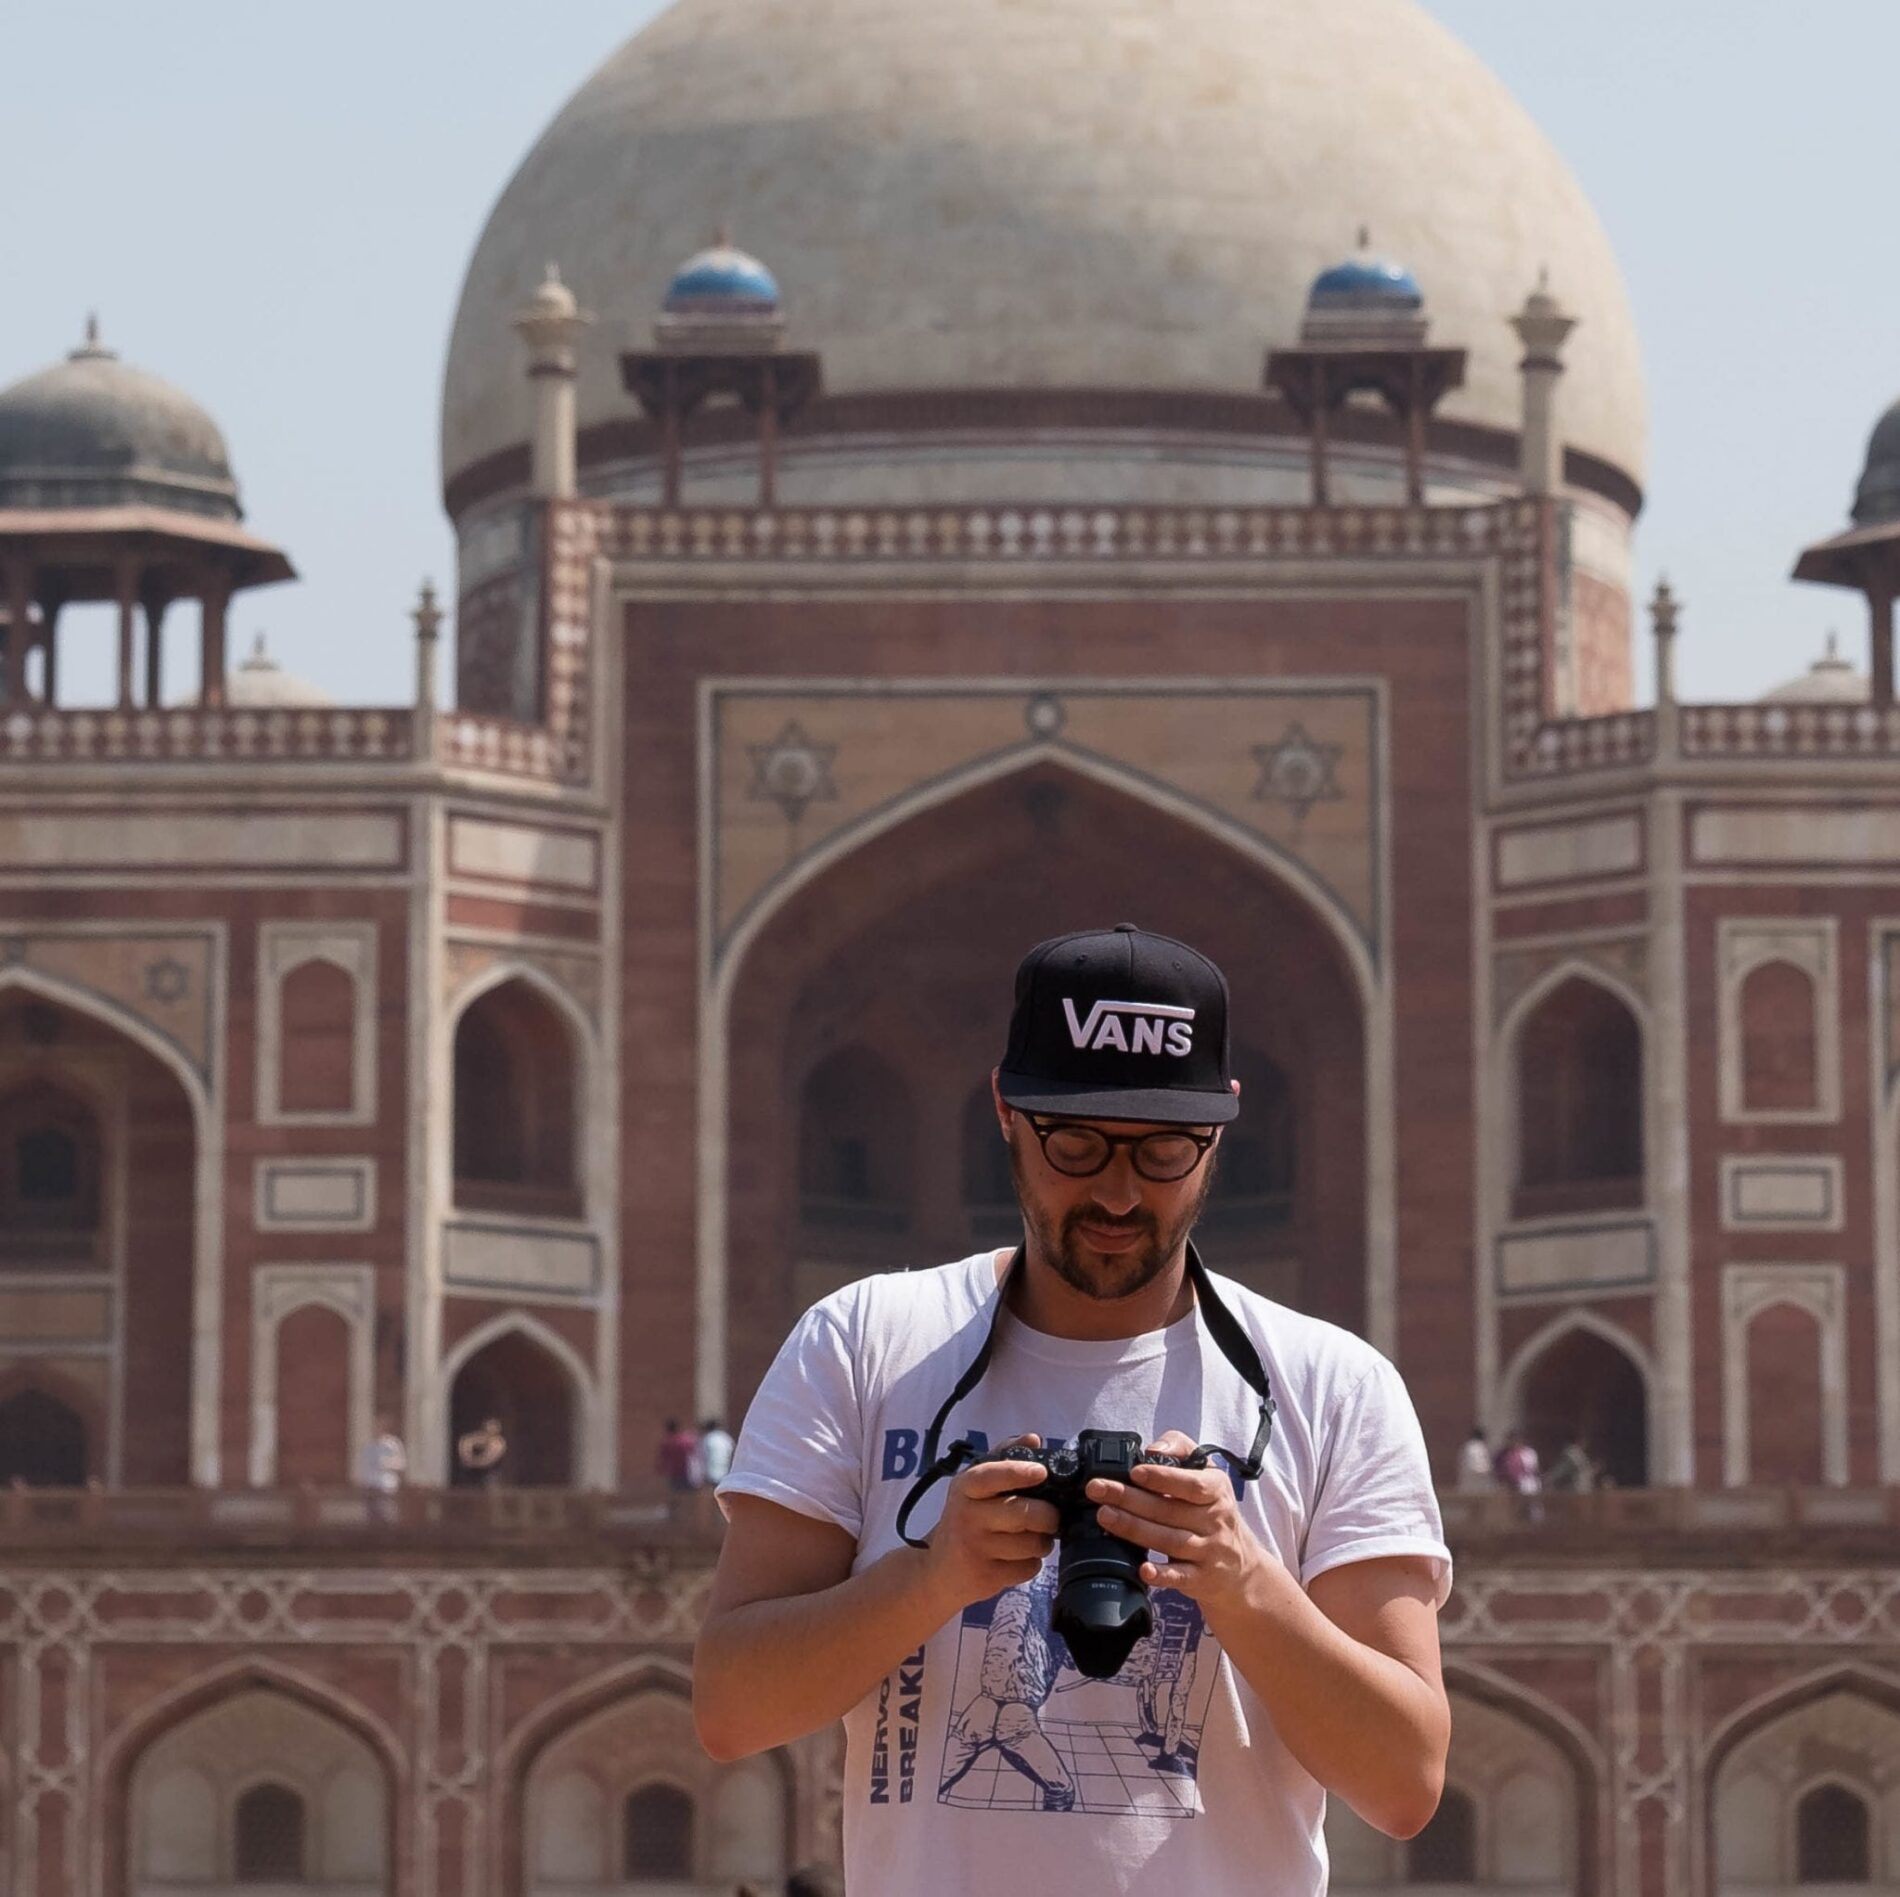
David McClane is a photographer and travel writer based in Leeds, UK. Since first picking up a camera on a yearlong journey through Central and South America in 2014/2015, He has carefully documented his travels through almost 50 countries.

A Guide to San Pedro de Atacama, Chile

Patagonia Itinerary: 3 Weeks in Argentina and Chile

10 Beautiful Day Hikes in Torres Del Paine National Park
Patagonia Packing List: Hiking the W Trek in Torres Del Paine
2 responses.
Hello David, thanks a lot for posting about your Patagonia W Trek trip. I found it very helpful as my wife and me are preparing to visit the trek in October this year. I have one question on the routing: Is it possible to start the hike at the “left top” of the W near Refugio Grey? On your map it looks like there is a boat trip available to get there. It would enable us to not walk the same way twice between Grey and Paine Grande. Thanks a lot in advance, Best Nils
Hi Nils. I’m glad that you found the post helpful! As far as I am aware, you can only take the boat across to Paine Grande, meaning you will have to hike the section between there and Refugio Grey in both directions (at least this is what I had to do). I think the boat trip shown on the map doesn’t actually stop near Glacier Grey.
Leave a Reply Cancel reply
Your email address will not be published. Required fields are marked *
Subscribe to my Newsletter
Sign up for my newsletter to get a monthly dose of beautiful photography and travel stories that are bound to fuel your next adventure.
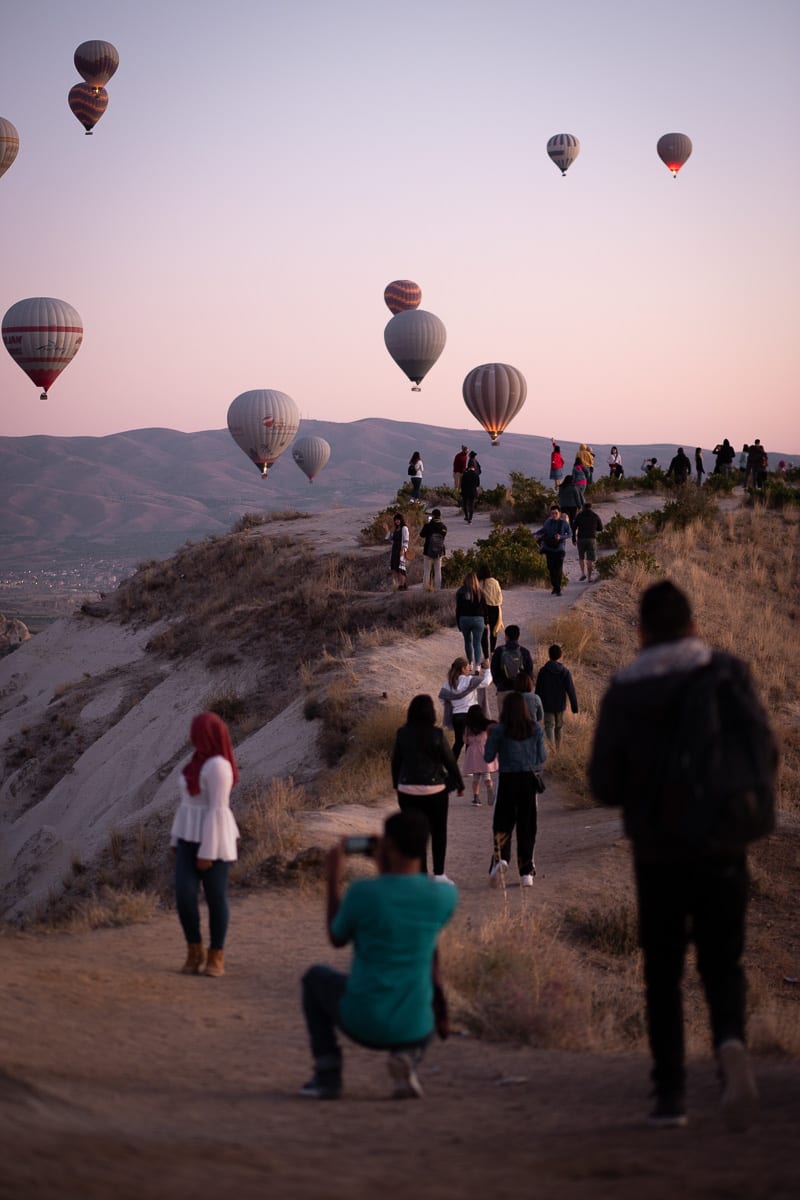
Copyright © 2024 Man Vs Globe
- [email protected]
- +51 084 287653
- +51 933 839 757
Inkayni Peru Tours
- Alternative Hikes
Machu Picchu
- Destinations Peru
- Festivities
- LARES TREK TO MACHU PICCHU: THE DEFINITIVE GUIDE TO AN EXTRAORDINARY ROUTE
If you are planning a visit to the picturesque city of Cusco and seek an unforgettable experience that encompasses a journey to Machu Picchu, while immersing yourself in Andean culture and residing with the local inhabitants of the Cusco Andes, then the Lares Trek is an absolute must!
The Lares Trek offers far more than mere natural splendor and physical exertion. It is a profoundly enriching human encounter that grants you the opportunity to unravel the true essence of the Andean populace. This captivating route seamlessly intertwines awe-inspiring natural landscapes with genuine interactions with the local communities, who diligently preserve their cultural heritage. Here, adventure and local hospitality are intertwined, bestowing upon you an unparalleled connection with the region’s culture and its people.
In this blog post, with Inkayni Peru Tours , we cordially invite you to embark on an exploration of the hidden treasures of this lesser-known yet remarkable route, which promises an exhilarating and meaningful expedition. Each encounter with the local inhabitants will be a cherished gem, eternally etched in the depths of your heart.

Lares Trek offers an indescribable experience, not only for its landscapes and Inca ruins, but also for its ability to take us away from mass tourism and into the most authentic corners of Peru.
What is Lares trek?
The Lares Trek is a captivating hiking route offered by Peru, holding a prominent position as the third most renowned trail, following the well-known Inca Trail and Salkantay Trek . If one seeks a less crowded experience in visiting the iconic Machu Picchu , this option proves to be ideal. Throughout the trek, individuals will encounter awe-inspiring landscapes in the majestic Andes Mountains and have the opportunity to fully immerse themselves in welcoming rural communities, thereby gaining an authentic and enriching cultural and natural experience.
What further distinguishes the Lares Trek is its affectionate nickname, “the route of the weavers” . Along the journey, individuals will engage with local communities who have diligently preserved ancient weaving traditions for centuries. They will witness the meticulous creation of exquisite textiles using ancestral techniques passed down through generations. This unique aspect adds an extraordinary dimension to the hiking experience, enabling one to gain knowledge and appreciation for the cultural heritage of the Peruvian Andes.

During the Lares Trek, you will visit charming rural communities where ancestral weavers continue to create beautiful textiles using traditional techniques.
The History of the Lares Trek
- The origins of the Lares Trek can be traced back to the era of the Inca Empire in the 15th century. During this period, the Incas established an extensive network of roads that connected their significant ceremonial centers and cities. These roads served strategic purposes, facilitating the transportation of goods, communication, and military mobilization.
- The Lares Trek, although not as renowned as the Inca Trail (Qhapac ñan), was one of the secondary routes utilized by the Incas and played a significant role in linking the Sacred Valley of the Incas with the citadel of Machu Picchu. Besides being a means of transportation, the Lares Trek also served as a pathway for cultural and commercial exchange among various communities.
- Following the arrival of the Spanish and the decline of the Inca Empire in the 16th century, the ancestral roads and trails lost their significance and were forgotten for many years. However, more recently, with the rise of tourism, interest in the cultural and natural heritage of the Cusco region has been reinvigorated, leading to the rediscovery of the Lares Trek as a less traveled yet equally captivating alternative for reaching Machu Picchu.
- Today, hikers have the extraordinary opportunity to tread the same paths that the Incas traversed centuries ago, unveiling the history, natural splendor, and cultural opulence of the region. The Lares Trek has become a favored choice for nature enthusiasts and adventurers seeking an authentic experience in the Peruvian Andes. By embarking on this route, travelers can revel in the breathtaking landscapes, immerse themselves in the vibrant local culture, and become part of the historical tapestry that has molded this unparalleled region of the world.
Why is the Lares Trek important?
The cultural significance of the Lares Trek holds great importance for both visitors and local communities residing in the Peruvian Andes. This particular trekking route stands out due to its ability to provide an authentic and enlightening experience, where cultural elements intertwine with the region’s natural beauty and the warmth displayed by its people.
Connection with the Andean culture
The Lares Trek offers individuals the chance to fully immerse themselves in the cultural richness found within Andean communities . The local inhabitants, who have diligently preserved their ancestral traditions and customs, extend a warm welcome to visitors. Whilst embarking on this trek, hikers can acquire knowledge about the historical background, cosmovision, handicrafts, and traditional cuisine, thereby allowing for a profound connection to be formed with Andean culture.
Valuing nature
The Lares Trek meanders through awe-inspiring landscapes and protected natural areas. This experience allows travelers to cultivate a heightened sense of respect and appreciation for the natural environment, promoting awareness about the crucial need for its conservation.
Cultural exchange
The Lares Trek route serves as a prime opportunity for genuine cultural exchange . Hikers are granted the chance to share their own experiences and knowledge with the local people, who reciprocate by imparting their wisdom and insights regarding nature and their immediate surroundings. This encounter proves to be mutually enriching, fostering a sense of mutual respect and admiration.
Preservation of traditions
Responsible and sustainable tourism practices implemented along the Lares Trek can have a positive impact on preserving cultural traditions. By valuing and supporting local culture, visitors contribute to the safeguarding of age-old practices and the transmission of knowledge across generations.
Economic Empowerment
Tourism along the Lares Trek route presents economic opportunities for local communities. The income generated through tourism-related activities enables the development of community projects, including improvements to infrastructure, education, and healthcare. This, in turn, empowers communities, boosting their autonomy and capacity to preserve their culture and territory.

A true cultural exchange is possible through the Lares Trek.
Where is the Lares trek?
The Lares Trek, also referred to as the “Trail of the Weavers”, is a captivating hiking route situated in the Cusco region of Peru. This awe-inspiring hike takes place to the east of the Urubamba mountain range and traverses a magnificent section of the renowned Sacred Valley of the Incas.
Where does the Lares Trek start?
The starting point of the captivating Lares Trek is typically Pumahuanca, located at an elevation of 3,150 meters/ 10,334 feet above sea level . From this enchanting location, adventurers embark on their journey through the breathtaking landscapes of the Peruvian Andes, in search of a one-of-a-kind cultural and natural experience in the renowned Sacred Valley.

Hikers, tour guide, cooks and chef ready to start the Lares hike.
Where does the Lares trek end?
The 4 days Lares Trek to Machu Picchu, a captivating and educational hiking trail through the magnificent landscapes of the Peruvian Andes, concludes in a grand manner in Lares, situated at an elevation of 3,200 meters / 10,498 feet above sea level. Typically, from Lares, trekkers will embark on a van journey to Ollantaytambo and subsequently board a train to the picturesque town of Aguas Calientes (the nearest town to Machu Picchu).

Hot springs of Lares, in the Lares trek
Lares Trek to Machu Picchu + Short Inca Trail 5D/4N concludes at the magnificent Inca citadel of Machu Picchu . You will arrive at the iconic archaeological site of Machu Picchu, one of the 7 wonders of the modern world, after hiking through landscapes and immersing yourself in the local culture for several days. From the Sun Gate (Inti Punku), you will be able to appreciate the wonder of this historic site and enjoy an incredibly panoramic view.

Tourists at the entrance to Inti Punku (Sun Gate).
What is the highest altitude on the Lares Trek?
Throughout the Lares Trek, explorers attain their utmost elevation at the Sicllakasa Pass, positioned at a remarkable altitude of 4,830 meters/ 15,846 feet above sea level . This lofty mountain pass presents hikers with extraordinary panoramic vistas of the majestic Andean summits and neighboring valleys, endowing them with an unmatched feeling of achievement and communion with the natural world. Overcoming this physical trial is gratifying and, concurrently, offers an unparalleled opportunity to fully grasp the magnificence of the Peruvian Andes.

Hikers at the highest point of Lares trek “Sicllakasa Pass” (4,830 meters/ 15,846 feet) proudly looking at their progress on the hike.
LARES TREK VERSIONS
Lares trek, has two versions:
- Lares Trek to Machu Picchu 4D/3N
- Lares Trek to Machu Picchu + Short Inca Trail 5D/4N

The Lares Trek takes its name from the Lares Valley, a remote region in the Peruvian Andes, where small communities still maintain their ancestral traditions.
4 DAY LARES TREK TO MACHU PICCHU
The Lares Trek to Machu Picchu 4D/3N is an exhilarating hiking route that allows you to explore stunning lakes and indigenous Quechua-speaking communities nestled in the elevated Andes. These villagers, who have inherited the occupation of farming and weaving from their ancestors, diligently uphold a conventional mountainous way of life.
If you are in search of a rewarding and significant journey en route to Machu Picchu, the 4-day, 3-night Lares Trek presents an optimal choice for immersing yourself in the bountiful natural wonders and rich cultural heritage of the Peruvian Andes, all within a shorter yet equally awe-inspiring itinerary.

Map of the Lares Trek to Machu Picchu 4D/3N version
Lares Trek Day 1
Lares trek day 2.

A small ritual is performed at the Sicllakasa pass (the highest point of the route on the second day).
Lares Trek Day 3
Lares trek day 4, 5 day lares trek to machu picchu + short inca trail.
The Lares Trek + Short Inca Trail 5D/4N will allow you to experience a unique fusion of nature, culture and archaeology. On your way to the majesty of Machu Picchu, you will enjoy an adventure that will connect you with the hidden treasures of the Peruvian Andes and provide you with unforgettable memories.
Lares Trek + Short Inca Trail Day 1

Camping in Puyoc, first day of the Lares Trek.
Lares Trek + Short Inca Trail Day 2
Lares Trek + Short Inca Trail Day 3
Lares Trek + Short Inca Trail Day 4

Kilometer 104, starting point of the Short Inca Trail.
Lares Trek + Short Inca Trail Day 5

Machu Picchu is the culmination point of Lares Trek to Machu Picchu + Short Inca Trail 5D/4N
How hard is Lares Trek to Machu Picchu?
Depending on the physical condition of the individual, the altitude at which the trek is located, weather conditions, and other factors, the Lares Trek to Machu Picchu may have a moderate to challenging level of difficulty.
The difficulty of the trek is influenced by several key factors:
Elevation: During the Lares Trek, significant altitudes are reached, exceeding 4,830 meters (15,846 feet) at Sicllakasa Pass. The high elevation can lead to symptoms of altitude sickness or soroche, such as headaches, nausea, and fatigue, particularly for individuals who are not acclimatized.
Terrain: The Lares Trek route entails traversing uneven trails, mountainous and slippery terrain, with steep ascents and descents in certain sections. It is necessary to be in good physical condition in order to fully enjoy the trek.
Climate: The weather conditions during the Lares Trek are unpredictable, especially during the rainy season (November to March). Hikers must be prepared to encounter varying weather conditions, including rain and cold.
Duration: The Lares Trek typically spans a period of 4 to 5 days, with daily hikes lasting approximately 6 to 8 hours. The duration and physical exertion required may pose a challenge for some individuals.
How long is the Lares trek in kilometers?
During the exhilarating Lares Trek, adventurers are presented with the opportunity to traverse a distance ranging from 31 kilometers, depending on the particular version of the Lares Trek they select. This noteworthy distance spans multiple days of hiking through awe-inspiring landscapes situated within the Peruvian Andes Mountains and the captivating Sacred Valley. Along the journey, hikers will navigate through lush valleys, cross pristine rivers and streams, and ascend mountain passes that provide indelible panoramic vistas. The trek itself constitutes a rewarding and demanding endeavor, enabling travelers to establish a connection with nature and the Andean culture as they make their way towards the majestic Inca city of Machu Picchu.
- In the Lares Trek to Machu Picchu 4D/3N you will cover approximately 31 kilometers.
- In the Lares Trek to Machu Picchu + Short Inca Trail 5D/4N you will hike approximately 41 kilometers.
How long is the Lares Trek in miles?
During Lares Trek you will cover 19 miles.

Machu Picchu is closer with each step you take on the Lares Trek.
Highlights of the Lares trek
During the Lares Trek, participants will have the opportunity to witness a diverse array of awe-inspiring landscapes and captivating locations that will fully immerse them in the natural magnificence and culturally rich heritage of the Peruvian Andes. Here I shall delineate a selection of these locations and furnish you with intriguing details about each of them:
Lares Hot Springs
The thermal baths of Lares are renowned for their medicinal and restorative properties, and have been utilized by local communities for centuries owing to their therapeutic advantages. The hot springs originate from natural subterranean sources.
The thermal bathing complex in Lares boasts several pools of varying sizes and temperatures, affording visitors the choice to select one that best aligns with their preferences. Some pools are warmer, while others are more moderate, delivering a serene and comforting experience amidst a breathtaking natural setting.

A hiker prepares to dip into the soothing waters of Lares’ thermal baths.
Sacred Valley
The Sacred Valley spans along the banks of the Urubamba River and encompasses a multitude of villages and archaeological sites that held significant importance during the Inca Empire. In Inca times, the Sacred Valley was deemed a hallowed region due to its fertility and harmonious connection with nature.
The Incas esteemed it for its agricultural productivity and employed it for cultivating a diverse range of crops, with corn being a staple ingredient in their diet. Within the Sacred Valley, one can discover numerous pivotal archaeological sites such as Pisac, Ollantaytambo, Chinchero, and Moray. These ancient Inca fortresses and temples serve as awe-inspiring exemplars of Inca architectural prowess and engineering ingenuity, still shrouded in an air of enigma and grandeur.

One of Peru’s most popular tourist attractions is the Sacred Valley.
Pumahuanca Inka Site
Pumahuanca constitutes an archaeological site situated in the Cusco region of Peru, and constitutes one of the notable attractions to explore during the Lares Trek. Pumahuanca was once an ancient Inca settlement renowned for its agricultural terraces, irrigation canals, and remnants of Inca structures. It stands as a captivating site that enables hikers to deepen their understanding of the agricultural engineering and urban planning implemented by the Inca civilization.
Lares Trek presents travelers with an opportunity to immerse themselves in Inca history and marvel at the awe-inspiring scenery of the Peruvian Andes.
Callorumiyoc
Callorumiyoc is an intriguing archaeological site situated in the vicinity of Cusco, Peru, near the Sacred Valley of the Incas. This site forms part of the Lares Trek route and is a prominent attraction for trekkers, accessible on the initial day of the trek.
This archaeological site serves as a remarkable exemplification of Inca architecture, showcasing the precision and expertise with which the ancient Incas constructed their edifices. The walls of the site consist of impeccably cut stones, meticulously assembled without the use of mortar, thereby exhibiting the advanced engineering capabilities of this ancient civilization.
These magnificent waterfalls can be observed on the initial day of the excursion, while passing by the archaeological site of Callorumiyoc (3,600 meters/ 11,811 feet).

The waterfall is located approximately one hour from Puyoc (4,300 m/14,108 ft.)
Sicllaccasa Pass
Sicllaccasa Pass represents the pinnacle of the Lares Trek, situated at an elevation of 4,830 meters (15,846 feet) above sea level. Upon reaching this significant milestone, one will be greeted with awe-inspiring and majestic vistas of the encompassing mountains, accompanied by a profound sense of accomplishment for conquering such a formidable challenge.
The ascent to the Sicllaccasa pass serves as a truly transformative encounter, where the forces of nature serve as a wellspring of inspiration, diligent perseverance is duly rewarded, and the spirit is revitalized.

Climbing to the Sicllaccasa pass, Lares trek.
Ipsaycocha Lake
En route, the magnificent Ipsaycocha Lake graces the path, a serene body of water characterized by its crystalline clarity, encircled by awe-inspiring mountainous terrain. It presents an idyllic setting to pause, rejuvenate, and savor the breathtaking scenery.
Puyoc village
The town of Puyoc emerges as one of the prominent highlights along the Lares Trek route. Situated within the Cusco region, amidst the Peruvian Andes, in the Sacred Valley of the Incas, Puyoc is a favored stopover point for adventurers undertaking the trek.
This quaint and picturesque village is inhabited by local residents who diligently uphold their traditions, customs, and coexist harmoniously with nature. Upon arrival in Puyoc, trekkers are afforded the opportunity to appreciate the traditional way of life embraced by the villagers, their customs, the characteristic architectural style of the houses, and the vibrant display of traditional attire, such as the intricately patterned multicolored ponchos and hats.
Cuncani village
The village of Cuncani stands as another captivating destination forming part of the Lares Trek in the region of Cusco, Peru. Nestled within the heart of the Peruvian Andes, within the Sacred Valley of the Incas, this enchanting village beckons as one of the most authentic and captivating sites that trekkers can explore during their journey.
Upon reaching this village, travelers will have the unique opportunity to engage with the local residents, gain insights into their customs, and even acquire a few phrases in Quechua (the predominant language spoken in the area).
Trekkers may relish the experience of witnessing the intricate process of weaving these garments and procure genuine souvenirs, including locally crafted handicrafts.

A hiker wearing a poncho typical of the village of Cunkani.
Yanacocha Lagoons
Lagunas Yanacocha is a notable attraction along the Lares Trek route, and is regarded as one of the most exquisite and picturesque locations that hikers can encounter during their expedition. These lagoons are situated in the Cusco region of Peru, specifically in the Lares Valley area.
Yanacocha, derived from the Quechua language meaning “Black Lagoon,” comprises a collection of lagoons nestled within a splendid natural setting, surrounded by majestic mountains and verdant vegetation. The waters of the lagoons possess a dark hue, which lends them their name, and mirror the hues of the sky and surrounding flora, thus creating awe-inspiring landscapes.

Hiker enjoying the Lares Trek.
Ollantaytambo
Located within the Sacred Valley of the Incas, in the Cusco region, Ollantaytambo is a picturesque town steeped in history, providing an authentic insight into Inca culture and establishing a profound connection to Peru’s ancestral past. It is an indispensable destination on the journey to Machu Picchu.

The picturesque town of Ollantaytambo
Machu Picchu stands as one of the most renowned and frequently visited archaeological marvels in the world. Constructed by the Incas in the 15th century, this Inca citadel garners acclaim for its ingenious architectural prowess, astronomical precision, and its remarkable placement amidst the mountainous landscape. The amalgamation of both physical and emotional exertion throughout the Lares Trek heightens the significance and reward upon arriving at Machu Picchu. As hikers set their eyes upon this majestic site, they are greeted with an unparalleled spectacle and an overwhelming sense of reverence as they bear witness to the grandeur and flawlessness of this ancient citadel.
Completing the Lares Trek in Machu Picchu affords travelers the opportunity to explore the various sectors of the site, including the Intihuatana, the Temple of the Sun, the Temple of the Three Windows, and the Main Plaza. Additionally, one can relish panoramic views from the Machu Picchu Mountain Viewpoint or the Intipunku, also known as the Sun Gate, offering a breathtaking panorama of the entire citadel.

A group of hikers in Machu Picchu on the last day of the Lares Trek.
Additional highlights seen in Lares trek + Short Inca Trail
Wiñay huayna.
The appellation “Wiñay Huayna” originates from the Quechua language and signifies “Always Young” or “Ever Young,” alluding to the luxuriant vegetation that envelops the site throughout the year. This archaeological site encompasses a series of agricultural terraces, edifices, and terraces that cascade along a steep hillside, affording breathtaking vistas of the Sacred Valley.
Wiñay Huayna stands as an impressive and momentous archaeological site that forms part of the Lares Trek to Machu Picchu + Short Inca Trail 5D/4N itinerary. It is located in the Cusco region of Peru, within the Sacred Valley of the Incas, and represents one of the highlights along the path to the renowned Inca citadel.

Wiñay Huayna Lares trek + Short Inca Trail 5D/4N
Intipunku, also called the Sun Gate, is located at the entrance to Machu Picchu. From Intipunku, which was built on top of a mountain, visitors arriving from the Inca Trail, the Inca empire’s road system, were provided with a ceremonial gate and checkpoint. From Intipunku, one can enjoy a magnificent view of Machu Picchu and its surroundings. Located along the Inca Trail, or a short Inca Trail route, it is easily accessible.
What is the temperature of the hot springs in Lares?
The thermal waters of Lares offer a serene and rejuvenating experience, with temperatures ranging from 36ºC (96.8ºF) to 44ºC (111.2ºF). The resort features three pools, each with unique characteristics for maximum enjoyment.
- The initial pool, supplied by the primary water source, maintains a pleasant temperature of 41ºC (41ºF). With dimensions of 5 meters in length, 3.50 meters in width, and 1.50 meters in depth, this pool provides a comfortable and inviting space to immerse oneself and savor the soothing thermal waters.
- The second spa maintains a temperature of 35ºC, offering a refreshing option for those seeking a milder thermal experience. Extending 6 meters in length, 4 meters in width, and 1.5 meters in depth, this pool invites you to relax and appreciate the natural surroundings that surround you.
- Lastly, the third spa offers a temperature of 38ºC, perfect for those who prefer more moderate thermal waters. With generous dimensions of approximately 15 meters in length, 8 meters in width, and 1.5 meters in depth, this pool provides ample space to immerse oneself and enjoy the serenity that this location offers.
Immersing oneself in the hot springs of Lares is an unforgettable experience that harmonizes the inherent beauty of the Andes with tranquility and well-being.

After the Lares Trek, these natural hot springs provide a well-deserved rest and a chance to relax tired muscles.
Entrance to the thermal baths of Lares Cusco.
- Foreign adult: S /. 15.00 (USD 5.00)
- Foreign child: S /. 7.50 (USD 3.00)
- National adult: S /. 8.00 (USD 3.00)
- National child: S /. 4.00 (USD 2.00)
- Rooms for rent: S /. 50.00 (USD 18.00)
- Camping Space Rental: S /. 7.00 (USD 3.00)
What is the flora and fauna found in Lares Trek?
Flora in lares trek, pisonay (erythrina falcata).
The Pisonay tree is indigenous to the Peruvian Andes and other areas of South America . It is a species renowned for its aesthetic appeal and prominent presence in the Andean terrain. During the Lares Trek, hikers have the opportunity to encounter these exquisite trees in their natural habitat and appreciate their magnificence and vibrant hues during the flowering season. Moreover, it is customary to observe the Pisonay in rural regions and cultivated fields of the area, where it has traditionally been utilized for shade and as a source of sustenance for livestock.
Chachacomo (Senecio chachacoma)
The chachacoma tree is a protected species in Peru. It is noteworthy to highlight that it possesses medicinal properties, and the utilization of plants for medicinal purposes is an ancient practice in numerous cultures, including the Andean culture in Peru. Traditional knowledge regarding the healing attributes of plants has been passed down through generations, and many local communities still employ these practices to treat a variety of illnesses and ailments.
The fact that the chachacoma tree is found in the region of the Lares Trek and is valued for its medicinal properties enhances the experience for hikers on this particular route. Travelers have the opportunity to encounter and learn about the medicinal plants employed by local communities and their harmonious relationship with nature in the Peruvian Andean region.
Queuña (Polylepis spp)
The Queuña tree is native to the Andean region. It is renowned for its capacity to endure extreme temperatures, drought, and strong winds. Its bark has traditionally been employed in Andean medicine to address various ailments, including respiratory and digestive diseases.
During the Lares Trek, hikers may come across specimens of queuña along the route, particularly at higher elevations and within the mountain forests. This tree plays a pivotal role in the Andean ecosystem, providing shelter and sustenance to diverse species of flora and fauna. Additionally, its roots are essential for maintaining soil stability on steep mountain slopes, averting erosion and landslides.

It has evolved adaptations in order to survive the harsh conditions of its habitat, including cold temperatures, high winds, and exposure to ultraviolet radiation.
Fauna in the Lares Trek
Viscacha (lagidium viscacia).
The viscacha is a small mammal belonging to the rodent family, and it is an animal that can be found in the Andes region, including the Lares Trek area in Peru. During the Lares Trek, it is possible to spot viscachas in the areas near the mountains and rocks where they usually inhabit. These animals are shy and cautious, so it is important to observe them from a respectful distance in order not to disturb their natural behavior. Despite being wild animals, their presence on the route adds a special touch to the hikers’ experience and provides an opportunity to appreciate the biodiversity and richness of the fauna in the Peruvian Andean region.

The castle rabbit is very similar to the vizcacha.
Alpacas (Vicugna pacos)
Alpacas are fascinating and valuable animals, both for their fiber and their cultural role in the Andes. Their unique appearance and adaptation to high altitudes make them a special part of the Andean landscape and the textile industry in the region.

Lares Trek alpacas spotted
Llamas (Lama glama)
During the Lares Trek to Machu Picchu, it is possible to find llamas in the areas near the local communities and in some parts of the trail. These animals are an essential part of Andean life and culture, and they have been domesticated by local communities for thousands of years.
Llamas are South American camelids and are highly valued animals in the Peruvian Andes region. They have a soft and woolly coat that is used for wool and fabric production, which is highly appreciated for its quality and warmth.

Vicuñas (Vicugna vicugna)
In the ancient Inca Empire, vicuñas were highly valued for the extraordinary quality of their wool. To obtain this precious fiber, a technique called “Chaccu” was carried out, which involved capturing and shearing the vicuñas in a careful and respectful manner for their well-being, and then releasing them back into their natural habitat.
During the Lares Trek, it is possible to spot vicuñas in the areas near the mountains and highlands of the Cusco region, Peru. Vicuñas are wild animals that inhabit the highlands of the Andes and are highly appreciated for their exquisite wool and natural beauty.
Vicuñas are a protected species due to their conservation status, so spotting them during the Lares Trek is a unique and special experience. These animals are usually shy and cautious in the presence of humans, making them more difficult to observe up close.
Puma (puma concolor)
Although they are elusive and rarely seen, pumas are felines native to the Andean region. They are solitary and nocturnal animals, making it unlikely to encounter one during the trek. However, occasional sightings have been reported in the area.

For the Andean cosmovision, the puma is a symbol of strength, wisdom and intelligence.
Andean Condor (Vultur gryphus)
The condor is one of the most majestic and emblematic birds of the Peruvian Andes, found in the Cusco region where the Lares Trek takes place. While the condor is more common in higher and wider mountain areas, occasional sightings are possible during the trekking.
Spotting condors during the Lares Trek is an unforgettable and exciting experience. Their elegance in flight and imposing presence in the Andean skies are a testament to the beauty and majesty of nature in this region. The possibility of spotting condors during the Lares Trek adds a special touch to the trekking experience, allowing hikers to further connect with the richness and diversity of fauna in the Peruvian Andes.

It is important to remember that Andean Condor watching is a natural experience
Andean Fox (Lycalopex culpaeus)
The Andean fox, also known as the culpeo fox, is a solitary and nocturnal animal that primarily feeds on small mammals such as rodents and birds. Although it is considered a “least concern” species in terms of conservation, habitat loss and poaching pose threats to its population in this area.

While undertaking the Lares Trek, hikers may have the chance to observe the Andean fox in its native environment if they are fortunate and vigilant of their surroundings.
Wild Guinea Pig (Cavia aperea)
The wild guinea pig has been significant in the Andean region of South America for a long time. It has been bred and consumed as a food source since ancient times and is still a fundamental part of the diet in many Andean communities.
During the Lares Trek, there is a possibility of encountering wild guinea pigs in the areas near the fields, meadows, and vegetation zones of the Cusco region. Wild guinea pigs are shy and elusive animals, so their sightings may be less common than more conspicuous species such as birds or camelids.

Wild guinea pigs are similar in appearance to domestic guinea pigs, with a rounded body and large ears.
Andean Toad (Rhinella spinulosa)
During the journey through the Lares Valley, it is likely that you may spot them in areas near bodies of water, such as streams, lagoons, or ponds. These toads are more active during the night, so you may encounter them during nocturnal walks or near camping sites.
What is the weather like during the Lares Trek to Machu Picchu?
If you are interested in embarking on the Lares trek and have concerns about the optimal time to do so, it is reassuring to know that the city of Cusco experiences distinct seasons.
The dry season, which spans from April to October, is characterized by minimal rainfall. Daytime temperatures can reach 21°C (70°F), while nighttime temperatures can drop to as low as 4°C.
On the other hand, the rainy season, occurring from November to March, witnesses more pronounced precipitation, particularly in December, January, and February.
Rainy season in Lares Trek: What to expect?
During the Lares Trek, the weather is unpredictable in the rainy season, and it is imperative to be prepared for variable weather conditions. Carrying a rain poncho is highly recommended as it will shield you from unforeseen precipitation and enable you to continue enjoying the trek without becoming excessively wet.
It is worth noting that January and February are the rainiest months along the Lares Trek route. During this period, rainfall is more frequent, which can impact the condition of the trails and render certain sections slippery and more difficult to traverse. Moreover, rainfall can impede visibility of the scenery and overall trekking experience.
Lares Trek in November
Weather: Still warm and rainy. Daytime temperatures range from 13°C to 15°C, and nighttime temperatures drop as low as 7°C. November signifies the onset of the rainy season, resulting in reduced tourist influx compared to previous months.
Pros: This month offers fewer crowds and lower prices for accommodations and activities. The lush vegetation and verdant landscapes due to the rain are a sight to behold!
Cons: Rainfall can disrupt travel plans and lead to the closure of some tourist routes.
Lares Trek in December
Weather: Daytime temperatures are warm, ranging from 13°C to 15°C, and nighttime temperatures can dip to 7°C. Tourism increases towards the end of December due to Christmas and New Year’s celebrations.
Pros: The entire atmosphere is filled with festive Christmas spirit, and you’ll have splendid views of the landscapes beginning to blossom.
Cons: Campsites and trails are often muddy and wet.
Lares Trek in January
Weather: Humid and rainy. Daytime temperatures hover around 10°C to 14°C, and nighttime temperatures can drop to 6°C. It is the rainy season with a high likelihood of precipitation, which can affect trails and visibility.
Pros: You can witness breathtaking rainbows and stunning scenes with mist and clouds.
Cons: Rainfall is more frequent and usually occurs in the afternoon.
Lares Trek in February
Weather: Humid and rainy. Daytime and nighttime temperatures are similar to January. There may be frequent rains. Daytime temperatures are warm, ranging from 10°C to 14°C, and nighttime temperatures can drop to 6°C.
Pros: Carnival festivities in Cusco are vibrant and steeped in local traditions. Along the route, you will be able to admire picturesque landscapes and flourishing fields.
Cons: This is the rainiest month along the Lares Trek route, and the trails can be slippery. It is advisable to bring waterproof clothing and a rain poncho.
Lares Trek in March
Weather: It remains warm and humid. Daytime temperatures range from 12°C to 14°C, and nighttime temperatures can reach 5°C. Rainfall continues to be frequent.
Pros: Prices and tourist demand may be lower compared to the peak season.
Cons: Ongoing rainfall in March can disrupt some travel plans and outdoor activities.
Dry season in Lares Trek: What to expect?
The dry season on the Lares Trek is renowned for its pleasant, sunny days and the opportunity to marvel at the captivating Andean landscapes. Nonetheless, this also entails a surge in tourists flocking to Cusco, eager to make the most of the dry weather and embark on the Lares Trek.
Lares Trek in April
Weather: The weather begins to stabilize and dry out. Daytime temperatures typically range between 13 °C and 15 °C, while nighttime temperatures drop to 5 °C. Rainfall gradually diminishes.
Pros: Daytime temperatures are milder, allowing for longer appreciation of the sun, and nights are clear.
Cons: The rainfall dwindles this month, resulting in a gradual increase in tourist traffic. Additionally, Easter week falls in Peru during this month, potentially leading to price hikes in hotels. It is advisable to make advance reservations.
Lares Trek in May
Climate: The weather remains dry and stable. Daytime temperatures are cooler, ranging between 12°C and 14°C, while nighttime temperatures range between 5°C and 3°C.
Pros: Enjoy sunny days and clear nights with breathtaking daytime and nighttime views.
Cons: It is necessary to make advance reservations for the Lares Trek as the demand continues to increase.
Lares Trek in June
Climate: The winter season brings drier weather. Daytime temperatures can range from 14°C to 16°C, while nighttime temperatures may drop below 3°C. Rainfall is minimal.
Pros: June is characterized by scarce rainfall, making it one of the best months to visit Cusco. It also coincides with one of the largest festivals, “Inti Raymi”. It is advisable to book the Lares Trek in advance.
Cons: This month experiences a massive influx of tourists, resulting in long queues to enter Machu Picchu and higher accommodation prices. It is recommended to bring sunscreen.
Inti Raymi Festivities-2018 Credits: Luz Incappuiño Martinez
Lares Trek in July
Climate: Dry winter weather prevails. Daytime temperatures can range from 14°C to 16°C, while nighttime temperatures drop to 2°C or even lower. Rainfall is minimal.
Pros: July is the busiest month in Cusco due to summer vacations in many countries. The city is at its peak in terms of tourist activities and energy. The weather is favorable for tourism, offering clear blue skies.
Cons: July is characterized by overcrowded tourism, with Machu Picchu reaching maximum capacity per day. Additionally, national holidays are celebrated during this month, resulting in a crowded city. It is recommended to book the Lares Trek in advance.
Lares Trek in August
Climate: The dry weather continues. Daytime temperatures generally range between 13°C and 15°C, while nighttime temperatures can drop below 3°C. Rainfall is minimal.
Pros: August remains crowded with tourists, providing extraordinary views under clear skies.
Cons: Crowds are still present on all tours and at Machu Picchu. Due to high demand, most hotels and tours are still operating at peak capacity. It is advisable to book your tours in advance.
Lares Trek in September
Climate: The weather starts to warm up. Daytime temperatures range between 13°C and 15°C, while nighttime temperatures are cool, reaching 5°C. Rainfall is minimal.
Pros: The crowds begin to thin out, although tourists still continue to arrive in smaller numbers. September is accompanied by occasional drizzles that often result in beautiful rainbows.
Cons: Rainfall becomes unpredictable and can occur at any time. It is recommended to bring a rain poncho.
Lares Trek in October
Climate: Warmer and more stable weather prevails. Daytime temperatures generally range between 12°C and 15°C, while nighttime temperatures are cool, reaching 6°C. Rainfall is minimal.
Pros: October is a favorable month to undertake the Lares Trek before the rainy season commences. Encounter fewer visitors and enjoy breathtaking mountain views. The temperature is warmer as well.
Cons: The trails and campsites may become wet, slippery, and muddy due to occasional drizzles.
What to pack for Lares trek?
In order to fully enjoy your tour during the Lares Trek, it is imperative to adequately prepare a suitable backpack. Please take note of the following recommendations:
Appropriate clothing:
- A waterproof jacket or windbreaker
- Warm clothing
- Comfortable and breathable garments for walking
- Additional underwear and socks
- Base layers
Sun protection essentials:
- A hat or cap
- Mosquito repellent
- Sturdy and comfortable hiking boots
- Lightweight sneakers for resting in the camp
Hygiene and personal care items:
- Small towels
- Toilet paper
- Biodegradable soap and shampoo
- Toothbrush and toothpaste
Personal equipment:
- Identification documents and passport
- Sufficient cash for additional expenses during the trek
Basic supplies:
- A water bottle or hydration system
- Snacks and energy food for the trekking
- Garbage bags to maintain the cleanliness of the natural environment
Photographic equipment:
- A camera or cell phone with ample storage space and battery life to capture unforgettable moments during your trek
When embarking on the Lares Trek, it is crucial to carry a backpack containing these essential items, as they will contribute to a comfortable and secure hiking experience.

Remember that carrying your passport is very important.
Is it dangerous to do the Lares Trek?
The Lares Trek is regarded as a secure expedition for tourists. Nonetheless, akin to any outdoor pursuit and within mountainous regions, there are specific hazards and precautions that necessitate consideration:
Trustworthy guides and agencies: It is imperative to engage the services of a reliable travel agency such as Inkayni Peru tours, renowned for their expertise and commendable reputation. Verify the testimonials and endorsements of individuals who have previously embarked on the trek with said agency to ensure you are entrusting professionals.
Physical and health conditions: The Lares Trek entails traversing uneven terrain and navigating high altitudes, thus it is crucial to possess sound physical fitness and robust health. If you have any medical ailments or health apprehensions, consult a physician prior to undertaking the trek.
Altitude: Cusco and its environs, encompassing the Lares Trek, are situated at considerable altitudes. Symptoms of altitude sickness (soroche), including headaches, nausea, and fatigue, may manifest. Allocating sufficient time to acclimate prior to commencing the trek and consuming an ample amount of water during the expedition are paramount.
Appropriate equipment: Ensure that you are equipped with suitable gear for trekking, encompassing fitting attire and footwear for diverse weather conditions and terrains.
Weather conditions: Weather patterns in mountainous regions can be capricious. Be prepared to confront variable weather conditions, comprising rainfall, cold temperatures, and sunny intervals, and don appropriate attire to shield yourself from inclement weather.
Is a guide required to do Lares Trek?
Indeed, it is necessary to have a tour guide for the Lares Trek. In contrast to the Inca Trail to Machu Picchu, where the presence of a guide is obligatory due to regulations imposed by the Peruvian government, it is highly recommended to have a guide for the Lares Trek. This is because the trails are not as well-defined and it is a less frequented route.
There are several compelling reasons why having a guide during the Lares Trek is highly recommended:
Route: The Lares Trek route can be intricate, with multiple trail and back road options. An experienced guide possesses extensive knowledge of the area and can ensure that you do not veer off course, enabling you to reach your destinations smoothly.
Safety: Guides are trained to handle emergency situations and provide first aid if necessary. Moreover, they are well-versed in the precautions to be taken in different weather conditions and at high altitudes, ensuring the safety of hikers.
Cultural immersion: Local guides possess profound knowledge of the culture, traditions, and history of the region. They can offer valuable insights into the local culture, the communities you visit, and the archaeological sites along the way, enhancing your overall experience.
Permits and regulations: Certain areas along the Lares Trek require special permits for entry. Guides are well-informed about the requirements and will ensure that the necessary permits are obtained for your trek.

It is important to keep in mind that the guide plays an important role as a leader and motivator during the hike. He or she can encourage hikers, provide emotional support, and keep morale high during challenging situations.
What is the difference between Lares Trek and other routes to Machu Picchu?
Lares Trek and other routes to Machu Picchu, such as the Inca Trail and the Salkantay Trek , offer unique and different experiences to reach the iconic Inca city. Here are some key differences between Lares Trek and other routes:
Difficulty level
The Lares Trek is considered a moderate difficulty route, while the Inca Trail is more challenging due to the steep climbs and descents through rocky terrain. The Salkantay Trek is also considered challenging due to the Salkantay mountain pass, which reaches a higher altitude compared to the Lares Trek.
Tourist influx
The Inca Trail is the most popular and crowded route to Machu Picchu, which means that there are a limited number of daily permits and it is necessary to book well in advance. The Lares Trek, although it has gained popularity, is still less traveled compared to the Inca Trail. The Salkantay Trek is also less crowded than the Inca Trail, but more popular than the Lares Trek.
Cultural Experience
The Lares Trek offers greater interaction with local communities in the Sacred Valley, allowing hikers to immerse themselves in Andean culture and learn about local traditions, especially related to weaving and llama and alpaca breeding. The Inca Trail also has important cultural aspects, but interaction with local communities is more limited due to the greater flow of tourists. The Salkantay Trek offers some opportunities to interact with local communities, but not to the same extent as the Lares Trek.
Every route presents remarkable and varied sceneries. The Lares Trek crosses exquisite valleys, lakes, and mountains, providing an opportunity to witness glaciers and relish in panoramic vistas. The Inca Trail is renowned for its historical archaeological sites and cobblestone paths that meander through the rainforest. The Salkantay Trek passes through mountainous landscapes, lagoons, and misty forests, offering glimpses of the grandiose snow-capped Salkantay.
How to book Lares Trek to Machu Picchu?
Reservations for the Lares Trek to Machu Picchu can be made through authorized travel agencies. It is highly recommended to make your reservation well in advance to secure a space on the trek, especially if you have specific date preferences or if you intend to trek during the peak tourist season in Peru.
While the demand for the Lares Trek is not as high as that of the Inca Trail, it is still advisable to book at least three months in advance, particularly if you plan to embark on the journey during the months of highest tourist activity (between April and October).
Making your reservation well ahead of time will enable you to secure a spot on the trek, calmly organize the trip’s details, and have the peace of mind that you will be able to partake in the experience on your desired date.
It is always prudent to verify the agency’s cancellation policy and booking conditions in case there are any alterations to your travel plans. Moreover, you will receive comprehensive information regarding the services included in the trekking package, the specifics of the itinerary, and other crucial aspects to ensure a gratifying experience during the Lares Trek to Machu Picchu.

Booking Lares Trek with Inkayni Peru Tours guarantees you a unique, enriching and safe experience on one of the most fascinating routes in the Peruvian Andes.
To plan your next Lares Trek adventure, please contact one of our sales representatives . We will be delighted to assist you in getting all the information you need, answering all your questions, and helping you design the trip of your dreams through the majestic landscapes of the Peruvian Andes.
Is it a requirement to have prior trekking experience in order to embark on the Lares Trek?
No, possessing previous trekking experience is not a prerequisite for undertaking the Lares Trek, as this trail has been specifically designed to accommodate individuals with varying levels of experience and physical fitness. The Lares Trek is classified as moderately challenging, implying that individuals in satisfactory overall health and reasonable physical condition can partake in and relish this exhilarating expedition.

It is not necessary to be an expert in trekking, but it is advisable to have a good physical condition and be prepared to walk in challenging terrain and high altitudes.
How to prepare for Lares Trek?
Acclimatization to high altitude:.
Prior to embarking on the Lares Trek, it is imperative to allocate a few days in Cusco or surrounding areas to gradually acclimate to the high altitude. This measure serves to prevent altitude sickness (soroche) and enables one to fully relish the trek without succumbing to its adverse effects.
Physical preparation
While it is not obligatory to possess the athleticism of a professional, it is recommended to engage in some physical conditioning in advance. Engaging in activities like hiking or other similar pursuits will aid in fortifying your leg muscles, enhancing cardiovascular endurance, and ensuring optimal readiness for the daily trekking.
Appropriate gear
Ensure that you procure the appropriate gear, including comfortable hiking boots tailored to the unique needs of your feet, weather-appropriate clothing, a well-fitting backpack, and other essential items.
Positive mindset and receptiveness
The Lares Trek presents a deeply enriching encounter that grants an intimate connection with both nature and Andean culture. Maintaining a positive mindset and an open attitude will facilitate the complete enjoyment of this thrilling adventure.

Having a positive attitude will enable you to fully enjoy the Lares Trek experience, overcome challenges with determination, and connect with the local culture and nature.
Is it necessary to bring camping equipment for Lares Trek?
Absence of a travel agency:.
If you opt to undertake the Lares Trek independently, it is imperative to bring your own camping equipment. This will encompass a weather-resistant camping tent, a cold-weather suitable sleeping bag, a sleeping pad or inflatable mattress for added comfort, as well as all the essential camping utensils, a flashlight, cooking equipment, among other necessities. Possessing the appropriate gear is vital to ensure a restful rest during the hike and to shield yourself from fluctuating weather conditions.
Irrespective of whether you choose to travel with an agency or independently, it is crucial to ascertain in advance what equipment is included in the agency’s package or to adequately prepare your own equipment if you are trekking solo. The level of comfort and safety experienced during the Lares Trek hinges greatly on having the correct gear to contend with the trail’s conditions and the mountain nights.
However, my suggestion is to arrange the Lares Trek with a knowledgeable travel agency that is well-versed in the route and can guarantee your well-being and a fulfilling experience in the Cusco Andes (Alternatively, endeavor to undertake the Lares Trek with a guide who is knowledgeable about the route).
With a travel agency:
Should you decide to embark on the Lares Trek through a travel agency, it is generally unnecessary for you to carry camping equipment, as the agency will furnish all the requisite gear for the expedition. This will encompass camping tents, sleeping bags, sleeping pads or inflatable mattresses, and, on certain occasions, even dining tents and kitchen facilities.
By making a reservation for the Lares Trek with a reputable travel agency like Inkayni Peru tours, they will handle the transportation of the camping equipment, cooking gear, and a maximum load of 7 kilos (15 pounds) per person consisting of your personal belongings. This allows you to relish the trek without the burden of excessive loads and enjoy a more comfortable and pleasant experience.

Before each expedition, our muleteers and muleteers ensure that the mules and horses are in optimal condition, with the loading equipment well adjusted and balanced.
Is it possible to hire a porter to transport my luggage while undertaking the Lares Trek?
If you make a reservation for the Lares Trek through an authorized agency, they will provide you with the opportunity to have your cooking and camping equipment, as well as 7 kilos (15 pounds) of your personal belongings, transported by a muleteer and his mules. Unlike the Inca Trail, which employs human porters, mules are utilized for equipment transportation on routes such as the Lares Trek. If you require assistance with a heavier load, it is advisable to arrange in advance with the agency so that they can arrange for an additional mule.
This method enables you to have a more manageable and comfortable trek, allowing you to fully immerse yourself in the experience without the burden of carrying all the equipment. The use of mule services is a practical and highly regarded option for numerous trekkers, ensuring the timely arrival of equipment and supplies at the campsite, alleviating logistical concerns.
It is crucial to establish communication with the agency beforehand in order to convey your requirements and ensure that they are adequately prepared to enhance your comfort during the Lares Trek. This approach allows you to fully appreciate the natural and cultural splendor of the Peruvian Andes as you make your way to Machu Picchu.

Inkayni Peru Tours is committed to responsible and sustainable tourism, which includes the ethical and humane treatment of the animals that are part of our expeditions.
What are the restrictions and regulations pertaining to the Lares Trek?
The restrictions and regulations governing the Lares Trek vary depending on the specific route and the policies of the travel agencies operating in the area:
- Permits and reservations: Unlike the Inca Trail, the Lares Trek does not necessitate a special permit issued by the government. Nevertheless, it is advisable to make a reservation with an authorized travel agency in advance to secure your spot and ensure compliance with the available quotas for entry into Machu Picchu.
- Environmental conservation: As is the case in any protected natural area, adhering to environmental conservation regulations is crucial. Leaving litter or refuse on the trail or at the campsites is strictly prohibited. Visitors must carry all items they bring with them, including non-biodegradable waste, and show reverence for the local flora and fauna.
- Respect for local communities: The Lares Trek traverses Andean communities, necessitating the utmost respect for their culture and traditions. Prior permission should be sought before photographing individuals, and their customs and beliefs should be honored. Supporting the local communities through the purchase of their handicrafts can be a means of assistance.
- Non-camping in undesignated areas: It is strictly forbidden to camp in sites that are not specifically designated for such purposes. It is imperative to camp only in areas approved by the travel agency or in pre-authorized locations.
- Small group sizes: To mitigate environmental and cultural impact, the number of participants in a group is restricted for the Lares Trek. This facilitates a more genuine and responsible engagement with the environment and local communities.
- Engagement of local guides: Numerous travel agencies mandate that groups be accompanied by knowledgeable local guides. This not only ensures a safer experience, but also provides an opportunity to gain insights into the culture and environment of the region.

Small groups offer a more intimate, authentic and responsible experience on the Lares Trek.
Are there transportation services during the Lares Trek?
Indeed, transportation services are available during the Lares Trek to facilitate the journey, particularly for individuals facing health challenges. These services commonly involve utilizing mules or horses as pack animals to transport camping gear, supplies, and to provide aid to hikers in need.
Certain travel agencies offer the possibility for hikers to mount mules or horses if they experience fatigue, illness, or simply desire to alleviate physical strain in specific segments of the trek. Pack animals are well-trained and adapted to the altitude and terrain, rendering them highly suitable for transporting equipment across the trekking routes in the Peruvian Andes.
Although utilizing pack animals may prove convenient for certain individuals, it is crucial to engage in adequate physical preparation and acclimatization to the altitude in order to achieve a successful trekking experience.

A pack animal transport service is a useful aid, but it should not serve as a substitute for adequate personal preparation for the trek.
What kind of food is offered during Lares Trek?
During the Lares Trek, the food provided is typically diverse and nourishing, meticulously crafted to provide the necessary sustenance for traversing extensive distances at high altitudes. The travel agencies and tour operators responsible for organizing the trek usually assemble a team of skilled chefs and offer prepared meals at the campsite.
At Inkayni Peru Tours, our highly trained chefs and cooks are dedicated to providing you with exquisite cuisine in the awe-inspiring Peruvian Andes. The meals consist of a blend of traditional Peruvian dishes. Lunches and dinners are served, usually including omelettes, pancakes, fresh produce, meats, poultry, rice, soups, and desserts.
If you have any dietary restrictions or allergies, it is essential to inform our sales associates in advance so that they can customize the meals to meet your specific needs.

Hikers ready to savor a delicious meal after a day’s trekking
Are you prepared to embark on this captivating expedition? Waste no time! Reserve your spot with Inkayni Peru Tours and be awestruck by the breathtaking panoramas, the hospitality of the local inhabitants, and the cultural opulence that awaits you on the Lares Trek. A remarkable and unforgettable experience awaits you in the lofty Peruvian Andes. During the hike, you will be in awe of the grandeur of the mountains, the verdant valleys, and the picturesque lakes that encompass this enchanting region. Furthermore, you will have the opportunity to immerse yourself in the Peruvian Andes community, acquainting yourself with their traditions, customs, and way of life as you draw nearer to the awe-inspiring citadel of Machu Picchu, the archaeological gem of the Incas, a destination shrouded in mysteries and intrigue. Throughout this voyage of exploration, our knowledgeable guides will be by your side, imparting their expertise on the history, flora, local fauna, and natural marvels that you will encounter along the way. We eagerly await your arrival, ready to capture indelible and extraordinary moments in your memories!
MASTERING THE INCA TRAIL TO MACHU PICCHU: YOUR ULTIMATE GUIDE TO CONQUERING “THE LOST CITY OF THE INCAS”

MACHU PICCHU TRAVEL GUIDE: ROUTES, TIPS AND RECOMMENDATIONS

SALKANTAY TREK TO MACHU PICCHU: ALL YOU NEED TO KNOW ABOUT THIS INCREDIBLE ROUTE

A COMPREHENSIVE GUIDE TO THE INCA JUNGLE TREK: IMMERSE YOURSELF IN THE JUNGLE OF THE INCAS
If you liked this article and the information you found, give us 5 stars.
Kedarnath Trek Guide: Exploring the Serene Beauty of the Himalayas
Are you an adventure enthusiast seeking a thrilling journey amidst the towering peaks of the Himalayas? Look no further than the Kedarnath Trek, an expedition that offers breathtaking landscapes, spiritual encounters, and a taste of nature’s grandeur. In this comprehensive guide, we’ll take you through the ins and outs of this incredible trekking experience.
Table of Contents
Introduction to the Kedarnath Trek
Nestled in the Garhwal region of Uttarakhand, India, the Kedarnath Trek is a revered pilgrimage and an adventure seeker’s paradise. The trek takes you to the sacred Kedarnath Temple, dedicated to Lord Shiva, situated at an elevation of 3,583 meters above sea level. The journey is not just about conquering heights; it’s a spiritual quest that connects you with nature’s raw beauty and ancient legends.
Preparation and Essentials for the Trek
Before embarking on this memorable journey, meticulous planning is key. Ensure you have sturdy trekking gear, including comfortable clothing, sturdy hiking shoes, a durable backpack, and other essentials such as water bottles, energy snacks, a first aid kit, and a map. Acclimatization is vital, so engage in light exercises a few weeks prior and stay hydrated.
Best Time to Visit
The ideal time for the Kedarnath Trek is during the months of May to June and September to October. The weather during these periods is relatively mild, offering clear skies and pleasant temperatures. Monsoon season is best avoided due to the risk of landslides and slippery trails.
How to Reach Kedarnath
To reach Kedarnath, one of the most revered pilgrimage sites in India located in the state of Uttarakhand, you can follow these steps:
- Reach Haridwar or Rishikesh : Most journeys to Kedarnath start from either Haridwar or Rishikesh. These towns are well-connected by road and rail to major cities in India.
- By Road : From Haridwar or Rishikesh, you can hire a taxi or take a bus to Gaurikund, the base camp for the Kedarnath trek. The distance is around 200-220 km and the journey takes about 8-10 hours.
- By Helicopter (Optional) : If you prefer a quicker and more convenient option, you can take a helicopter ride from Phata, Guptkashi, or Sersi to Kedarnath. This significantly reduces the travel time, but bookings need to be made in advance.
- Trek to Kedarnath : The main way to reach the temple is by trekking from Gaurikund. The trekking distance is around 16-18 km, and it usually takes about 6-8 hours to complete. The trek route is well-marked and passes through picturesque landscapes. You can also hire mules or ponies to carry your luggage or to assist you in the trek.
- Stay En Route : There are rest stops and accommodations available along the trekking route, such as Rambara and Kedarnath Base Camp. You can choose to stay overnight at these places if you find the trek challenging to complete in a single day.
- Reach Kedarnath : Once you reach Kedarnath, you can visit the famous Kedarnath Temple dedicated to Lord Shiva. The temple is nestled amidst the Himalayas and holds immense religious significance.
- Return Journey : After your visit to the temple, you can retrace your steps back to Gaurikund either by trekking or by availing helicopter services.
Kedarnath Trek Distance
The journey to Kedarnath spans 18 kilometers and commences from Gaurikund, extending all the way to the sacred destination of Kedarnath. This trek underwent modifications following the 2013 flood disaster in Uttarakhand, resulting in the expansion of the previous 14 km route to a new distance of 16 kilometers.
Route Map of the Kedarnath Trek:
- Rishikesh to Sonprayag: The journey usually starts from Rishikesh, where trekkers travel to Sonprayag by road. Sonprayag is the base camp for the Kedarnath Trek.
- Sonprayag to Gaurikund: From Sonprayag, trekkers proceed to Gaurikund, which is around 5 kilometers away. Gaurikund is named after Goddess Parvati and serves as the starting point of the actual trek.
- Gaurikund to Rambara: The trail from Gaurikund leads to Rambara, which is approximately 7 kilometers from Gaurikund. The path offers scenic views of the surrounding mountains and the Mandakini River.
- Rambara to Kedarnath: The journey continues from Rambara to Kedarnath, which is about 6 kilometers away. The route becomes steeper as trekkers ascend towards Kedarnath. The final stretch is known for its breathtaking views but can be challenging due to the altitude gain.
- Kedarnath Temple: At an altitude of around 3,583 meters (11,755 feet), the Kedarnath Temple is one of the holiest Hindu shrines dedicated to Lord Shiva. Pilgrims and trekkers visit the temple to offer prayers and seek blessings.
Route Map for Kedarnath Trek
Embarking on the Kedarnath trek, an 18 km journey, is a pilgrimage of both physical and spiritual significance. The expedition commences from Gaurikund, presenting trekkers with an enriching experience in the heart of the Himalayas. The route itself has undergone modifications, a response to the 2013 disaster that wiped away the original path. The new route, outlined below, serves as your comprehensive travel guide for the Kedarnath trek.
1. Gaurikund: To commence this memorable journey, one must first reach Gaurikund. This preliminary step involves a shared taxi ride of approximately 6 km from Sonprayag.
2. Gaurikund to Jungle Chatti: Begin the trek by moving from Gaurikund to Jungle Chatti, a distance of 6 km. This segment involves traversing the Rambara Bridge and immersing oneself in the scenic surroundings.
3. Jungle Chatti to Bheembali: Progress further along the path, covering a distance of 4 km to reach Bheembali. The natural beauty of the region accompanies your trekking endeavor.
4. Bheembali to Linchauli: Continue your journey through the mountainscape, venturing 3 km to arrive at Linchauli. Each step embraces the serenity of the environment.
5. Linchauli to Kedarnath Base Camp: Traverse a distance of 4 km as you approach the Kedarnath Base Camp. The gradual transition in landscape offers trekkers a sense of the grandeur that lies ahead.
6. Kedarnath Base Camp to Kedarnath Temple: The final stretch, spanning 1 km, leads from the Kedarnath Base Camp to the revered Kedarnath Temple. This sacred site, nestled amidst the heights, marks the culmination of your trek and the beginning of a spiritual sojourn.
Facilities at the Kedarnath Trek
Trail highlights and scenic views.
The Kedarnath Trail boasts an array of captivating highlights and breathtaking scenic views. Trekking through dense forests, tranquil meadows, and challenging terrains, adventurers are treated to glimpses of the Mandakini River’s sparkling beauty. The trail’s crescendo is the Chandrashila summit, offering panoramic vistas of snow-clad peaks that leave an indelible mark on the heart. Additionally, the Vasuki Tal glacial lake enchants trekkers with its serene turquoise waters against the backdrop of towering mountains.
Camping and Accommodation Options
Kedarnath holds a distinguished position among the revered shrines dedicated to Lord Shiva and is an integral part of Uttarakhand’s Char Dham Yatra . Once teeming with hotels, lodges, and ashrams in locations like Kedarnath, Gaurikund, and Rambara, providing budget-friendly lodging for pilgrims, the landscape underwent a transformation due to the devastating flash floods in 2013, resulting in the obliteration of all accommodations.
Please note that in response to this, entities like NIM and other aiding authorities have constructed a limited number of budget camps and tents within the Kedarnath region. These endeavors aim to expand the range of accommodation choices for tourists. At present, tourists and pilgrims can exclusively avail lodging at GMVN Tents & Camps, offering a secure and reliable place to stay.
Cultural and Spiritual Significance
Apart from its natural beauty, the Kedarnath Trek holds deep spiritual significance. According to Hindu mythology, this region is believed to be the abode of Lord Shiva, making it an essential pilgrimage for devotees. The journey itself becomes a spiritual cleansing, fostering a deep connection with the divine.
Challenges Faced During the Trek
While the Kedarnath Trek is a rewarding adventure, it comes with its share of challenges. The steep ascents and descents on rocky terrains demand physical stamina and mental determination. Acclimatizing to the high altitudes is essential to avoid altitude sickness, which can cause discomfort. The weather can be unpredictable, ranging from sunny skies to sudden rain or snowfall. Navigating through varying landscapes, such as narrow trails and river crossings, requires careful attention. Additionally, the lack of basic amenities along the route and limited mobile network coverage might test your self-sufficiency. Despite these obstacles, conquering the challenges of the Kedarnath Trek yields a sense of accomplishment and an unparalleled connection with nature.
Safety Measures and Health Considerations
Prioritizing safety and health considerations is paramount when embarking on the Kedarnath Trek. Begin by trekking with a certified guide who knows the trail and can navigate challenges. Stay informed about weather forecasts to prepare for changing conditions. Acclimatize gradually to prevent altitude sickness – stay hydrated, avoid alcohol, and ascend slowly. Carry essential medications and a well-stocked first aid kit. Respect the environment by following the “Leave No Trace” principle, ensuring the trail remains pristine for future trekkers. Finally, communicate your itinerary to someone and stay connected, as mobile network coverage can be limited in certain areas. By adhering to these safety measures, you can enjoy a secure and fulfilling trekking experience.
Packing Tips for the Trek
When preparing for the Kedarnath Trek, strategic packing can make your journey smoother and more enjoyable. Prioritize essentials like sturdy hiking boots for rocky terrains, moisture-wicking clothing to handle varying weather, and a waterproof jacket to combat unexpected rain. Don’t forget to pack a reliable backpack with adjustable straps for comfortable carrying, along with essentials like a first aid kit, energy-packed snacks, a reusable water bottle, and a compact sleeping bag. Trekking poles can provide stability, especially on steep ascents and descents. Lastly, a fully charged camera, sun protection, and a hat are crucial for capturing memories and shielding yourself from the elements.
Exploring Nearby Attractions
While embarking on the Kedarnath Trek, the adventure extends beyond the trail itself, offering the opportunity to explore nearby attractions that add depth to your journey. After paying homage at the revered Kedarnath Temple, consider extending your exploration to destinations like Badrinath, a significant pilgrimage site renowned for its temple dedicated to Lord Vishnu. Rudraprayag, where the Alaknanda and Mandakini rivers confluence, offers a serene atmosphere and a chance to connect with nature. Chopta, known as the “Mini Switzerland of India,” beckons with its captivating meadows and breathtaking views of the Himalayan peaks. These nearby attractions enhance your overall experience, painting a richer picture of the region’s cultural and natural diversity.
Capturing Memories: Photography Tips
As you embark on the Kedarnath Trek, don’t miss the chance to capture the awe-inspiring landscapes through your lens. To truly encapsulate the beauty of the journey, embrace natural lighting – early mornings and golden hours before sunset offer magical illumination. Experiment with different angles to showcase the vastness of the Himalayas, the serenity of the meadows, and the intricacies of the trails. Focus on details like vibrant wildflowers, flowing streams, and rugged terrains to convey the trek’s diversity. Additionally, consider using people in your shots to provide a sense of scale and perspective. Lastly, let the breathtaking views inspire you; tell a story through your photos and immortalize the memories created during this remarkable expedition.
Trekking Solo vs. Group Trek
When considering the Kedarnath Trek, the choice between embarking solo or joining a group trek comes down to personal preferences and desired experiences. Trekking solo offers introspection and a unique connection with nature, allowing you to set your own pace and relish the solitude. It’s a chance for self-discovery and embracing the trail at your own rhythm. On the other hand, a group trek infuses camaraderie and shared memories. It’s an avenue for forming bonds with fellow trekkers, exchanging stories, and enjoying collective triumphs. Group treks often offer organized logistics, easing the burden of planning and navigation. Ultimately, whether solo or in a group, the Kedarnath Trek promises transformative moments and breathtaking vistas, tailored to your chosen path.
Important Points to Keep in Mind Before Going Kedarnath Trek
Embarking on the Kedarnath Trek is an exciting adventure, but thorough preparation is key to ensure a safe and enjoyable experience. Here are important considerations before you begin your journey:
- Physical Readiness: The Kedarnath Trek involves challenging terrain and high altitudes. Make sure you’re physically fit and ready for the demands of the journey. Regular exercise and cardiovascular training can help build stamina.
- Weather Readiness: Weather conditions can change rapidly in the mountains. Pack clothing suitable for both warm and cold weather. Don’t forget rain gear to stay dry during unexpected rain showers.
- Footwear Selection: Invest in sturdy, comfortable trekking shoes with proper grip. Well-fitting footwear prevents discomfort and minimizes the risk of injuries.
- Appropriate Clothing: Layer your clothing to adapt to varying temperatures. Bring warm clothing like jackets, gloves, and hats, as temperatures can drop significantly at higher elevations.
- Important Documents: Safeguard your identification, permits, and relevant documents in a waterproof pouch. These might be necessary at different checkpoints during the trek.
- Hydration and Nutrition: Carry an ample supply of water to stay hydrated throughout the trek. Pack energy-rich snacks such as nuts, trail mix, and energy bars to sustain your energy levels.
- Basic First Aid Kit: Prepare a basic first aid kit containing essentials like bandages, antiseptic cream, pain relievers, and any personal medications you require.
- Communication Plans: Although mobile network coverage might be limited, carrying a fully charged power bank is useful. Inform a trusted person about your trekking plans and expected return date.
- Respect for Local Customs: The Kedarnath region holds deep religious significance. Respect local customs, traditions, and sacred sites. Dress modestly and avoid littering.
- Trekking Permits: Check whether you need permits to access the trekking route. Obtain these permits beforehand to prevent any delays.
- Guided Trek or Solo: Decide whether you’ll undertake the trek with a guided group or as a solo traveler. Guided treks offer expertise and logistical support.
- Altitude Adjustment: Allow your body time to acclimatize to higher altitudes. Take breaks, avoid rapid ascents, and pay attention to your body’s signals.
- Environmental Responsibility: Adhere to the Leave No Trace principles. Carry all your waste back with you and help preserve the natural beauty of the environment.
- Emergency Contacts: Keep emergency contact numbers readily accessible. Be aware of nearby medical facilities and rescue services.
- Travel Insurance: Consider obtaining travel insurance that covers potential medical emergencies and trip cancellations.
Conclusion: A Transformative Experience
The Kedarnath Trek transcends the ordinary, offering an unforgettable blend of adventure, spirituality, and natural beauty. As you trek through the breathtaking Himalayan terrain, you’ll find solace, courage, and a renewed sense of wonder. So, gear up for this life-changing expedition and embrace the journey of a lifetime.
FAQs (Frequently Asked Questions)
- Is prior trekking experience necessary for the Kedarnath Trek? While prior experience is beneficial, beginners with reasonable fitness levels can undertake the trek with proper preparation.
- Are there any age restrictions for the trek? The trek is suitable for individuals in good health. It’s recommended to consult a physician before embarking, especially for senior citizens.
- What’s the significance of Kedarnath Temple? Kedarnath Temple holds immense religious importance for Hindus and is one of the twelve Jyotirlingas of Lord Shiva .
- Are there any wildlife concerns during the trek? While encounters are rare, the region is home to various wildlife species. Trek in groups, make noise, and avoid venturing into dense forests.
- Can I undertake the trek during winter? The trek is not recommended during winter due to heavy snowfall and extreme cold temperatures.
Leave a Reply Cancel reply
Your email address will not be published. Required fields are marked *
Plan Your Trip Our expert will get in touch with you shortly
Mobile No *
A Guide for Kedarnath Trek

Kedarnath Route Map
Planning to go for the Kedarnath Yatra ? If yes then make sure you have a complete guide for the 18 km long Kedarnath Trek and thus enable yourself to have a journey that is satisfying and fulfilling both in terms of divinity and comfort. If you are looking for a travel guide for the Kedarnath Trek then look no more as we have prepared for you a complete catalogue of the Kedarnath Trek that will make your journey to Kedarnath easy and joyous.

Visit Kedarnath by Road (Till Sonprayag)
To reach at Kedarnath by road you need to book a taxi or bus service which can be privately run or by the GMOU ltd. To reach at Kedarnath from Delhi you need to travel till Dehradun for which you can choose any medium be it road, rail or airways. From Dehradun travel till Haridwar and from Haridwar the following route will be your Guide to the Kedarnath Trek.
New Delhi to Haridwar 206km >> Haridwar to Rishikesh 24km >> Rishikesh to Devprayag 74km >> Devprayag to Srinagar 34km >> Srinagar to Rudraprayag 33km >> Rudraprayag to Gaurikund (via Tilwara-Agastmuni-Chandrapuri >> Kund >> Guptkashi >> Phata >> Sitapur >> Sonprayag) 74km >> Gaurikund to Kedarnath (by trek) 18km.
You can also visit Kedarnath from Delhi by boarding a direct bus from Delhi Bus Stand Kashmiri Gate to Gaurikund which is run by the Uttarakhand Transport Corporation. From Gaurikund further continue your trek to Kedarnath.

Visit Kedarnath by Air
To reach Kedarnath by air you can book a seat for yourself in a helicopter. If travelling by a helicopter till Kedarnath you can from Dehradun as well as Haridwar and Rishikesh .
From Dehradun- travel till the Shastradhara Helipad in Dehradun. The Helicopter will drop yoiu at your destination within a time period of 40 minutes.
From Haridwar/Rishikesh- If you are planning to travel to Kedarnath from Rishikesh/Haridwar via Helicopter then travel from Haridwar/Rishikesh till Phata via taxi which is at an approx distance of 200km and 195km respectively.
Kedarnath Trek Guide – How to Reach Kedarnath by Trek
After you reach till Sonprayag you will have to travel in a shared cab which charges Rs 20 per person this cab will take you till Gaurikund, Further from Gaurikund the trek to Kedarnath begins the directions of which are listed below as your Guide to Kedarnath Trek.
Kedarnath Trek Distance
The trek to Kedarnath is a 18 km trek which starts from Gaurikund till Kedarnath. The trek has changed since the 2013 flood disaster in Uttrakhand and since then the 14 km trek to Kedarnath has increased to a 16km trek.
Route Map of the Kedarnath Trek
The Kedarnath trek is a 18 km trek which starts from Gaurikund. Earlier the route followed was from Rambara, it was a well developed, well fenced and a facilitated trek route. However the Gov has now changed the trek Route of Kedarnath after the 2013 disaster as the old trek route to Kedarnath was completely erased. The New Trek Route to Kedarnath is given below which will be your Travel Guide to Kedarnath Trek .
- Reach at Gaurikund (6km approx) through shared taxi from Sonprayag
- Gaurikund to Jungle Chatti(6km) through the Rambara Bridge.
- Jungle Chatti to Bheembali (4km)
- Bheembali to Linchauli (3km)
- Linchauli to Kedarnath Base Camp (4km)
- Kedarnath Base Camp to Kedarnath Temple (1km)

Features of the Kedarnath Trek
The Kedarnath Trek is a 18km medium to steep trek which requires a good level of physical fitness. Before going for the trek every pilgrim has to get themselves checked that whether they are capable of trekking or not. Timings of Kedarnath Trek from Gaurikund commences from 04:00AM in the morning till 01:30PM. This timing is fixed because Kedarnath is located in the Kedarnath Wildlife Sanctuary and therefore the pilgrims are not allowed to trek anytime. No pilgrim is allowed to leave after this specific time. These are high altitudes trek so it is advisory for the ones with respiratory problems to first consult with a doctor before trekking.
Facilities at the Kedarnath Trek
The Kedarnath Trek facilities include the services of Palki/Dandi, Kandi & Mule/Ponies. Anyone can book these services from the booking counter at Gaurikund/Sonprayag. Different distances have different rates such as the Gaurikund to Kedarnath Dandi will cost Rs 4450, Kandi will cost Rs 3350 and the Poni will cost Rs 4100. In the midst of the trek there are proper facilities of tented accommodation, drinking water and small shops/ restaurants are also there in the trek route. There is also Helicopter services from the Kedarnath helipad to Phata and other helipads.
Things to Remember Before Going on the Kedarnath Trek
- Do get a check up before going on the trek to Kedarnath.
- People with Respiratory disorders and High Blood Pressure should not trek to Kedarnath.
- If you want to travel through Kandi, Ponies and Palki make sure that the prior booking is done at Gaurikund/Sonprayag booking counter.
- Trek between 04:00AM to 01:30PM as this is the only time when pilgrims are allowed to trek to Kedarnath.
- In case you won’t be able to cover the trek till late evening you can take Palki or Ponies to reach to your destination. You can also stay in the camps which are set up in between the trek at Jungle Chatti, Bheem Bali and Lincholi for a night and start journey next morning.
So here is a Complete Guide to Kedarnath Trek for you which will help you to analyze and go for your Kedarnath Yatra, making it more divine and comfortable.
Kedarnath Trek Guide Faqs
Embark on a journey through the Kedarnath Trek with our concise FAQ guide, providing essential information for your adventure in the Himalayas. Explore the spiritual essence of this revered pilgrimage route amidst the awe-inspiring mountain scenery.
What is the best time to undertake the Kedarnath Trek?
The best time to undertake the Kedarnath Trek is usually from May to June and then from September to November. During these months, the weather is relatively stable, with clear skies and pleasant temperatures, making it ideal for trekking. However, it's important to check current weather conditions and any potential risks before planning your trek.
What is the popular route for the Kedarnath Trek?
The most popular route for the Kedarnath Trek is via Gaurikund. This route spans approximately 16 kilometers and offers picturesque views of villages, forests, and mountains. It's the traditional and well-established path taken by most trekkers, providing a scenic and immersive experience through the stunning landscapes of the Himalayas.
What are the essential items to pack for the Kedarnath Trek?
Essential items to pack for the Kedarnath Trek include sturdy hiking boots, warm clothing layers, waterproof jacket and pants, first aid kit, high-energy snacks, and personal toiletries. Additionally, carry any necessary permits or identification documents and pack light but nutritious food items for sustenance during the trek.
What is the altitude of Kedarnath and how does it affect trekkers?
The altitude of Kedarnath is approximately 3,583 meters (11,755 feet) above sea level. This high altitude can affect trekkers in several ways, including decreased oxygen levels, which may lead to altitude sickness symptoms such as headache, nausea, and fatigue. Trekkers need to acclimatize properly by ascending gradually, staying hydrated, and recognizing signs of altitude sickness to ensure a safe and enjoyable trekking experience.
How difficult is the Kedarnath trek?
The difficulty of the Kedarnath trek can vary depending on factors such as the route chosen and individual fitness levels. Overall, it's considered a moderately challenging trek, especially due to the high altitude and variable weather conditions. The trek involves ascending steep paths, navigating rocky terrain, and trekking for several hours each day. However, with proper preparation, including physical fitness training and acclimatization, most trekkers with moderate hiking experience can successfully complete the Kedarnath trek.
Are there any accommodation options available along the Kedarnath trek route?
Yes, there are accommodation options available along the Kedarnath trek route. These include guesthouses, lodges, tents, and camping sites at various points along the trail. Many villages en route offer basic accommodation facilities for trekkers, providing meals and overnight stays. Additionally, there are temporary tented accommodations set up during the peak trekking seasons to cater to the influx of tourists. It's advisable to book accommodation in advance, especially during the busy pilgrimage seasons, to ensure availability.
How much time it take to complete the Kedarnath trek?
Starting from Gaurikund, the Kedarnath trek covers a distance of roughly 16 kilometers. Along the way, hikers are treated to magnificent views of the Himalayas, passing through lush forests, majestic waterfalls, and winding rivers. Typically taking 6 to 8 hours to complete, this trek presents a moderate level of difficulty, balanced by the awe-inspiring scenery.
What are the highlights or attractions of the Kedarnath trek?
The highlights of the Kedarnath trek include breathtaking views of the Himalayan landscapes, serene forests teeming with wildlife, captivating waterfalls cascading down rugged cliffs, and the opportunity to immerse oneself in the spiritual ambiance of the revered Kedarnath Temple. Additionally, trekkers can experience the warmth of local hospitality in quaint mountain villages along the route, making the journey both enriching and unforgettable.
Get Tour Details
Add comments and suggestions or ask questions about "a guide for kedarnath trek".
We would be glad if you can comment below and provide your valuable suggestions and feedback on A Guide for Kedarnath Trek. If this A Guide for Kedarnath Trek page have any wrong information/list or out of context content, then you can report us as well.
If you have any questions, you can also ask as in the following comments section. Our team will try to provide you answers/solutions.
Why the prices are not as per the MRP? And why the prices of room is too high no fixed price, no proper facilities, they are cheating the pilgrims, shared taxi in which 12 people has to sit otherwise they will wait there. The trek is full of donkey sit all the way
What is the height at base camp and pick at kedarnath
Can we visit Kedarnath, Badrinath, gangotri and yamunotri
I am Heart patient should i go kedarnath after check up
Yes you can go if you are fit, The trek is too steep if you are planning then take proper medicine along with you
Is the Kedarnath trek open a day before temple opening? I want to go there on 8th May and stay overnight to offer prayers next day. The temple opens on 9th May. Can I trek on 8th May?
Yes, trek will be open by then.
Thanks for the question even i am trekking on 8th will see you
Destinations
Char dham yatra tour packages.
- Char Dham Packages
- Badrinath Packages
- Kedarnath Packages
- Gangotri Packages
- Yamunotri Packages
- Teen Dham Tours
- Do Dham Packages
- Chardham Helicopter Packages
- Chardham Leisure Hotels
- Fixed Departure Tours
- GMVN Tour Packages
- Hemkund Tours
- Winter Chardham Packages
- Chardham Packages 2024
Char Dham Hotels
- Chardham Hotels
- Hotels in Badrinath
- Hotels in Kedarnath
- Hotels in Gangotri
- Hotels in Yamunotri
- Hotels in Barkot
- Hotels in Joshimath
- Hotels in Auli
- Hotels in Srinagar
- Hotels in Devprayag
- Hotels in Guptkashi
- Hotels in Harsil
- Hotels in Ukhimath
- Hotels in Uttarkashi
- Hanumanchatti
- Rudraprayag
- Sayanachatti
- Srinagar Garhwal
- Karanprayag
- Jankichatti
Packages
tours, book now.

Gokyo Ri Trek
Gokyo Ri Trek, the best alternative trail to the Everest Base Camp Trek, offers exceptional views of the Himalayan peaks along with lakes and glaciers. Gokyo Ri Trek is a moderate trek in the high Himalayas of the Everest region. Instead of traveling to the more commercial Everest Trek, trekkers often choose this itinerary to…

Langtang Valley Trek
Langtang Valley is a classic trekking destination, located only 61.8km away from aerial distance, north of Kathmandu. Although the Langtang Valley Trek is relatively short, accessible, and cheap, the trails are quieter with less number of trekkers compared to other classic trekking destinations in Nepal. The trek is ideal for both experienced trekkers as well…

Mardi Himal Trek
Mardi Himal Trek is a hidden gem for the dedicated trekkers and backpackers. Located eastwards of the classic Annapurna Base Camp, this trekking route is yet to witness a large crowd like other commercial treks in Nepal though it officially opened for all in 2012. The richly diverse terrains of Mardi Himal takes you across…

Manaslu Circuit Trek
Manaslu Circuit Trek stands less beaten and secluded compared to treks like Everest or Annapurna, but it is equally as impressive as other classic treks. Manaslu Circuit Trek is the most beautiful as well as demanding treks in Nepal. Trekking in Manaslu is a delightful experience with a blend of adventure, scenery, culture, lifestyle, and…

Guide to Explore non Touristy places in Kathmandu
There are many places to visit and many things to do in Kathmandu. There are many tourist attractions in the Kathmandu Valley that you may like to visit like Durbar Squares, Swoyambhunath, Boudhanath, Pashupatinath etc. These places are great for visits, but there is more to this mystical city than these regular tourist spots. Sometimes…

Vegetarian’s Guide to Nepal
Nepal is an ethnically and culturally diverse country with an impressive variety of local cuisines. If you are vegetarian and looking to visit the beautiful country Nepal, you will not have any issues fueling for your days with delicious Nepalese food. Vegetarians will feel at home in Nepal as meat is considered to be a…

Trekking in Nepal: The Definite Guide
Every year thousands of travelers opt for ultimate adventure of trekking in Nepal. Home to some of the highest mountains in the world, Nepal is a paradise for all kinds of trekkers. From easy to a strenuous grade and trek to the lap of the highest peaks offer you the best memories. The best part…

Tour Packages in Nepal – How to find the Best ?
Once in a while, everyone needs to take a break from their monotonous life and go on a holiday. You feel relieved and rejoiced in your holiday tours. You may dream your holiday to be wild and adventurous. Or, wish it be culturally insightful. Or, want to feel more relaxed in the serene beauty of…

Plan your Trip with these Superb Tips
Are you ready for your first trip ever? Are you excited? Or are you getting a little nervous on how to plan your trip. Let us help you out with some basic guidelines to have a good travel experience. Planning your trip is very important. As life away from home will not be the same…
IMAGES
COMMENTS
Kilimanjaro Climb Routes. There are six main Kilimanjaro routes that one can use to trek the highest mountain in Africa. The seventh Kilimanjaro route, Mweka, is used for decent only. Lemosho Route. Machame Route. Marangu Route. Mweka Route (descent only) Rongai Route. Shira Route.
Annapurna Base Camp trek route/itinerary. There are 2/3 routes that you can take to ABC. From this, you can plan out many itineraries. All routes coincide at Chomrong and follow the same path to the base camp. The trail can go straight to the Annapurna Base Camp or take a detour to Ghorepani Poon Hill or take a smaller detour to Ghandruk or both.
The Everest Base Camp (EBC) trek is a spectacular high-altitude trek in the mountains of Nepal. Prepare for jaw-dropping scenery and a unique cultural experience exploring the challenging trekking routes around the highest mountain in the world.
Classic EBC trek. 2. EBC trek with a helicopter return. 3. EBC and Gokyo Lakes trek. 4. EBC and Three Passes trek. The Everest Base Camp trek is a truly exhilarating and once-in-a-lifetime experience. There are various routes you can trek there and back, and you can even opt to fly back after reaching base camp.
Route Details. At its pinnacle, the trek crosses the Thorung La Pass (5,416 meters) before descending down to the town of Muktinath. From here the road construction activities (2004 -2008/09) have had a measurable impact on the Annapurna Circuit trekking experience.
Mardi Himal Trek is a hidden gem for the dedicated trekkers and backpackers. Located eastwards of the classic Annapurna Base Camp, this trekking route is yet to witness a large crowd like other commercial treks in Nepal though it officially opened for all in 2012.. The richly diverse terrains of Mardi Himal takes you across the densely forested areas leading to the high rocky mountain trails.
The W Trek in Patagonia is a thrilling multi-day hiking route that takes you through the mesmerizing Torres del Paine National Park, one of the most remarkable hiking destinations in South America. This 80 km (50 mi) trail offers an exhilarating blend of spectacular scenery, challenging terrains, and unforgettable experiences.
Langtang Valley is a classic trekking destination, located only 61.8km away from aerial distance, north of Kathmandu. Although the Langtang Valley Trek is relatively short, accessible, and cheap, the trails are quieter with less number of trekkers compared to other classic trekking destinations in Nepal.. The trek is ideal for both experienced trekkers as well as novice travel enthusiasts.
The trek can be extended to 21 days with a side trip to Tsum valley. Highlights. Larkya La Pass- the highest point of the trek; Novel trek route; Diverse and secluded topography; Tsum Valley and Mu Gompa; Beautiful traditional Gurung and Tibetan-influenced culture; The less crowded trek route; Lowlights. It is a restricted trek route.
The W trek in Torres del Paine National Park, Patagonia is a stunning route with some of the most beautiful landscapes in Patagonian National Park. It's one of the most famous hikes in South America. The trek is a good compromise between day hikes in Torres del Paine and the challenging O-circuit. The W route takes hikers to all highlights of ...
The W Trek is a well-known and well-travelled route. There are certain elements that make hiking the W Trek a little easier, including the availability of refugios (mountain lodges), a relatively low altitude, non-technical hiking, generally gentle ascents and descents, and jaw-dropping scenery. That doesn't mean the W Trek is easy.
The O trek is a circular hiking route around the Cordillera del Paine in Torres del Paine National Park in Chilean Patagonia. The route includes the W trek and a remote route through the backside of the park. The circuit connects the popular areas and the remote parts of the park.
Leading from Chamonix in France through the southern Valais to Zermatt in Switzerland, the 2-week-long Walkers' Haute Route trek traverses some of the highest and most eye-popping scenery accessible anywhere in the Alps. Hiking here is a summertime endeavour, tracing a different course to the famous winter Haute Route for ski-tourers. ...
Ominous weather on Torres del Paine's O Circuit. In short, the O Circuit is a 126-kilometer loop around the scenic Cordillera del Paine mountains within Patagonia's Torres del Paine National Park. The trail includes the famous W Circuit (67 km), and wraps around the backside of the spectacular mountain range, eventually connecting to make a ...
The Best Char Dham Route Map. The Kedarnath walk or trek starts from Gaurikund. At Sonprayag, there is a parking space. You cannot take your personal vehicle from Sonprayag to Gaurikund. There are sharing autos available there. You have to travel to Gaurikund with this guide. The Kedarnath Trek Route of 16 kilometres is as follows:
Annapurna Circuit Trek. Annapurna Circuit is one of the most famous trekking routes in Nepal. The trail traverses a variety of terrain in the Annapurna region. And explore the rich cultural and natural diversity. The trek offers an amazing view of the Annapurnas, Macchupucchre, Dhaulagiri, Manaslu and Langtang Himal.
Kedarnath Trek, Uttarakhand. I want to drive there myself. What is the motorable route? Haridwar - Rishikesh - Devprayag - Srinagar - Rudraprayag - Augustmuni - Kund - Guptkashi - Sonprayag - Gaurikund. Distance from Haridwar to Gaurikund: 237 km. The motorable road ends at Gaurikund, but you'll need to park your vehicle at ...
Although there are myriad hiking routes in Torres Del Paine National Park, the most famous and most popular is the W, a 4 to 5-day hike that takes in the park's most spectacular sights: from the iconic spires of Mirador Las Torres and the enormous Grey Glacier to the steep trail along Valle Francis and the contorted, multicoloured horns of Los Cuernos.
What is Lares trek? The Lares Trek is a captivating hiking route offered by Peru, holding a prominent position as the third most renowned trail, following the well-known Inca Trail and Salkantay Trek.If one seeks a less crowded experience in visiting the iconic Machu Picchu, this option proves to be ideal.Throughout the trek, individuals will encounter awe-inspiring landscapes in the majestic ...
Route Map of the Kedarnath Trek: Rishikesh to Sonprayag: The journey usually starts from Rishikesh, where trekkers travel to Sonprayag by road. Sonprayag is the base camp for the Kedarnath Trek. Sonprayag to Gaurikund: From Sonprayag, trekkers proceed to Gaurikund, which is around 5 kilometers away. Gaurikund is named after Goddess Parvati and ...
The trek has changed since the 2013 flood disaster in Uttrakhand and since then the 14 km trek to Kedarnath has increased to a 16km trek. Route Map of the Kedarnath Trek. The Kedarnath trek is a 18 km trek which starts from Gaurikund. Earlier the route followed was from Rambara, it was a well developed, well fenced and a facilitated trek route.
Mardi Himal Trek is a hidden gem for the dedicated trekkers and backpackers. Located eastwards of the classic Annapurna Base Camp, this trekking route is yet to witness a large crowd like other commercial treks in Nepal though it officially opened for all in 2012.
WILLIMANTIC, Conn. (WTNH) — A former flight attendant is making a trek from Boston's Logan Airport to Ground Zero in New York City. The beverage cart he is pushing is like an actual beverage ...