
- Current Issue

- All Articles

- Best Sellers
- New Releases
- Print and Book Bundles
- Coming Soon

- Limited Editions

- Portfolios and Sets
- Back Issues
- Aperture PhotoBook Club
- Aperture Conversations
- Member Events
- Online Resources
- Internships
- Professional Development
- Educational Publications
- Portfolio Prize
- PhotoBook Awards
- Creator Labs Photo Fund

- Connect Council
- Patron Circle

- Tax-smart Ways to Give
- Annual Fund
- Capital Campaign
- Corporate Opportunities
- Vision & Justice Book Series

15 Photographers On Their Greatest Journeys
A journey implies a traversing a terrain, but photographs can also travel in time, transporting us to a distant past or an imagined future. Pictures can bring someone home, or closer to understanding themselves. Over the past sixty-five and seventy years, respectively, Aperture and Magnum photographers have demonstrated how photography moves across geography, time, space, and lives, both real and imagined.
This week, for five days only, get signed and estate stamped, museum quality, 6-by-6-inch prints by acclaimed Aperture and Magnum photographers for $100 each. Use this link to make your purchase and a proceed from each sale will support Aperture Foundation.

Jacob Aue Sobol, A boy does a somersault and lands in a deep pile of snow, Tiilerilaaq, Greenland, 2001 ©the artist/Magnum Photos
Jacob Aue Sobol
“I still recall my journeys to the East Coast of Greenland as the greatest and most fearless ones of my life. I was only twenty-three when I took this picture of a six-year-old boy jumping off the roof, making a summersault, and landing in a pile of snow. To me it became an image not only about the strength and courage of the children in this village, but also about what was happening inside myself. I had fallen in love with a local woman and [had] decided to live with her family to be trained as a hunter and a fisherman by the Inuits. I had started a new life, a new journey that made me feel exactly like that boy jumping off the roof.” —Jacob Aue Sobol

Hellen van Meene, Untitled , 1999 © the artist
Hellen van Meene
“The subjects of my photographs are at the cusp between childhood and adulthood. The girl here radiates a sense of ambiguity, of vulnerability, of soul-searching; it is in this fleeting in-between state of dramatic physical and emotional change, that these qualities become more visible. I’m interested in the tension between her teenage sweetness and awkwardness, made all the more palpable by her pose, and the contrasts between the textures. While this portrait shows a transitory moment of life, it is also timeless—a reminder that we are all in a state of change on life’s journey.” — Hellen van Meene

Todd Hido, Untitled, #2154-a , 1998 © the artist
“This particular photo has a special meaning to me, even though it hadn’t been published in my House Hunting series, where I explored the Bay Area suburbs at night. After the completion of a body of work, I will often find things that didn’t get published because there was certain hyper sense of uniformity that I was looking for when I was making my initial choices. However, once you are able to gain some space and time to reflect, gems like this emerge and you scratch your head and ask, why haven’t I used this one before?” — Todd Hido

LaToya Ruby Frazier, Pat Brunty, the caretaker, standing behind No Contest (1994). Noah Purifoy Outdoor Desert Art Museum, Joshua Tree, California , 2016 © the artist
LaToya Ruby Frazier
“I took a pilgrimage out in the Mojave Desert with sculptor/installation artist Abigail DeVille to pay homage and respects to our ancestor and predecessor, artist Noah Purifoy. Born in Alabama in 1917, Noah Purifoy, after serving in World War II, spent most of his adult life in Los Angeles as an artist, activist, and educator. In 1989, he relocated near Blair Lane in Joshua Tree, High Desert. For the last fifteen years of his life, Purifoy created nearly 120 sculptures, before he passed away at eighty-six on March 5, 2004. The caretaker of Noah Purifoy’s Desert Art Museum, Pat Brunty, a resident of Yucca Valley and also an Alabama native, worked closely with Noah during the final years of his life. She and her late husband Roger Brunty, under supervision of Noah, built his theater, Andrea’s Little Theater, in 2000. Pat is a passionate and dedicated caretaker of Noah’s work and is serious about maintaining the sculptures as he last saw them, from picking up trash to removing vandalism and greeting visitors. She believes visitors should encounter Noah’s works with an open mind of interpretation.” — LaToya Ruby Frazier

Olivia Bee, Pre-Kiss , 2010 © the artist
“This is part of my series, and book with Aperture , Kids in Love . It focuses on your internal universe expanding into the outside world, and experiencing things for the first time. They are real moments of my life that I treat with love and respect.” — Olivia Bee

Kwame Brathwaite, Bob Marley, Beacon Theatre , 1976 © the artist
Kwame Brathwaite
“I was backstage at Madison Square Garden when I first met Bob. We started talking about Marcus Garvey and Haile Selassie. He was a great storyteller. He had purpose. He talked about Rasta culture and knew a great deal about the African diaspora and the liberation struggles all over the world. Later, we spent time at his house on Hope Road in Kingston. He was great to be around and made everyone feel at home. His poetry and his music are still relevant today. He was a great voice for empowerment and freedom, and he was a friend.” — Kwame Brathwaite

Jamel Shabazz, A Time Before Crack , 1983 © the artist
Jamel Shabazz
“As the dark clouds of crack cocaine slowly casted [ sic ] their destructive shadows over America during the early 1980s, I saw the urgent need to take to the streets as a concerned citizen and documentarian. Already, a number of young men I knew personally were dying at the hands of other young men I also knew. I felt it was my duty both to warn the youth of the dangers that I foresaw, and to use my camera as a tool to engage and document. Anticipating more death and destruction, I found that photography was the key that allowed me entry into the lives of young people. I would venture out to the local high schools and shopping districts throughout the New York City area, searching for young people to speak to about this growing crisis. To my surprise, almost everyone seemed open to exchange thoughts and afterward stand for a portrait. Those images, in fact, became evidence of the countless exchanges I would have; many new friendships were also forged as a result of these interactions. In making these often-posed portraits, I wanted to capture a spirit of friendship and love. Today, these images serve as a constant reminder of a time before the great crack epidemic that would change life forever.” — Jamel Shabazz

Susan Meiselas, Shortie’s Dream, Barton, Vermont , 1974 ©the artist/Magnum Photos
Susan Meiselas
“The dream of the road: the place to escape, to wander, to encounter something beyond what you had imagined you’d find. That’s what led Shortie to leave home to strip in the Girl Show. We intersected while traveling through New England. Journeys are physical and emotional disruptions that involve both body and mind. For me, this journey also meant finding a new path. I followed the carnivals with the desire to make images and share the words of women whose working lives forced them to make extremely difficult choices to launch their dreams.” — Susan Meiselas

Zackary Drucker & Rhys Ernst, Relationship, #12 , 2008–13 © the artists
Zackary Drucker
“Before the prevalence of selfies, or the square files of Instagram, I photographed myself into existence to fill the void of feeling that gender outlaws had been erased or only rendered by outsiders. I don’t particularly like this self-portrait, but I acknowledge this past incarnation who exists within me, and honor them for delivering me here and now.” — Zackary Drucker

Leonard Freed, Divers on the banks of a canal near Dortmund, Dortmund, West Germany, 1965 ©the artist/Magnum Photos
Leonard Freed
“As a young photographer in the 1950s, Leonard left New York City for post-war Europe. He found devastated European nations that were in the process of rebuilding themselves. When in Rome, he met, and later married, a German woman. Together they would photograph Germans in Germany for the next ten years, creating two photobooks: Deutsche Juden heute (1965) and Made in Germany (1970).” — Elke Susannah Freed

Justine Kurland, Sea Stack, Double Mama, Ruby Beach, Washington , 2006, from the series, Of Woman Born © the artist
Justine Kurland
“After the birth of my son, Casper, in 2004, I began a series of photographs that juxtapose radical representations of motherhood with idealized views of the American West. The project was titled after Adrienne Rich’s seminal feminist text, Of Woman Born: Motherhood as Experience and Institution (1976), in which she analyzes the patriarchal construct of motherhood and discusses why it is such a problematic topic for many feminists. While some theorists would prefer to do away with the body altogether, Rich envisions a new rubric in which the libidinal value of ‘tits and ass’ is replaced by the uterus and clitoris, and women are positioned as the arbiters of their own bodies. This series was my attempt to visualize what that shift might look like—women and children wandering in blissful togetherness through the social space of shared landscapes. I made them mostly for myself during my first years with a small baby, because I couldn’t relate to the depictions of motherhood available to me. These photographs opened up space for me to imagine a different way of being a mother.” — Justine Kurland

Graciela Iturbide, Cemetery, Juchitán, Mexico , 1988 © the artist
Graciela Iturbide
“Midway between the documentary and the poetic, my unusual way of looking through the lens integrates what has been experienced and what has been dreamt, into a complex web of historical, social and cultural references. The fragility of ancestral traditions and their difficult survival, the interaction between nature and culture, the importance of ritual in everyday body language and the symbolic dimension of landscapes and randomly found objects are paramount to my career. My work is characterized by an ongoing dialogue between images, time and symbols, in a poetic display in which dream, ritual, religion, travel and community all blend together.” — Graciela Iturbide

Joel Meyerowitz, Scotty’s Drive in, Florida , 1967 © the artist
Joel Meyerowitz
“Here’s Scotty’s. Sometimes when you’re traveling in the car all day, on the lookout for life on the fly, a great thirst comes over you and that desire for the next event evaporates immediately upon seeing an old-fashioned diner, I mean the real thing, not some dolled-up imitation serving prepackaged crap, but a place where some degree of reverence for the past lets you know that a milkshake from childhood can be found there. And here’s Scotty’s. Mmmmmm.”— Joel Meyerowitz

Enri Canaj, Korçë, Albania , February 2015 © the artist/Magnum Photos
“This is from a journey backward, to my own homeland, to what I have kept in my memory, what I have forgotten, what I grew up away from. All of it slowly melting together into a light crystal snow ball, that I keep safe with me. To keep me safe.” — Enri Canaj

Jérôme Sessini, Caracas, Venezuela , May 27, 2013 ©the artist/Magnum Photos
Jérôme Sessini
“For most people, travel is synonymous with vacation, exoticism and relaxation. Or flight, to escape the quotidian. I understood by traveling, that there was no trip far enough to escape from oneself. Elsewhere becomes here when we are there.” — Jérôme Sessini
Support Aperture today through the Magnum Square Print Sale in Partnership with Aperture , open online October 30–November 3, 2016.

A Young Photographer Makes a Family Tree about South Africa

Kosen Ohtsubo’s Flower Planet

A Biennial in Houston Explores the Politics of Visibility

8 Photobooks that Consider How Artists Engage with the Environment

Picturing Britain’s Working Class after the “End of History”

Announcing the 2024 Aperture Portfolio Prize Shortlist

The Musicians Who Energized a Revolution in Nepal

Close Encounters with Miranda July

Mariko Mori’s Anime-Inspired Critique of Gender in Japan

The World Is Martin Parr’s Runway

Learning From Mistakes: How They Shaped My Photography Journey
Throughout my photography journey, I've encountered various mistakes that have served as valuable learning experiences, ultimately shaping my understanding and approach to the craft. In this article, I'll share some of these mistakes, how you can avoid them, and how they've contributed to my growth as a photographer.
The following mistakes I’ve made are ones that everyone has made at some point in their journey, whether a beginner or a passionate amateur, and may not come as news to some. However, if I had this info early on, then I know I would have been in a position to fast-track my learnings and, of course, the resulting images.
Not Having a Subject Clearly Identifiable
Initially, I struggled with compositions lacking a clearly identifiable subject. This mistake taught me the importance of identifying and emphasizing the main subject within the frame. By making mistakes that have ultimately helped me understand this skill, I've been able to create more compelling and impactful compositions, drawing viewers' attention to the focal point of my photographs. Now, I look for what I like to call the “star of the show” first; this is the main subject or star of the image. I then look for the supporting actors who will complement the scene, either by acting as leading lines or as complementary items to tie the image together. When you are composing, you avoid elements that will take the viewer's eye out of the frame. Instead, look for elements that will keep the eye within, a great example of this can be trees and branches, which can act like a natural frame within a frame. Take many shots while on location, moving 6 inches in all directions, and see the changes that they can make to your images!
Not Shooting at the Right Time
Another mistake I made was not considering the timing of my shoots. Through many mistakes, I learned the significance of capturing images during the golden hour, leveraging soft, warm light to enhance the mood and atmosphere of my photographs. Understanding the optimal times for shooting has elevated the quality of my images and allowed me to convey the desired emotions more effectively. With that being said, I have managed to capture some great images outside of these ideal times; however, I did that by being at a location well in advance and not rocking up 10 minutes before I needed to! Finally, when it comes to mood, you can get tons of it on cloudy days and at the totally wrong time, so even if you don’t get the conditions you had hoped for, take your shots regardless. If they aren’t banshees, then at least you have used it as a scouting opportunity for compositions to return to when the light does play ball!
Not Understanding the Exposure Triangle
Early on, I underestimated the importance of mastering the exposure triangle. By learning to manipulate aperture, shutter speed, and ISO settings, I gained greater control over exposure and creative effects in my photographs. Understanding the exposure triangle has enabled me to overcome exposure challenges and achieve the desired results consistently. This skill has been used many times when the light or conditions change, and I need to be able to dial in settings quickly to ensure I get the shot! Take the time to fully understand how each influences the other, make mistakes of course, but learn from them! It’s best to practice in all types of light and conditions so you have the memory built up and ready to be deployed when out in the field!
Gear Isn’t the Magic Wand
Now I know we all like having the latest camera , lens, and all the trimmings; however, it is important to recognize that all of these tools will only serve us if we understand the fundamentals of photography first. If we don’t fully understand, then all that this new camera is going to do is produce a better quality bad image. Instead, I would recommend mastering the settings of even the most basic cameras first before even considering upgrading to that monster megapixel beast. Then when you do eventually upgrade, you will know what you are doing and be able to do it well.
Not Forcing Myself to Get Out of Auto Mode
Remaining in auto mode limited my creative control and hindered my photography growth. Yes, it’s very easy to just point the camera in auto mode and get a shot; however, it’s not the type of shot you may have wanted to capture. For example, when it comes to photographing water, it needs some motion to fully deliver the feeling of movement in the image; this won’t be possible unless you take control of the shutter speed, and remaining in auto won’t allow this. Auto will also pick the best ISO that it feels is needed to capture the snapshot, yes a snapshot, not an image taken by you the photographer. Transitioning to manual shooting modes empowered me to take full control of my camera settings, resulting in images that better reflect my creative vision. Embracing manual mode has unlocked new possibilities and expanded my capabilities as a photographer, and I would highly recommend you get out of auto today!
Not Shooting in Raw
For a while, I overlooked the benefits of shooting in raw format. I felt it was easier to just get the file off the camera and not have to process it later! However, by embracing raw files, I gained greater flexibility and control during post-processing. After all, raw images retain more detail and dynamic range, allowing me to fine-tune exposure, color, and other aspects of the image to achieve the desired look. A JPEG is the finished file and shouldn’t be used to edit an image unless, of course, you want to be able to take a shot and have it ready to share at a moment's notice! Shooting in raw format has enhanced the quality and versatility of my photographs. I would assume most of you reading this already are shooting in raw; however, if you’re not, then make the change.

Only Shooting at Eye Level
Initially, I tended to stick to shooting at eye level, limiting the variety and creativity of my compositions. This approach doesn’t give a different viewpoint from what we normally see and most of the time results in a boring image. Exploring different angles and perspectives has broadened my creative horizons and enriched my photography and, of course, the resulting images. By diversifying shooting perspectives, I've been able to capture more dynamic and visually engaging images that stand out from the crowd. If you rock up to a location, place your tripod at eye level, and put your camera on to take the shot, you are missing out. The ground below you can contain the missing elements to complete the image; fallen branches, rocks, streams, and many other items can elevate your images as they can all be the supporting actors in your play. Finally, by getting lower, you can enable small items to become larger in the frame.
Buying Cheap Tripods
Investing in cheap tripods proved to be a mistake that compromised the stability and reliability of my photography equipment. Recognizing the importance of quality tripod support , I upgraded to a sturdy and durable tripod, ensuring stable support and consistent results in various shooting conditions. You’ve spent thousands on a camera and possibly the same on a lens, but to then place that investment at the mercy of a $50 tripod makes no sense! The risk of it falling over is high, plus if you are attempting to do some long exposures, then the chances of success are going to be slim as this cheaper tripod simply won’t remain solid during the time of exposure. Add into the mix wind and uneven ground, and you’re heading for a world of problems. Investing in a quality tripod has been a worthwhile investment; treat it as an essential part of your gear and invest wisely! My epiphany came after losing a camera, lens, and filters to the sea. Making the change resulted in contributing to the overall improvement of my photography and enjoyment!
In conclusion, each of these mistakes has played a crucial role in shaping my photography journey and enhancing my skills as a photographer. Embracing these learning experiences and applying the lessons learned has been instrumental in my growth and development. My advice to you is to embrace mistakes as opportunities for learning and growth, as they can ultimately lead to significant improvements in your craft. I’ve certainly made many, but hopefully, you won’t have to!

Darren J. Spoonley, is an Ireland-based outdoor photographer, Podcaster, Videographer & Educator with a passion for capturing the beauty of our world.

- Luminar Neo
- Luminar for iPad
- Portrait Background
- Structure AI
- Supercontrast
- Composition AI
- Studio Light
- Water Enhancer AI
- Twilight Enhancer AI
- See All 30+ Features
- Extensions Pack
- Supersharp AI
- Focus Stacking
- Background Removal AI
- Noiseless AI
- Magic Light AI
- Panorama Stitching
- Landscape Photography
- Wildlife Photography
- Portrait Photography
- Family Photography
- Wedding Photography
- Newborn Photography
- Photoediting for beginners
- AI Photo Editor
- Real Estate
- E-commerce Photography
- Food Photography
- About Skylum
- Technology Licensing
- Photo Tours
- Ambassadors
- Affiliate Program
New tools. New look. New possibilities.
Special offer: Up to 83% off
February 26, 2022
ACT NOW! SAVE UKRAINE. DEFEND DEMOCRACY.

Team Skylum
Photography

At 5 am on February 24, Russia began the full-scale military invasion of Ukraine. They are violently trying to steal our country.
Russian forces have invaded Ukraine, confirming our worst fears. At this very hour they are attacking us on the streets of many Ukrainian cities. We are at war.
Skylum was proudly founded in Ukraine, and our core development center is based in Kyiv. At this harrowing time, unfortunately we cannot guarantee the on-time delivery of updates to Luminar Neo. We strive for excellence in everything we do, and we will make sure to further develop and improve Neo and to keep you updated on any news.
However, today we ask our community for help and support. Here are some details on what has happened and how you can support Ukraine in this difficult time.
! At 5 am on February 24, Russia began the full-scale military invasion of Ukraine. They are violently trying to steal our country.
! Right now, there are missile strikes and bombardment of peaceful Ukrainian cities. We must hide our families in bomb shelters and protect our land with weapons in our hands as part of the territorial defense forces.
! This disastrous and entirely unprovoked Russian war has already taken the lives of 198 civilians. 33 children have been injured, and 3 have been killed.
! The Armed Forces of Ukraine, young and brave heroes, are fighting all over the country not only for Ukraine but for Peace and Clear Skies in Europe.
As we write to you from a city under attack, we want to be very clear: This war is not just something you see on TV. It is not happening in some distant lands. It is happening right now here in Ukraine, and the Russian forces who are invading our lands and threatening our families may come to your doorstep one day too if we do not stop them.
Sanctions that world governments are currently imposing are not enough. Russia must be completely isolated from all spheres of the civilized world: the financial system, technologies, sports, culture.
Here is a list of simple actions you can take to help Ukraine. We MUST unite to quite literally save the world before it’s too late:
- Contact your local representatives and pressure them to provide more support for Ukraine and stricter sanctions on Russia. We need military and humanitarian aid and Russia must be cut off from SWIFT.
- Donate money to humanitarian aid organizations. Find a full list over here: https://how-you-can-support-ukraine.super.site/
- Follow the news from official channels. Avoid fake news and disinformation!
Twitter: https://twitter.com/ZelenskyyUa
https://twitter.com/DmytroKuleba
https://twitter.com/Hromadske
https://twitter.com/DefenceU
https://twitter.com/backandalive
Telegram: https://t.me/Forbes_Ukraine_official
- Support the Ukrainian Army — Official Account of the National Bank of Ukraine
We stand together
Please share this information with your community.
#Ukrainians #NATO #Ukraine #StandWithUkraine

Experience the power of Luminar Neo
Did you enjoy this post.
Share it on your social media
Advanced yet easy-to-use photo editor
Most Popular

April 04, 2023
GIMP vs. Krita: which one is better for you?

December 02, 2023
GIMP vs Photoshop: Which Photo Editor Is Better?

May 25, 2023
Photography Composition Techniques: A Beginner's Guide
A special perk for our blog readers.
Get a 10% discount on Luminar Neo and dive into professional photo editing today!
I agree to my personal data being stored and used to received newsletters and commercial offers from Skylum.
Thank you for subscribing.
Your gift is waiting in your inbox!
Skylum Blog
The latest news and updates. direct from Skylum
Use Aurora HDR for free for 14 days.
Sent successfully!
Please check your inbox. We've sent you a copy via email.
Looks like you're subscribed already
This is sad. Looks like you’ve earlier unsubscribed from Skylum emails.
Thank you for downloading Aurora HDR
Preparing your download...
Did your download not start? Dont worry, just click here to try again.
Oops! Something went wrong. Don't worry, just click here to try again.
Step 1 Find & Open Aurora HDR Installer
Step 2 Follow the instructions to install Aurora HDR
Step 3 Enjoy new photo editing experience
Get started for free
Try out Luminar Neo for free for 7 days. No credit card needed.
Please check your email
Make sure it's a valid email address
Unlock Pro-Quality iPhone Photos with Our Free Guide! 📸
Gain instant access to simple yet powerful tips for enhancing composition, lighting, and editing—everything you need to transform your photos effortlessly!
👇 Fill out the form below to receive your guide directly via email.
Curiosity is the doorway to skill
Thank you for your interest! Discover the secrets to pro-quality photos in your guide, waiting in your inbox.
Try the request again later. If the error does not resolve, contact support.

- FOR VENDORS
HOW I STARTED: MY JOURNEY TO PHOTOGRAPHY
I have had quite a few people ask me lots of questions about my photography lately, so I have decided to answer those questions here on my blog through a series of posts! With that said, if anyone has any questions about me or about photography that they want answered, don’t hesitate to ask!
Question #1: How did you get started in photography?
I will definitely answer that question with this post, but that isn’t my only reason for writing this, either. I hope that maybe some of you who are reading this and are aspiring photographers get some hope. I completely understand that getting into photography can be super difficult and frustrating, but I promise, it is worth it!
So, here goes!
____________________________________________________
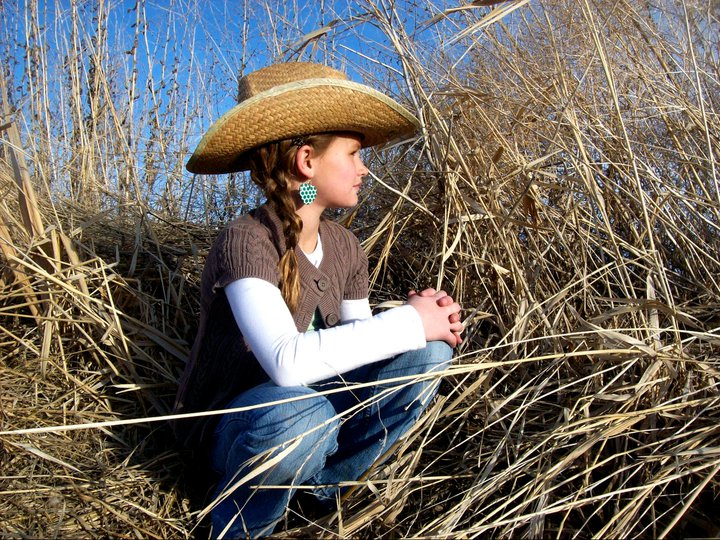
It all started in 8th grade. I was in a class called GT, and had just finished a massive research project, when my teacher announced that it was up to each of us students what we wanted to study for the rest of the school year. I spent the next week or so just running through ideas, but I got nowhere. Nothing was catching my attention! Then, one day, my friend looked at me and said, “What if we study photography?” Instantly, I knew that’s what I wanted to study.
I had always been fascinated with photography, but I had never thought I could be a photographer. As I started studying photography, I fell in completely in love with it. I still remember the day that my teacher handed me her camera. I took photos of lockers and the fence outside the back of my school. I was so fascinated with the depth of field! I came home that day and took my little point and shoot out with my neighbor Kelsey, and I had my first “photoshoot” ever.
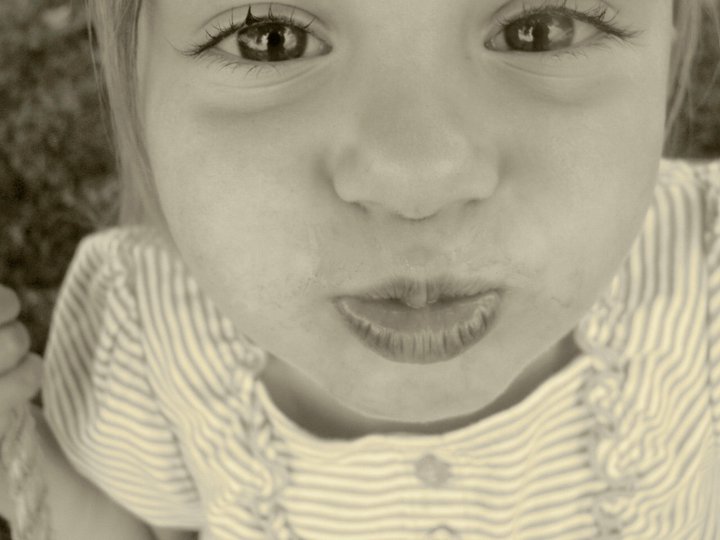
This is what I got:
I thought I was SO GOOD!!!! You guys, I am not even kidding. I honestly thought these photos were amazing. From this point on, I started taking photos pretty much everywhere I went. I didn’t really get any better, but I kept taking photos. For the next few years, I took lots and lots of photos (if you ask my dad, he will tell you I made our computer crash because I had too many photos on it). I even got hired from a few different people to take photos for them.
Turning point #1 came for me when I was a junior in high school. A lady that my family is friends with dropped a camera off to me. She said that her father-in-law had been a professional photographer and this was his old camera. She didn’t know how to use the camera, so I could use it, learn how to use it, then just teach her when I was done with it. This camera ended up being a huge blessing for me, but once again, I knew nothing about shooting in manual mode and I knew nothing about editing. I literally edited all of my photos on iPhoto. Knowing nothing then, it worked. Knowing what I know now, I was doing everything absolutely wrong.
In high school, I came across a few photographers that I loved, and I constantly stalked their blogs. My goal was to one day be as good as they were, and I always compared my photos to theirs. I thought I was so good at taking photos….until I compared mine to others. That was always a huge blow! I would find photos online that I liked and then try to recreate them. No matter what I did, I didn’t know how to edit my photos or how to even get the photo to look like theirs. I just really didn’t know anything more than just clicking a button and taking a photo.
However, one day in particular, I came across a post on Facebook that was obviously about me. Someone had posted about how horrible of a photographer I was, and even worse, there was a thread of comments all bashing my photography. I didn’t really know what to do, and I am pretty sure that I cried. I was trying so hard, and I genuinely thought I was so good! I knew I wasn’t the best, but I didn’t think I was horrible. It really made me so so so sad. [Now, I look back at the photos, and I understand that they really aren’t good at all, but I had to start somewhere. We all have to start somewhere. It’s literally impossible to pick up a camera and be amazing.]
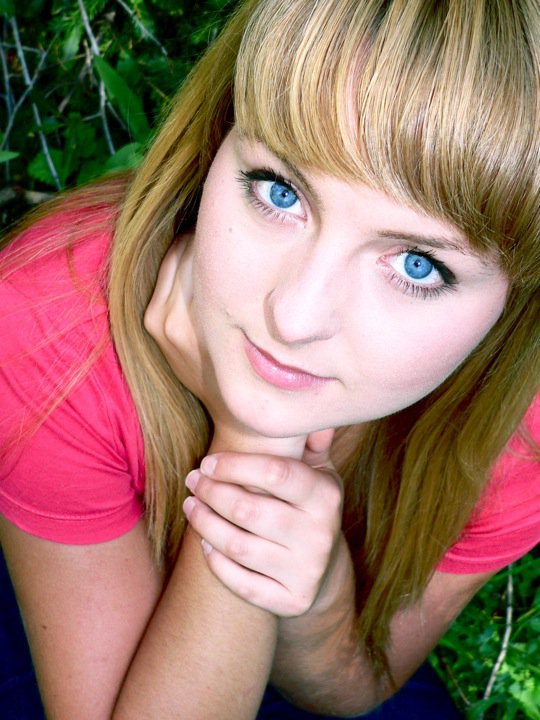
Guys, I am not kidding when I say that my photos weren’t that good. Haha! I’m literally laughing as I go through these photos to prove my point. To prove this point, here are the photos that I took my first couple of years:

I even entered this one in a contest for Idaho and somehow won……this photo still hangs in a local hospital. Hahahaha….
As I spent more and more time taking photos, I would luckily learn random little tricks that helped me get better, but I didn’t take any photography classes, nor did I study anything about photography. I really didn’t know anything, and anything I did know had been learned by chance.
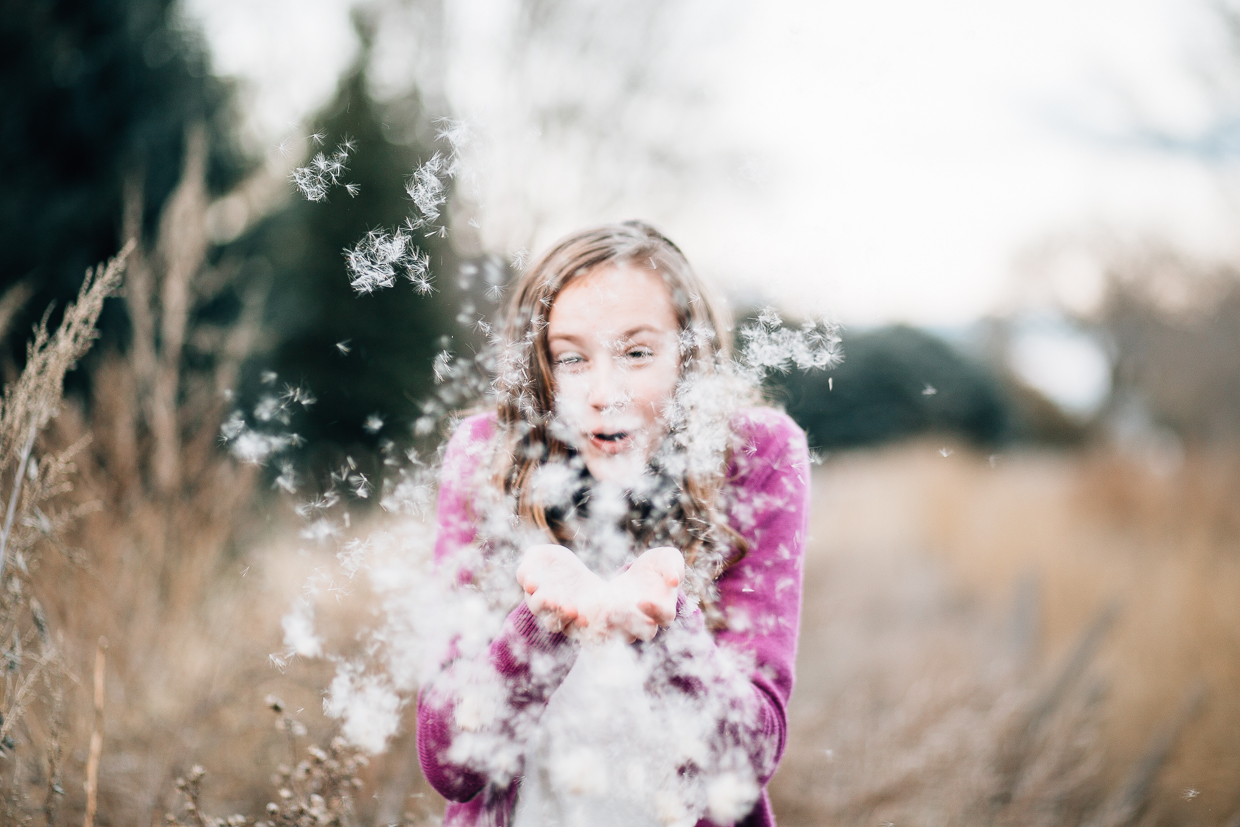
Turning point #2 for me came with this next photo. This was the first photo I ever took in complete shade. This was the day that I figured out that I thrived shooting in shade. I loved the clean look that shade gave you….no shadows. It quickly became my favorite. (Even to this day, I have people contact me and ask about my lighting and how I get it to be so perfect. The secret is I always shoot in shade. Like, I am a Nazi about it. I will not take a photo unless it isn’t in shade. It just isn’t my style.)
Despite the little things I learned, when I graduated high school, I was nowhere near where I wanted to be. It had been four years, and I still was horrible. I felt like I was stuck. I didn’t know what else to do. I was sick of being below average, and I decided to stop. Not many people even know this, but when I moved to college, I completely stopped taking photos. I didn’t tell anyone I liked photography. In my head, that dream was over. SO, my camera sat in my closet for almost a year, nearly untouched. In my head, I was finished.
Then, in April, someone in my ward found out that I took photos, and they asked me to take their engagements. I explained that I wasn’t any good, but if they really wanted me to, I would. They insister, so, I did.
When I got home from their shoot, I was BEYOND frustrated. Once again, I had tried to recreate photos I had found online, but I wasn’t anywhere near where I wanted. The photos just looked so bad! However, this shoot became very pivotal in my career. This was the shoot that helped me realize that photography truly was something that I loved. I wanted so badly to be good at it! I wanted to be like one of those photographers who everyone wanted to shoot their senior photos or their wedding! I wanted that so badly! I vowed in that moment to do whatever I could to become better.
I started with going to Allen’s Camera and buying a new camera and lens. I think I spent three hours in their store that day just quizzing them on different cameras. After lots of debating and phone calls with my dad, I settled on buying the Nikon D5200 and an 85mm lens. This was by far the largest purchase I had ever made in my life, and anyone who knows me knows that I am super thrifty and hate spending money. This was such a large decision for me! After I bought my camera, I came home and stared at the box for at least a week before I even told anyone I had bought it, let alone open the dang thing.
I bought it right around the time of finals, so it was almost summer break. I set a goal for myself to really focus on photography that summer and figure out my style. I spent every spare minute I had that summer taking photos and learning my editing. I started using Lightroom (seriously turning point #4. Lightroom changed my life). I would spend SO MUCH TIME editing each photo, and I was getting better at editing, but I still wasn’t in love with my editing. At work, each extra minute that I had, I stalked different photography blogs. I learned how to batch edit (what a time saver) and then I also discovered VSCO presets (turning point #5!). I worked and worked and worked until I understood Lightroom in and out so that I knew exactly how to edit my photos and exactly what I was doing to each of them! I started shooting weddings, and I think I shot five that summer and fall. I would go back and forth between loving my work and hating my work. To me, there was something missing! I just didn’t know quite what it was yet.
Then, I figured it out. TURNING POINT #6! In January of this year, I learned manual mode on my camera. HOW THE HECK DID I GO SO LONG WITH NOT KNOWING MANUAL MODE?? I do not know, but that was a game changer for me. In manual mode, you really control what your photo looks like! I now could manipulate my photos to get the lighting just the way I liked it! From here, I was able to really get my editing style down, and I even created my preset that worked for every photo that I took. (For those of you that are confused as to what a preset is, it is basically a button that I push that will automatically set certain settings that I pick for my photos. This saves me time, as well as makes all of my photos look the same. It gives me a style and a brand!)
It really was only about four or five months ago that I became 100% comfortable and satisfied with my editing. I finally reached the point where I had my own personal style. I was no longer trying to mimic another photographer at all! I was happy with my work, and it had taken me so long! Not only was I happy with it, but I literally know Lightroom like the back of my hand….no, I probably know Lightroom better than I know the back of my hand. So, now that I was comfortable with my work, I needed to figure out how to get my name out there.
First, I actually upgraded to a full-frame camera. I bought the Canon 6D and the Sigma Art 35mm lens. The quality of my photos and the beautiful skin tones were now amazing. It was such an amazing decision, and I don’t regret it for a second.
TURNING POINT #7! This is a big one! NETWORK! I really feel like my work took off when I decided to go to a local Instameet, which I actually won. I started branching out and collaborating with local photographers, stylists, makeup artists, musicians, and even models. I put so much time and effort into getting my name and brand out there! Seriously, I jumped at any chance I had to network. It gave me experience AND put me in contact with people who would ultimately put my name out there for me. My Instagram exploded, and I now have people stop me pretty regularly and ask if I am aliceshootspeople and then tell me they follow me. It’s super cool!
Now, people contact me from all over the country to photograph products for them! I love shooting weddings, and I booked around 15 wedding this year.
Like I said, I didn’t just pick up a camera one day and become good! It took a TON of time and effort! I cannot believe that I actually gave up at one point! I still have a lot to learn, but I think we always do. We should always be growing and learning! I truly believe (and people will disagree with me all the time on this) that anyone can be a photographer. As long as you are determined and willing to put in the research, time, and money, and don’t give up, you can do it. I 100% believe that, and if you don’t, just remember that I started here! These photos are taken in the exact same spot, just a few years apart:
LEARN ABOUT
THE EXPERIENCE
[…] A: YES! Don’t give up. Keep shooting. Set goals for yourself. Watch tutorials. Shadow people. Stalk your favorite photography blogs. Search poses. Be adventurous. Find your style! Stick with it! Own it! If you put in the time and effort, I promise you will achieve your goals and become the photographer that you dream of but don’t know how you will ever get there. Also, I wrote this post about a year ago, and it is my journey that I took to get to where I am! It probably needs to be updated, but I definitely think that it might help: https://www.aliceshootspeople.com/how-i-started-my-road-to-photography/ […]
- PRIVACY POLICY
- TERMS AND CONDITIONS
My Photography Journey – How I Found My Calling!

- October 2, 2020
- Photography
- Beginners photography , nikon dslr , Photography blog , Photography techniques , photography tips , portrait photography
My photography journey encapsulates deep learning and discovery of my calling in a specific photography genre – portrait of humans . The journey started with my love-hate relationship with the art. In absence of a mentor and dedicated time for long learning-curve, I studied, explored, and practiced alone. Eventually, the mundane, thankless, and unrewarding journey resulted in unyielding passion!
Read on to deep-dive into my roller-coaster ride and share your thoughts if you’ve also experienced same in your creative pursuits.

The first lesson and my unboxing moment!
Discovered the shutter-press button and got overwhelmed with the gear.
Not too long ago, in 2016, I went to a camera shop in Gurgaon with one of my photography enthusiast friends. I told him to get me the same DSLR that he possessed for 3-4 months by then. We got the camera and unboxed it at the shop. He looked through the viewfinder – showed me the shutter button.
“Dude, this is how you’ll hold the DSLR and here’s the shutter button.” He taught me the first lesson!
While I was holding the gear in my hand, got overwhelmed with so many buttons and icons on the camera. I trusted my self-learning capability to crack every button, settings, and master the technology to take my photography journey to mainstream. The learning started next day.
The first setback and how I overcame!
Learning photography seemed uphill task.
Next one week was so bad that I thought I should sell my camera and save my money and time. I was not even able to get objects in focus. Hell, I didn’t know the half shutter press keeps the subject in focus. I thought ‘A’ is auto mode. I saw so may numbers (he, he! Those were shutter, ISO, and Aperture), that I thought let me not worry about those and see the results after pressing the shutter button. Because that was the only lesson I had learned so far that my friend had taught at the shop!
Alrighty… Somehow, I felt I shouldn’t give up so soon and decided to stay in the game…
In a span of next couple of years of my deep learning, I viewed hundreds of hours of photography tutorial videos on YouTube, browsed online photography tips, and blogs of successful international photographers. I read dozens of photography books and hundreds of articles for beginners and specific genres such as landscape, wildlife, portraits, and food photography. I learnt about composition, lights, camera manual setting, back button focus, exposure triangle, aperture priority, shutter priority, Photoshop, Lightroom, posing for portraits, lighting, noise correction, depth of field… and you know, the list goes on and on!
Few days felt like I’m on the path of becoming world’s best photographer. Other days felt like I should sell my camera and save my time and energy!
The moment I started grabbing the concepts of photography, I started hunting for the subjects. The simplest options were the stationary items at home. Those objects (photographers call them subjects) follow your instructions, they stay where you want them to, and they won’t get impatient like your family and friends would get annoyed.
What do you think I tried first with those subjects?
1. Focussss!
2. Blurrrr background!!
My practice and studies went hand-in-hand till I qualified (and graduated) myself to ask humans to pose for me. Friends, family, colleagues… whoever I owed something, I asked them to return favor by posing in front of my camera. I attempted everything I learnt so far – composition, non-distracting background, quality of light, and a little bit of posing.
My second lesson!
A photograph is not complete till it’s edited.
I was getting ok pictures but not better than my smartphone photos. So, I started blaming my DSLR, kit lens, subjects, ambient lights and everything else than my acquired skills. I was high on ego because I learnt so many concepts that I could talk for full day about photography. But why is it that my camera was not supporting me? What was the missing link?
I used to take pride in sharing straight-from-the-camera photos. On hindsight, I thought of giving editing a try. Photoshop entered my life and my love/ hate relationship with editing software started.
Photoshop had so many tools and options, I didn’t know where to start. So, I just played with contrast and brightness for few weeks… But even these two settings were doing magic with my raw photos. It led me to think what magic I can create if I learn most of the capabilities an editing software like Photoshop and Lightroom can offer. Learning and practicing Photoshop and Lightroom started along with relentless photographing of human, birds, and streets.
As a result, my colleagues started praising my photos. My friends were ok with my photography (maybe they were jealous!). My family thought I’m going crazy and I must stop pursuing it further. Family thought I’ll quit job and start pursuing my photography passion. They were not completely wrong! I had this in back of my mind.
My second setback!
Monetization opportunity got me distracted from artwork.
After couple of years of my rigorous self-training and practicing…
Most common thought people shared when I improved on photographing and editing… that I’ve a good career in photography.
This thought distracted me from both — job and photography! Because I started thinking about setting up business and was ok to take hit of my earnings momentarily to achieve bigger dreams. My attention from job receded. Since I was not finding way to monetize photography so passion in creative pursuits of photography also diminished.
Realty stuck me when few people asked me to do photography for free. Well, I did couple of them to build my portfolio… but then I realized, I’m doing disservice to my photography fraternity who is slogging with their art for money and this is their only source of income. Eventually, I dropped idea of monetizing photography for commercial purpose and decided to enjoy the passion.
The next challenge was where do I take my photography from learning, practicing, and expanding my portfolio…
My third lesson!
Blend both the passions to enjoy the journey – photography and writing.
I saw an opportunity in blending my writing passion with photography. The days I’m not able to travel or step out – well, lockdown provided ample of such opportunities – I decided to write about my photography experience, share thoughts with the world and, hopefully, help them learn from my mistakes or experience.

So, the idea of the book came in my mind… I launched my first photography in the genre which I loved the most! Street Portrait Photography.
To launch the book, the learning started on how to draft the book, get it edited, launch on Amazon Kindle . I didn’t want to go to traditional publishers for three reasons:
1. They’d not love to launch a fresh author. I had heard/ read the horror stories of new authors.
2. People are reading digital so even if I don’t launch physical copies, I won’t compromise on reach.
3. I can expand my readership to multiple countries.
To my luck and power of Kindle platform, the book became bestselling in one of the photography categories. I felt empowered to release more books. The journey of learning, practicing, sharing, and writing continues. My photography is companion of my lifetime journey now!
People also read:

Street Photography in Small Towns: Visual Stories in Uncharted Territories

7 tips for stunning equine photography

16 Fan Ho photography techniques for strong narrative photography

21 verified techniques of making portrait of strangers in street photography

Ranjan is a self-taught photographer with expertise in Portrait Photography and has passion of street photography. He has authored street photography book which was bestselling on Amazon.
Stay in Touch
Subscribe to the latest posts, news and alert. No spamming!
What Is Journey Photography? (A Guide To Capturing Life Memories)
Do you have a passion for capturing lifes memories? Have you ever wanted to take your photography to the next level, but werent sure how? Then journey photography is for you! Journey photography is a unique form of photography that allows you to capture lifes special moments and tell a story through each photograph.
In this guide, well discuss the benefits, tips, and equipment you need to get started in journey photography.
Well also explore the different types of journey photography, such as adventure, nature, and street, and how to edit and share your journey photos.
So grab your camera and lets dive into the world of journey photography!.
Table of Contents
Short Answer
Journey photography is a type of photography that focuses on documenting a persons journey or travels.
It captures the unique moments and experiences, emphasizing the emotional connection the photographer has with the places they visit.
Journey photography often includes landscape, portrait and street photography, as the photographer strives to capture the essence of the journey they are on.
In addition, journey photography often combines creative and documentary photography, making it an exciting and engaging way to tell stories.
What Is Journey Photography?
Journey photography is a unique form of photography that focuses on the journey itself, rather than on the destination.
It is about capturing the experience of the journey, rather than the beauty of a specific location.
It is a genre of photography that captures the essence and emotion of a journey.
It can include anything from capturing the beauty of a landscape to documenting the experiences of a traveler.
Journey photography can include photos taken on a road trip, during a hike or camping trip, or during any other form of travel.
Journey photography has become increasingly popular in recent years, as people seek to document and share their experiences.
It allows us to capture the moments that make our journeys unique and special, and to share them with the world.
Journey photography is an art form that can capture the beauty of a place, the people and the culture of a journey, and the emotions and memories of a journey.
Unlike traditional landscape photography, journey photography requires the photographer to be more creative and to capture the essence of the journey itself.
The photographer must be able to capture the moments that make a journey unique and special, as well as the emotions experienced on the journey.
Journey photography often requires the photographer to be flexible and to be able to quickly adapt to changing conditions and unexpected moments.
Journey photography is a great way to capture the memories of a journey and to share them with others.
It is also a great way to capture the beauty and culture of a place, and to document the experiences of a traveler.
With the right approach, it can be an incredibly rewarding and satisfying experience for both the photographer and the viewer.
Benefits of Journey Photography

Journey photography is an incredibly rewarding experience, as it allows us to capture the essence of our travels and share our memories with the world.
There are many benefits to journey photography, including the ability to capture moments of beauty and wonder, to create works of art that will last a lifetime, and to share our experiences with others.
When it comes to capturing the beauty of a landscape, journey photography provides excellent opportunities to capture stunning views and unique perspectives.
With an eye for detail and a creative approach, journey photographers can capture stunning photos of unique locations and share them with others.
Journey photography also allows us to capture moments of our lives that we may not be able to experience again.
Whether its a breathtaking sunset or a special moment between two people, journey photography allows us to capture these memories and keep them with us forever.
Finally, journey photography allows us to share our experiences with others.
Through journey photography, we can share our stories with the world and inspire others to explore the places we have been.
By sharing our photos and stories, we can help others to experience the beauty and adventure of travel.
In short, journey photography is an incredibly rewarding experience that allows us to capture the beauty of our travels, create works of art, and share our stories with the world.
By taking the time to capture our experiences and share them with others, we can help to create a community of adventurers who are inspired by our stories.
How to Get Started in Journey Photography
Getting started in journey photography is a great way to capture the beauty and special moments of your travels.
Whether youre taking a road trip, going on a hike, or simply exploring a new place, journey photography can be an amazing way to document and share your experiences with others.
The first step to getting started in journey photography is to decide on the type of photos you want to take.
Do you want to focus on landscapes, people, or both? Consider what makes your journey unique and special, and think about how you can capture that in your photos.
You can also decide on a specific theme or project you want to work on.
Once youve decided on the type of photos you want to take, its time to invest in some equipment.
A good camera is essential for journey photography, as well as lenses and other accessories.
You may also want to invest in a tripod, flash, or other photography equipment.
Consider your budget and your needs before purchasing any equipment.
Next, make sure you have the right software for editing and post-processing your photos.
Photo-editing software like Adobe Photoshop or Lightroom can help you make the most of your photos.
You can also use online software like Google Photos to store and organize your photos.
Finally, its time to get out there and start taking photos.
Make sure youre prepared with the right equipment and the right attitude.
Be mindful of the environment and the people around you, and have fun with it.
Journey photography is all about capturing the essence of your journey and the special moments along the way.
Tips for Taking Memorable Journey Photos

Taking memorable journey photos is an art form that requires creativity and practice.
Here are some tips to help you capture the essence of your journey in a way that conveys the joy, wonder, and adventure of the experience: 1.
Choose the right equipment.
A good camera is essential for capturing the most beautiful and memorable journey photos.
If youre just starting out, consider investing in a DSLR or mirrorless camera, as these will give you the most flexibility when it comes to shooting in different lighting conditions and capturing the details of your journey.
Know your settings.
To ensure that youre capturing the best photos possible, its important to be familiar with your camera settings.
Be sure to familiarize yourself with the different shooting modes, as well as the aperture, shutter speed, and ISO settings.
Capture the details.
Journey photography is all about capturing the small, everyday moments that make a journey special.
Look for interesting details, such as a beautiful pattern on the side of a building or a unique flower in a field.
Get creative with composition.
Dont be afraid to experiment with different angles and perspectives when shooting your journey photos.
Try shooting from different heights, or even experiment with different focal lengths to create interesting compositions.
Use natural light.
Natural light can be one of the most powerful tools in journey photography.
Look for ways to use natural light to create beautiful, evocative images.
Capture the emotion.
Journey photography isnt just about capturing beautiful landscapes and scenes.
Its also about conveying the emotion of the journey.
Look for ways to capture the joy, wonder, and excitement of the experience in your photos.
Tell a story.
When taking your journey photos, think about the story you want to tell.
Consider the different elements of your journey and the emotions you felt throughout the experience, and use your photos to tell a story that conveys that experience.
Following these tips will help you capture the essence of your journey in a way that conveys the joy, wonder, and adventure of the experience.
Journey photography is a powerful tool for documenting and sharing your journey, and these tips will help you create beautiful, memorable images that reflect the unique and special moments of your journey.
Types of Journey Photography
Journey photography is a genre of photography that allows us to capture the unique and special moments of our travels.
It can encompass a wide variety of different types of photography, all of which are focused on capturing the essence of a journey.
One of the most popular types of journey photography is landscape photography.
This type of photography focuses on capturing the beauty of a landscape, often from a unique angle or perspective.
Landscape photography can be taken from a variety of different locations, from a beach to a mountain range, and can often be used to tell a story.
Another popular type of journey photography is travel photography.
This type of photography focuses on documenting the experiences of a traveler, such as their travels, activities, and adventures.
Travel photography can be used to capture a variety of different moments, from a sunset on the beach to a night out in a foreign city.
Journey photography can also include other types of photography, such as portrait photography.
This type of photography focuses on capturing the unique personalities of a person or group of people.
Portrait photography can be used to capture special moments with family or friends, or to document the experiences of a traveler.
Finally, journey photography can include event photography.
This type of photography is focused on capturing the unique moments of special events, such as weddings and festivals.
Event photography can be used to capture the beauty and emotion of an event, and to tell the story of the event.
Overall, journey photography is a unique type of photography that allows us to capture the unique moments of our travels and share them with the world.
By utilizing different types of photography, we can capture the beauty and emotion of our journeys and use them to create lasting memories.
Editing and Sharing Journey Photos

The editing and sharing of journey photos is an important part of the journey photography experience.
Editing photos can help capture the beauty and emotion of the journey, and sharing photos can help others to connect with the experience.
Editing can help to enhance the colors, contrast, and composition of the photos, making them more visually appealing and interesting.
Sharing photos can be done through various social media platforms, such as Instagram, Facebook, and Twitter, and also through websites such as Flickr and 500px.
Additionally, journey photos can be printed and framed for display, making them a lasting reminder of the journey.
When editing journey photos, it is important to keep the overall feel of the journey in mind.
After all, the photos are meant to capture the essence of the journey, not to be overly edited or manipulated.
Some basic editing techniques, such as cropping and adjusting the exposure, can help to bring out the best in the photos.
For more advanced techniques, such as color grading and sharpening, it is best to consult with a professional photographer.
Sharing journey photos can be a great way to share the experience with family and friends, as well as to connect with other travelers.
Social media platforms make it easy to post photos and share stories about the journey, allowing others to virtually experience the journey alongside you.
Additionally, websites such as Flickr and 500px allow for a more in-depth look at the journey, with the ability to post more detailed descriptions and stories.
In conclusion, the editing and sharing of journey photos is an important part of the journey photography experience.
Editing photos can help to enhance the beauty and emotion of the journey, and sharing photos can help to spread the experience to others.
By utilizing social media platforms, websites, and even printing and framing photos, it is possible to capture and share the beauty of the journey with the world.
Journey Photography Equipment
Journey photography is a unique art form that requires the right equipment to capture the beauty of any journey.
While most cameras will work for journey photography, having the right gear can make a huge difference in the quality of the photos you take.
Here are some essential pieces of equipment to consider for journey photography: 1.
Camera: First and foremost, having a reliable digital camera is key for journey photography.
Look for a camera with a wide range of features, such as a high resolution, long battery life, and a wide selection of shooting modes.
Tripod: A tripod will help you capture crisp and shake-free images, even in low-light settings.
Look for a lightweight and sturdy option that can be easily packed away for your next journey.
Lenses: Different lenses will help you capture different types of photos.
Look for a wide-angle lens for landscapes, a telephoto lens for distant subjects, and a macro lens for close-up shots.
Memory Cards: Memory cards are essential for storing your photos securely.
Look for a high-capacity and fast-writing memory card to ensure your photos are safe and sound.
Accessories: Accessories such as a remote shutter release and filters can help you take your journey photography to the next level.
Consider what type of accessories you need and invest in quality pieces that will last.
By investing in the right equipment, you can take your journey photography to the next level and capture stunning images of your travels.
With the right gear, you can share your journey with the world and create lasting memories.
Final Thoughts
Journey photography is a wonderful way to capture the beauty, joy, and unique experiences of lifes journeys.
From documenting a road trip to capturing a breathtaking landscape, journey photography allows us to share our memories and adventures with the world.
With the right equipment, a good eye for composition, and some practice, you can begin your journey in journey photography.
So what are you waiting for? Lets start creating lasting memories with journey photography!.
James Braden
He is a reporter, collaborating with many famous sports newspapers. But in addition to sports and writing, Jonathon is interested in photography. He has taken several short courses in photography and is an active member of the city’s photography club.
Recent Posts
When Did Fujifilm Start Making Cameras? (A Brief History)
Fujifilm started making cameras in 1948 with the release of the Fujica Six. Since then, Fujifilm has become a renowned brand in the camera industry, known for their innovation and high-quality...
What is the Best Fujifilm Camera? Unveiling the Top Choice for Your Photography Needs
When considering the best Fujifilm camera, it ultimately depends on your specific needs and budget. However, the Fujifilm X-T4 is often regarded as one of the top choices due to its impressive image...
Passion Blog
Embarking on Your Photographic Journey: Essential Tips for Beginners
As we conclude our series on photography, I want to empower aspiring photographers with the knowledge and confidence to kickstart their own photographic journey. Whether you’re picking up a camera for the first time or looking to refine your skills, these essential tips will help you navigate the exciting world of photography with ease.
1. Know Your Gear Before you start shooting, take the time to familiarize yourself with your camera gear. Whether you’re using a smartphone, a point-and-shoot camera, or a DSLR, understanding its features and settings will help you capture better images. Experiment with different modes, settings, and lenses to discover what works best for you.
2. Learn the Basics of Composition Composition is key to creating compelling photographs. Familiarize yourself with fundamental techniques such as the rule of thirds, leading lines, and framing. Experiment with different compositions to add visual interest and depth to your images.
3. Master the Basics of Exposure Understanding exposure is essential for capturing well-exposed photographs. Learn the basics of aperture, shutter speed, and ISO, and how they affect the exposure of your images. Experiment with different exposure settings to achieve the desired look and feel in your photographs.
4. Practice, Practice, Practice Like any skill, photography takes practice to master. Make it a habit to take your camera with you wherever you go and practice regularly. Experiment with different subjects, lighting conditions, and techniques to hone your skills and develop your unique style.
5. Study the Work of Others Study the work of renowned photographers and draw inspiration from their images. Analyze their composition, lighting, and storytelling techniques, and think about how you can apply similar principles to your own photography. Join photography communities online or locally to share your work, receive feedback, and learn from others.
6. Embrace Criticism and Learn from Mistakes Don’t be afraid to seek feedback on your work and embrace criticism as an opportunity for growth. Learn from your mistakes and use them as stepping stones to improve your skills. Remember that every photographer starts somewhere, and it’s okay to make mistakes along the way.
7. Find Your Unique Voice Discover what sets your photography apart and embrace your unique perspective and vision. Whether it’s a particular subject matter, style, or storytelling approach, find what resonates with you and make it your own. Your individuality is what will make your photography stand out.
8. Have Fun and Keep Exploring Above all, remember to have fun and enjoy the process of learning and exploring photography. Don’t be afraid to step out of your comfort zone, try new things, and push the boundaries of your creativity. Photography is a journey of self-discovery and expression, so embrace every moment along the way.
As you embark on your photographic journey, remember that there’s always something new to learn and discover. Stay curious, stay inspired, and keep capturing the world through your lens. Happy shooting!
Leave a Reply Cancel reply
Your email address will not be published. Required fields are marked *
Save my name, email, and website in this browser for the next time I comment.
- Green Spaces in Urban Places
- To Give is To Grow: Community Gardens Fight Food Insecurity
- Are Words The New Weapon To Fight For Social Justice?
- Europe has Changed: How I turned my Upset about Russia Invading Ukraine into Action
- Dangerous Realities of Medical Misogyny
- Student Success: Spotlight on ADHD
Love Letter to Uncertainty: A Photo Essay
- Walter’s Story: Leaving Nazi Germany

Healing Through Photos: Therapeutic Photography
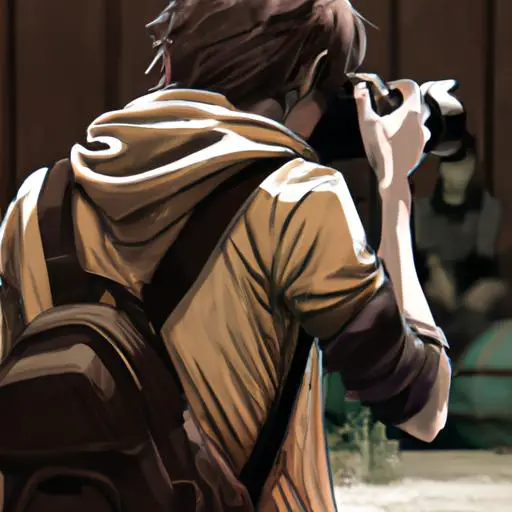
Twelve years old and sitting on a plane with a one-way ticket to a new life in a foreign place. It sounds exciting right? Wrong, the culture shock was overwhelming. Things that were once familiar suddenly weren’t. There was a new language to learn, a new town to explore, a new school to fit into, and new hobbies and friends to be found. The feeling of vacation soon passed and the notion of permanency set in. How would you cope with all of that? Photography was my solution.
Photographs have power. Everyone views the world in a unique way, seeing beauty in things that others might not. Photography allows us to see those different perspectives. While Photography remains a job for some or just art for others, it is a tool for personal healing and positive change for many.
What is Therapeutic Photography?
While therapy through other art mediums such as painting, sculpturing, dancing and poetry are not really new concepts; the healing aspects of photography are emerging. Therapeutic Photography has been defined as:
“The name for photo-based activities that are self-initiated and conducted by oneself (or as part of an organized group or project), but were no formal therapy is taking place and no therapist or counselor needs to be involved.”- Judy Weiser
What makes photography a tool for healing?

The “Selfie”
“A picture taken of yourself that will be uploaded to Facebook… A strange phenomenon in which the photographer is also the subject…because you have extremely low self-esteem…it is the beginning of the end of an intelligent civilization…” – Urban Dictionary
How can a “selfie” be self-healing, and is it really that strange and narcissistic to take a picture of yourself? Throughout history artists have searched for self-understanding by depicting themselves in self-portraits. Van Gough was especially known for painting his own portrait, and Frida Kahlo once said:
“I paint myself because I am often alone and I am the subject, I know best.” – Frida Kahlo
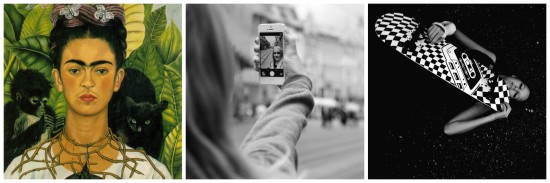
(Left) Frida Kahlo Self-portrait (Center) Today’s Version of a Self-Portrait (Right) One of my first Self-portraits
These days, the self-portrait might not be portrayed on a canvas but whether they are destined for social media or the works of a photographer, they can exemplify a form of self-centered healing. Examples of why people choose to take self-portraits include but aren’t limited to, dealing with depression, illness or grief, for transformation, and for self-confidence building. The self-portrait is a powerful practice in therapeutic photography.
Photography for Activism
While therapeutic photography emphasizes self-directed activities to provide personal insight and to increase ones well being, it can also be used as a method for social activism. The goal for social action photography is to bring attention to social justice issues through a lens. The photographer in that case generally wants the audience to feel their pain or anger towards the subject and encourages you to do something about it. Photography has the power to give a voice to stories and to benefit individuals as well as entire communities.
My Journey Continues…
Photo by: Kari Jensen
My journey as a photographer began at a challenging time in my life. A time where my emotions took control. Language remained a barrier but I discovered that emotions were universal and could be expressed through a photograph. I started with self-portraits simply documenting what was going on and how I was feeling. Eventually I became comfortable enough to make it more of a social activity. My friends and I would scope out locations and put together a so-called “story” that we wanted to come through in the pictures, something that would really make a statement. While I have never been too concerned with having the best equipment, I think the way in which a photo is inspired, edited and presented requires the most creativity. Over the years I truly believe that photography has broadened my knowledge, increased my well-being and has presented me with some amazing opportunities. Now I want to encourage everyone to find that special something that allows them to do and feel the same.
About Author

Kari Jensen
Kari Jensen is a recent graduate of Antioch University Santa Barbara where she pursued a Bachelors degree in Psychology. Throughout her academic journey she has taken the opportunity to express her interests in sustainable food & drink trends writing articles for Antioch’s Odyssey Online and exercising her professional photography skills. With a passion for social justice, she volunteers for the Freedom to Choose Foundation as a social media intern promoting education for second chances. Kari seeks to incorporate her heart-driven personality with her academic voice to make a difference in the lives of others.
Related Posts

The Responsibility of Fiction Writers

How to Transform Your Life through Conscious Festivals
Comments are closed.
Powered by themekiller.com
Journey Photo
How-To Geek
These 8 midjourney commands upped my ai image creation game.
Elevate your AI art game with these 8 powerful Midjourney features!
Quick Links
- The Blend Command: Combine Images Together
- The Describe Command: From Images to Text
- The No Parameter: Avoid Certain Elements In Images
- The Stylize Parameter: Control Midjourney's Stylization
- The Repeat Parameters: Fast Visual Exploration
- The Weird Parameter: Make Images Stranger
- The Video Parameter: Capture the Creation Process
- The Tile Parameter: Craft Stunning Patterns
Midjourney has a ton of features baked into it that you won’t find if you don’t know where to look. Many of these features can help you create awesome images, while others are not so useful. So, here are eight Midjourney commands and parameters that I find most productive and fun to use.
Midjourney commands refer to typed commands such as "/imagine" or "/settings" that you type into the message bar to trigger the Midjourney bot. Whereas, parameters refer to examples like "--v6" or "--niji," which you use to provide additional instructions along with your prompt.
1 The Blend Command: Combine Images Together
You might already know that Midjourney lets you create AI images using your own images . Now with the blend command, you can upload 2-5 images to Midjourney and combine the concepts and aesthetics of each image into a new original creation.
To use it, enter “/blend” into the Midjourney bot and upload your images. You can either drag and drop the images from your PC or upload them from your mobile photo library. By default, the blend will take two images as input. But you can add up to 5 by tapping the options field in the prompt window and then choosing "image3", "image4", and "image5."
Now, let’s see this in action. I inserted the following 3 images
And got this blended result:
By default, /blend generates square images with a 1:1 aspect ratio. You can customize this by going into Options > Dimension, in the prompt window and specifying the aspect ratio to Portrait, Square, or Landscape. You can also add suffixes and parameters to your blend command just like with /imagine, to further customize the results.
2 The Describe Command: From Images to Text
You can use the describe command to provide Midjourney with an image and get a prompt as input. So, the reverse of what we generally use it for. Simply type in “/describe” and you’ll be asked to either upload the image or provide a link to the image. Provide your image, and Midjourney will present 4 potential prompts for that image.
You can now use these prompts with the /imagine command to see what Midjourney cooks up. Or you can just use this to expand your artistic vocabulary. That said, one of the best use cases of this command is to reverse engineer AI images you see online and on social media and try to recreate them using Midjourney.
3 The No Parameter: Avoid Certain Elements In Images
Sometimes, when using a prompt, certain elements or items might repeatedly pop up in your image. At this point, you can use the no parameter to remove items or objects you don’t want in your composition.
For instance, this is what Midjourney generates with the following prompt:
summer picnic scene
As you can see, Midjourney is creating images with trees in them. But I don’t want trees. So, if I modify the prompt to:
summer picnic scene without trees
This is what I get:
Still, the generated images include trees. But you can stop this from happening by using the “no” parameter and specifying what you want removed. The modified prompt becomes:
summer picnic scene --no tree, branches, leaves, trunks.
And here’s the generated image:
Yes, trees are still present in the composition, but their presence is significantly reduced.
You can remove multiple items using the “no” parameter, such as: --no item1, item2, item3, item4…
4 The Stylize Parameter: Control Midjourney's Stylization
The 'stylize' parameter has a value between 0-1000 with the default value being 100. You can freely increase or decrease it to create more or less stylistic art by adding "--s 10" or "--stylize 900" (or whatever value you want to specify) at the end of the prompt.
If the Stylize Parameter is close to 10, it will create images that closely adhere to the prompt. However, if you go for a high Stylize parameter like 900, you’ll get an image that tries to look good (stylistic, according to Midjourney's training) even if it has to ignore elements of the given prompt.
Let’s take this prompt for example:
a child’s painting of a house with a car and a pool.
Here’s what you get from Midjourney without using the stylize feature:
Now, with stylize set to 10:
a child’s painting of a house with a car and a pool --s 10
This is the generated image:
And with stylize set to 900:
a child’s painting of a house with a car and a pool --s 900
We get this:
5 The Repeat Parameters: Fast Visual Exploration
Midjourney simultaneously generates 4 images from a single prompt to let you pick your favorite and work with it. However, sometimes 4 generations isn’t enough and you need to see more variations. At this time, you can either keep clicking the "reroll" button over and over again, or use the repeat parameter.
To do so, add "--repeat" (or "--r") at the end of your prompt along with the number of times you want it to repeat. For instance, the following prompt will generate 5 sets of 4 image grids:
two friends sitting at the beach, sunset, --r 5
You can also mix the “repeat” parameter with other options like the “stylize” parameter to speed up your explorations.
Basic users can do 2-4 repeats, Standard users can do 2-10, and Pro/Mega users can go wild with 2-40 repeats. Also, the repeat parameter only works with Fast or Turbo GPU models, not Relax, and will eat up a fair amount of GPU hours very quickly.
6 The Weird Parameter: Make Images Stranger
If you’ve used Midjourney long enough, you’ll soon realize it has a distinct style and aesthetic preference. If you want to force it to move away from the default styling, you can use the "weird" parameter. To do so, append your prompt with "--weird" (or "--w") at the end of your prompt along with a number between 0-3000, with 0 being the default value, meaning no weirdness.
To showcase this feature in action, let’s consider, by default, the Midjourney image you get with the prompt:
a steampunk cyborg
This is exactly how you'd expect Midjourney to create images. Now, let’s set weird to 100:
a steampunk cyborg --w 100
This is with weird raised to 1000:
a steampunk cyborg --2 1000
And finally, this is with weird cranked up to 2500
a steampunk cyborg --w 2500
7 The Video Parameter: Capture the Creation Process
As Midjourney processes your base imagine prompt and generates the final image grid, you get to see a slow evolutionary process of how your image goes from a crude blur to an AI masterpiece (most of the time). If you want to capture this creation process and save it as a GIF or short movie, you can do that using the "video" parameter. Just follow these steps:
Add "--video" at the end of your prompt such as:
watercolor scenery of a mountain in the woods --video
After the job finishes, click "Add Reaction" button and select the "Envelope" Emoji.
The Midjourney bot will send you a direct message with the link to the video. You can open it to view in a browser or right-click (or long press if on mobile) to download it.
And here’s what the video looks like:
8 The Tile Parameter: Craft Stunning Patterns
I often use Midjourney to create monotonous pattern-based wallpapers and this is when the 'tile" parameter comes in real handy. Of course, you can also use this feature to create any seamless repeating patterns, or textures, or even for printing on fabrics. To use the feature, simply prompt Midjourney to create a pattern and append it with the --tile parameter. You will get a grid of patterns that you can individually upscale and use them as repeating patterns to create large images.
Example prompt:
a pattern of autumn leaves --tile
And this is the result:
Ensure to mention "pattern" in the prompt or else the generated image will have absurd cuts and breaks in the image.
You can now use the Seamless Texture Checker to see the tile repeat and download it to your system. Whereas, if you want to use it as wallpaper like I do, follow these steps. On your Windows 11 system, go to Settings > Personalize > Background. Pick "Picture" under the option "Personalize Your Background" and select the image under "Choose A Photo field." Then, select “Tile” under "Choose A Fit for your desktop image," and voilà!
With these powerful Midjourney commands at your fingertips, you're well on your way to becoming an AI image wizard. Whether crafting seamless patterns, removing unwanted elements, or adding an extra dose of weirdness, these tools offer endless ways to refine and customize your creations.
Flowers of Southern Nevada a Photo Journey

December 1, 2022 through February 28, 2023
Larry Lodwick, author of Plants of Ash Meadows National Wildlife Refuge will be displaying his beautiful Flowers of Southern Nevada photos in the lobby of the visitor center. Stop by Corn Creek to see flowers through the eyes of Larry Lodwick.
Visitor Center hours
Thursday - Monday
8:00 am - 4:00 pm
Latest Stories

You are exiting the U.S. Fish and Wildlife Service website
You are being directed to
We do not guarantee that the websites we link to comply with Section 508 (Accessibility Requirements) of the Rehabilitation Act. Links also do not constitute endorsement, recommendation, or favoring by the U.S. Fish and Wildlife Service.
Wahine Māori says getting her moko kauae helped her become sober
- Layla Bailey-McDowell
Born and bred in Whakatāne, Moses Thornton's life was a battle from the start.
Raised in the gangs, her early years were tainted by addiction, violence, and despair.
"I was a meth addict for 8 years and an alcoholic since I was 15 years old," Thornton said. "I was raised in the Black Power and this cycle led me down a dark and ugly path of destruction. "
Looking back on her upbringing, she thought "it was normal,"
"Until I realised, it's not," she said.
In a heartfelt post to the 'Moko Kauae Aotearoa' Facebook Page, Thornton shared her harrowing journey alongside photos of her newly adorned moko kauae.
"I have been inspired by this rōpu for a few years," she wrote. "And now it's my turn to give back."
"I've been suicidal, I've worked as a prostitute, I've been a victim of domestic violence, where I fled my hometown for my safety and raised my kids on my own."
But amidst the chaos, addiction and pain, an eye-opening experience altered everything. "My life changed when I had an encounter with Atua (God)," she shared.
It sparked a journey of redemption, leading to 10 years of sobriety.
"I had to grow through the seasons of my life," she explained. "To be in full knowing of who I am."
Whakapapa: Breaking the Cycle
Moses Thornton (Ngāti Awa) descends from a royal line of wāhine who mau moko kauae, and now she has finally unveiled her own.
She explained receiving moko is something you are called to do.
"It's not just an idea, it's not just a passion, it's not a hope," she said.
"You feel it, and then things just start to show itself to you."
In some whānau and iwi, it may be tikanga that to receive your tāonga, your elder sibling must receive theirs first- especially if you are the 'baby' of the family.
Thornton is the youngest of 16, however, none of her sisters wear moko kauae.
"So, I had to wait," she said.
With that in mind, she aims to encourage other wāhine alike to not let other people stop them from receiving what is "rightfully" theirs.
Thornton reflected on her moko kauae journey and emphasised that wanting to receive her tāonga was a blessing.
She explained the calling to unveil her moko kauae helped her "get off the drugs and the alcohol."
"It was the actual motivator to me getting sober, me getting clean," she said.
She needed a clean tinana (clean body) to carry something that is so meaningful and vulnerable to her.
Thornton saw the experience as an opportunity to learn her native tongue, Te Reo Māori. A language she was stripped of due to the impacts of colonisation and disconnection.
"I went to learn my reo, and I came out with a level four understanding."
For Thornton, her moko kauae was more than ink on skin; it was a revelation of her inner strength and resilience. "My life story is in my moko kauae," she declared.
Her journey was not solitary; it was intertwined with her journey of sobriety but also with her role as a māmā of five.
"They were my motivation to break the cycle," she said. "To be the change I wanted to see."
The decision to receive her moko kauae was not taken lightly. It symbolised a rebirth - a shedding of past pain and embracing of her true identity.
"It's almost a revealing of what's already been in us," she mused.
Resurgence of Tikanga: Revealing one's truest self
Surrounded by whānau, and in the comfort of her own whare, Thornton embarked on this transformative journey.
"It was very intimate," she said.
She explained she chose her home because that is where a lot of her spiritual and emotional growth occurs.
"I went this route so I wouldn't be discouraged."
"Because there is a lot of negativities around getting your moko kauae, people think they can put their opinion on you, and people can really pull you back."
Her talented kaitā was her brother, Ed Harawira, who guided her through the process of unveiling her moko, symbolising her path from darkness into light.
She explained it made the process even more meaningful, to have whānau, her own blood, reveal such a treasure.
Each stroke was more than just a mark on her skin; it was a passage through her past, a journey through the impossible, the hardship, and the darkness she had overcome.
She had previously heard stories from others that during the process they had fallen asleep and that they did not feel the mamae (hurt).
She had a completely different experience, reiterating that her skin was extremely tough when getting her moko kauae.
However, she said she was meant to feel it.
"I felt it all."
"Because those strokes, they took me back to my journey of the impossible, the hardship, the darkness."
With each stroke, she felt herself breaking free, shedding the weight of her past and embracing the promise of her future.
She said that the right side of her chin was especially painful, and after sharing kōrero with her brother, he explained that taha mātau, the right side represented tāne, it represented males.
This kōrero connected with her deeply.
"All the men in my life have caused me nothing but pain," she said.
"But that pain, that mamae, has led me to my purpose and it was special."
She reminisced on the powerful and spiritual journey of receiving her moko kauae.
"I had my late mum and kuia come through, and I felt that presence,"
She felt a sense of pride wash over her. It was not only a moment of reckoning - but also a culmination of her struggles and triumphs, her pain, and her resilience.
"It was a huge pivotal point in my life."
And as the last line was drawn, she felt a profound sense of wholeness wash over her.
"It's a rebirth, a revival," she declared. "A revealing of the person I carry inside out."
Ingoa: Naming of tāonga
Some wāhine may choose to name their moko but some may choose not to.
Thornton was one of many who chose to lay down a name for her tāonga.
'Toa o te Ariki' would be the ingoa, which came to her the night of receiving her moko kauae.
"I kept hearing the words toa, and then ariki, over and over again." she said.
Toa o te Ariki is kupu Māori for Jesus and aligns her faith with her Māori whakapapa.
"It's a tribute to my battles and my faith in the Lord," she explained. "A testament to every storm I've overcome."
This is why Thornton says her story is in her moko kauae.
The cross in her design represents her whakapono, her faith in the lord which pulled her out of darkness.
With Moses being the baby of the whānau, the mangopare sits at the bottom, representing her place as the youngest sibling. The lines etched across her skin; represent every "storm" she has overcome.
More from Newshub
In the aftermath of her moko kauae unveiling, she found herself transformed.
With her tāonga proudly displayed on her face, she embraced a newfound sense of identity and purpose.
She added that before receiving her moko kauae, she felt as though she needed to "prove herself to wear it."
However, as soon as she received her tāonga, this feeling vanished away, but her drive for learning Te Reo Māori and tikanga kept growing.
"It's encouraged me to pursue my reo, so that I can communicate."
"So I can have the tools to kōrero and stand proud as Māori."
She also added that unveiling her moko kauae was a rebirth.
"It means my identity," she said.
"It means, mana wāhine, a place you know you belong. Because in the world today, where our worlds and our physical places can be changed, but your place of identity and where you come from, you carry that in your wairua."
Reflection: A warrior, survivor and proud wahine Māori
Today, Thornton stands tall like her maunga Pūtauaki, and is a beacon of empowerment. Her moko kauae serves as a reminder of her journey - from darkness to light, from despair to triumph. And in its sacred lines, she finds not just beauty, but a reflection of her truest self - a warrior, a survivor, and a proud wahine Māori.
Through day-to-day life, Thornton also stands as a beacon of hope for others. Through her mahi 'Legacy Sisterhood Empowerment', she offers support and healing to those battling their demons.
"We're losing too much of our own," she added. "But there's hope, and there's help."
She explained she first came to Legacy with a lot of trauma and a lot of heaviness.
"Even though I started a new journey and cleaned myself up, I still carry it. And triggers would sometimes open those wounds of my childhood."
"So Legacy was a platform where I learnt to heal, unpack, and forgive myself."
Her message to those struggling with their identity is clear: "Stay true to who you are. You don't have to go through struggles alone."
"Just like our ancestors that went before us, we live in their inheritance. It's ours, don't let anyone's opinions stop you from being who you are created to be."
IMAGES
VIDEO
COMMENTS
My journey to becoming an artist began in 2012, when I started my freshman year at a charter film school. For four years, I attended G-Star School of The Arts, where my passions for photography ...
It made me step out of my comfort zone and by doing so, it helped me to improve myself as well as my work. I hope I was able to inspire you with my story of how photography changed my life for the ...
About the author: Christine Hess is a photographer based in Niagara Falls, Ontario, Canada, where she lives with her husband, Jim, and her sons, Jaxson and Colton. Her photos include land, water ...
After more than 12 years of diligent (albeit part-time) work, I now reflect on the journey and highlight those joys of the path that were important in the development of my art from the camera ...
In this episode, I'm time traveling back to 2007 when I first picked up my camera, and giving you a guided tour of my photography journey over the last 17 years or so! I'm sharing my ups and downs, the mistakes I've made, the challenges I've had, and the lessons I've learned along the way. Most importantly, I'll also be sharing what ...
10) Do a 365 Day Project. One of the best things you can do with your camera is to start a 365 Day Project. Photo sites like 500px, SmugMug, and Flickr have communities set up in which you post a ...
Jacob Aue Sobol. "I still recall my journeys to the East Coast of Greenland as the greatest and most fearless ones of my life. I was only twenty-three when I took this picture of a six-year-old boy jumping off the roof, making a summersault, and landing in a pile of snow.
Throughout my photography journey, I've encountered various mistakes that have served as valuable learning experiences, ultimately shaping my understanding and approach to the craft. In this ...
There may come a time when you feel stuck in your photography journey, unable to see any improvement despite your best efforts. Should you find yourself in this situation, don't be discouraged. Instead, take a step back to simpler times. Remember the joy you felt in the mere act of pressing the shutter button, capturing moments just for the ...
The story of Photographer in the summer vacations of the year 2012, a boy of 12 years old went with his photographer uncle in a grassland. Both were wandering for best photos. Suddenly, the boy ...
I'm sharing the story of how I got started in photography, studying it in college, accepting a full-time photo position, and my experience as a freelancer.BU...
I even got hired from a few different people to take photos for them. Turning point #1 came for me when I was a junior in high school. A lady that my family is friends with dropped a camera off to me. She said that her father-in-law had been a professional photographer and this was his old camera.
Hey there, fellow photo enthusiasts! Let me take you on a little journey into my world of photography. When I first started, oh boy, it was like navigating through a maze blindfolded! Learning the ropes from snapping pics to figuring out all the buttons on my camera was no easy feat. It felt like trying to solve a puzzle without a picture to ...
Jim is a landscape and fine art photographer from Northern California. After surviving leukemia in 2008, Jim purchased his first semi-professional camera and began a journey that has become a wonderful passion. He is now using a professional camera. You can see and purchase his photography at JimmyQPhoto.com.
Starting my journey in photography was not an easy decision to make mainly because I already had an established career and a solid family commitment. I was not interested in discovering a new venture. After having two unsuccessful business attempts. I was content with my current life's situations and didn't want for anything more.
by Ranjan. October 2, 2020. Photography. My photography journey encapsulates deep learning and discovery of my calling in a specific photography genre - portrait of humans. The journey started with my love-hate relationship with the art. In absence of a mentor and dedicated time for long learning-curve, I studied, explored, and practiced alone.
It is a genre of photography that captures the essence and emotion of a journey. It can include anything from capturing the beauty of a landscape to documenting the experiences of a traveler. Journey photography can include photos taken on a road trip, during a hike or camping trip, or during any other form of travel.
As we conclude our series on photography, I want to empower aspiring photographers with the knowledge and confidence to kickstart their own photographic journey. Whether you're picking up a camera for the first time or looking to refine your skills, these essential tips will help you navigate the exciting world of photography with ease. 1.
My journey as a photographer began at a challenging time in my life. A time where my emotions took control. Language remained a barrier but I discovered that emotions were universal and could be expressed through a photograph. I started with self-portraits simply documenting what was going on and how I was feeling.
In addition to its value as a collection of emotionally rich photographs, A Camera, Two Kids, and a Camel will find wide appeal as a unique and meaningful gift for Mother's Day, birthdays, and many other occasions. Show more. Genres Nonfiction Photography Memoir Animals. 224 pages, Hardcover. First published March 18, 2008.
Here's a little about my photography journey SO FAR! Hope this inspires you to invest in what you love and to keep practicing.This is my first official Youtu...
I have been looking into starting my photography journey and am wondering if this would be a good camera bundle to invest in for $300, a cannon t6 with a 18-55 mm, 50mm, and 75-300 mm lens. I was wanting to get a camera that I would be happy with for a little while and wouldn't want to replace that quickly.
My Journey Photography. 42 likes. Event | Portrait Family | Landscape Real Estate I'm accept sessions for individual, couple or grou
Click here for more info. Journey Photo. Home; About; Galleries. Weddings; Family; Birthstory; Blog; Contact
My Journey in Photography: He Who Falls Today May Rise Tomorrow. The year was 2019, I had just gotten accepted into the USA Olympic Weightlifting program and had accepted a personal training ...
1 The Blend Command: Combine Images Together . You might already know that Midjourney lets you create AI images using your own images.Now with the blend command, you can upload 2-5 images to Midjourney and combine the concepts and aesthetics of each image into a new original creation.. To use it, enter "/blend" into the Midjourney bot and upload your images.
Flowers of Southern Nevada a Photo Journey. Jan 4, 2023. December 1, 2022 through February 28, 2023. Larry Lodwick, author of Plants of Ash Meadows National Wildlife Refuge will be displaying his beautiful Flowers of Southern Nevada photos in the lobby of the visitor center. Stop by Corn Creek to see flowers through the eyes of Larry Lodwick.
"My life changed when I had an encounter with Atua (God)," she shared. It sparked a journey of redemption, leading to 10 years of sobriety. "I had to grow through the seasons of my life," she ...
A three-masted sailing ship, Balem, has carried the Olympic flame through the Corinth Canal on a journey designed to reflect the shared history between France and Greece. Sunday 28 April 2024 19: ...
"It feels like society is finally making space for brutally honest conversations," Bush says Lauren Dukoff Sophia Bush is opening up about her fertility journey. In Glamour's April cover story ...